Delicious Celtic Knot Rolls: A Festive St. Patrick’s Day Treat
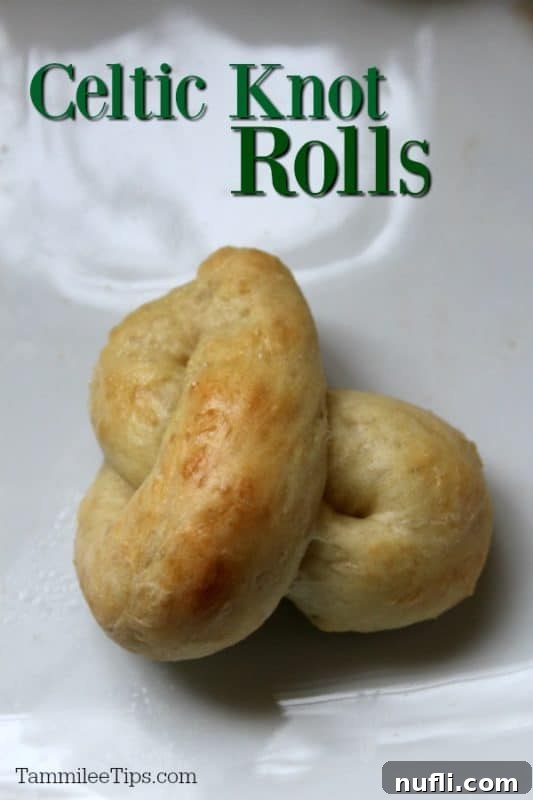
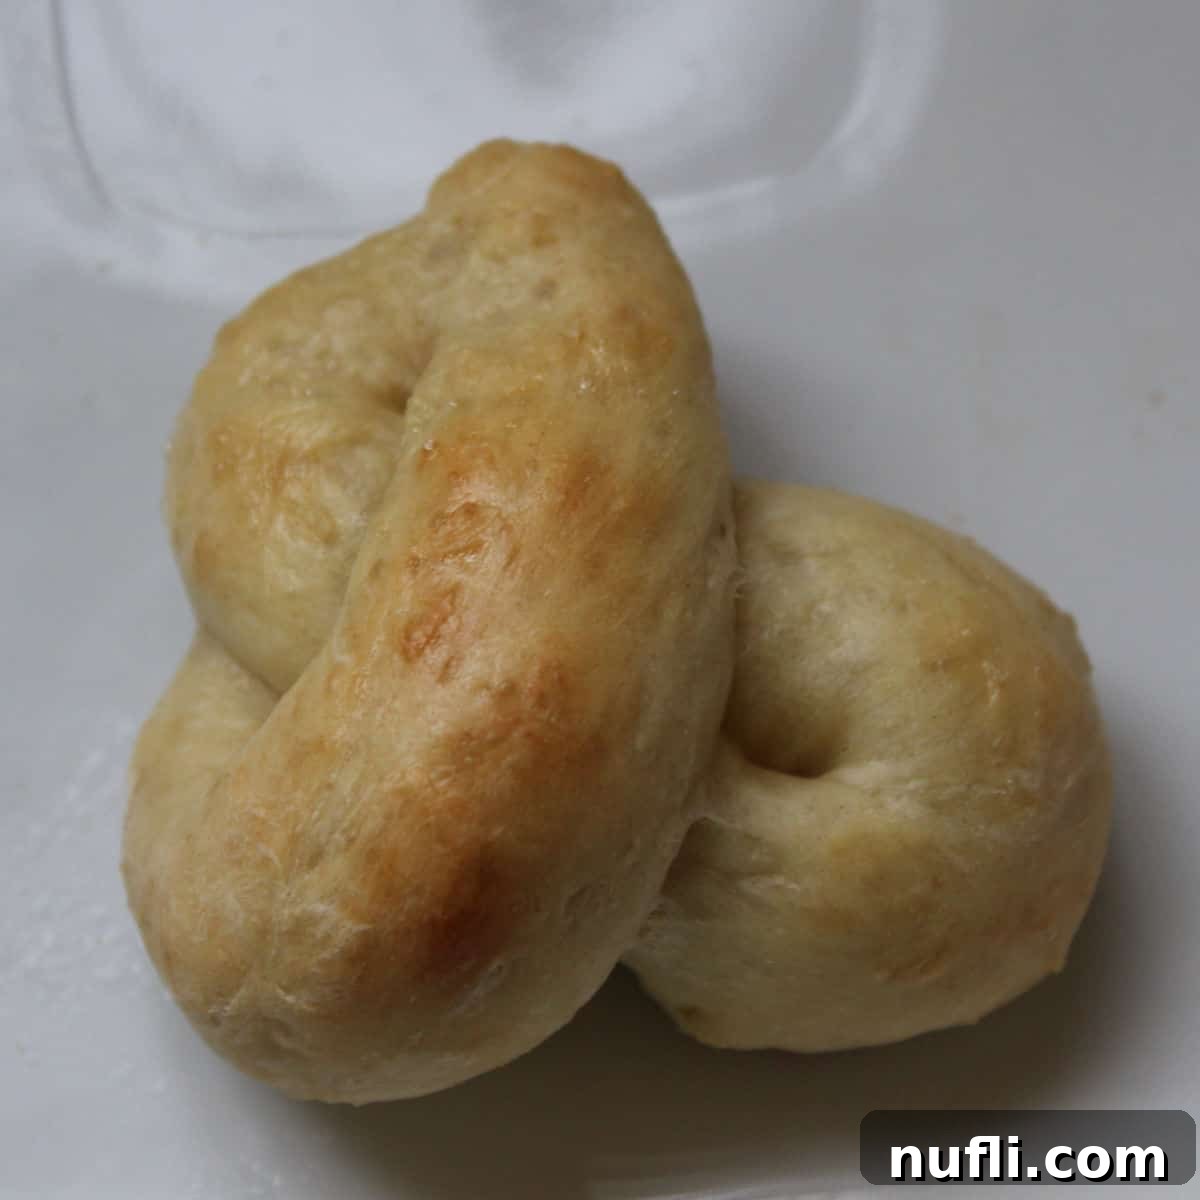
As St. Patrick’s Day approaches, the air fills with anticipation for all things green and gold, leprechauns, and delicious Irish-inspired fare. What better way to celebrate than with a batch of beautiful, homemade Celtic Knot Rolls? These delightful rolls aren’t just a treat for the taste buds; their intricate knot design adds a touch of ancient charm and festivity to any meal. Imagine soft, fluffy bread, perfectly golden and adorned with a symbol of eternal love and interconnectedness, ready to grace your dinner table.

Why These Golden, Fluffy Rolls Will Be Your New Favorite
These Celtic Knot Rolls are more than just a visually appealing side dish; they are incredibly versatile and utterly delicious. Made from a hot roll mix, they boast a wonderfully soft, tender crumb that melts in your mouth. Their delicate texture and savory flavor make them an ideal accompaniment to heartier Irish meals, soaking up every last bit of flavor from your favorite stews or roasted meats. Whether you’re hosting a grand St. Patrick’s Day feast or simply looking for a unique bread to elevate your weeknight dinner, these rolls promise to impress with both their taste and their striking appearance.
They are particularly fantastic alongside our favorite Slow Cooker Corned Beef and Cabbage or a rich Guinness Glazed Corned Beef. And, of course, no St. Patrick’s Day meal would be complete without a bit of festive green beer!
The Enduring Symbolism of Celtic Knots
Beyond their culinary appeal, the Celtic knot design carries deep cultural significance. Originating in ancient Ireland, these intricate patterns, often without a beginning or end, symbolize eternity, continuous life, endless love, and interconnectedness. By shaping your dinner rolls into these timeless motifs, you’re not just serving bread; you’re sharing a piece of history and a symbol of enduring warmth and togetherness. It’s a thoughtful way to add an extra layer of meaning to your meal, especially for celebrations like St. Patrick’s Day or even an Irish-themed wedding.
Simple Ingredients for Outstanding Flavor and Texture
One of the best aspects of this recipe is its simplicity, largely thanks to the use of a hot roll mix. This streamlines the process, allowing you to focus on the fun part: shaping the knots! Here’s a closer look at the minimal yet essential ingredients:
- Hot Roll Mix: This is your secret weapon for quick and easy rolls. It comes with all the dry ingredients pre-measured, including flour, yeast, and a touch of sweetness, ensuring a consistent and reliably soft dough every time. Simply follow the package directions for preparation, and you’re halfway to baking success.
- Egg White: Beaten with a little water, the egg white wash brushed over the rolls before baking serves a crucial purpose. It helps create that beautiful, glossy, golden-brown crust that makes these rolls so appealing. It also aids in adhering the coarse salt.
- Water: Used in two ways – first, to activate the yeast and bring the hot roll mix dough together as per package instructions. Second, a small amount is mixed with the egg white to create the perfect consistency for the egg wash.
- Coarse Salt: A sprinkle of coarse salt (like sea salt flakes or kosher salt) on top of the rolls adds a delightful textural contrast and a burst of savory flavor. It also makes the rolls look more professional and appealing, catching the light on their golden surface.
Essential Kitchen Tools for Baking Success
Having the right tools can make all the difference in your baking experience, especially when it comes to rolls with a unique shape. Here’s what we recommend to make preparing your Celtic Knot Rolls a breeze:
- Large Mixing Bowl: A sturdy mixing bowl is essential for preparing your dough. We’re particularly fond of glass batter bowls equipped with a handle. The handle provides excellent leverage and keeps the bowl steady on your counter while you’re mixing, preventing spills and making the process much easier and more enjoyable.
- Pastry Brush: This simple tool is indispensable for applying the egg wash evenly over each roll. An even coat ensures a consistent golden-brown finish and helps the coarse salt adhere beautifully, giving your rolls that professional, bakery-quality appearance.
- Parchment Paper: A true kitchen hero! Lining your baking sheets with parchment paper makes cleanup incredibly easy – no more scrubbing stubborn baked-on dough. It also ensures that your rolls don’t stick to the pan, allowing them to release cleanly and maintain their perfect knot shape.
- Baking Sheet with Sides: While any baking sheet will work, one with raised sides offers an extra layer of security. We speak from experience: a slight bump can send your beautifully shaped dough rolling off a flat sheet and onto the oven floor. Sides provide a barrier, preventing such unfortunate incidents and protecting your culinary creations.
- Heat-Resistant Potholders: Safety in the kitchen is paramount. Investing in good quality, heat-resistant potholders is crucial. A few years ago, we had a fire scare when a cloth potholder accidentally came into contact with a hot burner. Since then, we’ve exclusively used silicone or other highly heat-resistant options. They provide superior protection, giving you peace of mind while handling hot baking sheets.
Mastering the Art of Celtic Knot Shaping
For many, the most intimidating part of this recipe is achieving the distinctive Celtic knot shape. However, with a simple technique, it becomes quite fun and rewarding! The key is to think of it like tying a basic knot or ribbon. Here’s a detailed guide to help you master this beautiful design:
- Prepare Your Dough Ropes: After your dough has risen and is ready to be portioned, divide it into 16 equal pieces. Roll each piece into a long, even rope. The length is crucial; aim for at least 10-12 inches, and ensure the thickness is as consistent as possible along the entire length. This uniformity is vital for a well-defined knot that bakes evenly. Rolling them on a lightly floured surface or directly on your parchment-lined cutting board can help.
- Form the Initial Bow: Take one dough rope and shape it into a simple loop, similar to the first step of tying a shoelace or forming the letter ‘P’. Let the ends cross over each other at the top.
- Interlace for the Knot:
- Take the top end of the rope (the one that crossed over).
- Pass it under the bottom loop you just formed.
- Then, bring it over itself to create an interwoven look.
- Now, take the other end of the rope (the one that was on the bottom of the initial ‘P’ shape).
- Pass it over the first part of the knot you’ve created.
- Then, bring it under itself to complete the interlace.
Essentially, you’re creating a continuous loop where the dough passes over and under itself, mimicking the look of woven fabric.
- Connect the Ends Seamlessly: Once you have the interlace, carefully bring the two loose ends of the rope together and pinch them firmly to seal them. Try to tuck the seam underneath the roll so it’s not visible. Smooth the dough gently to ensure the knot holds its shape during baking.
Don’t be discouraged if your first few knots aren’t perfect. Practice makes perfect, and even slightly imperfect knots will look charming and taste delicious. The goal is to have fun with the process!
Celtic Knot Rolls Recipe
Super easy and fun Celtic Knot Rolls, great for St. Patrick’s Day or an Irish Wedding.

Prep Time: 15 minutes
Cook Time: 15 minutes
Total Time: 30 minutes
Servings: 16
Calories: 46 kcal per serving
Author: Tammilee Tips
Ingredients
- 6 Ounce Hot Roll Mix
- 1 Egg White
- 2 teaspoons Water
- 1 tablespoon Coarse Sea Salt
Instructions
- Prepare Hot Roll Mix according to box directions.
- Preheat oven to 375 degrees F (190 degrees C). Spray baking sheet with nonstick spray or line with parchment paper.
- Divide dough into 16 pieces. Shape each piece into a rope at least 10-12 inches long, ensuring consistent thickness.
- Form into Celtic Knot rings on the baking sheet.
- Beat egg white and 2 teaspoons of water together, then brush this mixture over the top of each roll.
- Sprinkle coarse sea salt generously over the egg-washed rolls.
- Bake for 15 minutes, or until golden brown.
Kitchen Tools
- Large Mixing Bowl
- Pastry Brush
- Baking Sheet
- Parchment Paper (optional, but highly recommended)
- Heat Resistant Potholders
Nutrition Facts (per serving)
- Calories: 46 kcal
- Calories from Fat: 18
- Fat: 2g (3% Daily Value)
- Saturated Fat: 1g (6% Daily Value)
- Cholesterol: 1mg (0% Daily Value)
- Sodium: 575mg (25% Daily Value)
- Potassium: 20mg (1% Daily Value)
- Carbohydrates: 7g (2% Daily Value)
- Fiber: 1g (4% Daily Value)
- Sugar: 1g (1% Daily Value)
- Protein: 1g (2% Daily Value)
- Calcium: 19mg (2% Daily Value)
- Iron: 1mg (6% Daily Value)
* Percent Daily Values are based on a 2000 calorie diet.
Pro Tips for Perfectly Baked Celtic Knot Rolls
Even with a simple recipe, a few expert tips can elevate your baking from good to extraordinary:
- Don’t Overwork the Dough: After the initial mixing, handle the dough just enough to shape it. Overworking can develop too much gluten, resulting in tougher rolls instead of soft, fluffy ones.
- Allow Adequate Rising: The hot roll mix includes yeast, which needs time to activate and make the dough airy. Ensure your dough has enough time in a warm, draft-free place to double in size. This step is crucial for light rolls.
- Even Thickness is Key: When rolling your dough into ropes, strive for consistent thickness. Ropes that are too thin in some areas will bake faster and become brittle, while thicker parts might remain doughy. Uniform thickness ensures uniform baking and a more aesthetically pleasing knot.
- Preheat Oven Properly: Always preheat your oven for at least 15-20 minutes before baking. This ensures the oven reaches and maintains the correct temperature, leading to even baking and a beautiful golden crust.
- Generous Egg Wash: Don’t be shy with the egg wash. A good, even coating is what gives these rolls their irresistible golden sheen and helps the coarse salt stick without falling off.
- Don’t Overcrowd the Pan: Give your rolls space to expand. Arranging them too closely on the baking sheet can lead to uneven baking and prevents air from circulating properly around each knot.
Delightful Serving Suggestions for Your Knot Rolls
These versatile rolls can accompany a wide variety of dishes, making them a staple beyond St. Patrick’s Day:
- Classic Irish Pairings: As mentioned, they’re perfect with Corned Beef and Cabbage, Irish Stew, or Shepherd’s Pie. Their soft texture is ideal for soaking up rich gravies and sauces.
- Soup and Salad Companion: Serve them warm with a hearty bowl of potato leek soup, a creamy tomato soup, or alongside a fresh green salad for a light lunch.
- Breakfast or Brunch: While savory, these rolls can also be enjoyed with butter, jam, or honey for a delightful breakfast or brunch treat.
- Holiday Feasts: Their elegant shape makes them a fantastic addition to Thanksgiving, Christmas, or Easter dinner spreads.
- Simple Snack: Sometimes, a warm roll straight from the oven with a pat of butter is all you need for a comforting snack.
Creative Variations to Explore
While delicious on their own, these Celtic Knot Rolls are also a fantastic canvas for culinary creativity:
- Herb Infusion: Add dried herbs like rosemary, thyme, or oregano to the dry mix before adding water for an aromatic twist. Fresh chopped chives or parsley can also be mixed into the dough.
- Cheesy Delight: Incorporate shredded cheddar, Parmesan, or a blend of your favorite cheeses into the dough or sprinkle on top before baking for a savory, gooey treat.
- Garlic Butter Bliss: Brush the freshly baked rolls with melted garlic butter for an extra layer of flavor that pairs wonderfully with Italian or Mediterranean meals.
- Sweet Glaze (with a different dough base): If you’re feeling adventurous and want a sweet knot, consider using a sweet roll mix or a brioche-style dough. After baking, a simple sugar glaze or cinnamon sugar topping could transform them into a dessert-like indulgence.
- Everything Bagel Seasoning: For a unique savory kick, try sprinkling “everything bagel” seasoning instead of just coarse salt before baking.
Storage and Reheating Tips
To enjoy your Celtic Knot Rolls at their best, follow these storage and reheating guidelines:
- Room Temperature: Store cooled rolls in an airtight container or a large zip-top bag at room temperature for up to 2-3 days. This helps keep them soft and fresh.
- Freezing: For longer storage, freeze the baked and cooled rolls. Wrap them individually in plastic wrap, then place them in a freezer-safe bag or container. They can be frozen for up to 2-3 months. Thaw at room temperature before reheating.
- Reheating:
- Oven: For best results, reheat rolls in a preheated oven at 300°F (150°C) for 5-10 minutes, or until warmed through. This helps restore their softness and a slight crispness to the crust.
- Microwave: For a quick reheat, wrap a roll in a damp paper towel and microwave for 10-20 seconds. Be careful not to overheat, as this can make them tough.
Frequently Asked Questions (FAQs)
Can I use homemade dough instead of hot roll mix?
Absolutely! If you have a favorite dinner roll or brioche dough recipe, you can certainly use it. Just ensure the dough is pliable enough to be rolled into ropes for shaping the knots. Adjust rising times according to your recipe.
Can I prepare these Celtic Knot Rolls in advance?
Yes, you have a few options:
- Dough Refrigeration: You can prepare the dough up to the first rise, then punch it down, cover it tightly, and refrigerate for up to 24 hours. Let it come to room temperature and perform a second rise before shaping and baking.
- Partial Bake (Par-baking): Bake the shaped rolls for about 8-10 minutes (until very lightly golden but not fully cooked). Let them cool completely, then freeze. When ready to serve, bake from frozen at 375°F (190°C) for an additional 8-10 minutes until golden brown.
What if I don’t have coarse salt?
While coarse salt adds a fantastic texture and visual appeal, you can substitute it with flaky sea salt for a similar effect, or simply omit it. If using fine salt, use a lighter hand as it can make the rolls too salty.
Are these rolls suitable for beginner bakers?
Yes! Using a hot roll mix simplifies the dough preparation significantly, making this a very beginner-friendly recipe. The knot shaping might take a couple of tries, but it’s a fun skill to learn.
Can I make these rolls sweeter?
This recipe is designed for savory dinner rolls. To make them sweeter, you would need to use a sweet roll mix or a different dough recipe entirely. You could then add cinnamon sugar, a simple glaze, or fruit fillings after baking.
More St. Patrick’s Day Recipes to Savor
Looking for more delicious ways to celebrate the Emerald Isle? Check out these other fantastic St. Patrick’s Day-themed recipes:
- Crockpot Reuben Dip
- Guinness Beer Cheese Dip
- Guinness Chocolate Cake Pops
- Homemade Irish Cream
- Fuzzy Leprechaun Cocktail
- Lucky Charms Marshmallow Treats
Do you love recipes? Explore our extensive collection of copycat recipes, irresistible dessert recipes, and convenient Crock Pot Recipes.
Final Thoughts on Your Celtic Knot Creation
Baking these Celtic Knot Rolls is a wonderfully rewarding experience, blending cultural tradition with culinary delight. The process of shaping the knots, watching them rise, and seeing them emerge golden and beautiful from the oven is truly satisfying. They are a testament to how simple ingredients can create something both beautiful and incredibly tasty. Whether you’re celebrating St. Patrick’s Day, an Irish heritage event, or simply want to add a touch of elegance to your dinner, these rolls are sure to be a hit. Enjoy the aroma of fresh bread filling your kitchen, and savor every soft, savory bite!
If you love this recipe, be sure to follow @TammileeTips on Pinterest for more inspiring ideas. And if you’ve tried this recipe, we’d love to see your creations! Mention @TammileeTipsLife on Instagram when you share a photo!
Recipe originally shared on February 21, 2013. Updated October 2020.
