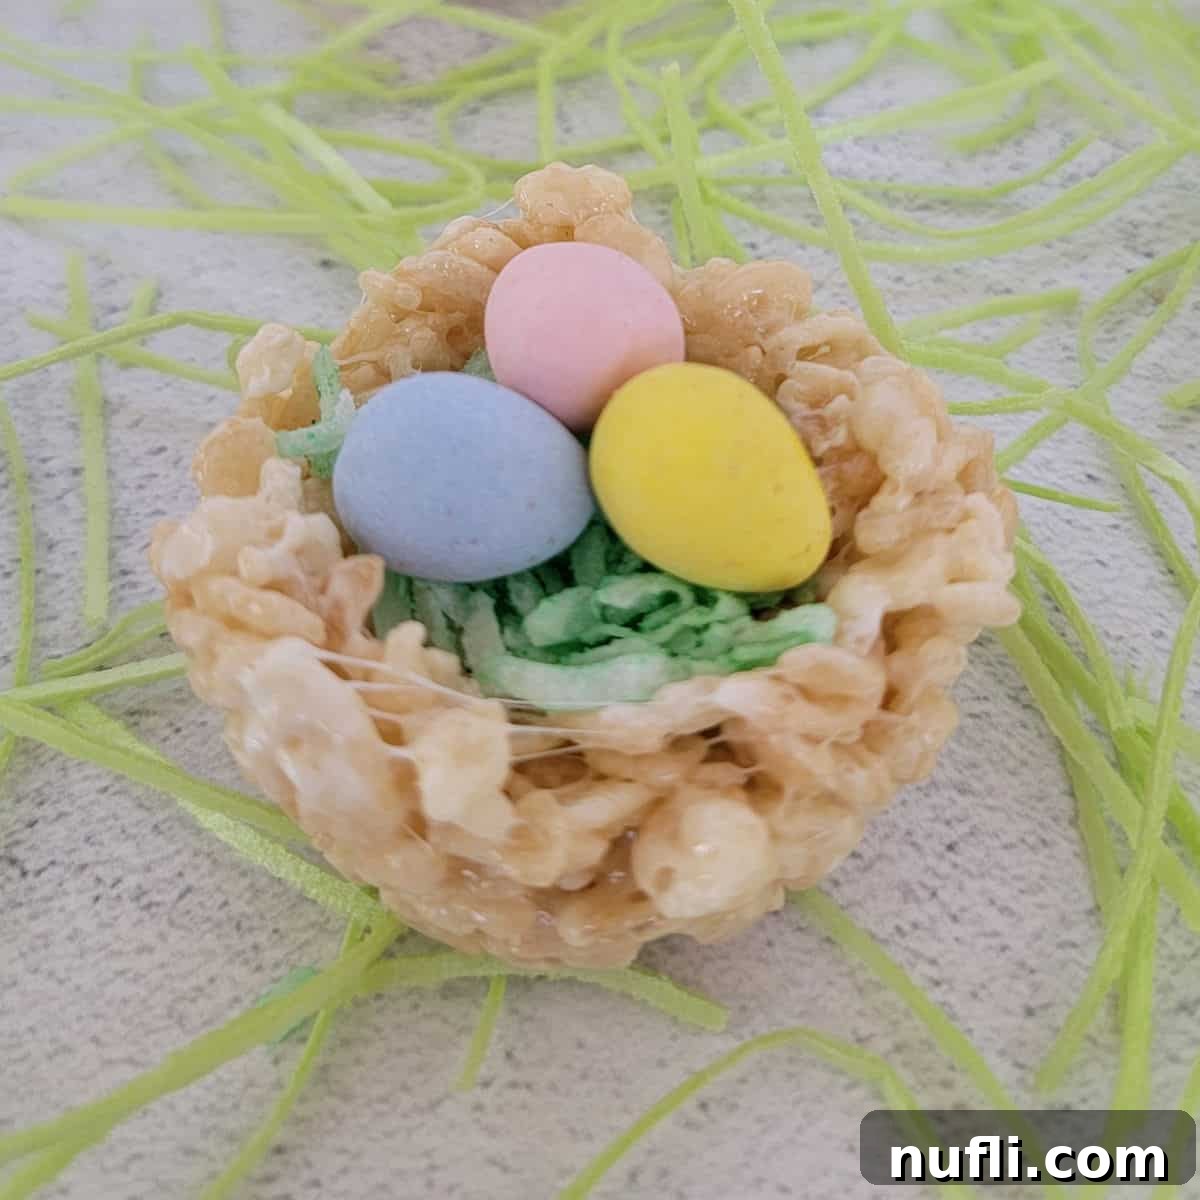
Welcome the joyous arrival of spring and Easter with these delightful, no-bake Easter Rice Krispie Nests! Perfectly capturing the essence of the season, these charming treats are not only incredibly simple to prepare but also offer endless possibilities for creative decoration. Ideal for busy families, these nests come together in minutes, making them a fantastic last-minute dessert or a fun activity to enjoy with little ones. Forget the oven and dive into the simplicity and sweetness that these festive nests bring to your Easter table.
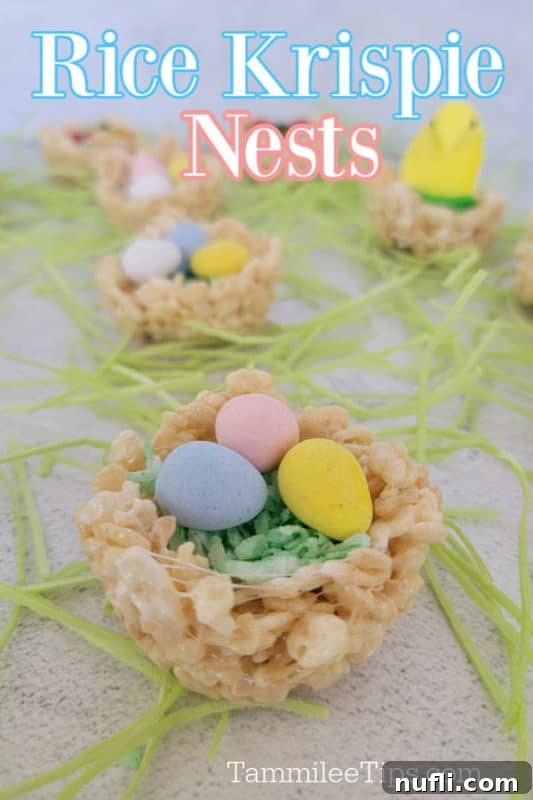
Easy No-Bake Easter Rice Krispie Nests: Your Perfect Spring Dessert
As the sun finally peeks through the clouds in Spokane, signaling the end of a long winter, our thoughts naturally turn to lighter, brighter flavors and fun, spring-themed treats. There’s an undeniable excitement in preparing for Easter, and what better way to celebrate than with desserts that are as cheerful as they are delicious? While we’ve recently shared super cute Bunny Cupcakes, today we’re focusing on another holiday favorite that’s a true game-changer: epic Rice Krispie Easter Nests.
Everyone loves the simplicity and satisfying crunch of Classic Rice Krispies Treats. They’re a staple for a reason – quick to whip up and universally adored. We’re taking that classic appeal and giving it a festive Easter twist. With Easter just around the corner, our kitchen has become a hub of creativity, exploring all sorts of seasonal dessert ideas. You can expect more exciting experiments, perhaps even some chocolate-dipped Peeps or innovative Peeps Rice Krispie Treats, as we continue to embrace the spirit of spring.
Why You’ll Adore These Rice Krispie Nests
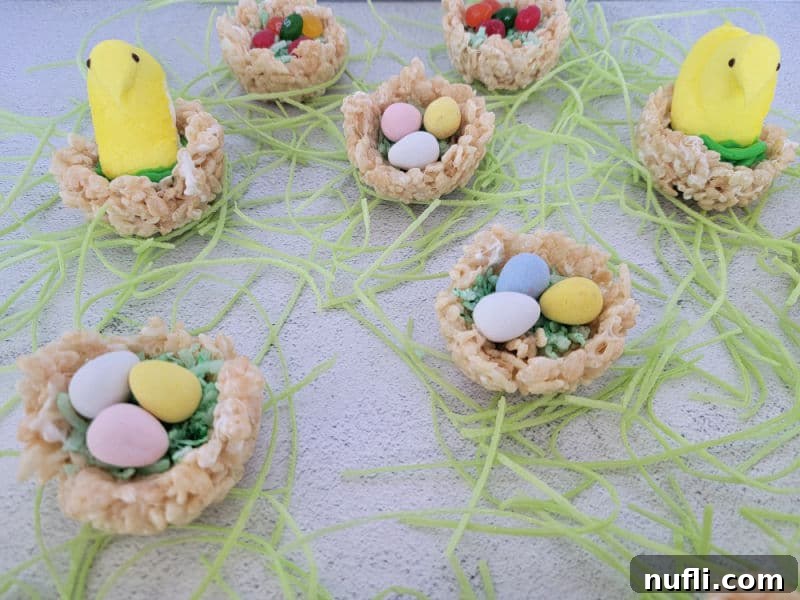
These adorable Rice Krispie Treat bird nests are truly a joy to create and personalize. Imagine a table laden with an array of vibrant Easter candies: colorful jelly beans, classic Cadbury Mini Chocolate Eggs, charming mini chocolate Easter eggs, or cheerful Easter M&M’s. Each nest becomes a miniature canvas, reflecting individual creativity and bringing a smile to everyone’s face. We love serving these nests both with and without edible grass, allowing everyone to customize the sweetness and aesthetic of their treat.
One of the best aspects of this recipe is its kid-friendliness. It’s a fantastic opportunity to gather the little ones for some hands-on fun. Set up individual decorating stations with small plates and bowls filled with different candies and edible embellishments. Watching their imaginations soar as they design their own Easter Krispie nests is truly priceless. These treats aren’t just desserts; they’re an experience, a memory in the making, and a perfect embodiment of the season’s playful spirit.
Gather Your Ingredients for Sweet Success
The beauty of these no-bake Easter treats lies in their simplicity, requiring just a few basic ingredients that you likely already have on hand. Each component plays a crucial role in creating the perfect chewy and delicious nest base.
- Rice Krispies Cereal: The star of the show! This crispy rice cereal provides the essential crunch and texture that makes these treats so satisfying.
- Butter: Good quality butter is key for flavor and helps create that wonderful, chewy texture. It also prevents the marshmallows from sticking too much.
- Mini Marshmallows: These melt down beautifully and act as the binding agent, holding the cereal together in a sweet, sticky embrace. Mini marshmallows melt faster and more evenly than larger ones, making the process smoother.
For the Festive Decor:
To truly bring your nests to life, you’ll need some creative decorations. We recommend a combination of:
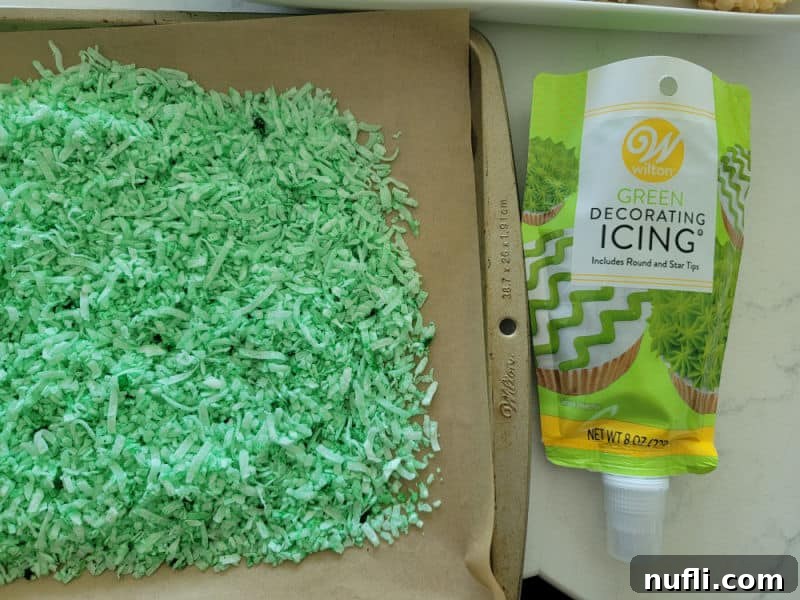
- Coconut Grass: A simple way to create edible “grass” for your nests. You can easily dye shredded coconut green for a realistic look.
- Wilton Green Decorating Icing: For those who prefer a frosting-like grass or to help secure larger decorations.
- Variety of Candies:
- Jelly Beans: Their vibrant colors make them look like tiny, painted eggs.
- Cadbury Mini Eggs: A classic Easter favorite, these chocolate eggs are perfect for nest fillings.
- Easter M&M’s: Offer a colorful chocolate crunch.
- Peeps: These iconic marshmallow chicks and bunnies add a whimsical touch, sitting perfectly atop your nests.
Essential Equipment for Effortless Nests
You won’t need an arsenal of specialized baking tools for this recipe. Most items are common kitchen staples, making these nests accessible to everyone.
- Large Pot: Essential for melting the butter and marshmallows and mixing in the cereal. Choose one with enough space to comfortably stir.
- Wooden Spoon or Silicone Spatula: Sturdy and non-scratch, perfect for mixing the sticky ingredients without damaging your pot.
- Muffin Pan: This is your secret weapon for shaping uniform, perfectly sized nests. A standard 12-cup muffin tin works wonderfully.
- Cookie Scoop: While optional, a cookie scoop is incredibly helpful for portioning the Rice Krispie mixture and pressing it into the muffin pan to form the bowl shape of the nests. It ensures even sizing and makes the process cleaner.
- Non-stick Cooking Spray: Absolutely crucial to prevent the sticky Rice Krispie mixture from adhering to your hands, the pot, or the muffin pan.
If you don’t have a cookie scoop, don’t worry! You can easily use the back of a spoon, a muddler, or even your lightly greased hands to form the nest shapes. We personally love using the gorgeous blue Wilton Texturra Performance Non-Stick Bakeware muffin pan, which not only performs exceptionally well but also adds a lovely pop of spring color to the kitchen.
How to Make Easy Easter Rice Krispie Nests: A Step-by-Step Guide
Creating these festive Easter treats is a straightforward and enjoyable process. Follow these steps for perfectly shaped and delicious nests every time.
Step 1: Prepare Your Muffin Pan for Non-Stick Perfection
Before you begin mixing, ensure your muffin pan is ready. Generously spray each cup of the muffin pan with non-stick cooking spray. This crucial step will prevent your sticky Rice Krispie treats from adhering to the pan, making removal effortless once they’ve set. A well-greased pan is the key to perfectly formed nests.
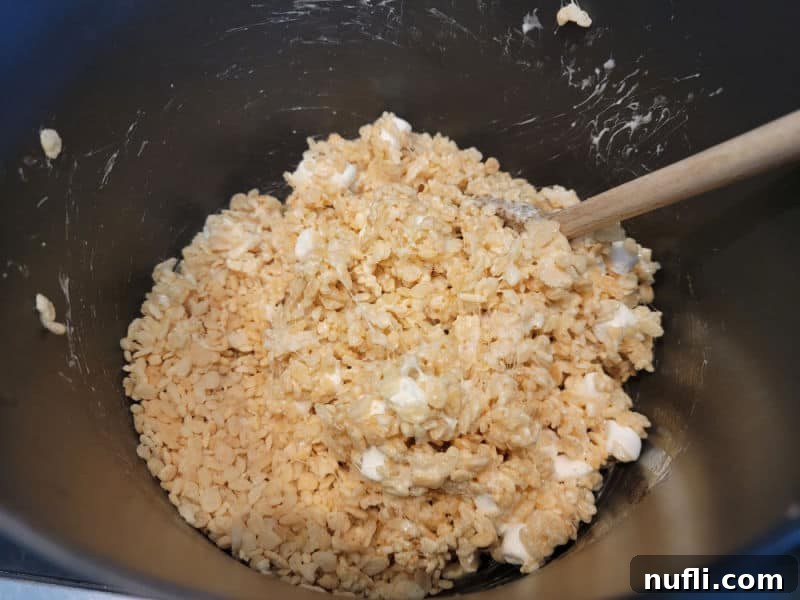
Step 2: Melt, Mix, and Combine Your Sweet Base
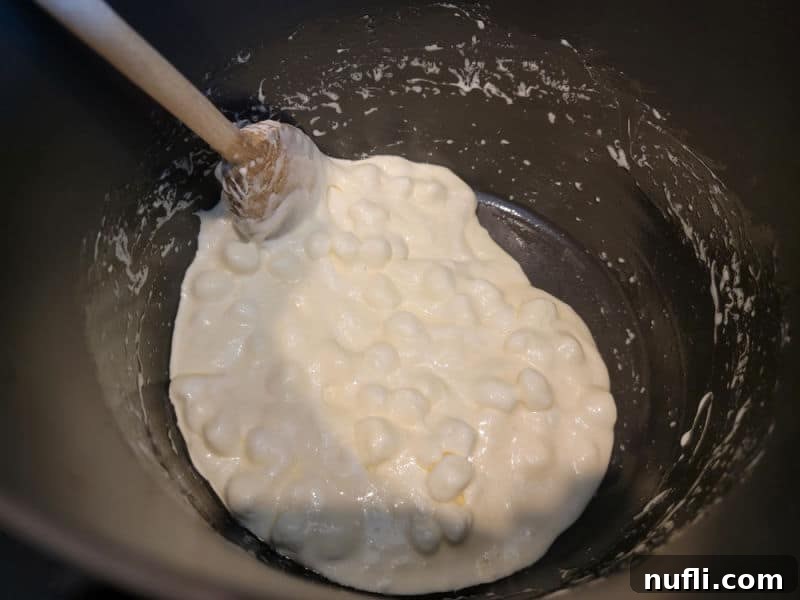
In a large, heavy-bottomed pot, melt the butter over low to medium heat until it’s completely liquid. Once the butter has melted, add in all of your mini marshmallows. Stir continuously with a wooden spoon or silicone spatula until the marshmallows are completely smooth and fully incorporated with the butter. This melted marshmallow mixture will be beautifully gooey and uniform. Immediately remove the pot from the heat and gently fold in the Rice Krispies cereal. Stir thoroughly until every single piece of cereal is coated with the marshmallow mixture. Work quickly but gently to ensure even distribution without crushing the cereal.
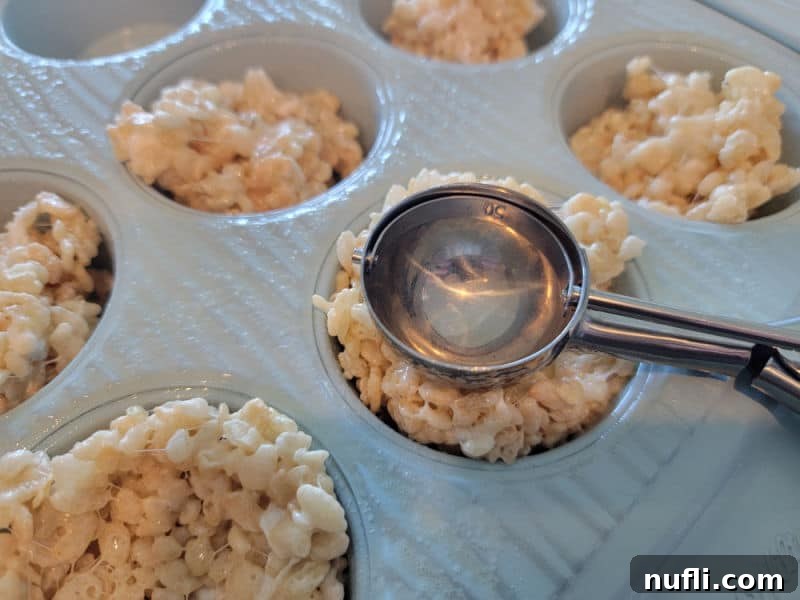
Step 3: Shape Your Nests and Allow to Cool
Using a greased cookie scoop (or a greased spoon/your hands), scoop a generous amount of the Rice Krispie treat mixture into each opening of your prepared muffin pan. Press the mixture down firmly and use the back of the scoop or spoon to create a deep, well-defined bowl shape in the center of each treat. This forms the perfect “nest” for your Easter candies. Once all the nests are shaped, allow them to cool completely at room temperature or in the refrigerator for about 15-20 minutes until they are firm enough to handle. For easy removal and decorating, you can place the cooled nests on wax paper or parchment paper.

Expert Tips for Crafting the Best Rice Krispie Nests
Achieving perfect desserts, even simple ones, sometimes comes down to a few clever tricks. Here are some pro tips to ensure your Rice Krispie Nests are not only delicious but also visually stunning:
- Size It Up or Down: These nests are incredibly versatile. You can easily adjust their size depending on your serving needs. For a party, smaller nests might be ideal for individual servings, while larger ones could make a grand statement as a centerpiece. Don’t worry if your nests are a little wobbly or misshapen; that’s part of their rustic charm and uniqueness. They’ll still taste amazing!
- Go Green with Food Coloring: For an extra festive touch, consider adding a few drops of green food coloring to the melted marshmallow mixture while it’s still in the pot. This will create vibrant green nests, reminiscent of fresh spring grass, even before you add your edible decorations.
- Microwave Method: In a rush? You can absolutely make microwave Rice Krispie treats for these nests. Just ensure you use a microwave-safe bowl and follow your preferred microwave recipe for melting butter and marshmallows. The key is to melt them slowly to avoid burning.
- Peanut Butter Perfection: For a delicious variation, add about half a cup of creamy peanut butter to the melted butter and marshmallow mixture. Stir until fully combined before adding the cereal. This creates a rich, nutty flavor that pairs wonderfully with chocolate eggs.
- Creating Edible Grass: Dying coconut green is super simple and adds a fantastic texture and color element to your nests. Simply place shredded coconut in a zip-top bag with a few drops of green food coloring, shake until evenly coated, and spread on parchment paper to dry slightly before using.
- Securing Your Peeps: If you’re adding Peeps to your nests and they seem a bit unstable, a small dollop of Wilton Icing or a dab of melted chocolate can act as edible “glue” to hold them firmly in place. You can also strategically place a mini chocolate egg behind a Peep for extra support.
- Preventing Stickiness: Lightly grease your hands or a spoon with butter or non-stick spray when pressing the mixture into the muffin pan. This will prevent the sticky cereal from clinging to your tools and hands, making the shaping process much easier.
- Storage Solutions: Once decorated, store your Rice Krispie Nests in an airtight container at room temperature for up to 3 days. If you’ve used perishable decorations, consider refrigerating them.
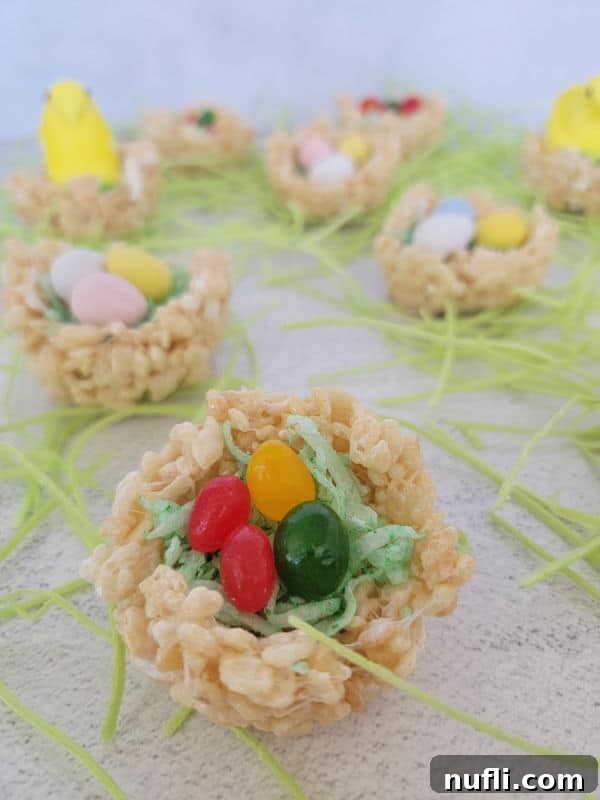
Making Easter Memories: A Fun Family Activity
One of the most heartwarming aspects of these Easter Rice Krispie Nests is how they bring people together, especially during the holiday season. This recipe is an absolute dream for families looking for engaging activities with children. The no-bake nature means no hot oven for little hands, and the steps are simple enough for even toddlers to participate with some guidance.
Imagine the joy on your child’s face as they choose their favorite candies to adorn their very own nest. Set up a “nest decorating bar” where everyone can customize their creations. This isn’t just about making a dessert; it’s about fostering creativity, sharing laughter, and building lasting memories. From melting marshmallows to placing the final jelly bean “egg,” every step can be a shared experience, making the holiday even more special. These nests are more than just treats; they are edible crafts that celebrate the joy and renewal of spring.
Explore More Festive Easter Recipes
If you’re brimming with excitement for more spring and Easter culinary adventures, we have a treasure trove of recipes to inspire you. From other adorable themed treats to savory main courses, our collection ensures your holiday feast is nothing short of spectacular.
- Carrot Strawberries – A healthy and cute Easter snack.
- Easter Chick Cupcakes – Another delightful cupcake idea for spring.
- Lemon Meringue Cookies – Light, airy, and bursting with citrus flavor, perfect for spring.
- Slow Cooker Coke Ham – A fuss-free main course that’s incredibly tender and flavorful.
- Orange Glazed Ham – A classic holiday ham with a sweet and tangy glaze.
Be sure to check out all of our Easter Recipes for a complete guide to your holiday meal planning. And for those who love to experiment in the kitchen, explore our diverse categories including copycat recipes, a wide array of dessert recipes, and our convenient Crock Pot Recipes for everyday meals.
Stay connected with Tammilee Tips for all our latest recipe posts and culinary inspiration. Follow us on Facebook, Instagram, Pinterest, and Twitter, and don’t miss our updates on MSN. Happy baking, and happy Easter!
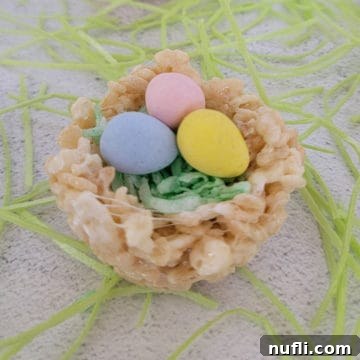
Easter Rice Krispie Nests
Easy Easter Rice Krispie Nests are the perfect spring sweet treat.
Rated 5 out of 5 stars from 1 vote.
Print Recipe
Prep Time: 10 minutes
Cook Time: 10 minutes
Total Time: 20 minutes
Servings: 24 nests
Calories: 81 kcal
Author: Tammilee Tips
Ingredients
- 4 Tablespoons Butter
- 10 oz Mini Marshmallows
- 6 cups Rice Krispies Cereal
- Jelly beans, mini chocolate eggs, coconut grass (Decorations)
Instructions
- Melt butter in a large pot until completely melted. Stir in mini marshmallows and stir until melted.
- Add in Rice Krispies cereal and stir until well combined.
- Spray a muffin pan with non-stick cooking spray and shape the mixture into nests. Use a cookie scoop or spoon to form the nest indentations.
- Let cool before decorating.
Kitchen Tools
- Muffin Pan
- Wooden Spoon
Nutrition
Nutrition Facts
Easter Rice Krispie Nests
Amount Per Serving
Calories 81 (Calories from Fat 18)
% Daily Value*
Fat 2g 3%
- Saturated Fat 1g 6%
- Trans Fat 1g
- Polyunsaturated Fat 1g
- Monounsaturated Fat 1g
Cholesterol 5mg 2%
Sodium 61mg 3%
Potassium 10mg 0%
Carbohydrates 16g 5%
- Fiber 1g 4%
- Sugar 7g 8%
Protein 1g 2%
Vitamin A 524IU 10%
Vitamin C 4mg 5%
Calcium 1mg 0%
Iron 2mg 11%
* Percent Daily Values are based on a 2000 calorie diet.
Love this recipe? Follow @TammileeTIps on Pinterest!
Tried this recipe? Mention @TammileeTipsLife when you share a photo!
