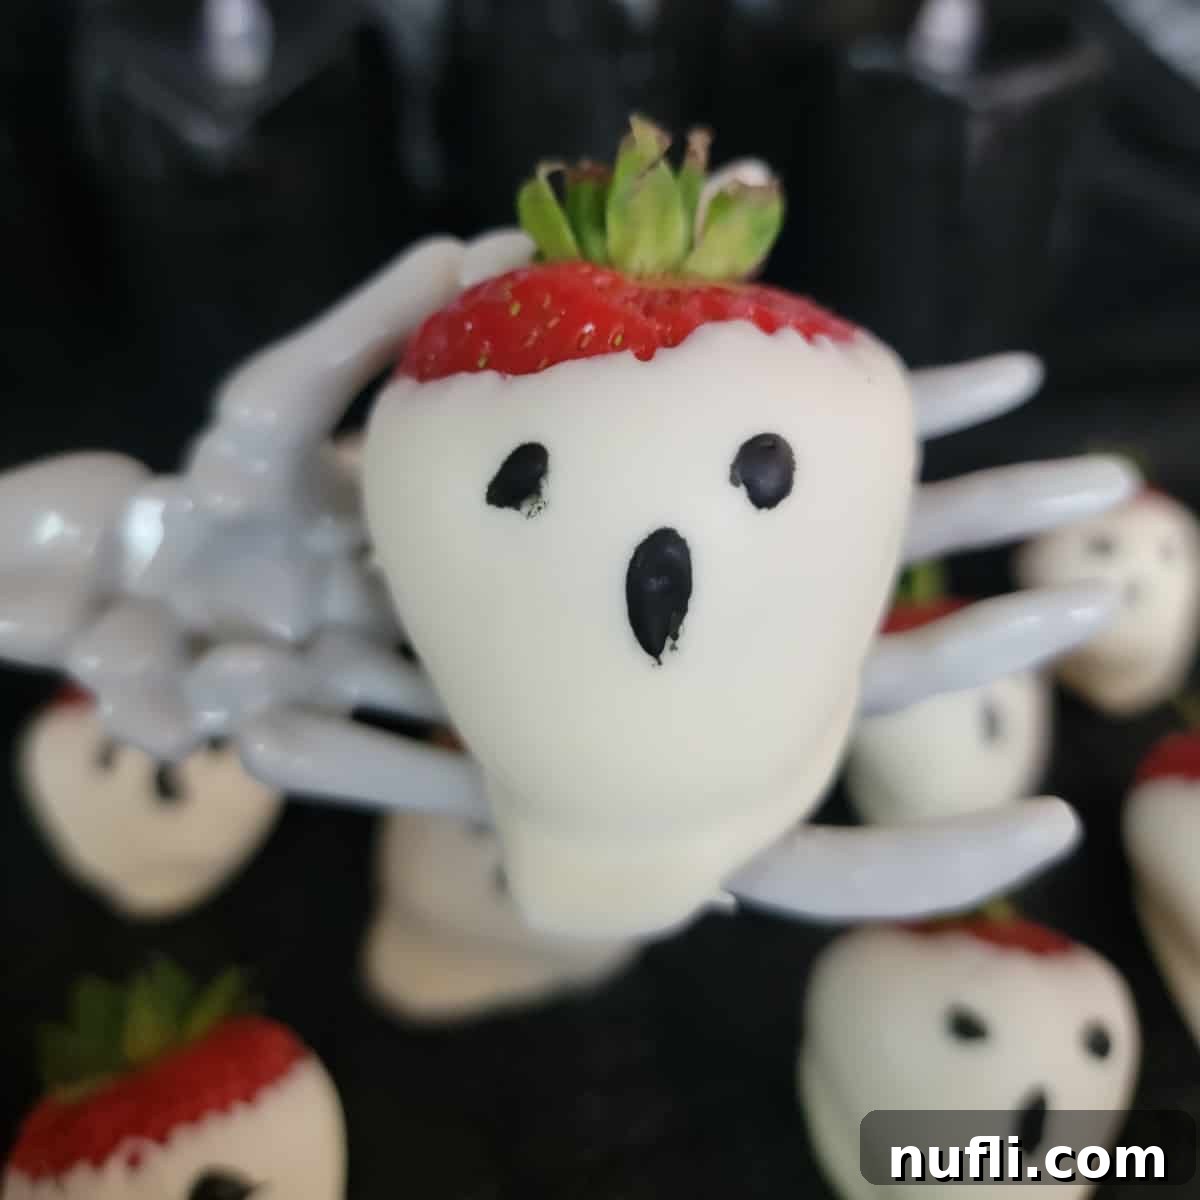
Transform ordinary strawberries into enchanting and edible specters with this incredibly easy Ghost Strawberry Dessert recipe! Perfect for adding a touch of spooky charm to your Halloween party spread, a romantic Halloween-themed dinner, or simply a fun autumnal treat, these delightful confections are a guaranteed crowd-pleaser. With just a few simple ingredients and minimal effort, you can create a striking and delicious dessert that captures the whimsical spirit of the spooky season.
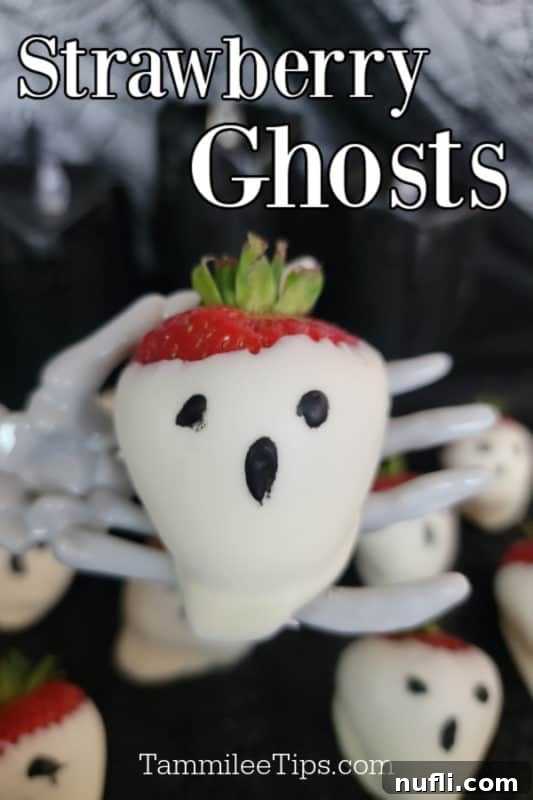
Why Ghost Strawberries Are a Must-Have for Halloween Celebrations
As the leaves turn and the air grows crisp, our kitchens often fill with the wonderful aromas of autumn and Halloween treats. While mummy cookies and goblin-themed cupcakes have their undeniable charm, these Ghost Strawberries offer a unique and refreshing twist to your Halloween dessert platter. They provide a vibrant pop of fresh red color amidst a sea of browns, oranges, and blacks, instantly catching the eye and adding a touch of natural sweetness.
Beyond their stunning visual appeal, these chocolate-covered strawberry ghosts are incredibly versatile. They’re not overly sugary, making them a fantastic counterpoint to richer holiday sweets. Their simplicity also makes them an ideal project for all ages – kids will love helping dip the strawberries and, once the chocolate is set, drawing the playful or spooky ghost faces. Imagine the delight of your guests as they discover these adorable, sweet surprises!
This year, we’ve truly embraced the spirit of the season, delving deep into crafting a collection of easy Halloween recipes. From frightfully fun main courses to ghoulishly good snacks, we’ve gathered over 60 creative ideas to ensure your Halloween is both delicious and memorable. The autumn season is a magical time, ushering in the excitement of Halloween before the warmth of Thanksgiving and the joy of Christmas. Our neighborhood is already adorned with elaborate spider webs and flickering lights, setting a wonderfully eerie mood. Even a quick glance out the office window, with flashing lights illuminating yard decorations of goblins and mummies, can still give me a playful start to the day. It’s all part of the fun and anticipation that these festive times bring!
The Magic Behind Ghost Strawberries: Ingredients & Essential Tools
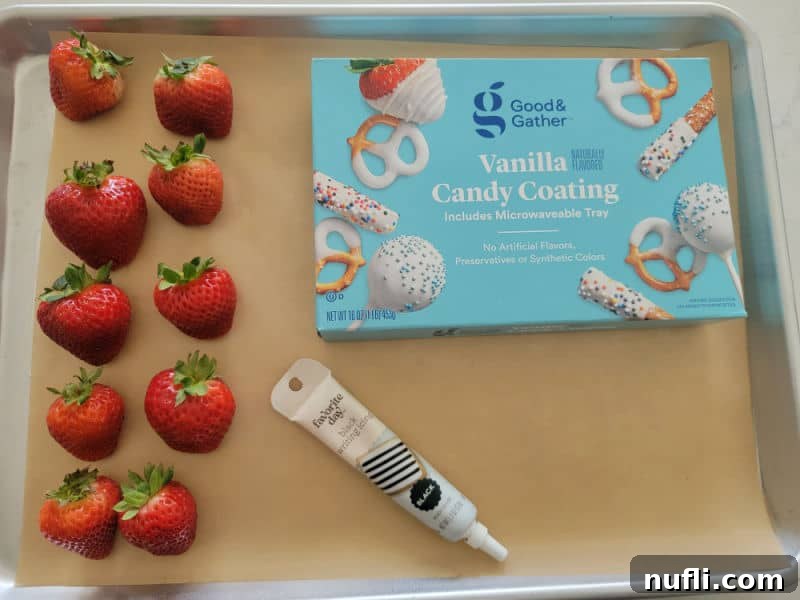
Creating these delightful strawberry ghosts requires surprisingly few ingredients, making it an accessible project for even the busiest of Halloween enthusiasts. Quality ingredients will elevate your final product, ensuring both great taste and a stunning appearance.
Ingredients You’ll Need:
- Fresh Strawberries: The star of our show! Look for firm, ripe strawberries with vibrant red color and intact green caps. Medium to large strawberries work best for dipping, providing a good canvas for your ghostly creations. Ensure they are thoroughly washed and completely dry before dipping, as any moisture can cause the chocolate to seize or create an uneven coating. For more berry inspiration, explore all our strawberry recipes!
- White Candy Melts / Almond Bark / Candy Quick: These are ideal for coating as they melt smoothly and harden quickly, creating a beautiful, opaque white finish without tempering. They are readily available in most grocery stores or craft stores in the baking aisle. If you prefer, high-quality white chocolate can also be used, though it might require tempering for the best results and sheen.
- Black Icing Pen or Mini Chocolate Chips: To bring your ghosts to life! A black icing pen (gel or tube icing) offers precision for drawing eyes and mouths. Alternatively, you can use mini chocolate chips for eyes (simply press two into the wet chocolate) or even melted dark chocolate in a piping bag with a fine tip for more detailed expressions.
Essential Equipment for Spooky Success:
Having the right tools can make the ghost-making process even smoother and more enjoyable. These items are commonly found in most kitchens, or easily acquired.
- Baking Sheets: Sturdy baking sheets with raised sides are incredibly useful. They provide a stable, flat surface for setting your dipped strawberries and prevent them from rolling off, especially when transporting them to the fridge or freezer.
- Parchment Paper: A true kitchen hero for minimal cleanup! Lining your baking sheets with parchment paper ensures that the chocolate-covered strawberries won’t stick, making them easy to remove once set. It also catches any drips, keeping your workspace tidy. Wax paper is a good alternative if you don’t have parchment.
- Microwave-Safe Bowl: For melting your candy coating. Choose a bowl that is deep enough for dipping but not too wide, to minimize the amount of candy coating needed to submerge the strawberries.
Crafting Your Ghostly Delights: Step-by-Step Instructions
Creating these charming ghost strawberries is a simple process that yields impressive results. Follow these detailed steps to bring your edible specters to life!
Step 1: Prepare Your Workspace and Strawberries
Begin by thoroughly washing your fresh strawberries under cool running water. Gently pat them completely dry with paper towels. This step is crucial, as any residual moisture on the strawberries can cause your candy melt or chocolate to seize and become clumpy. Once dried, arrange a sheet of parchment paper over your baking sheet. This prepared surface will be where your ghostly creations will set.
Step 2: Melt the Candy Coating
Place your chosen white candy melts, almond bark, or white chocolate into a microwave-safe bowl. Heat the coating in 30-second intervals, stirring thoroughly after each interval. Continue this process until the coating is completely melted and smooth, with no lumps remaining. Be careful not to overheat the chocolate, as this can cause it to burn or become too thick. If using white chocolate, ensure it’s not seized; if it is, a tiny bit of vegetable shortening can sometimes rescue it, but it’s best to avoid overheating altogether. Alternatively, you can melt the coating using a double boiler for a more controlled, even melt.
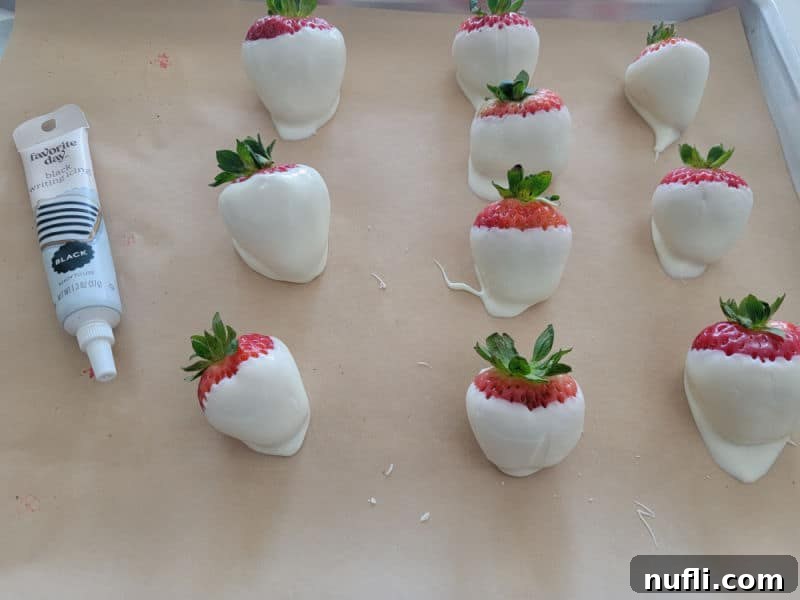
Step 3: Dip and Shape Your Strawberry Ghosts
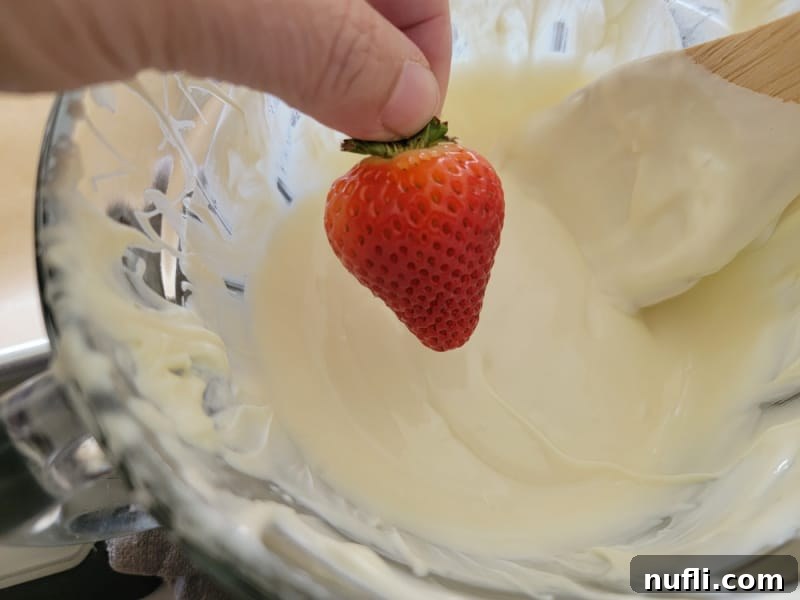
Hold each strawberry by its green cap (stem) and carefully dip it into the melted white coating. Rotate the strawberry to ensure it’s fully coated, leaving a small portion of the green top exposed if desired for contrast, or cover it entirely for a more seamless ghost look. Gently lift the strawberry, allowing any excess chocolate to drip back into the bowl. To create the classic “ghost tail” effect, you have a couple of options: you can either spread a small dollop of white chocolate onto the parchment paper before placing the dipped strawberry on top, or you can allow a heavier drip of chocolate to pool at the bottom of the strawberry as you set it down. This will create an uneven, flowing base that resembles a ghost’s ethereal form. Place the coated strawberries on the parchment-lined baking sheet and allow them to set. For faster setting, you can place the baking sheet in the refrigerator for 10-15 minutes.
Step 4: Bring Your Ghosts to Life with Faces
Once the white coating has completely hardened, it’s time for the fun part: giving your ghosts their unique personalities! Using a black icing pen, carefully draw two dots for eyes and a small oval or wavy line for a mouth on the front of each strawberry. You can create different expressions—happy, sad, surprised, or downright spooky—to give your ghost brigade a diverse cast of characters. If you’re using mini chocolate chips for eyes, simply press them gently into the still-wet chocolate immediately after dipping (skip this step if the chocolate is already hard, as they won’t stick). Allow the icing to dry completely before serving or storing.
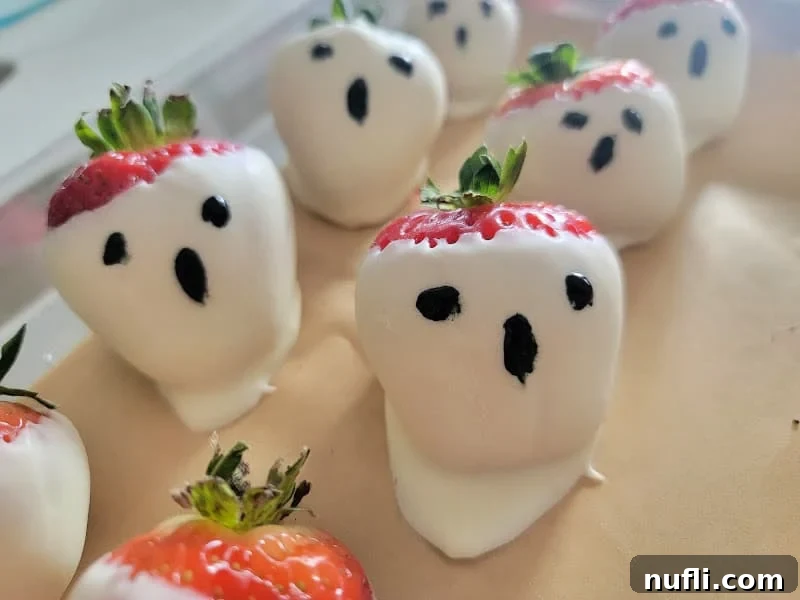
Preparation and Storage Tips for Perfect Ghost Strawberries
To ensure your ghost strawberries remain fresh, firm, and perfectly presentable, consider these preparation and storage guidelines:
Make Ahead: You can prepare the dipped and set strawberries a day or two in advance. However, a crucial tip for successful make-ahead ghost strawberries is to wait to pipe on the ghost faces until just before serving. If there is any condensation or moisture within the storage container, the black icing can begin to “bleed” or droop down the strawberry, transforming your adorable ghosts into sad, smeared figures. To combat this, place a layer of paper towel at the bottom of your airtight container to help absorb any excess moisture, then arrange the unfaced strawberries in a single layer. Store them in the refrigerator.
Storage: For immediate serving (within the same day), these ghost strawberries can be stored in an airtight container at room temperature, provided your kitchen isn’t excessively warm. Always ensure the strawberries are completely dry before coating and that the chocolate has fully set before storing. If storing for a day or two, refrigeration in an airtight container is best, again remembering to add faces just before presentation.
Freezing / How to Freeze: We generally do not recommend freezing chocolate-covered strawberries if you intend to thaw and serve them. The freezing and thawing process can significantly alter the texture of the strawberries, often making them mushy and less appealing. If you do choose to freeze them, it is best to enjoy them directly from the freezer as a frozen treat. Once they begin to thaw, their delicate structure will compromise, leading to a less enjoyable experience.
Recipe Variations to Spookify Your Strawberries
While the classic white ghost strawberry is charming, don’t hesitate to get creative with variations!
- Colorful Ghosts: Instead of plain white candy melts, try using different colored candy melts. Green candy melts can create Frankenstein’s monster strawberries, orange can make pumpkin-themed ones, or even purple or black for truly spooky specters.
- Flavor Boosts: Add a few drops of food-grade extract to your melted white chocolate for extra flavor. Peppermint, almond, or even a hint of orange extract can add a delightful surprise.
- Textured Toppings: Before the white chocolate sets, sprinkle your ghosts with edible glitter for an ethereal shimmer, or finely chopped nuts for a subtle crunch (though this might detract from the smooth ghost appearance).
- Vampire Bites: For a gruesome twist, use red icing gel to create a “blood drip” from the ghost’s mouth or two small red dots for vampire fangs.
- Monster Mash-up: Use different colored icing pens to draw stitches, scars, or multiple eyes to turn your ghosts into unique monsters.
- Substitutions: For the white chocolate coating, ensure you check labels for dietary needs. This recipe is inherently Vegetarian. For a Vegan Option, seek out dairy-free white chocolate or confirm that your chosen almond bark is vegan-certified. For a Gluten-Free option, always double-check the packaging of your candy melts or almond bark, as some brands may contain gluten-containing ingredients.
- Adjusting Serving Sizes: This recipe is incredibly adaptable. To make a Smaller Serving Size, simply use fewer strawberries and adjust the amount of candy coating accordingly. For a Larger Group / More Servings, easily double or triple the ingredients. The process remains the same, just ensure you have enough baking sheets and parchment paper!
Top Tips for Perfect Ghostly Strawberry Treats
Achieving perfectly spooky and delicious ghost strawberries is easy with these insider tips:
- Completely Dry Strawberries are Key: This cannot be stressed enough. After washing, ensure each strawberry is thoroughly patted dry. Water is the enemy of melted chocolate and candy melts; even a tiny drop can cause your coating to seize and become unusable.
- Patience with Melting: When melting your candy coating, use short intervals and stir diligently. Overheating can lead to burnt chocolate or a thick, unworkable consistency. Low and slow is the way to go for a smooth, dippable coating.
- Creating the Ghostly Tail: Don’t be afraid to experiment with the “tail.” A slightly heavier dip, allowing the excess to pool at the bottom when placed on parchment, creates a more pronounced, flowing ghost shape. You can also use a small spoon to gently spread a bit of the melted coating into a wavy shape on the parchment before placing the strawberry on top.
- Decorate When Fully Set: Resist the urge to draw faces on warm or still-wet chocolate. The coating must be completely hardened before applying icing, otherwise, the colors will bleed and your expressions won’t be crisp.
- Use a Toothpick for Detail: If you don’t have an icing pen, a toothpick dipped in melted dark chocolate can be used for drawing small, intricate eyes and mouths.
- Consider a Cooling Rack: If you run out of parchment paper, a cooling rack placed over a baking sheet can also work. Just ensure there’s a tray underneath to catch any drips, making cleanup easier.
- Optimal Storage: As mentioned, if making ahead, store in the fridge without faces. The moisture can cause facial features to spread, making your adorable ghosts look like “sad clowns” as the icing runs. A paper towel in the container helps absorb excess humidity.
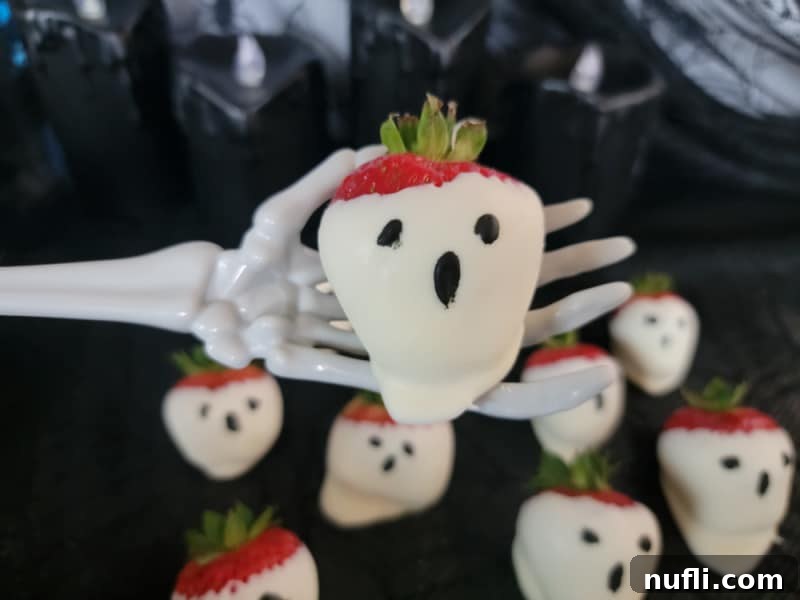
What to Serve with Your Spooky Strawberry Ghosts
These versatile ghost strawberries pair wonderfully with a variety of Halloween-themed treats and beverages, making them a perfect addition to any festive gathering:
- Drinks: Complement their sweetness with comforting Hot Chocolate, a seasonal Pumpkin Spice Latte, refreshing Kool Aid Slushies for the kids, or a rich Oreo Milkshake.
- Main Dish/Entrée: Balance the dessert with a fun and savory Mummy Quesadilla or a vibrant plate of Halloween Pasta.
- Snacks: Create a full spread of spooky snacks like Monster Munch, a classic Candy Corn and Peanuts snack mix, adventurous Kool Aid Pickles, or a sweet and salty Salted Caramel Popcorn. And, of course, no Halloween party is complete without an abundance of your favorite Halloween Candy!
When to Serve These Enchanting Treats
Ghost Strawberries are incredibly versatile and suitable for a myriad of autumn and Halloween occasions:
- Halloween Parties: The quintessential occasion for these spooky sweets.
- School Parties: A healthy-ish and fun option for classroom celebrations.
- Fall Events: Perfect for harvest festivals, autumn potlucks, or bonfire gatherings.
- Family Dinner: A simple yet special dessert to elevate an everyday meal.
- Movie Night: An ideal snack for a cozy horror movie marathon or a family-friendly Halloween film.
- Halloween Wedding: Add a whimsical touch to a uniquely themed celebration.
- Trick-or-Treat Handouts (Non-Candy Alternative): A creative and delightful surprise for neighborhood trick-or-treaters (if prepared and packaged appropriately).
More Spooktacular Halloween Recipes to Explore
If you’re looking to expand your repertoire of Halloween treats, be sure to check out some of our other fantastic ideas:
- Candy Corn Jello Shots
- Nutter Butter Ghosts
- Spider Doughnuts
- Reese’s Bats
- Witch Hat Cookies
- Marshmallow Ghosts
Discover even more Great Halloween Recipes to make your celebrations unforgettable!
Do you love discovering new recipes? Be sure to explore our diverse collections including copycat recipes, a wide array of dessert recipes, and our convenient CrockPot Recipes.
Stay connected with Tammilee Tips for all our latest culinary creations and lifestyle advice. Follow us on Facebook, Instagram, Pinterest, and Twitter!
Ghost Strawberry
Print
Rate
Ingredients
- 12 Strawberries
- 1 Vanilla Almond Bark
- Black Icing Pen
Instructions
- Gather all of the ingredients, line a baking sheet with parchment paper.
- Melt candy melt/almond bark in 30 second intervals stirring after every interval until completely melted.
- Dip strawberries in melted chocolate until nicely coated. Place on Parchment paper to set.
- Draw ghost eyes and a mouth on the front of the strawberry.
Kitchen Tools
- Large Mixing Bowl
- Cookie Sheets
- Parchment Paper
Nutrition
Calories from Fat 1
