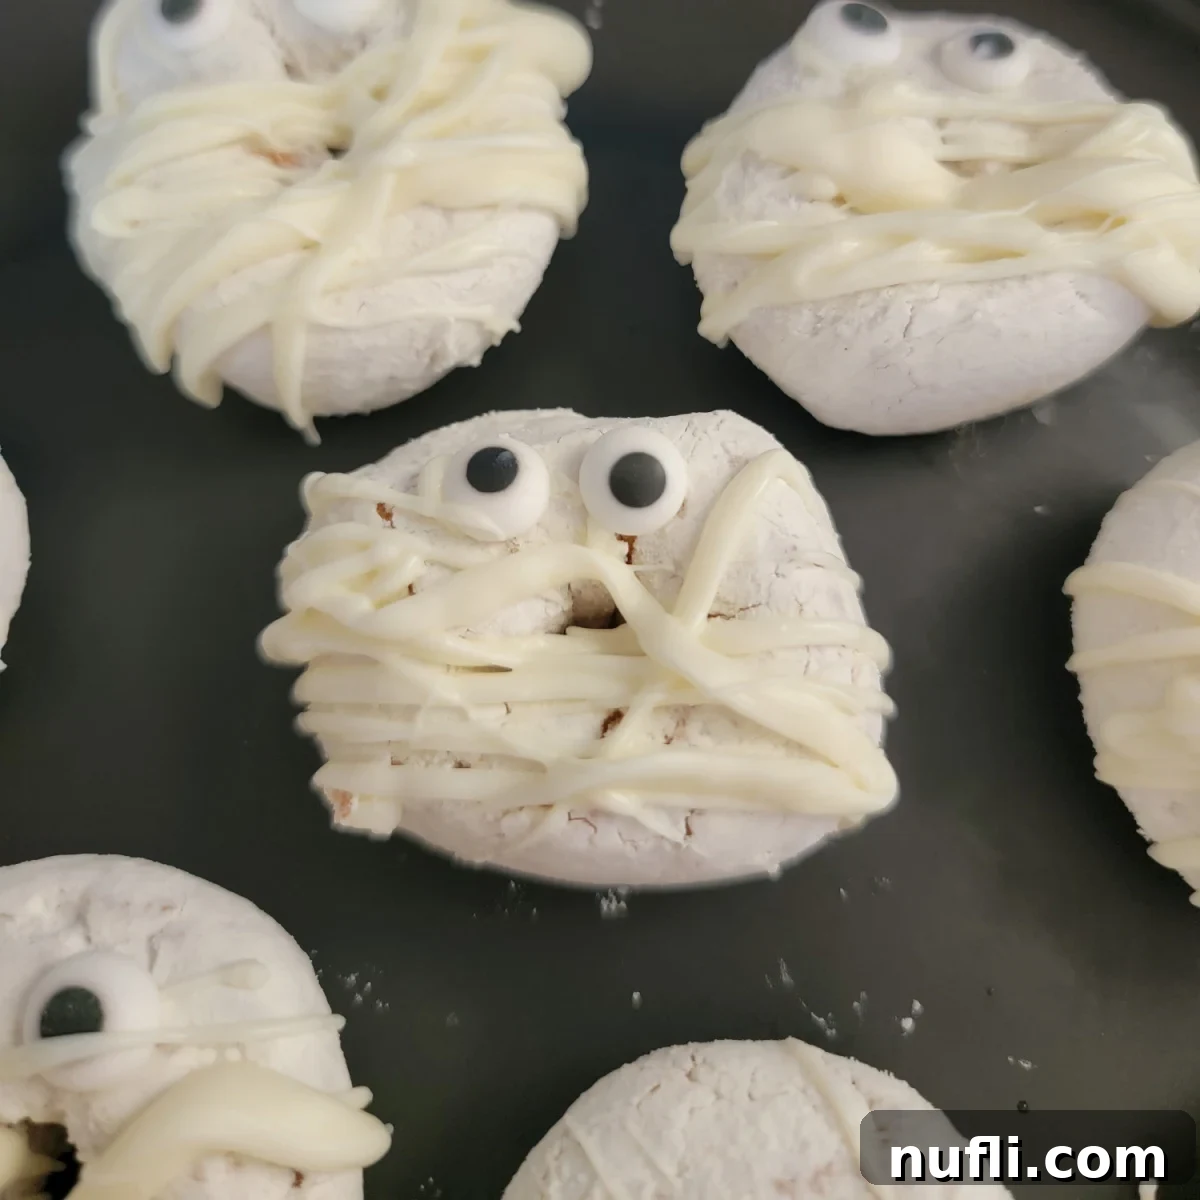
Get ready to unwrap the cutest Halloween treat of the season! These Easy Mummy Donuts are an absolute delight, transforming simple store-bought donuts into adorably spooky edible mummies in mere minutes. Perfect for a Halloween breakfast surprise, a school party, or a fun movie night snack, they require no baking and minimal effort, making them a fantastic project for kids and adults alike.
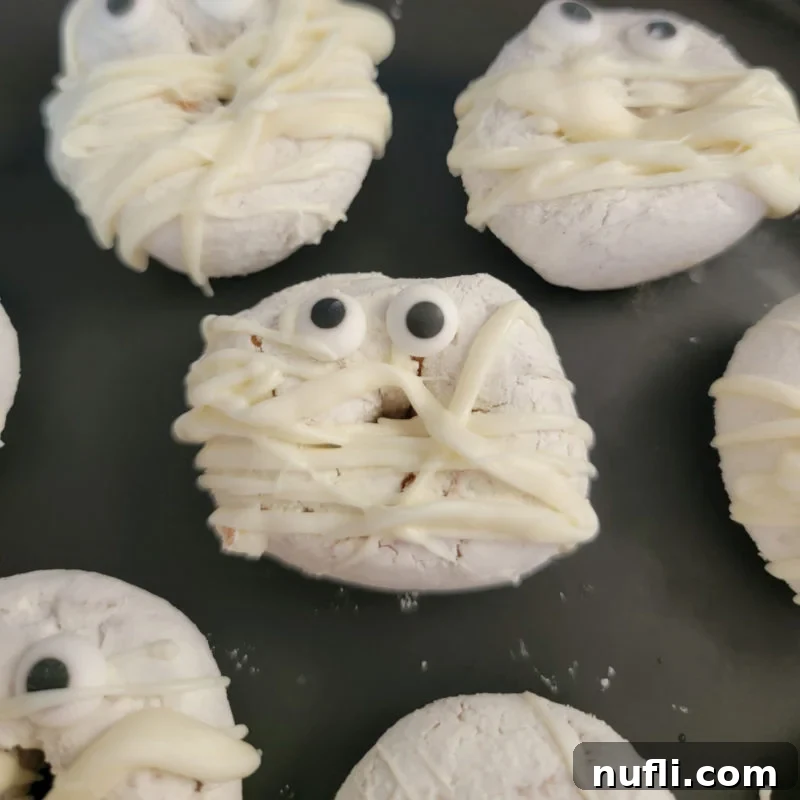
Easy Mummy Donuts: The Ultimate Spooky & Sweet Halloween Treat
Halloween is all about fun, creativity, and, of course, delicious treats! But who says you need hours in the kitchen to whip up something spectacular? Our Easy Mummy Donuts are here to prove otherwise. Imagine the delighted gasps when your family wakes up to these charmingly ghoulish goodies, or the smiles they’ll bring to any Halloween gathering. Crafted from pre-made donuts and a few simple decorations, these no-bake wonders are a testament to how effortless festive food can be.
Forget complicated baking or intricate decorating techniques. With this recipe, you’re just a few steps away from creating a batch of mummified masterpieces. Whether you’re a seasoned baker or a complete novice, these donuts are incredibly forgiving and always turn out wonderfully cute. They’re ideal for busy parents, last-minute party planners, or anyone looking to add a touch of Halloween magic without the stress.
Unleash Your Inner Ghoul: Why You’ll Love These Mummy Donuts
This recipe isn’t just about making donuts; it’s about embracing the spirit of Halloween with minimal fuss and maximum fun. This year, we’ve declared it “Mummy Week” in our kitchen, diving headfirst into all things mummified! What started as a fun challenge from my husband to see how many items I could transform into mummies has blossomed into a full-blown obsession. After successfully mummifying everything from Mummy Hot Dogs to Mummy Twinkies, it was only natural that donuts would get their turn under the (candy melt) bandages.
You’ll adore these mummy donuts for several reasons. Firstly, their simplicity is unmatched. By starting with store-bought mini donuts, you bypass all the baking, rising, and frying, cutting down your prep time to under 15 minutes. This makes them an absolute lifesaer when you need a quick, impressive treat. Secondly, their adorable factor is off the charts! While not “super spooky,” their googly eyes peeking out from white bandages make them irresistibly charming, perfect for younger children or those who prefer a more playful Halloween aesthetic.
Finally, these donuts are incredibly versatile. Serve them as a festive breakfast, a delightful dessert for a Halloween party, or even as a unique addition to a spooky brunch board alongside other themed treats. They pair wonderfully with other mummy-themed snacks like Mummy Rice Krispie Treats, Mummy Nutter Butters, and Mummy Brownies. I’m even experimenting with savory options like mummy pizzas and brie – so stay tuned for more mummified creations!
Gather Your Hauntingly Simple Ingredients
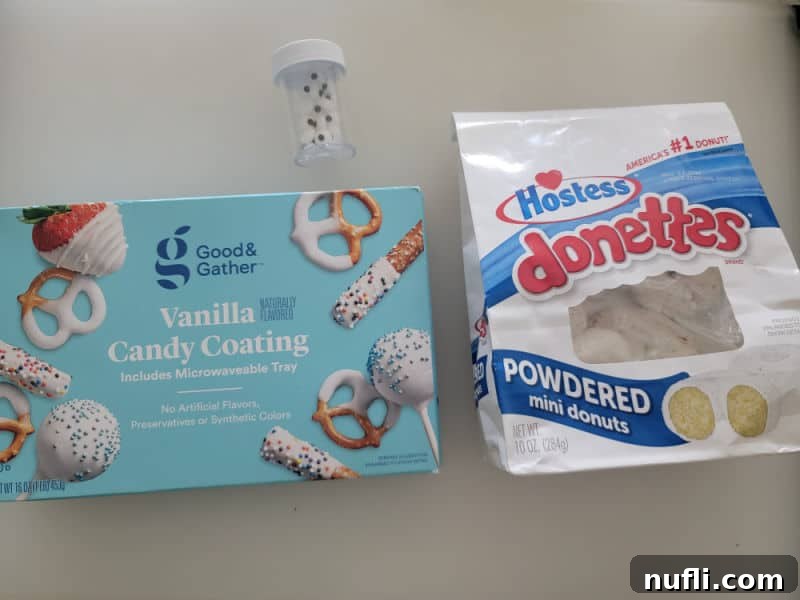
Creating these delightful mummy donuts requires only a handful of readily available ingredients. The beauty of this recipe lies in its minimal components and maximum impact, making it perfect for a last-minute Halloween treat.
- Powdered Mini Donuts: These are the star of our show! We opted for pre-made mini powdered sugar donuts for ultimate convenience. Their small size makes them perfect for individual servings and quick decorating. However, don’t feel limited! You can easily use full-size donuts for a larger treat, or even homemade baked donuts if you have a favorite recipe and a little extra time. Glazed or plain donuts also work wonderfully, just be aware that the white candy melt might not adhere quite as strongly to a very slick glaze.
- White Vanilla Candy Melts or White Chocolate: This forms the “bandages” of our mummies. Vanilla candy melts (also known as candy coating or almond bark) are ideal as they melt smoothly and set quickly, providing that perfect crisp white finish. Alternatively, good quality white chocolate chips or bars can be used. If using white chocolate, you might need to add a teaspoon of coconut oil or vegetable shortening per cup of chocolate to ensure it melts to a smooth, drizzly consistency.
- Candy Eyes: These are essential for giving your mummies their endearing (or slightly eerie) personalities! Look for small, edible candy eyes in the baking aisle of your grocery store or craft supply store. They come in various sizes, so choose ones that fit your donuts well.
Essential Tools for Your Mummy Donut Magic
While the ingredients are few, having the right tools on hand will make the mummy-making process even smoother and more enjoyable. These aren’t fancy, specialized items, but rather common kitchen essentials that help ensure success.
- Baking Sheets (with sides): These are invaluable for keeping your workspace clean. You’ll place your cooling rack or parchment paper on top, catching any excess candy melt drips. The sides prevent any potential mess from spilling onto your counters.
- Drying Rack/Cooling Rack: A wire rack placed over a baking sheet is highly recommended. It allows the excess candy melt to drip away from the donuts, preventing a thick, uneven coating and ensuring a cleaner, more professional-looking finish. If you don’t have one, parchment paper works in a pinch, but the drips will pool around the base of the donuts.
- Parchment Paper: Even if you use a drying rack, lining your baking sheet with parchment paper makes cleanup an absolute breeze. If you’re skipping the rack, parchment paper is essential to prevent the donuts from sticking to the tray as the candy melt sets.
- Cute Serving Platter: While not strictly necessary for making the donuts, a festive serving platter elevates their presentation. A black plate or Halloween-themed board provides a striking contrast to the white mummies, making them even more appealing.
- Small Microwave-Safe Bowl: For melting the candy melts.
- Spoon or Fork: For drizzling the candy melt over the donuts. A piping bag with a small round tip can also be used for more precise “bandages.”
How to Make Easy Mummy Donuts: Step-by-Step Guide
Creating these adorable mummy donuts is an incredibly straightforward process, perfect for involving little helpers in the kitchen. Follow these simple steps to bring your Halloween treats to life!
Step 1: Prepare Your Workspace and Melt the Candy
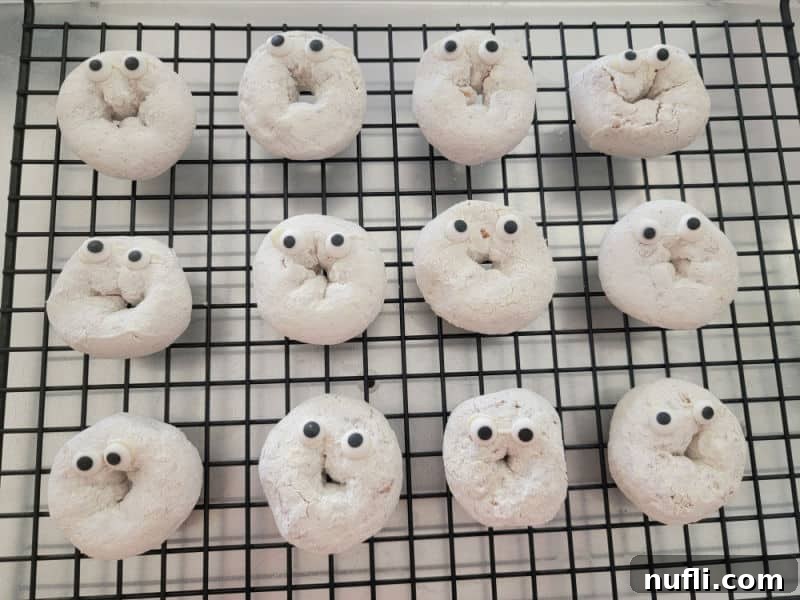
Begin by arranging your powdered donuts on a drying rack set over a baking sheet. If you don’t have a drying rack, simply line a baking sheet with parchment paper. The rack helps any excess candy melt drip off, ensuring a cleaner finish, while parchment paper still prevents sticking and makes cleanup easier. Next, place your white vanilla candy melts (or white chocolate) into a microwave-safe bowl. Microwave in 30-second intervals, stirring thoroughly after each interval, until the candy is completely melted and smooth. Be careful not to overheat it, as this can cause it to seize or burn.
Step 2: Attach the Candy Eyes
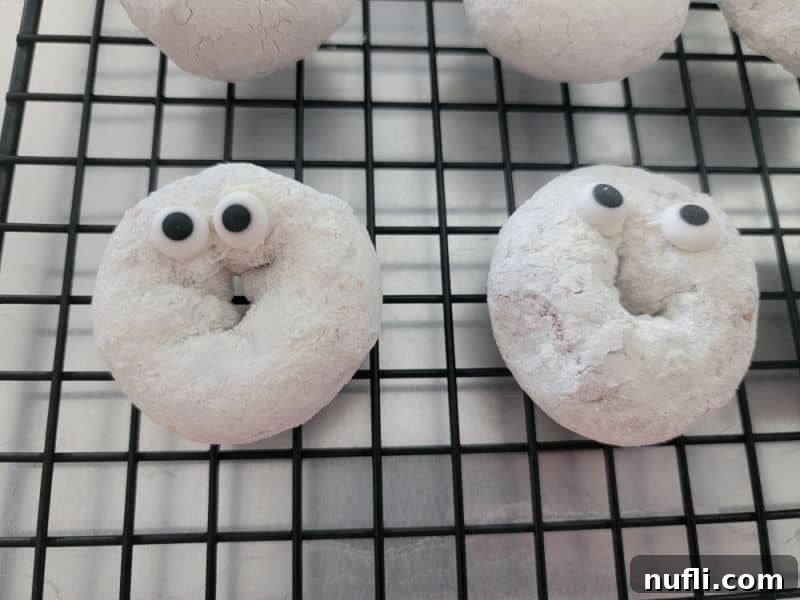
Once your candy melt is smooth and liquid, use a small dab (about two drops) of the melted candy to attach two candy eyes to each donut. Position them towards the top of the donut, leaving enough space below for the “bandages.” The candy melt acts as a quick-setting edible glue, securing the eyes in place.
Step 3: Create the Mummy Bandages
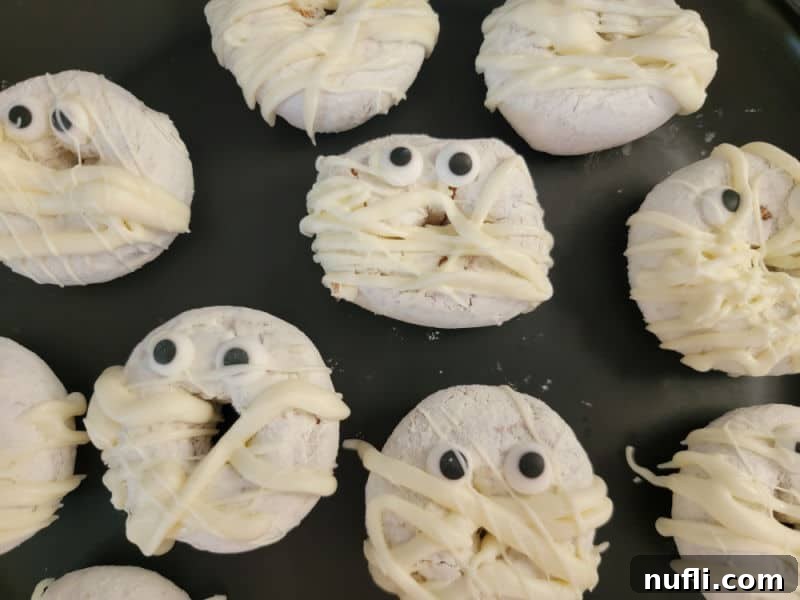
Now for the fun part – transforming your donuts into mummies! Dip a spoon into the melted candy and drizzle it back and forth over the top of each donut in a random, overlapping pattern. You want to create the illusion of bandages wrapping around the donut, leaving small gaps for the eyes to peek through. A fork can also be used for finer, more delicate lines. For a more controlled look, you can transfer the melted candy into a piping bag fitted with a small round tip and pipe the lines. Don’t worry about perfection; uneven lines add to the rustic, mummified charm!
Step 4: Allow to Set and Enjoy
Once all your donuts are mummified, allow them ample time for the candy melt to set completely. This can take anywhere from 10 to 30 minutes at room temperature, or you can speed up the process by placing the baking sheet in the refrigerator for about 5-10 minutes. Once the candy is firm to the touch, your cute mummy donuts are ready to be served and enjoyed!
Tips for Achieving Perfectly Mummified Donuts
While these mummy donuts are incredibly simple to make, a few expert tips can help you achieve the best results every time:
- Consistency is Key for Candy Melts: If your candy melts seem too thick after melting, you can thin them slightly with a small amount of vegetable shortening or coconut oil (about ½ teaspoon per cup of candy melts). Add it gradually and stir until you reach a smooth, drizzly consistency. If they become too thin, they might not coat the donuts well.
- Don’t Overheat: Overheating white chocolate or candy melts can cause them to seize (become lumpy and unusable) or burn. Microwave in short bursts and stir frequently. If using a double boiler, keep the heat low and ensure no water gets into the chocolate.
- Creative Drizzling Techniques: Experiment with your drizzling. Hold the spoon higher for thinner, more delicate lines, or closer for thicker bands. Criss-cross patterns work well, but remember that randomness enhances the mummy effect. You can also try using a zip-top bag with a tiny corner snipped off for a makeshift piping bag.
- Quick Setting: If you’re in a hurry, place the decorated donuts in the refrigerator for 5-10 minutes. The cool temperature will help the candy melt set much faster, preventing smudging and allowing for quicker serving.
- Add a Pop of Color: While traditional mummies are white, consider adding a few drops of food coloring to a small portion of your candy melt for a “bloody” accent (red drizzle) or other spooky touches.
- Prevent Sticky Situations: Ensure your donuts are completely cooled before applying the candy melt. Warm donuts can cause the candy to melt and slide off rather than setting cleanly.
Preparation, Storage, and Enjoyment
These Mummy Donuts are wonderfully convenient, not only in their creation but also in how you can prepare and store them. Planning ahead for your Halloween festivities has never been easier!
Make Ahead
These donuts can be prepared a day or two in advance without losing their charm or taste. Simply follow all the steps and allow the candy melt to fully set. Preparing them slightly ahead of time allows you to focus on other Halloween preparations on the day of your event, reducing stress and maximizing enjoyment. However, we recommend not making them too far in advance, as the donuts can start to get a bit crunchy or stale if left for too long.
Storage
To keep your mummy donuts fresh and delicious, store them in an airtight container at room temperature. Placing them in a cool, dry pantry or on the counter away from direct sunlight is ideal. Avoid refrigerating them for extended periods if you want to maintain the soft texture of the donuts, as the cold can sometimes make them a little firm.
Freezing/How to Freeze
While technically possible, freezing may slightly affect the texture of the donuts, making them a bit chewier or drier upon thawing. If you do choose to freeze them, wrap each mummy donut individually in plastic wrap, then place them in a freezer-safe container or bag. This individual wrapping helps prevent freezer burn and keeps them from sticking together. When ready to serve, thaw the donuts at room temperature for a few hours. This slow thawing process helps minimize any textural changes.
Mummy Donut Recipe Variations for Every Diet
One of the best things about these Easy Mummy Donuts is how adaptable they are. With a few simple substitutions, you can cater to various dietary needs and preferences, ensuring everyone can enjoy a spooky sweet treat!
Donut Substitutions
As mentioned, while powdered mini donuts are our go-to for convenience, you’re not limited. Feel free to use full-size donuts for a more substantial treat, or even homemade baked donuts if you prefer to bake from scratch. You can also experiment with different donut flavors – plain, glazed, or even chocolate donuts will provide a fun contrast under the white “bandages.”
Vegetarian Option
This recipe is inherently vegetarian, as all the core ingredients (donuts, candy melts, candy eyes) typically do not contain meat products. Always double-check ingredient labels to ensure no hidden animal-derived components are present in specific brands, especially for gelatin in certain candy eyes.
Vegan Option
Most traditional pre-made donuts, like Hostess Donettes, contain dairy and eggs, making them unsuitable for a vegan diet. However, many excellent vegan donut options are now available! Look for brands that specifically market vegan donuts in your local grocery store or online. You can find several varieties of pre-made vegan donuts on Amazon. Ensure your candy melts are also dairy-free; many white candy coatings are naturally vegan, but always verify the ingredients list.
Gluten-Free Option
Similar to vegan options, traditional Hostess Donettes are not gluten-free. Fortunately, the market for gluten-free baked goods has exploded, and you can now find numerous delicious brands of gluten-free mini donuts. Check the specialty aisle of your supermarket or browse Amazon for suitable choices. Always confirm the ingredients on the packaging to ensure they meet specific gluten-free requirements and don’t contain any cross-contaminants if allergies are severe.
Adjusting Serving Sizes
This recipe is incredibly flexible for different crowd sizes. To make a smaller batch, simply use fewer donuts and adjust the amount of candy coating accordingly. For larger groups or parties, the recipe can easily be doubled, tripled, or scaled up as needed. Just ensure you have enough candy melts and candy eyes to go around!
Important Allergy Note: While we strive to highlight common dietary considerations, always advise guests with allergies to check product packaging themselves. Ingredients can vary by brand and manufacturing process.
What to Serve with Your Spooky Sweet Treats
Mummy Donuts are fantastic on their own, but pairing them with other Halloween-themed delights truly completes the festive experience. Whether you’re planning a full meal or just a snack spread, here are some ideas:
Complementary Drinks
Wash down your mummies with some equally festive beverages:
- Hot Chocolate: A classic comfort, perfect for a crisp fall evening.
- Pumpkin Spice Latte: Embrace the autumn flavors with this popular drink.
- Kool-Aid Slushies: Choose red or green for a spooky potion effect.
- Oreo Milkshake: A dark, creamy treat that contrasts beautifully with white mummies.
- Freckled Lemonade: A sweet and tangy option.
- Sonic Ocean Water: A vibrant blue drink for a ghostly theme.
Fun Halloween Snacks
Create a full snack spread with these easy Halloween treats:
- Monster Munch: A sweet and salty mix perfect for snacking.
- Candy Corn and Peanuts: A simple, addictive classic fall combo.
- Pretzel Bones: White chocolate-dipped pretzels shaped like bones.
- Salted Caramel Popcorn: A delightful blend of sweet and salty.
- Pumpkin Rice Krispie Treats: Shaped like jack-o’-lanterns for an extra festive touch.
- Frankenstein Rice Krispie Treats: Another fun character treat.
- Bloody Bandages: Simple, spooky, and delicious.
- Candy Corn Bark: A colorful, easy-to-make candy treat.
- And, of course, plenty of Halloween Candy!
Hearty Halloween Mains
If you’re serving these as dessert for a meal, consider these fun main dishes:
- Halloween Pasta: A vibrantly colored pasta dish.
- Mummy Dogs: The savory counterpart to our mummy donuts, always a hit!
- Mummy Quesadillas: Another fun and easy mummified meal.
More Halloween Desserts
Expand your sweet table with additional spooky treats:
- Pumpkin Rice Krispie Treats: Always a crowd-pleaser.
- Frankenstein Rice Krispie Treats: Green and gooey goodness.
- Witch Hat Cookies: Simple cookies decorated to look like witch hats.
- Reese’s Bats: Chocolate and peanut butter in a fun shape.
- Marshmallow Ghosts: Light, fluffy, and perfectly spectral.
- Pretzel Skeleton Bones: A crunchy, sweet, and eerie treat.
Perfect Occasions for Mummy Donuts
These delightful treats are so versatile, they fit right into almost any fall or Halloween event. Here are some ideal times to serve your Easy Mummy Donuts:
- Halloween Breakfast/Brunch: Start your spooky day with a smile!
- Halloween Parties: A crowd-pleasing dessert that’s easy to make in large batches.
- School Parties: A fun, kid-friendly treat that’s easy to transport.
- Sweet Treat: A simple indulgence whenever a craving strikes.
- Trick or Treating: A little bite-sized energy boost before heading out.
- Movie Night: Perfect for munching during a scary (or not-so-scary) movie.
- Fall Picnics: A festive addition to your outdoor gathering.
- Office Parties: Bring some Halloween cheer to your colleagues.
- Kids After-School Snack: A fun surprise to brighten their afternoon.
Discover More Hauntingly Good Halloween Recipes
If you loved making these Mummy Donuts, you’ll find plenty more spooky inspiration on our site! We’re passionate about making holidays fun and delicious. Explore some of our other favorite Halloween recipes:
Candy Corn and Peanuts Snack Mix
Pumpkin Angel Food Cake
Jack-O’-Lantern Pumpkin Rice Krispie Treats
Frankenstein Rice Krispie Treats
Edible Fake Blood
White Chocolate Skeleton Bones
Be sure to check out our complete collection of Halloween Recipes for even more ideas!
Love finding new recipes? Don’t miss our copycat recipes for your favorite restaurant dishes, a wide array of dessert recipes to satisfy any sweet tooth, and our easy Crock Pot Recipes for delicious, hands-off meals.
Follow Tammilee Tips on MSN, Facebook, Instagram, Pinterest, and Twitter for all our latest recipe posts and culinary adventures!
Mummy Donuts
Easy Mummy Donuts perfect for Halloween, a cute and quick treat for all ages.
10 minutes
10 minutes
12
270 kcal
Tammilee Tips
Ingredients
- 12 powdered donuts
- 24 Candy Eyes
- 1 package Vanilla Almond Bark (or white vanilla candy melts/white chocolate)
Instructions
- Arrange powdered sugar donuts on a drying rack over a baking sheet lined with parchment paper.
- Melt almond bark/white chocolate melts in 30-second increments in a microwave-safe bowl. Stir after every 30 seconds until completely melted and smooth.
- Add 2 small drops of candy melt to the top of each donut to attach the candy eyes, pressing gently to secure.
- Using a spoon, drizzle the melted white chocolate back and forth across the donuts in random patterns to create the mummy bandages, leaving small gaps for the eyes to show.
- Allow the candy melt to set completely at room temperature or in the refrigerator for 5-10 minutes before serving.
Kitchen Tools
- Baking Sheets
- Drying Rack (optional, but recommended)
- Parchment Paper
- Microwave-Safe Bowl
- Spoon or Fork (for drizzling)
Nutrition
Calories from Fat 117
Love this recipe?
Follow @TammileeTIps on Pinterest
Tried this recipe?
Mention @TammileeTipsLife when you share a photo!
