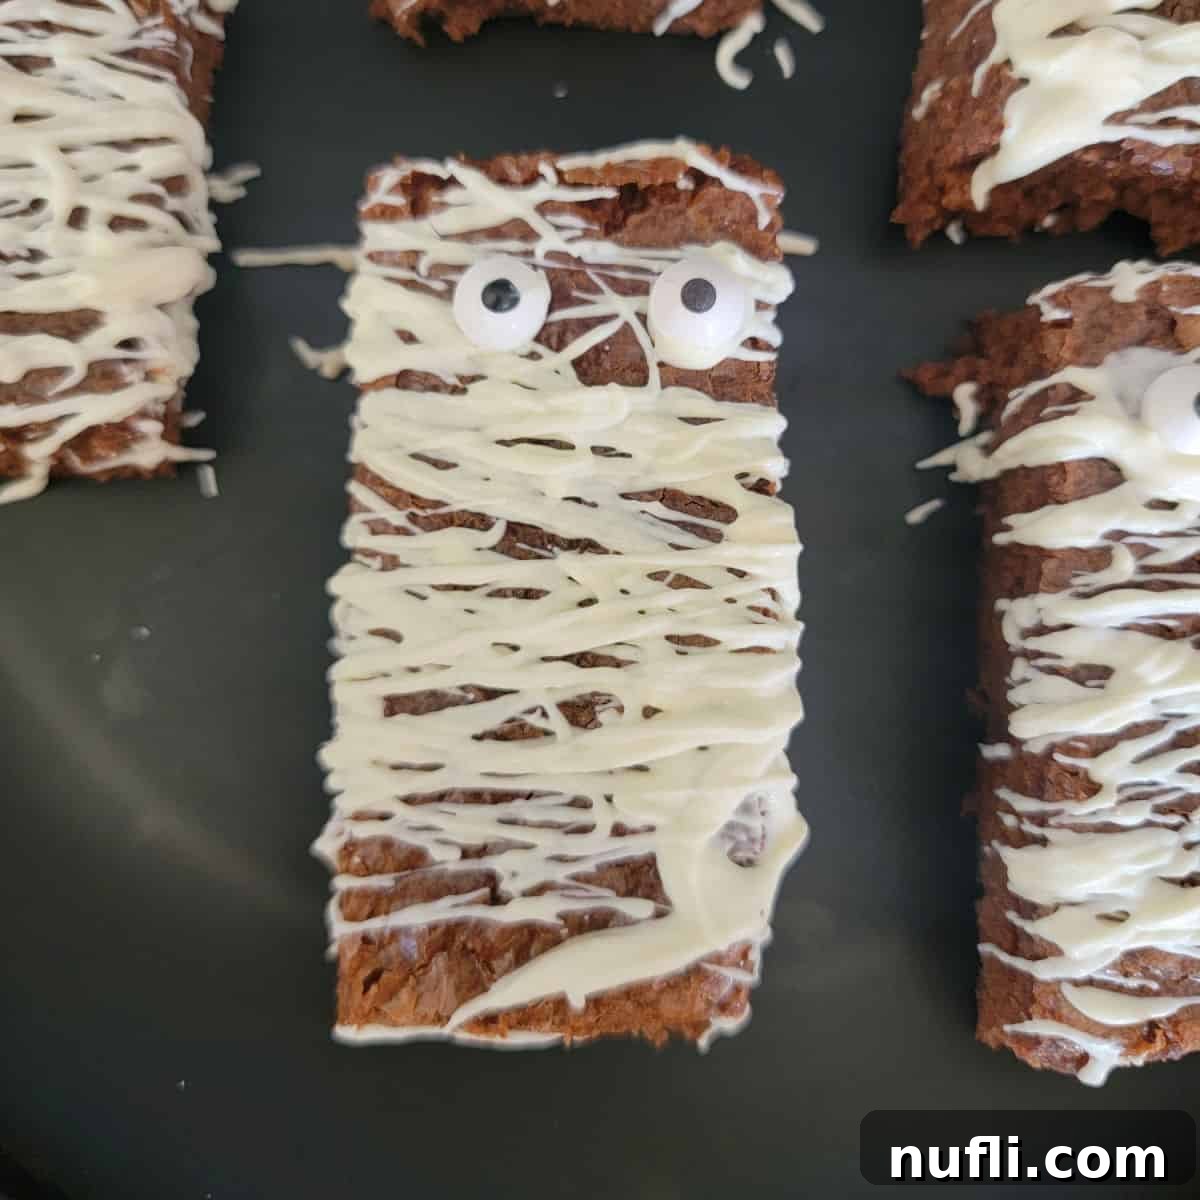
Get ready to bewitch your taste buds and delight your guests with these absolutely
adorable and incredibly easy Mummy Brownies! Perfect for any Halloween party, school event,
or simply a spooky movie night, these treats combine rich, fudgy brownies with a playful
mummy disguise that’s sure to get everyone talking. Whether you’re a seasoned baker or
just starting out, this recipe is designed for effortless fun, making it your ultimate
go-to for homemade Halloween treats.
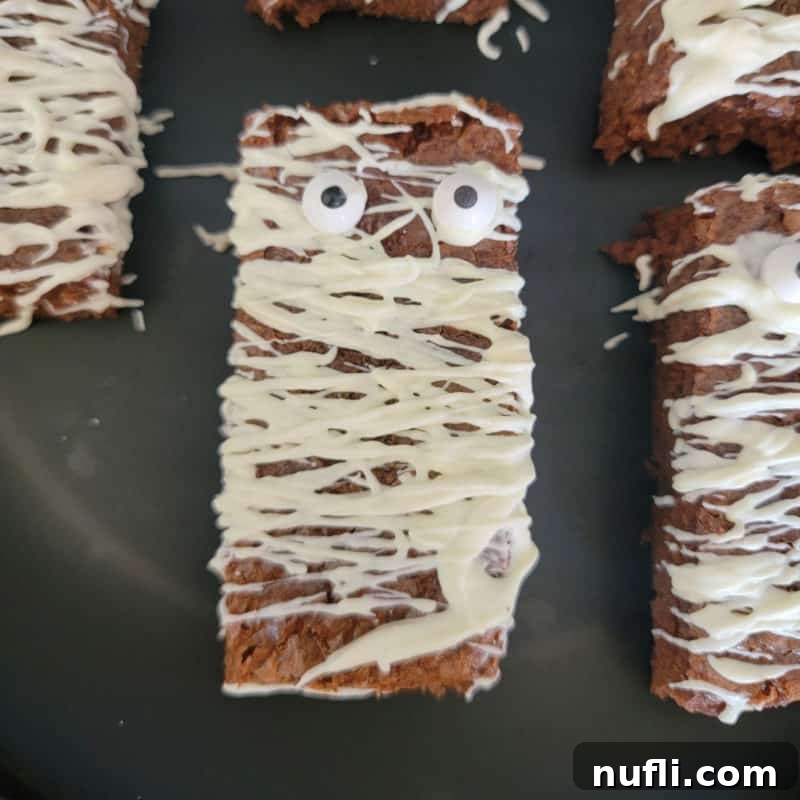
Easy Mummy Brownies: Your Go-To Spooky Halloween Treat
Halloween is a time for spooky fun, creative costumes, and, of course, delicious treats that capture
the spirit of the season! If you’re searching for an impressive yet simple dessert that will be
the star of any festive gathering, look no further than these charming Mummy Brownies. This recipe
is a fantastic addition to your Halloween repertoire, offering a delightful combination of classic
chocolate brownies and a ghostly white chocolate “bandages” design, complete with expressive candy eyes.
These easy Halloween brownies are perfect for busy parents, enthusiastic party hosts, or anyone who
wants to add a touch of homemade magic to their celebrations without spending hours in the kitchen.
You can choose to bake your favorite homemade brownie recipe for that extra touch of love and flavor,
or opt for a convenient box brownie mix when time is of the essence. Either way, the result is a
perfectly moist, fudgy, and chewy brownie transformed into a hauntingly cute mummy. They’re not just
for kids; adults will love these fun and festive desserts too!
Why You’ll Adore These Spooky Mummy Brownies
These Mummy Brownies aren’t just a treat; they’re a delightful experience. Here’s why they’ll become a Halloween favorite:
-
Effortlessly Spooky & Impressive: The mummy design, achieved with simple drizzles of white chocolate
and a pair of candy eyes, looks elaborate but is surprisingly easy to create. You’ll impress everyone with minimal effort! -
Kid-Friendly & Fun to Make: This is a fantastic baking project to do with children. From mixing the
brownie batter to carefully placing the candy eyes, kids will love being involved in bringing these mummies to life. -
Perfect for Parties: Whether it’s a school Halloween party, a neighborhood get-together, or your own
spooktacular bash, these brownies are the ultimate crowd-pleaser. They’re easy to transport and individually portioned. -
Incredibly Customizable: Don’t limit yourself! Adapt the base brownie recipe to suit your preferences
(think gluten-free, vegan, or even black bean brownies). You can also experiment with different frosting flavors for
the “bandages” to add unique twists. -
Make-Ahead Marvel: Prepare these treats a day or two in advance to save valuable time on the day of
your Halloween festivities. They store beautifully, allowing you to focus on other party preparations.
Simple Ingredients for Fudgy & Delicious Mummy Brownies
Crafting these irresistible spooky treats requires just a handful of basic ingredients, most of which you
likely already have in your pantry. The beauty of this recipe lies in its flexibility, allowing you to choose
your preferred brownie base while keeping the decorating components consistent for that iconic mummy look.
-
Brownies: The Essential Base: This is the foundation of our mummy treats! You have several excellent
options here, depending on your time and preference:-
Homemade Brownies:
For the ultimate fudgy texture, rich chocolate flavor, and a truly gourmet feel, a classic scratch-made
brownie recipe is unbeatable. This allows you complete control over ingredients and taste. -
Black Bean Brownies:
A fantastic choice for a healthier twist, these brownies cleverly incorporate black beans, adding fiber
and nutrients without compromising on moisture or chocolatey goodness. They are often surprisingly delicious and moist! -
Box Brownie Mix: When time is tight or you need a quick and easy solution, a good quality box brownie mix
is your best friend. Simply follow the package instructions to prepare a reliable and consistent batch of brownies.
Remember to have any additional ingredients the mix calls for, such as eggs, oil, and water, on hand.
-
Homemade Brownies:
-
White Candy Melts or White Chocolate: This is the magical ingredient that gives our mummies their
distinctive ghostly wrapping. White candy melts are specifically designed for easy melting and setting, creating smooth,
clean lines and a professional finish. White chocolate chips or baking bars can also be used, but they might require
a bit more care during melting to prevent seizing or burning. For best results, choose a high-quality white chocolate. -
Candy Eyes: The Expressive Details: These small, edible decorations are the essential element that brings
our mummies to life, giving them their characteristic adorable (or spooky!) expressions. Candy eyes are readily available
in the baking aisle of most grocery stores, especially around the Halloween season. Make sure to stock up – you’ll find
yourself wanting to mummify everything once you see how cute they make your treats!
Essential Equipment for Spooky Baking Success
Having the right tools makes the process of creating these Halloween brownies even smoother,
more efficient, and enjoyable. Here’s a comprehensive list of the equipment you’ll need,
along with a few tips on why each piece is beneficial for this particular recipe:
-
9×13 Casserole Baking Dish: This is the standard size for most brownie recipes and yields a good number of
medium-thick brownies, perfect for a party. If you prefer extra thick, fudgy brownies
with a higher profile for decorating, consider using a smaller 8×8 baking dish or pan
with the same amount of batter, just be sure to adjust baking time accordingly. -
Large Mixing Bowl: An essential item for combining your brownie batter ingredients without spills
or mess. A glass batter bowl with a convenient handle is particularly useful as it
provides a steady grip and added stability on the counter while you’re mixing, ensuring
all ingredients are thoroughly incorporated. -
Wooden Spoon or Rubber Spatula: These tools are perfect for stirring
the brownie batter and, crucially, for gently stirring the melted white chocolate or
candy melts. A rubber spatula is also excellent for scraping down the sides of your
mixing bowl to ensure no dry ingredients are left behind. -
Parchment Paper: A true kitchen hero that makes cleanup a breeze! Lining your baking pan with
parchment paper prevents sticking and makes removing the cooled brownie slab incredibly
easy, allowing for clean cuts and protecting your pan. It’s also great for lining
baking sheets when decorating. -
Heat-Resistant Potholders: Safety first in the kitchen! Always use reliable, heat-resistant potholders or oven
mitts when handling hot baking dishes and other items from the oven or microwave to
prevent burns and accidents. -
Baking Sheets with Sides: These are perfect for laying out your cut brownie pieces before and during the
decorating process. The raised sides ensure that your brownies won’t accidentally
slide off the counter, keeping your workspace neat and your treats safe.
How to Make Spooktacular Brownie Mummies: Step-by-Step Guide
Creating these adorable mummy brownies is a fun and straightforward process that even novice
bakers can master. Follow these simple steps to bring your spooky treats to life and impress
all your Halloween guests!
Step 1: Bake and Prepare Your Brownie Base
-
Bake Your Brownies: Begin by preparing and baking your brownies according to your
chosen recipe or the package directions for a box mix. For the easiest removal, we highly recommend
lining your baking dish with parchment paper, leaving an overhang on the sides. This creates a
convenient sling for lifting the cooled brownies. -
Cool Completely: This is a crucial step that cannot be rushed! Allow the brownies
to cool entirely in the pan before you attempt to cut or decorate them. Warm brownies will be
crumbly and difficult to handle, and the melted white chocolate will simply melt and spread
rather than forming distinct “bandages.” For best results and to speed up the process, you can
transfer the pan to the refrigerator for about 30-60 minutes after it has mostly cooled at
room temperature, to firm them up. -
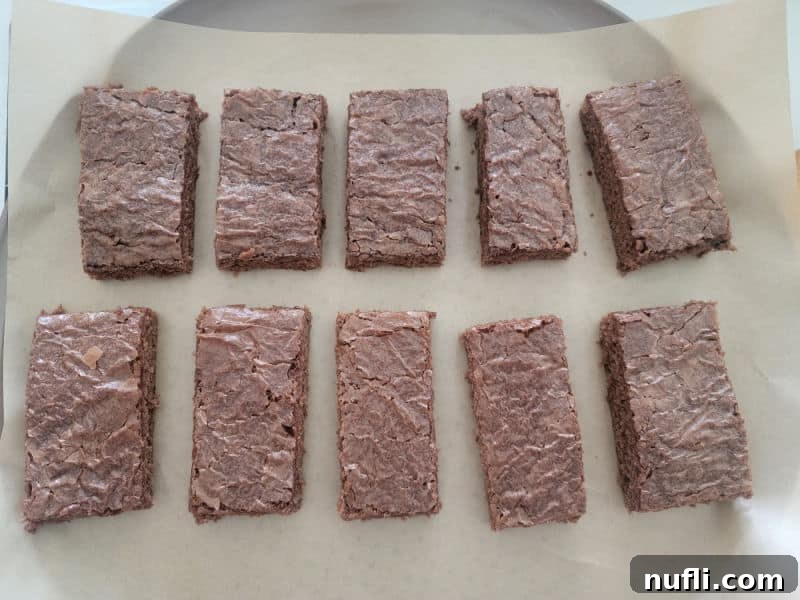
Cut into Mummy Shapes: Once the brownies are firm and completely cooled, use the
parchment paper overhang to carefully lift the entire brownie slab out of the pan. Place it
on a flat, clean surface, such as a large cutting board. Using a sharp knife, cut the brownies
into even squares or rectangles. We find that cutting rectangles often works best, as it provides
more surface area to create those distinct and fun mummy “bandages.” Aim for uniform sizes for
a professional and appealing presentation. -
Arrange on Baking Sheet: Gently transfer the cut brownie pieces and spread them
out on a parchment-lined baking sheet. This arrangement makes the decorating process much easier,
less messy, and allows the white chocolate to set without sticking to your counter.
Step 2: Create the White Chocolate “Bandages”
-
Melt the White Chocolate or Candy Melts: Place your white candy melts or white
chocolate (like vanilla almond bark) in a microwave-safe bowl. Microwave in short bursts, typically
30-second intervals, stirring thoroughly after each interval. White chocolate can easily seize
(become thick and grainy) if overheated, so go slowly and stir continuously until it is
smooth, creamy, and completely melted. Alternatively, you can use a double boiler method on the
stovetop for a more controlled and gentle melting process. -
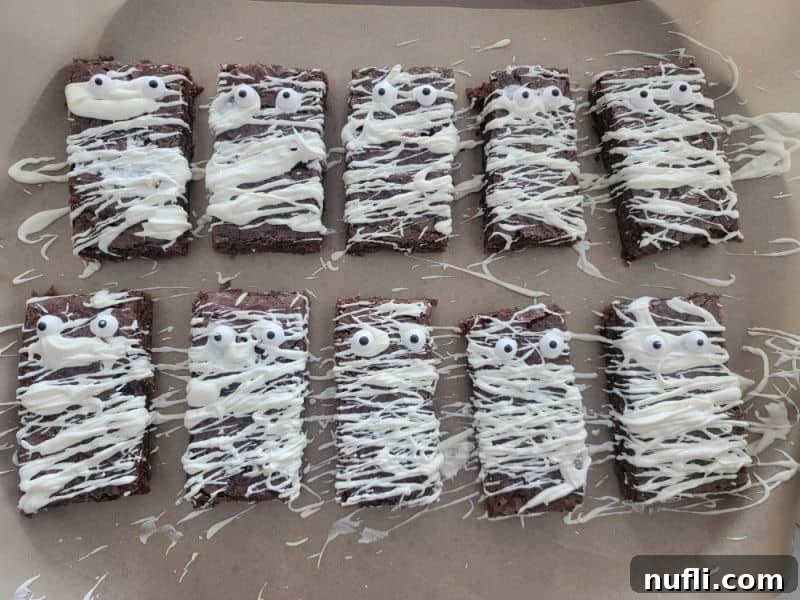
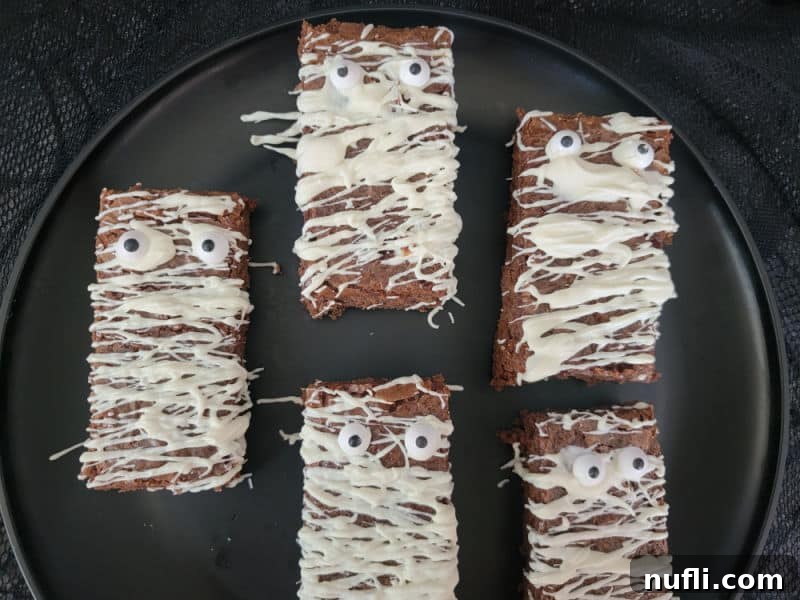
Drizzle the Mummy Bandages: Using a spoon, drizzle the melted white chocolate
over each brownie in a zigzag or back-and-forth motion. Don’t worry about achieving perfect
symmetry; the random, uneven lines are what give them their charming and authentic mummy
appearance. Aim to cover most of the brownie, leaving a small, clear space near the top where
the eyes will be placed. For those who prefer more precision, transfer the melted chocolate to
a piping bag (or a sturdy Ziploc bag with a tiny corner snipped off) and pipe the lines.
Step 3: Add the Eyes and Allow to Set
-
Place the Candy Eyeballs: While the white chocolate “bandages” are still wet
and pliable, carefully place two candy eyeballs near the top of each brownie. Position them
just above where your chocolate drizzles start, creating the mummy’s face. The melted chocolate
will act as a natural adhesive, securing the eyes firmly in place as it cools. -
Allow to Set Completely: Once all your mummy brownies are decorated, let them
sit at room temperature for the white chocolate to harden and set completely. This process
usually takes about 20-30 minutes, depending on the ambient temperature. To speed up this
setting process, you can carefully place the baking sheet of decorated brownies in the
refrigerator for 10-15 minutes. Once the chocolate is firm to the touch, your Mummy Brownies
are fully ready to serve and enjoy!
Expert Tips for the Best Spooky Mummy Brownies
Elevate your Mummy Brownies from good to absolutely unforgettable with these helpful tips and tricks.
These insights will ensure your treats are not only visually stunning but also perfectly delicious!
-
The Golden Rule: Cool Brownies are Key: This is arguably the most important tip!
Ensure your brownies are completely cooled – ideally chilled – before you even think about
adding the white chocolate bandages. Warm brownies will cause the white chocolate to melt
and spread, ruining the distinct “bandage” effect and creating a messy look. Patience here
ensures crisp, defined lines and a professional finish. -
Pre-Frost for Extra Indulgence: For an even richer, more decadent treat, consider
spreading a thin, even layer of chocolate frosting (store-bought or homemade) over the cooled
brownies before you begin drizzling the white chocolate “bandages.” This adds an extra layer
of chocolatey flavor and moisture, making your mummy brownies truly irresistible. -
Piping Bag for Precision (Optional): While a spoon works perfectly well for a
charming, rustic mummy look, if you desire perfectly uniform and consistent “bandages,”
transfer your melted white chocolate to a piping bag fitted with a small round tip. If you
don’t have a piping bag, a sturdy Ziploc bag with a tiny corner snipped off will work just as well. -
Explore Flavorful “Bandage” Variations: Don’t limit yourself to just plain white
chocolate! You can melt cream cheese frosting (ensure it’s thin enough to drizzle) for a
tangy and creamy twist, or even try using tinted white chocolate for colorful mummies. To color
white chocolate, always use oil-based food coloring to prevent it from seizing. -
Quality Ingredients Truly Matter: The foundation of any great dessert is great
ingredients. Using a high-quality brownie mix or your absolute favorite scratch recipe will
ensure the best possible flavor and texture for your brownie base. Similarly, a good quality
white chocolate or candy melt will yield better results for your bandages. -
Get Creative with Eye Placement: The candy eyes are what give your mummies personality!
Play around with their placement – positioning them slightly askew, closer together, farther apart,
or even using different sized eyes on one mummy can give them distinct, funnier, or spookier
expressions. -
Proper Storage for Optimal Freshness: Once decorated, store your finished Mummy
Brownies in an airtight container at room temperature. This will keep them moist and delicious
for several days. While they can be refrigerated, sometimes refrigeration can cause brownies
to dry out, especially if they are uncovered.
Preparation and Storage Guidelines
Planning ahead? These delightful Mummy Brownies are incredibly forgiving and can be prepared
in advance, making them an ideal choice for busy schedules leading up to Halloween.
-
Make Ahead: Yes, absolutely! These festive brownies can be made a day or two
in advance without any loss of quality. Once decorated, store them in an airtight container
at room temperature. The chocolate bandages will set firmly, and the brownies will remain
moist and fresh, ready for your event. -
Storage: Keep your decorated Mummy Brownies in an airtight container at
room temperature for up to 3-4 days to maintain their best texture and flavor. For longer
storage, consider the freezing option below. While refrigeration is possible, it sometimes
causes brownies to dry out if not properly sealed. -
Freezing: Brownies are fantastic for freezing! To freeze, we recommend
wrapping individual brownies (or the whole undecorated slab) tightly in plastic wrap,
then placing them in a freezer-safe container or a heavy-duty freezer bag. They can be
frozen for up to 3 months. When you’re ready to serve, thaw them at room temperature.
If you choose to freeze them undecorated, you can always decorate them fresh before your event.
Recipe Variations & Dietary Adaptations
These versatile Mummy Brownies are incredibly adaptable, allowing you to easily customize
them to suit various tastes, dietary needs, or creative preferences.
-
Alternative Dessert Bases: Feel free to get creative with your base!
Instead of traditional brownies, consider using chocolate cake slices, rice krispie treats
cut into rectangles, or even large, dense sugar cookies as the foundation for your
mummy creation. The decorating steps remain the same. -
Vegetarian Option: Good news! This recipe is inherently vegetarian,
making it a suitable and delightful treat for a wide audience without any modifications needed. -
Vegan Option: To make these Mummy Brownies vegan-friendly, simply use a
dark chocolate vegan brownie recipe or choose a reliable
vegan brownie mix.
Popular and highly-rated vegan mixes include brands like King Arthur, Miss Jones, and Better Batter.
Crucially, ensure that your candy melts or white chocolate for the bandages are also
dairy-free and explicitly labeled as vegan-friendly. -
Gluten-Free: It’s simple to make these spooky treats suitable for gluten-sensitive
guests! Just use a
gluten-free brownie mix.
Many excellent options are available in grocery stores today that produce delicious, fudgy results,
rivaling their gluten-containing counterparts. -
Adjusting Serving Size: This recipe is incredibly adaptable to your needs. You can
easily bake a smaller batch of brownies for a cozy family night, or double or even triple the recipe
for larger gatherings, school events, or big Halloween parties. Don’t hesitate to freeze extra
undecorated brownies for future use – it’s a great time-saver!
What to Serve with Your Spooky Mummy Brownies
Pair these delightful Mummy Brownies with other festive Halloween treats and drinks for a complete
and impressive spread that will enchant all your ghoulish guests!
-
Spooky Sips (Drinks):
- Warm & Cozy Hot Chocolate
- Spiced Pumpkin Spice Latte (with a boozy option for adults!)
- Refreshing & Colorful Kool Aid Slushies
- Indulgent Oreo Milkshake
- Sweet & Tangy Freckled Lemonade (Red Robin copycat)
- Fun & Bubbly Sonic Ocean Water (copycat)
-
Hauntingly Good Snacks & Appetizers:
- Spooky Monster Munch Mix
- Classic Sweet & Salty Candy Corn and Peanuts Snack Mix
- Crunchy Pretzel Bones
- Sweet & Salty Salted Caramel Popcorn
- Adorable Jack-O-Lantern Pumpkin Rice Krispie Treats
- Green & Goofy Frankenstein Rice Krispie Treats
- Grossly Delicious Bloody Bandages (strawberry fruit roll-ups)
- Colorful Candy Corn Bark
- And, of course, plenty of assorted Halloween Candy to fill up those trick-or-treat buckets!
-
Main Dishes/Entrees for a Full Feast:
- Festive & Fun Halloween Pasta
- Classic & Easy Mummy Hot Dogs
- Whimsical Mummy Quesadillas
-
More Enchanting Desserts:
- Jack-O-Lantern Pumpkin Rice Krispie Treats
- Frankenstein Rice Krispie Treats
- Charming Witch Hat Cookies
- Spooky Reese’s Bats
- Ethereal 3-Ingredient Marshmallow Ghosts
- Crunchy Pretzel Skeleton Bones
- And a wide array of Halloween Candy to complete the sweet, spooky feast!
When to Serve These Fun Halloween Brownies
These versatile Mummy Brownies are perfect for almost any autumnal or Halloween-themed occasion:
- Halloween Parties (of course!)
- School Class Parties or Bake Sales
- A Cozy Sweet Treat for Family Movie Night
- Fuel-Up Snack Before or Reward After Trick-or-Treating
- Spooky Movie Marathon Snack
- Fall Picnics and Autumnal Gatherings
- Office Halloween Potlucks
- After-School Snack for Kids (or adults!)
- Community Harvest Festivals
More Fantastic Halloween Recipes to Try
If you’re still in the mood for more Halloween magic and creative culinary adventures,
be sure to check out these other festive and delicious recipes from our collection:
- Charming Graham Cracker Owls
- Ghoulish Creepy Egg Eyes (a fun savory snack!)
- Festive & Swirly Halloween Pinwheel Cookies
- Spooky Bloody Colada Cocktail (for adults!)
- Sweet & Salty Candy Corn and Peanuts Snack Mix
Explore our full collection of Halloween Recipes
for even more inspiration to make your celebrations unforgettable!
Looking for other culinary delights beyond Halloween? Dive into our extensive selection of
copycat recipes,
irresistible dessert recipes,
and convenient Crock Pot Recipes
for every occasion and craving.
Stay connected with Tammilee Tips for all our latest recipes, travel adventures, and lifestyle advice!
Follow us on Facebook,
Instagram,
Pinterest, and
Twitter to never miss a delicious update.
Mummy Brownies
These easy Mummy Brownies are a fantastic Halloween treat or snack that everyone will love, from kids to adults!
Prep Time: 20 minutes
Total Time: Approximately 20 minutes (plus brownie baking and cooling time)
Yields: 12 servings
Author: Tammilee Tips
Print Recipe |
Rate Recipe
Ingredients
- 1 box Brownie Mix (or ingredients for your favorite homemade brownie recipe)
- 1 package Candy Eyes
- 1 package Vanilla Almond Bark or White Candy Melts
Instructions
- Bake your chosen brownies according to the package or recipe directions. Allow them to cool completely.
- Once cooled, cut the brownies into even squares or rectangles. Rectangles often provide more surface area for the mummy bandages.
- Arrange the cut brownie pieces on a parchment-lined baking sheet.
- Melt the almond bark or white candy melts in a microwave-safe bowl. Heat in 30-second intervals, stirring well after each interval until smooth.
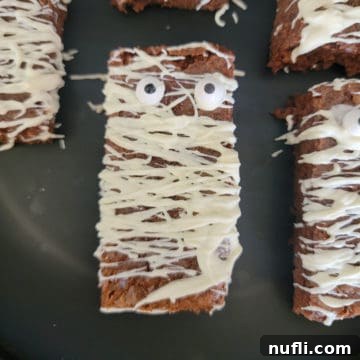
- Using a spoon (or a piping bag with a small hole), drizzle the melted chocolate over each brownie in a zigzag motion to create mummy “bandages,” leaving a small space for the eyes.
- While the chocolate is still wet, gently press two candy eyeballs onto each brownie.
- Allow the chocolate to set completely at room temperature or by placing the baking sheet in the refrigerator for 10-15 minutes before serving.
Kitchen Tools You’ll Need
- 9×13 inch or 8×8 inch Baking Dish
- Large Mixing Bowl
- Spoon or Rubber Spatula
- Parchment Paper
- Baking Sheet (with sides recommended)
- Microwave-safe bowl
- Heat-Resistant Potholders
Nutrition Information (Per Serving, Approximate)
Calories: 187 kcal
Fat: 5g
Saturated Fat: 1g
Polyunsaturated Fat: 0.3g
Monounsaturated Fat: 3g
Sodium: 124mg
Carbohydrates: 33g
Sugar: 21g
Protein: 2g
Iron: 1mg
* Percent Daily Values are based on a 2000 calorie diet. Nutritional values will vary significantly based on the specific type of brownies used (homemade vs. box mix) and the brands of ingredients.
Love this recipe? Follow @TammileeTIps on Pinterest for more delicious ideas!
Tried this recipe? We’d love to see your creations! Mention @TammileeTipsLife when you share a photo on Instagram!
