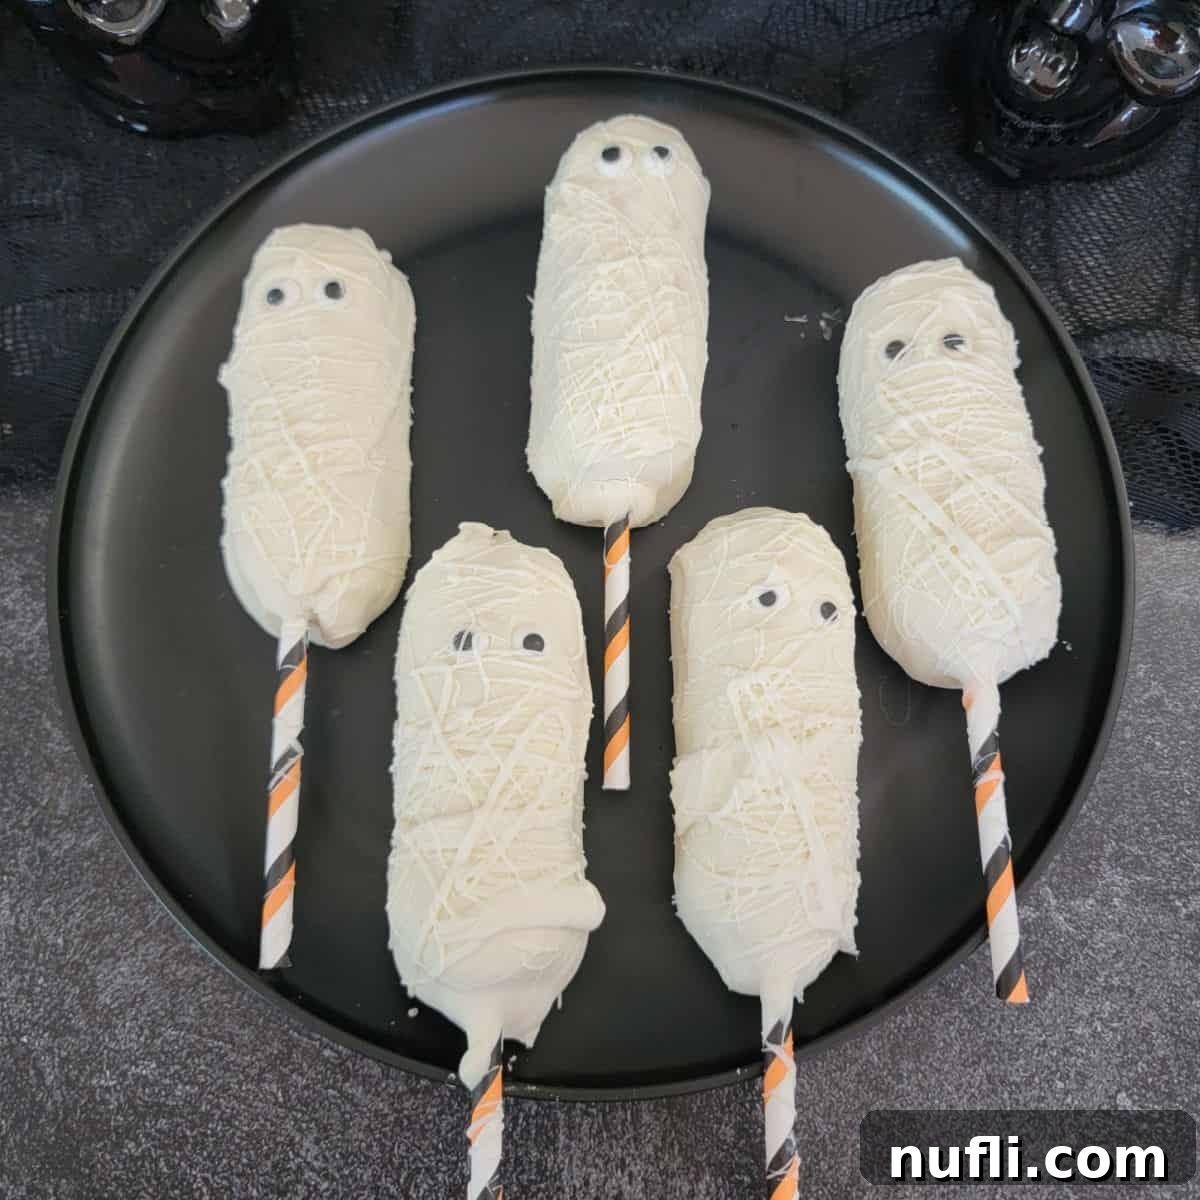
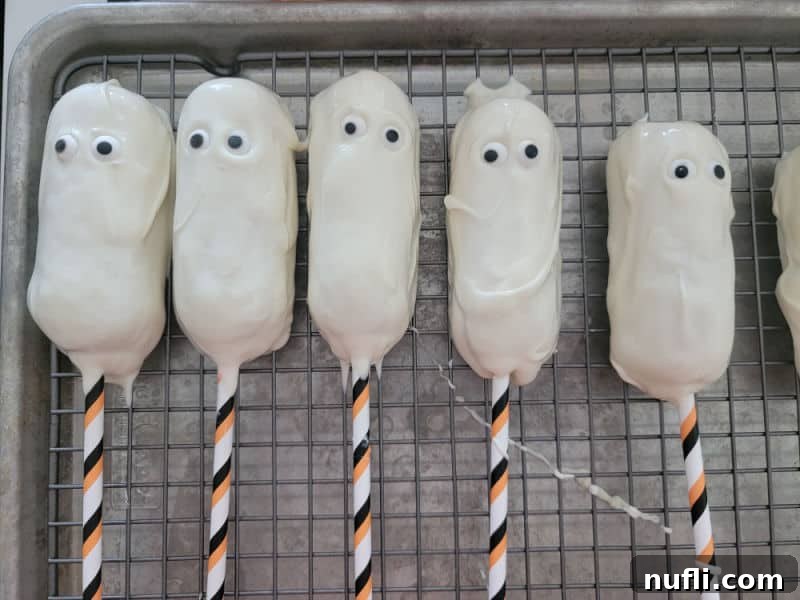
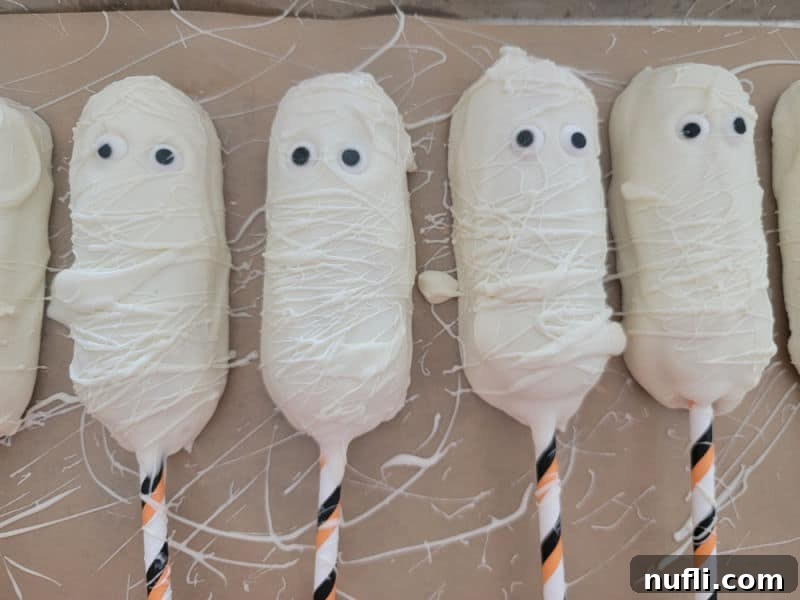
Get ready for a treat that’s as delightful as it is simple to create! Our **Easy Mummy Twinkies** are the ultimate no-bake Halloween dessert, guaranteed to bring smiles and spooky fun to any gathering. Forget complicated recipes and long hours in the kitchen; these adorable mummy-themed treats come together with just a handful of ingredients and minimal effort, making them a perfect project for bakers of all skill levels, especially those looking for a quick yet impressive Halloween solution. Whether you’re planning a ghoulish gala or a quiet family movie night, these cute Halloween desserts will be the star of your snack table, blending charm with deliciousness effortlessly.
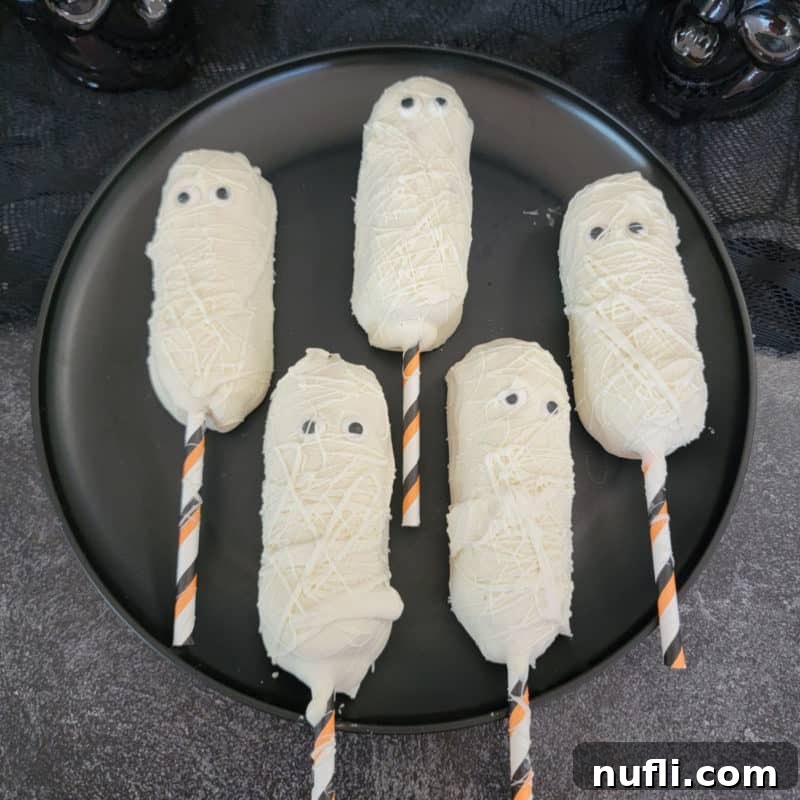
Unwrapping the Fun: Easy Mummy Twinkies for Halloween
Welcome to a special segment dedicated to our favorite Halloween staple: mummies! We’ve been having a blast transforming everyday snacks into eerie-sistible mummified treats, including our popular Crescent Mummy Dogs and delightful Mummy Donuts. Today, we’re adding another fantastic creation to our collection: these incredibly cute and unbelievably easy Mummy Twinkies. This no-bake recipe is a game-changer for anyone wanting to create impressive Halloween party food without the stress.
The joy of “mummifying all the things” has truly taken over! My kitchen has become a spooky laboratory where every snack is a potential candidate for a ghostly transformation. While our current focus is on these delightful **Mummy Twinkies**, my mind is already buzzing with countless other Halloween treat ideas. The beauty of these recipes lies in their simplicity, proving that you don’t need to be a seasoned baker or a master crafter to whip up something truly special for the holiday. If I can make these charming mummy treats, so can you!
Our upcoming Halloween treat lineup includes more fantastic ideas like Mummy Nutter Butters and Mummy Oreos, ensuring your Halloween celebrations are filled with delicious, spooky fun. My husband has been a good sport, test-tasting and delivering batches of these mummified delights to his colleagues all week, much to everyone’s amusement! We even curated a comprehensive Mummy Dessert Board, perfect for showcasing a variety of these easy-to-make treats at any Halloween party or school event.
Our mission is to share a wealth of Halloween treats that are quick to prepare, leaving you more time to enjoy the festivities. These **Mummy Twinkies Pops** epitomize that goal – they are incredibly easy to make, require no baking, and are guaranteed to be a hit. For an extra dose of Halloween charm, consider pairing them with our whimsical Frankenstein Twinkies to create a truly unforgettable and adorable Halloween treat board that will impress guests of all ages.
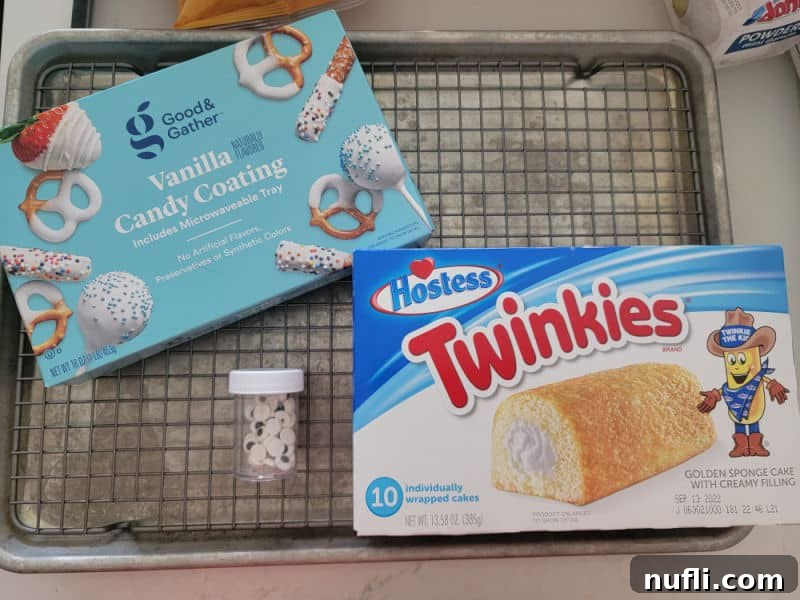
Ingredients for Your Mummy Twinkies
Creating these delightful **Mummy Twinkies** requires just a few basic ingredients, making this recipe incredibly accessible. Here’s a quick look at what you’ll need:
- Hostess Twinkies: The star of our show! We typically use classic vanilla Twinkies, but feel free to get creative. Chocolate Twinkies offer a richer base, or you could experiment with seasonal flavors if available. For the ambitious home baker, homemade Twinkies can also be used for a truly personalized touch.
- Candy Melts (Vanilla/White Chocolate): These form the base of our mummy “bandages.” White candy melts or vanilla almond bark work perfectly for achieving that classic mummy look. You can find these in most craft stores or baking aisles. Choose a good quality melt that liquefies smoothly for easy dipping.
- Edible Candy Eyes: These are essential for bringing your mummies to life and giving them that playful, spooky stare. They are readily available online and in baking supply sections of grocery stores.
Essential Equipment for Crafting Mummy Twinkies
While this recipe is simple, having the right tools makes the process even smoother. Here’s a breakdown of the equipment you’ll want to have on hand:
- Large Mixing Bowl: A deep bowl is ideal for melting your candy coating and ensuring the Twinkies can be easily dipped. If your bowl isn’t deep enough for a full dip, a large spoon or spatula will be indispensable for coating the upper portions of the Twinkies evenly.
- Halloween Straws (Optional): While not strictly necessary, inserting a straw into each Twinkie before dipping transforms them into fun “Mummy Twinkie Pops,” making them easier to handle and serve. You can trim the straws to your desired length once the Twinkies are set.
- Parchment Paper or Wax Paper: This is a must-have for easy cleanup and preventing your mummified treats from sticking to your work surface. Laying it on your baking sheet ensures a smooth removal once the candy coating has hardened.
- Baking Sheet with Sides: A baking sheet provides a stable, flat surface for your parchment paper and the drying Twinkies. The raised sides are a bonus, preventing any rogue Twinkies from sliding off!
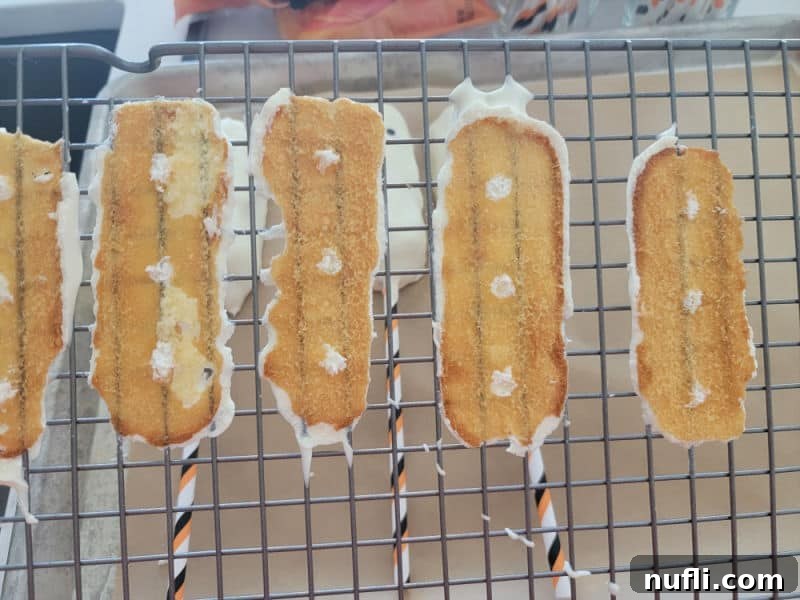
A Note on Drying Racks: We initially experimented with a drying rack, thinking it would allow excess candy melt to drip off. However, this often led to the bottom of the Twinkies adhering to the rack, resulting in lost portions when removed. We highly recommend sticking with parchment paper or wax paper for the initial setting process. This ensures your **Mummy Twinkies** can be easily lifted without damage.
Tools for Drizzling: You’ll need a fork, a spoon, or even a plastic baggie with a snipped corner for drizzling the “bandages.” A fork provides thin, uneven lines for a more authentic mummy look, while a plastic baggie acts as a makeshift piping bag for more control.
Small Knife or Spatula: Once your mummies have set, a butter knife or small spatula can be useful for carefully trimming any excess candy coating from the bottom or sides, giving them a clean, professional finish.
How to Make Spooktacular Mummy Twinkies
Creating these **easy Halloween treats** is a straightforward process. Follow these steps for perfect Mummy Twinkies every time:
- Preparation is Key: Begin by carefully unwrapping all your Twinkies. Lay them out on a baking sheet lined with parchment paper, and gather all your ingredients and equipment. This setup will make the dipping process much smoother.
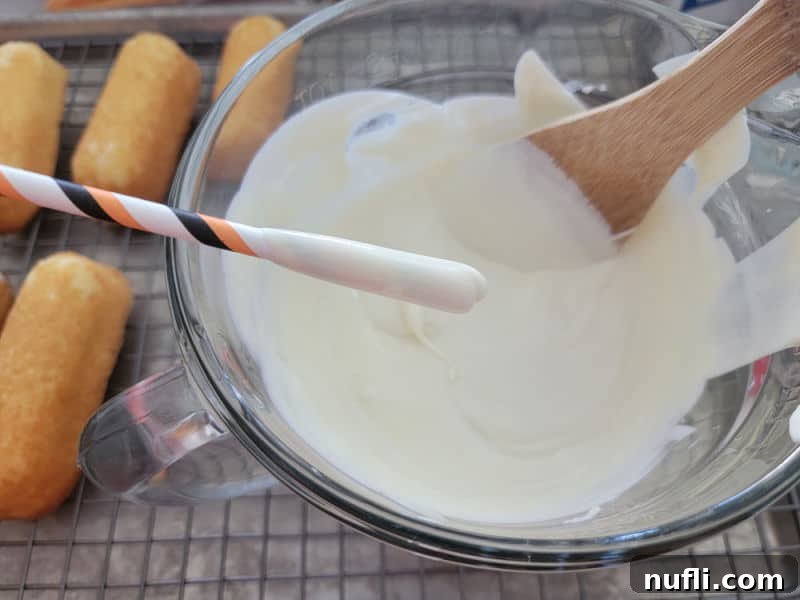
- Melt the Candy Coating: Place your candy melts or vanilla almond bark in a large, microwave-safe mixing bowl. Microwave in 30-second intervals, stirring thoroughly after each interval, until the candy is completely melted and smooth. Be careful not to overheat, as this can cause the chocolate to seize.

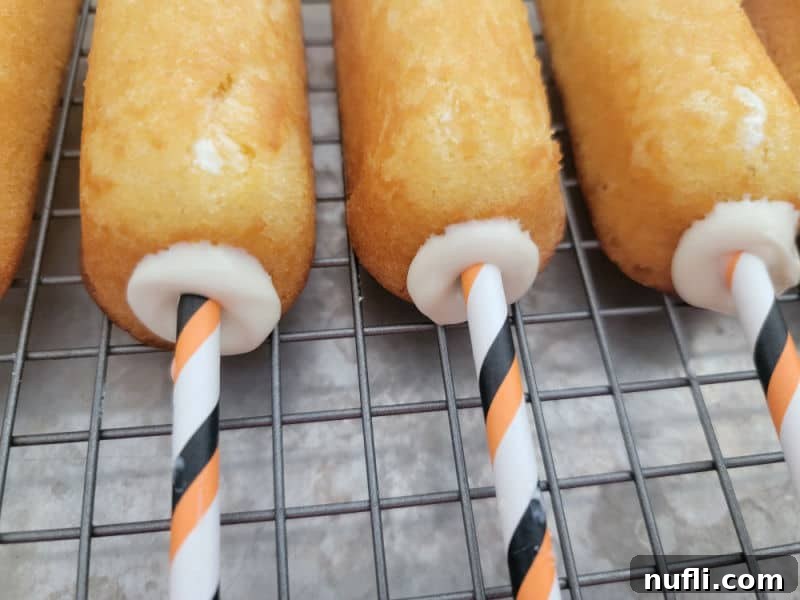
Insert Straws (Optional): If you’re making Mummy Twinkie Pops, dip one end of a Halloween straw into the melted candy coating before gently inserting it into the center of an individual Twinkie. The candy melt acts as a “glue” to secure the straw.

Allow Straws to Set: Let the Twinkies with inserted straws sit for a few minutes until the candy melt around the straw hardens slightly. This provides a stable handle for dipping the entire Twinkie.

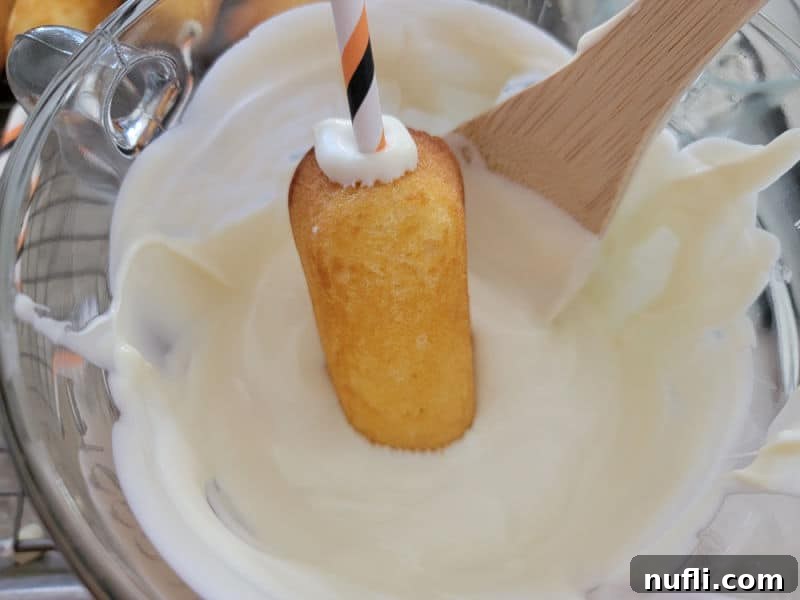
Dip the Twinkies: Carefully dip each Twinkie into the melted candy coating, ensuring it’s fully submerged. If your bowl isn’t deep enough, use a large spoon to pour and spread the melted chocolate over any uncoated areas. Gently tap off any excess coating.

Add the Eyes: Immediately after dipping (while the coating is still wet), carefully place two candy eyes onto the front of each Twinkie. This creates the adorable mummy face. Place the coated Twinkies back onto the parchment-lined baking sheet to allow the first layer of chocolate to set completely. This is why a wire rack is not recommended for this step, as it can damage the delicate base.

Create the Bandages: Once the base layer of white chocolate candy bark has fully set, it’s time to create the mummy bandages. Re-melt any cooled candy coating if necessary. Use a fork or a spoon to drizzle additional melted candy back and forth over the Twinkies in an irregular pattern. Alternatively, fill a disposable piping bag (or a plastic baggie with a small corner snipped off) with melted chocolate and pipe thin lines to create a more controlled bandage effect.
- Final Set: Allow the drizzled candy coating to set completely at room temperature. This can take anywhere from 15-30 minutes, depending on the thickness of your coating and room temperature. Once firm, your spooky yet sweet Mummy Twinkies are ready to be served and enjoyed!
Preparation and Storage Tips for Mummy Twinkies
Planning ahead for your Halloween celebrations? These **Mummy Twinkies** are fantastic for making in advance, offering flexibility and convenience.
- Make Ahead: You can easily prepare these delightful treats a day or two before your event. This allows ample time for the candy coating to fully set and for you to arrange them perfectly.
- Storage: To maintain their freshness and appearance, store your Mummy Twinkies in an airtight container at room temperature. It’s crucial to keep them away from direct sunlight or overly warm areas, as heat can cause the candy coating to melt or become sticky.
- Avoid the Fridge: We generally advise against storing these in the refrigerator. The condensation inside a cold environment can cause the candy coating to “sweat,” leading to a less appealing texture and appearance.
- Freezing: While Mummy Twinkies can be frozen, be aware that the texture of the Twinkie cake may change slightly after thawing. It might become a little softer or spongier. If you choose to freeze, ensure they are in an airtight container to prevent freezer burn and thaw them at room temperature before serving.
Creative Recipe Variations for Your Mummy Twinkies
The beauty of this simple recipe lies in its versatility. Don’t hesitate to personalize your **Mummy Twinkies** with these fun variations:
- Snack Cake Substitutions: If Twinkies aren’t your preference or readily available, feel free to substitute them with other snack cakes. Little Debbie Zebra Cakes, Ho Hos, or even small pound cake slices can be transformed into adorable mummies. Adjust dipping times as needed for different cake densities.
- Vegetarian Considerations: For those following a vegetarian diet, please note that traditional Hostess Twinkies may contain beef fat (tallow) in their ingredients, making them unsuitable. Always check the ingredient list for alternative snack cakes or consider Heavenly Crème Cakes, which are a popular gluten-free option and might also cater to specific dietary needs.
- Vegan Options: Unfortunately, due to animal-derived ingredients, conventional Twinkies are not suitable for a vegan diet. There are some vegan snack cake alternatives available on the market that could be used to create a similar mummy treat, just ensure the candy melts used are also vegan-friendly (look for dairy-free white chocolate options).
- Gluten-Free Mummies: Standard Twinkies contain gluten. As mentioned, Heavenly Crème Cakes are an excellent gluten-free alternative that can be easily mummified.
- Customizing Serving Sizes: This recipe is incredibly flexible. Need a smaller batch for a family night? Simply melt down a proportionate amount of vanilla chocolate coating and prepare fewer Twinkies. Hosting a large Halloween bash? This recipe can be easily doubled or even tripled! When preparing larger quantities, work in batches to ensure the chocolate-covered Twinkies have enough time to set properly before stacking or moving them into storage containers. This prevents smudging and ensures each mummy looks its best.
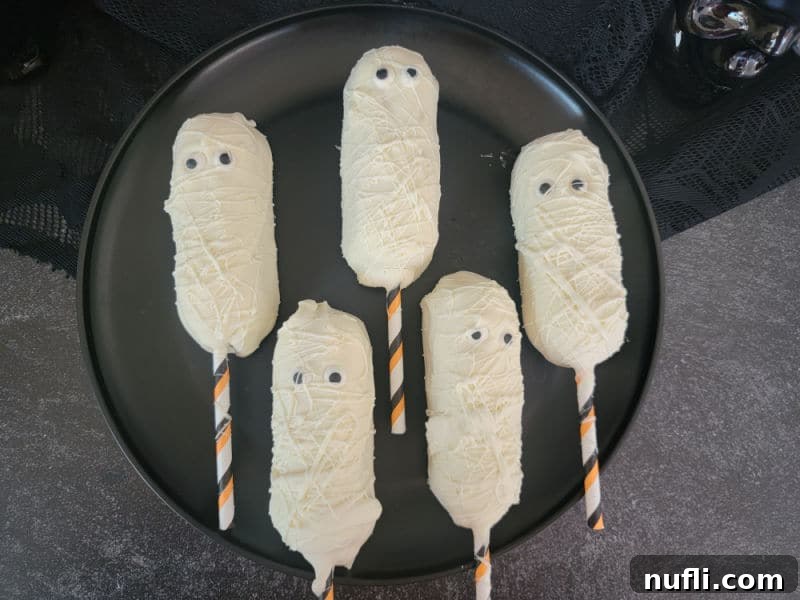
What to Serve with Your Mummy Twinkies
These adorable **Mummy Twinkies** are a versatile Halloween dessert that pairs well with a variety of spooky-themed treats and beverages. Here are some ideas to complete your Halloween spread:
Spooky Sips (Drinks):
Complement the sweetness of the Twinkies with refreshing or warm beverages.
- Hot Chocolate: A classic comfort drink, perfect for a chilly Halloween evening.
- Pumpkin Spice Latte: Embrace the fall flavors with this seasonal favorite.
- Kool Aid Slushie: A vibrant, colorful drink that kids will love.
- Oreo Milkshake: Indulgent and creamy, a perfect treat alongside your mummies.
- Freckled Lemonade: A tangy and sweet option for a lighter pairing.
- Sonic Ocean Water: A fun, blue beverage that adds a touch of oceanic mystery to your party.
Creepy-Crawly Snacks:
Offer a variety of savory and sweet snacks that fit the Halloween theme.
- Monster Munch: A salty and sweet mix that’s easy to grab and enjoy.
- Candy Corn and Peanuts: A simple, classic Halloween snack combo.
- Pretzel Bones: Salty and crunchy, these are fun for guests to nibble on.
- Salted Caramel Popcorn: A comforting and addictive treat for movie nights.
- Pumpkin Rice Krispie Treats: Chewy, sweet, and perfectly shaped for Halloween.
- Frankenstein Rice Krispie Treats: Another delightful rice krispie variation to add to the spooky spread.
- Bloody Bandages: An edgy and fun snack for the daring party-goer.
- Candy Corn Bark: A colorful and easy-to-make sweet treat.
- And of course, a generous selection of your favorite Halloween Candy!
Main Dishes/Entrées for a Full Meal:
If you’re hosting a full meal before dessert, consider these themed main courses.
- Halloween Pasta: A fun and festive main dish that can be customized.
- Mummy Dogs: A savory and playful appetizer or light meal, echoing the mummy theme.
- Mummy Quesadillas: A cheesy, easy-to-make dinner option that continues the mummy motif.
More Delightful Desserts:
Offer a variety of sweets to satisfy every sweet tooth.
- Pumpkin Rice Krispie Treats: A festive and chewy classic.
- Frankenstein Rice Krispie Treats: More spooky fun with rice krispies.
- Witch Hat Cookies: Simple, creative cookies that add a magical touch.
- Reese’s Bats: An easy, chocolatey treat using popular candy.
- Marshmallow Ghosts: Light, fluffy, and adorable spooky figures.
- Pretzel Skeleton Bones: A simple and fun treat that’s both salty and sweet.
- And, naturally, a wide assortment of Halloween Candy is always a welcome addition!
When to Serve Mummy Twinkies
These versatile and visually appealing **Mummy Twinkies** are perfect for almost any occasion, especially during the fall season and leading up to Halloween. Their ease of preparation makes them a go-to choice when you need a quick yet impressive dessert. Here are some ideal times to serve them:
- Halloween Parties: They are a quintessential treat for any Halloween gathering, adding a festive and playful touch to your dessert table. Their individual serving size makes them easy for guests to enjoy.
- School Parties: A safe and crowd-pleasing option for school events, especially since they don’t require nuts (though always check ingredient labels for specific allergies). Kids absolutely adore their cute mummy faces!
- A Sweet Treat: Anytime you’re craving something sweet and fun, these mummies hit the spot. They are a delightful pick-me-up during the day or a comforting indulgence in the evening.
- Trick or Treating: While not handed out to trick-or-treaters, they are perfect to have at home as a reward for a successful night of candy collecting or to share with friends before heading out.
- Movie Night: Enhance your family movie night with a batch of these spooky snacks. They’re easy to eat and add to the fun of watching a Halloween-themed film.
- Fall Picnics: If the weather is still pleasant, bring these along to a fall picnic for a festive outdoor treat that everyone will love.
- Office Parties: Bring some Halloween cheer to the workplace. These individually portioned treats are perfect for sharing with colleagues.
- Kids After-School Snack: Surprise your children with these adorable mummies as an after-school snack. It’s a fun way to celebrate the season and satisfy their sweet cravings.
More Great Halloween Recipes to Explore
If you loved making these Mummy Twinkies, you’ll definitely want to check out these other fantastic Halloween-themed recipes to complete your spooky celebrations:
- Candy Corn Bark
- Pumpkin Spice Rice Krispie Treats
- Pumpkin Spice Pretzels
- Pumpkin Spice Frappuccino
- Owl Pretzels
- Pretzel Broom Sticks
For an even broader selection of seasonal delights, explore all our Great Halloween Recipes.
Do you love discovering new culinary creations? Be sure to explore our extensive collection of copycat recipes, delectable dessert recipes, and convenient Crock Pot Recipes for every occasion.
Stay connected and never miss a recipe! Follow Tammilee Tips on MSN, Facebook, Instagram, Pinterest, and Twitter for all our latest posts and culinary inspiration.
Mummy Twinkies
Easy Mummy Twinkies are the perfect no-bake Halloween dessert, combining simplicity with delightful spooky charm.
Prep Time: 20 minutes
Total Time: 20 minutes
Servings: 8
Calories: 405 kcal per serving
Author: Tammilee Tips
Ingredients
- 8 Hostess Twinkies
- 16 Candy Eyes (edible)
- 1 package Vanilla Almond Bark (or white candy melts)
Instructions
- Unwrap all of the Twinkies and gather all necessary supplies, laying out parchment paper on a baking sheet.
- Melt the candy bark/melts in a large microwave-safe bowl in 30-second increments, stirring after each, until completely smooth and melted.
- Optional: Dip one end of a Halloween straw into the melted candy, then insert it into the center of each Twinkie. Allow to set for a few minutes to secure the straw.
- Once straws are set (if using), completely dip each Twinkie into the melted candy coating. If your bowl is not deep enough, use a large spoon to help spread the coating over the Twinkie.
- Immediately add two candy eyes to each Twinkie while the coating is still wet. Place the coated Twinkies on the parchment-lined baking sheet.
- Allow the first layer of chocolate coating to set completely at room temperature. Do NOT use a wire rack for this step.
- Once the base layer has set, re-melt any cooled candy coating if needed. Use a fork or a small spoon to drizzle/spread additional candy melt back and forth over the Twinkies to create the mummy bandage effect.
- Optional: For more controlled “bandages,” fill a disposable piping bag (or a plastic baggie with a snipped corner) with melted chocolate and pipe thin lines.
- Allow the drizzled candy coating to set fully before serving or storing.
Kitchen Tools
- Large Mixing Bowl
- Parchment Paper
- Baking Sheet with Sides
- Fork/Spoon or Plastic Baggie (for drizzling)
- Small Knife or Spatula (for trimming, optional)
Nutrition Facts
Amount Per Serving:
- Calories: 405 kcal
- Fat: 20g (31% Daily Value*)
- Saturated Fat: 20g (125% Daily Value*)
- Sodium: 21mg (1% Daily Value*)
- Carbohydrates: 51g (17% Daily Value*)
- Sugar: 51g (57% Daily Value*)
* Percent Daily Values are based on a 2000 calorie diet.
