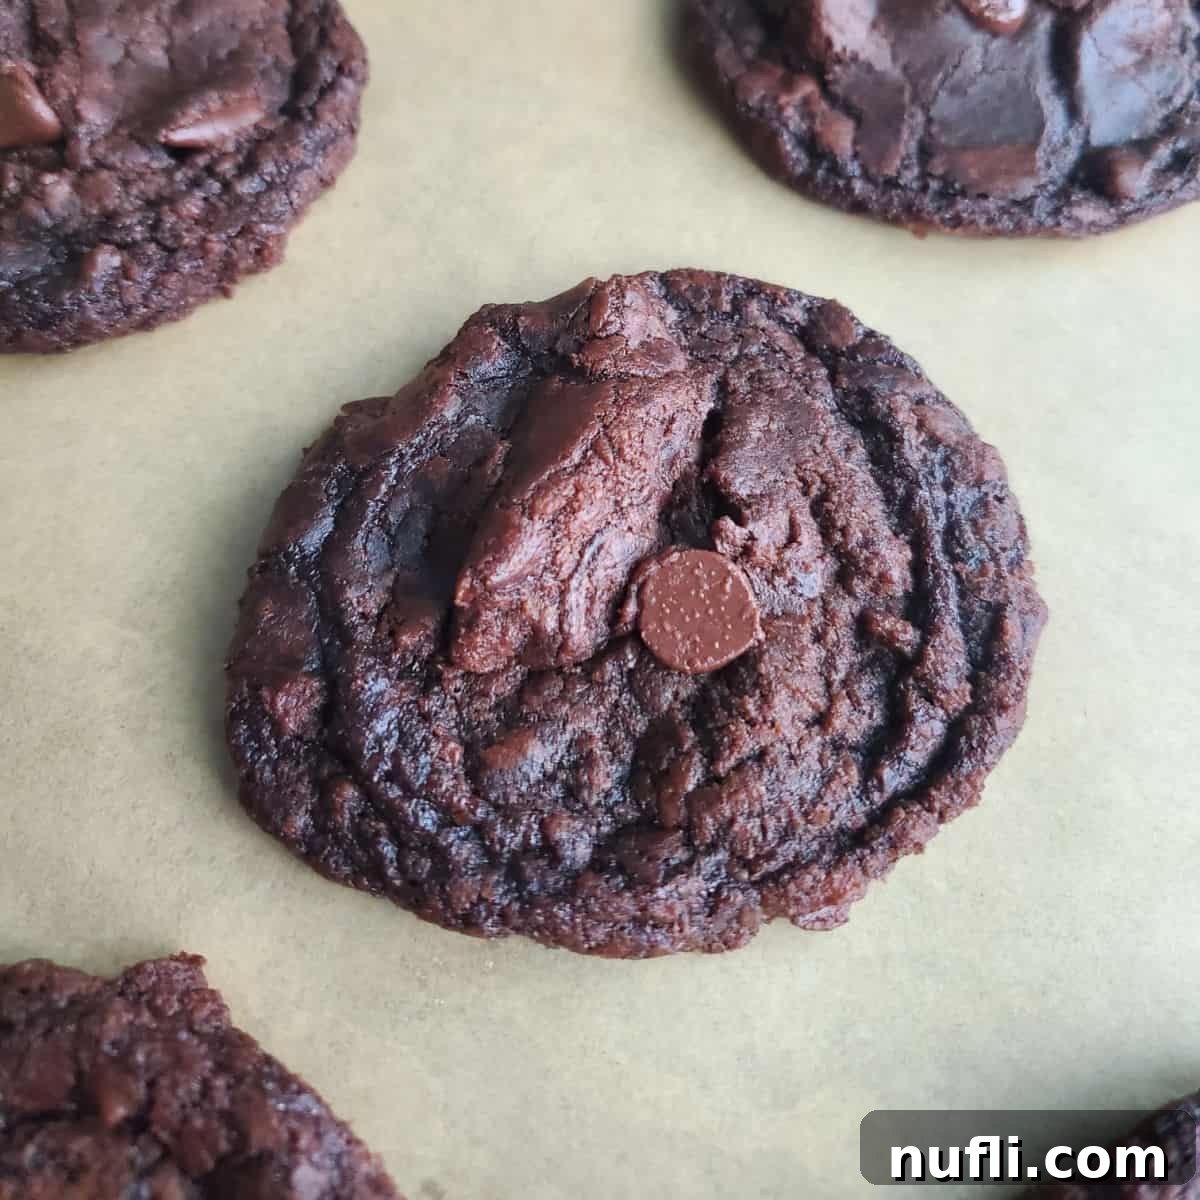
Welcome to the world of effortless baking, where gourmet flavors meet incredible simplicity! Our Easy 3-Ingredient Brownie Mix Cookies are a delightful testament to how quickly you can whip up something truly amazing. Forget complicated recipes and long ingredient lists; these cookies are designed for busy schedules, novice bakers, and anyone craving a rich, chocolatey treat without the fuss. Imagine biting into a soft, chewy cookie that tastes like the center of your favorite fudgy brownie – all made with just a brownie mix, an egg, and a touch of oil. It’s a fun, exciting twist on classic chocolate cookies that will have everyone asking for your secret (we promise not to tell!).
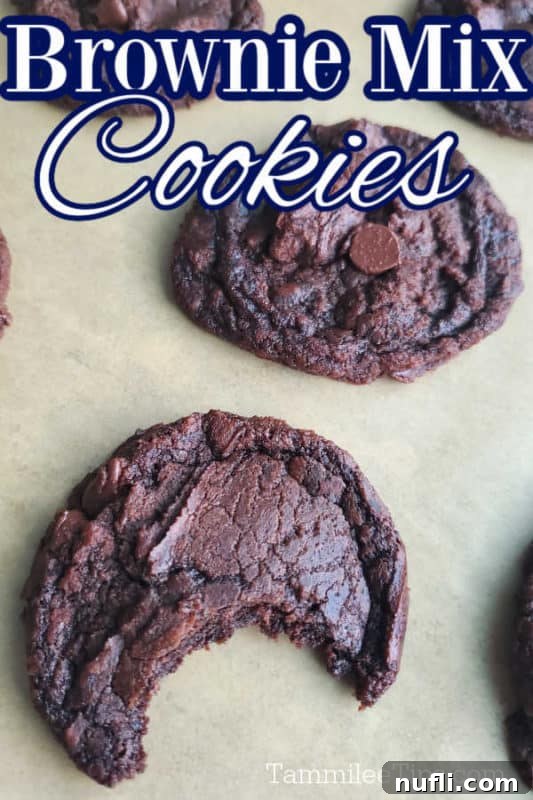
The Ultimate Quick & Easy Chocolate Brownie Cookies Recipe
There’s nothing quite like the satisfaction of creating a decadent dessert with minimal effort, and these chocolate brownie cookies deliver exactly that. I finally decided it was time to share my go-to recipe for easy chocolate brownie cookies. My goal was simple: to create a delicious, fudgy chocolate cookie using only a few basic ingredients that are likely already in your pantry. In a world where time is precious and grocery runs aren’t always convenient, having adaptable recipes that rely on pantry staples is a game-changer.
This past year has reinforced the importance of flexibility in the kitchen. There are times when getting to the store for specific items isn’t feasible, or perhaps certain ingredients are simply unavailable. That’s why focusing on recipes that require only a handful of common items has become a priority for us. These brownie mix cookies fit perfectly into that philosophy, offering a quick and satisfying solution for your sweet cravings.
If you’re already a fan of our popular cake mix cookies, you’ll adore this brownie version! We’ve been transforming cake mixes into delicious cookies for years, from our delightful chocolate chip cake mix cookies to the bright lemon crinkle cookies and the festive red velvet cake mix cookies. The principle is the same: take a humble mix and elevate it into something extraordinary!
I still laugh thinking about the time I went to the grocery store and filled my cart with an abundance of brownie mixes, alongside a few cake mixes for other upcoming recipe experiments. The cashier gave me a look and commented, “You must be doing a lot of baking!” I explained that I was turning brownie mixes into cookies, cake mixes into fun new treats, and even angel food cake into incredible lemon bars. Her expression suggested I had completely lost my mind, and honestly, that’s part of the fun!
Why limit yourself to a mix’s intended purpose when you can unleash your culinary creativity and transform it into an entirely different, equally delicious baked good? It’s about embracing simplicity without sacrificing flavor or fun.
One of the absolute best things about these brownie cookies made from a boxed mix is their incredible ease of preparation. I often tease my husband that these are the perfect cookies for him to master. I recently shared how much he loves making our Bisquick Waffles – he’s truly a pro at them! My mission now is to expand his recipe repertoire and introduce him to a few more simple yet impressive dishes, starting with these irresistible brownie cookies.
Essential Ingredients for Your Brownie Mix Cookies
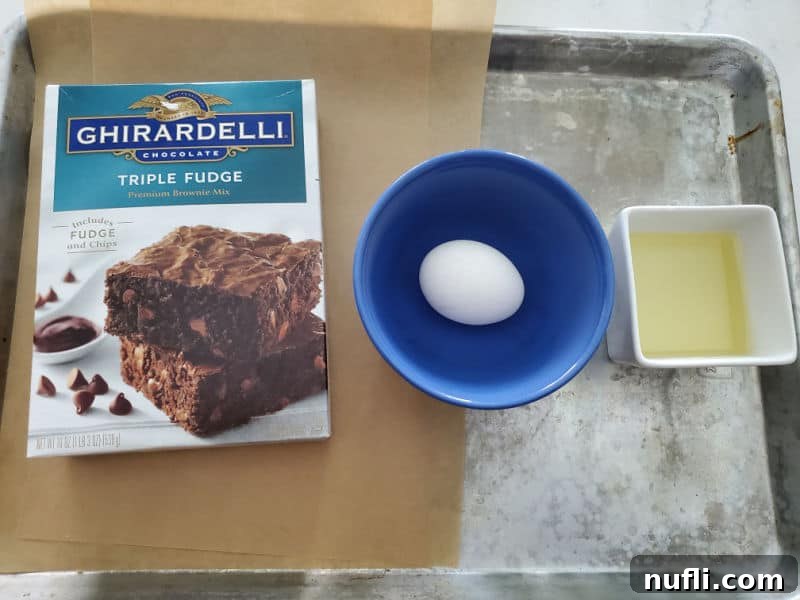
The beauty of this recipe lies in its minimalist approach. With just three core ingredients, you’re well on your way to a batch of heavenly chocolate cookies.
Brownie Mix: The star of our show! You can use any 18-ounce box of brownie mix you prefer. I personally love using a Ghirardelli brownie mix because of its rich, intense chocolate flavor and the fudgy texture it imparts. However, brands like Betty Crocker, Duncan Hines, or any other quality brownie mix will work wonderfully. Experiment with different types like double chocolate, dark chocolate, or even ones with added chips to find your favorite. For a larger batch, consider using a family-size mix and adjusting the other ingredients proportionally. Different brands might yield slightly different textures, so don’t hesitate to try a few until you discover your perfect match.
Egg: The egg acts as a crucial binder, holding all the ingredients together and adding moisture to the dough. It helps create that desirable chewy texture we all love in a good cookie.
Vegetable Oil: This provides the necessary fat content to make your cookies moist, tender, and incredibly fudgy. While vegetable oil is standard, you can also use canola oil. For a slightly different flavor profile, melted unsalted butter can be substituted, which will add a richer, more buttery note. Coconut oil can also be used, but be aware it might impart a subtle coconut flavor.
Optional Add-ins for Enhanced Flavor
While these cookies are fantastic on their own, a few additions can take them to the next level of deliciousness:
- Chocolate Chips: For an extra boost of chocolate, stir in ½ to 1 cup of semi-sweet, milk chocolate, or white chocolate chips.
- Nuts: Chopped walnuts or pecans add a delightful crunch and nutty flavor.
- Peanut Butter Chips: A classic pairing with chocolate for a sweet and salty twist.
- Sprinkles: Add a festive touch, especially for holidays or birthdays.
- Caramel Bits: For gooey pockets of caramel goodness.
- Sea Salt Flakes: A sprinkle on top before baking can really bring out the chocolate flavor.
- Mini Marshmallows: Stir in during the last minute of mixing for a s’mores-like experience.
Essential Equipment for Baking Success
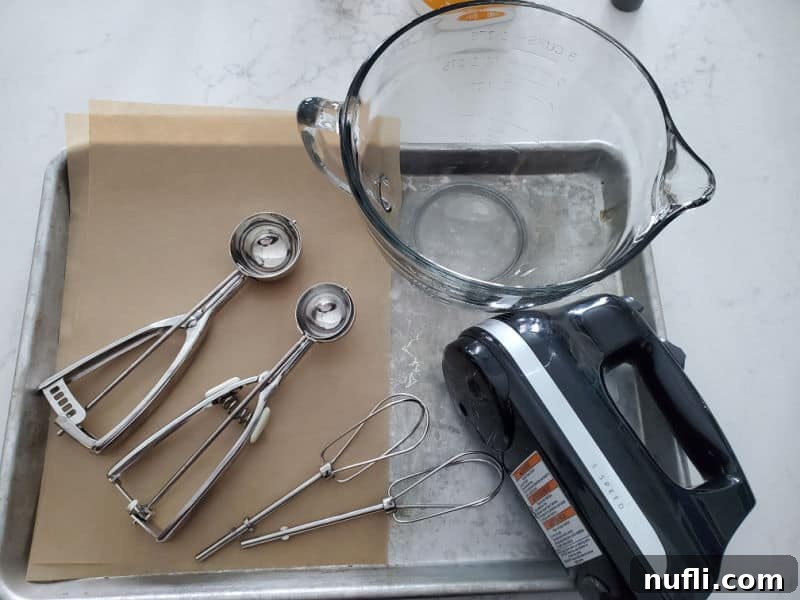
Having the right tools can make your baking experience even smoother and more enjoyable. Here’s what you’ll need:
Baking Sheets: I always recommend using sturdy baking sheets with raised edges. Not only do they help distribute heat evenly for consistent baking, but those little lips are a lifesaver! I’ve had clumsy moments where cookies almost slid right off into the oven (a lesson learned the hard way!), so the edges provide a much-needed safeguard. Opt for light-colored sheets to prevent over-browning on the bottoms of your cookies.
Parchment Paper: A baker’s best friend! Parchment paper ensures your brownie cookies won’t stick to the baking sheet, making removal incredibly easy. Beyond preventing sticking, it also promotes even baking and helps with consistent browning. Plus, cleanup is an absolute breeze – simply crumple it up and toss it when you’re done! If you don’t have parchment paper, be sure to generously spray your baking sheet with a non-stick cooking spray.
Hand Mixer: This brownie cookie dough is wonderfully thick, which is great for texture but can be challenging to mix by hand. A hand mixer makes quick work of combining all the ingredients thoroughly and effortlessly, ensuring a smooth, uniform dough without overworking it. A stand mixer with a paddle attachment would also be excellent.
Large Mixing Bowl: A spacious mixing bowl is crucial for this recipe. We’re particularly fond of glass batter bowls that feature a sturdy handle. The handle makes it easy to hold the bowl steady on the counter while mixing, preventing spills and making the entire process more comfortable and efficient. Ensure it’s large enough to accommodate all the ingredients without overflow.
Cookie Scoop: For perfectly uniform cookies every time, a cookie scoop is an indispensable tool. It ensures each cookie is the same size, which means they’ll bake evenly and look professionally made. Consistency in size also prevents smaller cookies from burning while larger ones are still undercooked.
Cooling Rack: Once your cookies are out of the oven, transfer them to a cooling rack. This allows air to circulate around the cookies, preventing them from becoming soggy on the bottom and helping them cool down completely and evenly. This step is key for achieving that perfect chewy-on-the-inside, slightly crisp-on-the-outside texture.
Heat Resistant Potholders: Safety first! A couple of years ago, we had a fire scare in the kitchen when a cloth potholder accidentally caught fire on a burner we didn’t realize was on. Thankfully, we noticed the smoke and acted quickly. Since then, we exclusively use silicone heat-resistant potholders to prevent similar incidents. They’re a small investment for peace of mind in the kitchen.
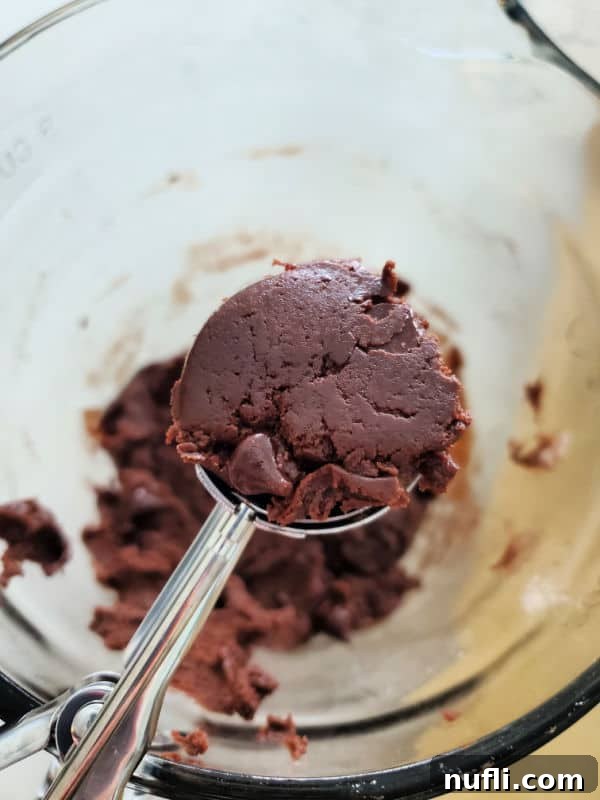
Expert Recipe Tips & Tricks for Perfect Brownie Cookies
Achieving bakery-quality brownie cookies at home is easy with a few simple tips:
- For Fudgier Cookies: If you adore super fudgy brownies, you can enhance that texture in your cookies by adding one additional egg yolk to the mix. The extra fat from the yolk will make the brownie cookies even softer, chewier, and closer to the rich, gooey center of a classic brownie.
- Handling Thick Dough: Be prepared for a thick dough – that’s a good sign for chewy cookies! When mixing, ensure all ingredients are fully incorporated. I like to use a sturdy spatula to periodically scrape down the sides and bottom of the mixing bowl, pressing any dry brownie mix into the main dough. This ensures everything is thoroughly combined and prevents pockets of unmixed ingredients.
- Amp Up the Chocolate: Can you ever have too much chocolate? We think not! Feel free to stir in ½ to 1 cup of your favorite chocolate chips (dark, milk, or white) for an extra layer of chocolatey goodness and texture.
- Precise Baking Time: Oven temperatures can vary, so keep a close eye on your cookies. These typically bake perfectly between 9-10 minutes. I usually set my timer for 9 minutes and then check them. You’re looking for edges that are set and slightly firm, while the center still looks a bit soft and perhaps slightly puffed. If you prefer crunchier edges, you can leave them in for an additional minute or two, but be careful not to overbake, as they can quickly dry out. Remember, cookies continue to cook slightly after they are removed from the oven.
- Preheat Your Oven: Always preheat your oven completely before placing cookies inside. Baking in a cold oven will negatively impact the texture and spread of your cookies, leading to inconsistent results.
- Cooling is Key: Don’t skip the cooling rack! Transferring cookies to a cooling rack allows air to circulate, preventing the bottoms from becoming soggy and helping them set up properly. This ensures they maintain their delightful texture.
- Gluten-Free Exploration: I haven’t yet experimented with making these cookies using a gluten-free brownie mix, so I can’t confirm if the baking times or temperatures would need adjustment. It’s on my list to test soon!
- Storage Suggestions: Store your cooled brownie mix cookies in an airtight container at room temperature for up to 3-4 days. For longer storage, you can freeze them for up to 2-3 months. Thaw at room temperature before enjoying.
- Serving Suggestions: These cookies are epic on their own, but imagine them as a base for brownie cookie ice cream sandwiches! Simply squish a scoop of vanilla bean (or your favorite flavor) ice cream between two cookies – hello, pure deliciousness! They’re also fantastic served warm with a glass of cold milk, a hot cup of coffee, or even drizzled with a little hot fudge sauce. A dusting of powdered sugar can also add a touch of elegance.
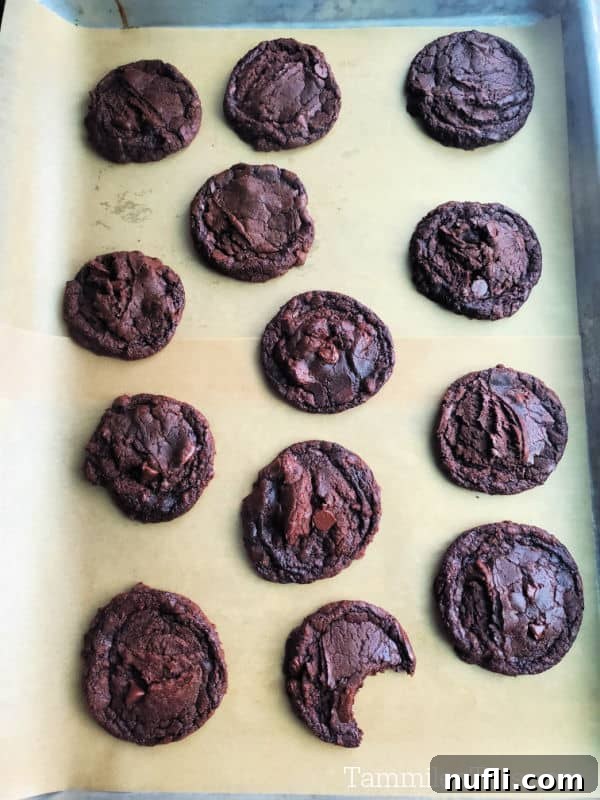
More Irresistible Dessert Recipes to Explore
If you love simple, delicious desserts, be sure to check out some of our other fantastic recipes:
- 4 Ingredient Pie Crust Cookies
- Blueberry Cake
- Cherry Brownies
- Oreo Fluff Salad
- Peanut Butter Cheerio Bars
- Oreo Rice Krispie Treats
This recipe is also a proud feature in our curated collection of Easy Cookie Recipes, where you’ll find even more simple delights.
Are you a fan of discovering new and exciting recipes? Then you’ll love exploring our copycat recipes, a wide array of delectable dessert recipes, and our incredibly convenient Crock Pot Recipes. There’s always something new to inspire your next kitchen adventure!
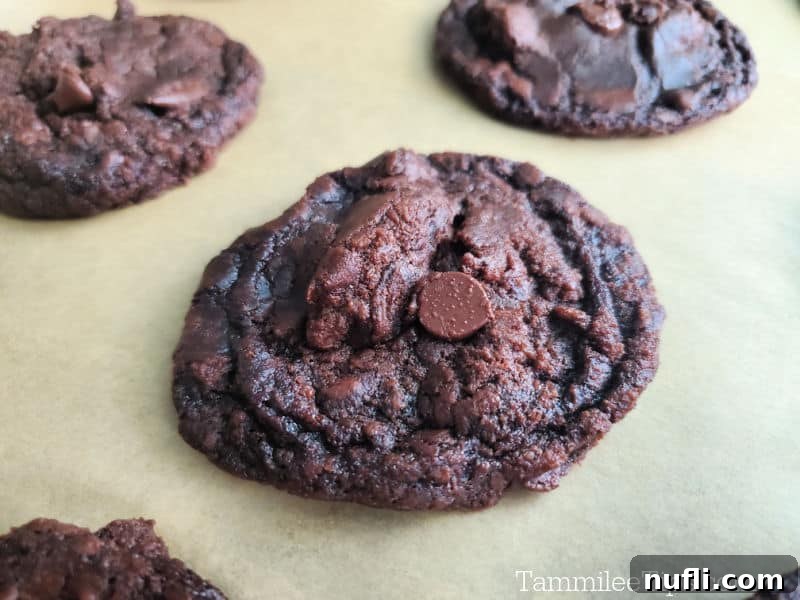
Brownie Mix Cookies
⭐
⭐
⭐
⭐
🖨️Print
⭐Rate
Ingredients
- 18 Ounce Brownie Mix
- ½ cup Vegetable Oil
- 1 egg
Instructions
- Preheat oven to 350 degrees F (175 degrees C).
- In a large mixing bowl, combine the brownie mix, vegetable oil, and egg. Mix thoroughly with a hand mixer until a thick dough forms. If adding optional mix-ins like chocolate chips or nuts, gently fold them in now.
- Using a cookie scoop, drop spoonfuls of dough onto a baking sheet lined with parchment paper, leaving about 2 inches between each cookie.
- Bake for 9-10 minutes, or until the edges are set and the centers still look slightly soft. Avoid overbaking for the best fudgy texture.
- Remove from oven and let the cookies cool on the baking sheet for 5 minutes before transferring them to a wire rack to cool completely.
Kitchen Tools
- Parchment Paper
- Cookie Sheets
- Hand Mixer
- Large Mixing Bowl
- Cookie Scoop
- Cooling Rack
Nutrition
Calories from Fat 72
