Welcome to the delightful world of simple baking, where extraordinary flavors meet effortless preparation. If you’re looking for a dessert that combines the rich, distinctive taste of red velvet with the comforting chewiness of a brownie, you’ve found your new favorite! These Red Velvet Brownies, made from a convenient cake mix, are a true revelation. They deliver an incredibly moist and chewy texture, boasting that signature vibrant red hue and a subtle cocoa flavor, all without the fuss of measuring countless ingredients.

Effortless Elegance: Red Velvet Brownies from Cake Mix
The culinary journey can be exciting, especially when discovering how versatile a simple cake mix can be. I’ve had so much fun experimenting with different cake mix bases, creating everything from Red Velvet Cookies to Cake Batter Chocolate Chip Cookies. Now, these Red Velvet Brownies join the ranks of my easiest and most satisfying recipes. There’s something truly magical about transforming a humble box of cake mix into a sophisticated dessert that tastes entirely homemade.
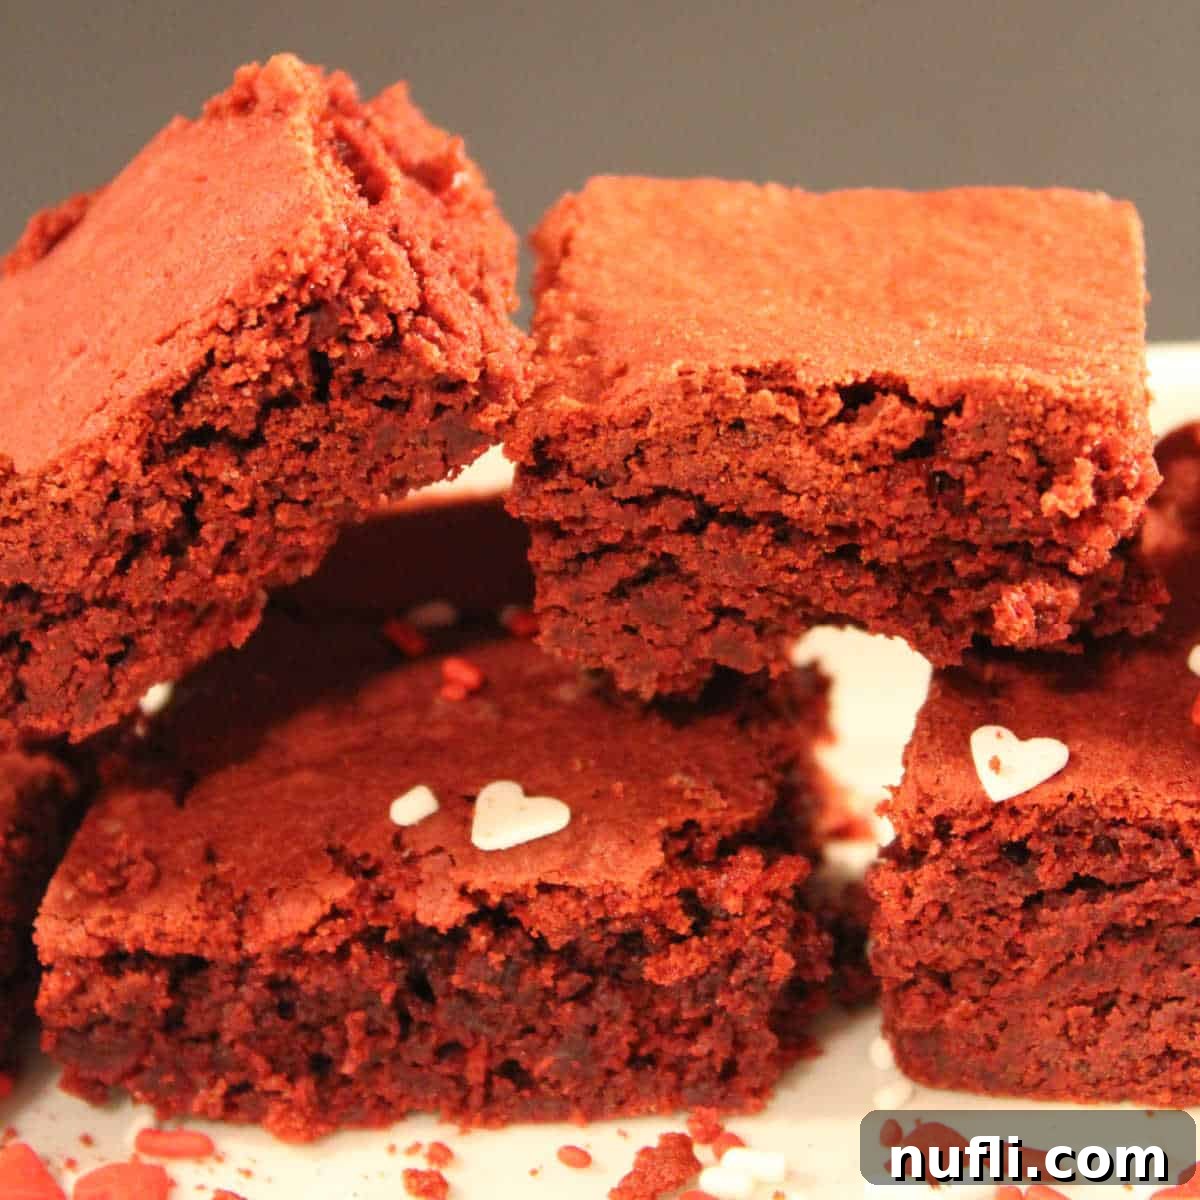
What sets these brownies apart is not just their stunning appearance, but their irresistible flavor and texture. Each bite offers a perfect balance of deep cocoa notes, a hint of tang, and an incredibly moist, fudgy chewiness that will leave you craving more. They are so good, in fact, that an 8×8 inch pan disappears in our house almost instantly! These brownies are an ideal treat for any occasion, whether it’s a cozy evening at home or a festive gathering. Imagine serving them at Valentine’s Day, cut into charming heart shapes, perhaps with a dollop of cream cheese frosting or a dusting of powdered sugar. The possibilities for presentation are endless.
The real beauty of using a cake mix for brownies lies in its unparalleled convenience. Forget the exhaustive process of measuring out multiple dry ingredients like all-purpose flour, cocoa powder, baking soda, and salt. No need to meticulously combine wet and dry ingredients separately. With this brilliant red velvet brownie recipe, you simply gather a handful of basic pantry staples, combine them in a single bowl, and you’re well on your way to baking perfection. It’s a fantastic shortcut that doesn’t compromise on taste or quality, making decadent desserts accessible to even the busiest home bakers.

The Simple Ingredients You’ll Need
One of the best aspects of this recipe is the minimal list of ingredients, most of which you likely already have on hand. These pantry basics come together to create a remarkably rich and satisfying brownie. Here’s a quick overview:
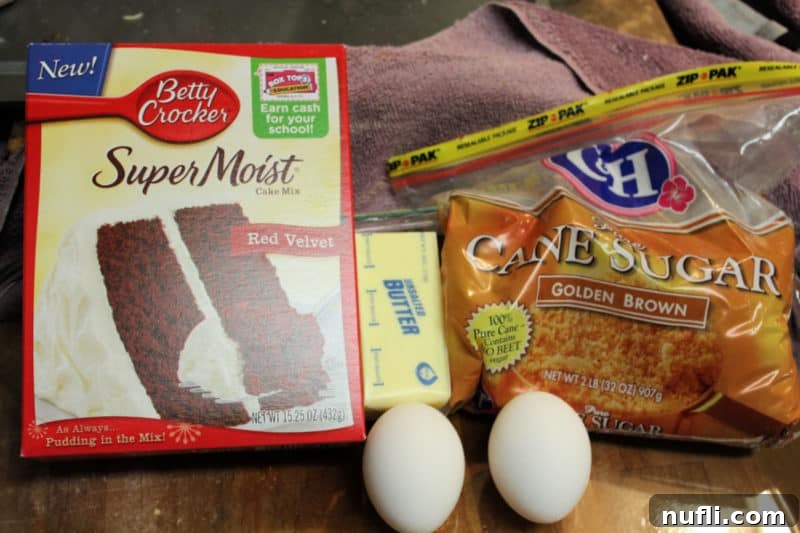
- Red Velvet Cake Mix: This is the star of our show, providing the base flavor, color, and much of the structure. Any brand of red velvet cake mix will work beautifully, so pick your favorite!
- Unsalted Butter: Melted butter contributes to the fudgy texture and rich flavor. Using unsalted butter allows you to control the overall saltiness of the brownies.
- Brown Sugar: The addition of brown sugar, with its molasses content, enhances the chewiness and moisture of the brownies, giving them a depth of flavor that complements the red velvet perfectly.
- Eggs: Eggs act as a binding agent, providing structure and richness, and helping to create that desirable chewy texture.
Optional Garnishes: To elevate your Red Velvet Brownies even further, consider these delightful additions:
- Cream Cheese Frosting: The classic pairing for red velvet, a tangy cream cheese frosting adds a luxurious touch and balances the sweetness of the brownie.
- Heart Sprinkles: Perfect for holidays like Valentine’s Day, these add a fun and festive visual appeal.
- Powdered Sugar: A simple dusting of powdered sugar offers a elegant finish.
- Chocolate Chips: White chocolate chips or dark chocolate chunks can be folded into the batter for an extra layer of indulgence.
While red velvet cake mix typically provides a lovely red hue, if you desire an even more intense color, feel free to add a few drops of red food coloring to the batter. This ensures your brownies are as visually striking as they are delicious.

Essential Equipment for Perfect Brownies
Having the right tools can make your baking experience even smoother. For these Red Velvet Brownies, you won’t need anything fancy, just a few standard kitchen items:
- KitchenAid Mixer or Hand Mixer and Large Mixing Bowl: A stand mixer or a hand mixer will make combining the thick batter much easier and ensure all ingredients are thoroughly incorporated. If you don’t have one, a large sturdy bowl and a strong arm will also do the trick!
- 8×8 or 9×9 Baking Pan: An 8×8 inch pan will yield thicker, fudgier brownies, while a 9×9 inch pan will result in slightly thinner ones. Either works perfectly.
- Whisk and Spoon: For initial stirring and scraping down the sides of the bowl.
- Toothpick: Essential for testing doneness without overbaking.
- Parchment Paper: I’m a huge advocate for using parchment paper. Lining your baking pan with it makes for incredibly easy removal of the brownies once baked and simplifies cleanup significantly. You can lift the whole batch out to cool and slice!
- Heat-Resistant Potholders: Safety first! Investing in good heat-resistant silicone potholders is always a smart choice. They provide superior protection against burns and can prevent unfortunate accidents in the kitchen.
How to Make Red Velvet Brownies from Cake Mix: Step-by-Step
Making these decadent brownies couldn’t be simpler! Follow these easy steps for a perfectly baked batch every time:
- Preheat and Prepare: Begin by preheating your oven to 375°F (190°C). Lightly grease and flour your 8×8 or 9×9 inch baking dish, or, even better, line it with parchment paper, leaving an overhang on two sides to create “handles” for easy removal.
- Combine Ingredients: In a large mixing bowl, or the bowl of your stand mixer, combine the entire box of red velvet cake mix, melted unsalted butter, brown sugar, and eggs.
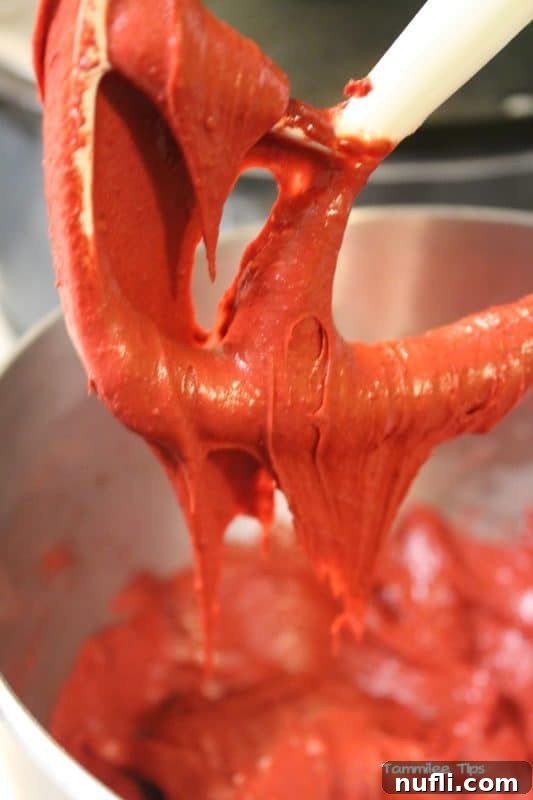
- Mix Thoroughly: Using your KitchenAid mixer with the paddle attachment, or a hand mixer on medium speed, mix all the ingredients until just combined. The batter will be quite thick, so don’t be alarmed! Scrape down the sides of the bowl as needed to ensure everything is well-incorporated. Be careful not to overmix, as this can lead to tougher brownies.
- Pour into Pan: Evenly spread the thick red velvet brownie batter into your prepared baking dish. Use a spatula to ensure it reaches all corners.
- Bake to Perfection: Place the baking dish in the preheated oven and bake for 25-30 minutes. Baking times can vary slightly depending on your oven, so keep an eye on them.
- Check for Doneness: To test if the brownies are done, insert a toothpick into the center. If it comes out with moist crumbs attached, but not wet batter, they are ready. A clean toothpick means they might be slightly overbaked, so err on the side of slightly underdone for fudgier results.
- Cool Completely: This is arguably the most crucial step for perfect brownies! Allow the brownies to cool completely in the pan on a wire rack before attempting to slice them. Cooling solidifies the texture and makes for clean cuts. If you used parchment paper, you can lift the entire slab of cooled brownies out of the pan onto a cutting board.
We are confident that these Red Velvet Cake Mix Brownies will quickly become a cherished favorite in your household. Their incredible flavor and delightful texture are truly hard to beat!
Preparation and Storage Tips
To help you enjoy your Red Velvet Brownies at their best, here are some helpful tips for preparation and storage:
- Make Ahead: You can certainly prepare the brownie batter a day in advance. Store the covered bowl of batter in the refrigerator until you’re ready to bake the next day. A useful tip to keep in mind is that refrigerating the batter overnight can often yield even fudgier and denser brownies, which many people prefer. Just be aware that chilled batter may require a few extra minutes of baking time.
- Storage: Once baked and completely cooled, store any leftover brownies in an airtight container. They will remain fresh and delicious at room temperature for up to three days, or in the refrigerator for up to four days. Keeping them in an airtight container prevents them from drying out and maintains their moist, chewy texture.
- Freezing/How to Freeze: Freezing is an excellent option for longer storage. Allow the brownies to cool completely, then cut them into individual squares. For optimal freshness and to prevent freezer burn, wrap each brownie square snugly in a layer of plastic wrap, followed by aluminum foil. Place the wrapped brownies in an airtight, freezer-safe container or freezer bag. They can be stored in the freezer for up to three months. This method is perfect for grab-and-go servings whenever a craving strikes.
- How to Reheat: If you enjoy your brownies warm, with that fresh-from-the-oven feel, simply reheat individual squares in the microwave for ten to fifteen seconds, or until warmed through. If you’re reheating frozen brownies, it’s best to let them thaw overnight in the refrigerator before warming them gently.
Delicious Recipe Variations to Try
This Red Velvet Brownie recipe is wonderfully adaptable, allowing for creative twists to suit various dietary needs and taste preferences:
- Cake Mix Substitutions: While we often use Betty Crocker Super Moist Red Velvet Cake Mix, any brand you prefer will work beautifully. Experiment with different brands to find your favorite flavor profile and texture.
- Vegetarian Option: This recipe is inherently vegetarian, provided you use a boxed cake mix that is labeled vegetarian, which most conventional cake mixes are. Always check the ingredient list if you have strict dietary concerns.
- Vegan Option: To make these brownies suitable for a vegan diet, select a vegan-friendly boxed cake mix. Replace the unsalted butter with a plant-based butter alternative (like vegan margarine) and substitute the eggs with a suitable egg replacer, such as flax eggs (1 tablespoon ground flaxseed mixed with 3 tablespoons water per egg) or a commercial vegan egg substitute.
- Gluten-Free: For those following a gluten-free diet, simply opt for a gluten-free red velvet cake mix. Many brands now offer excellent gluten-free cake mixes that perform just as well as their conventional counterparts, ensuring everyone can enjoy these delicious brownies.
- Smaller Serving Size + Larger Group/More Servings: Our recipe, using one standard box of red velvet cake mix, typically yields 16 servings when cut into a 9×9 inch pan. If you need a smaller batch, you could halve the recipe and bake it in an 8×4 inch loaf pan, adjusting baking time. For a larger crowd, simply double the recipe and bake in a 9×13 inch baking pan, again adjusting the baking time as needed.
- Sugar-Free: The original recipe contains approximately 14 grams of sugar per serving. To create a sugar-free version, choose a sugar-free red velvet cake mix (if available) and use a sugar-free alternative to brown sugar. Be aware that texture might vary slightly with sugar substitutes.
Pro Tips for the Best Red Velvet Cake Mix Brownies
Achieving bakery-quality brownies at home is easy with a few simple tricks:
- Melt Your Butter: Do not skip melting your butter before mixing it into the batter! Cold butter will not incorporate properly, leading to a lumpy batter and uneven texture. Melted butter ensures a smooth, uniform batter that bakes beautifully.
- Avoid Overmixing: While you want ingredients to be well combined, overmixing the batter can develop too much gluten, resulting in tougher, cake-like brownies rather than the desired fudgy texture. Mix until just combined.
- Don’t Overbake: Brownies are best when slightly underbaked, as they continue to cook a little after being removed from the oven. Overbaking leads to dry, crumbly brownies. Watch them closely and remove them when the edges are set and a toothpick inserted into the center comes out with moist crumbs.
- Cool Completely: As mentioned, allow your brownies to cool entirely before slicing. Warm brownies are fragile and messy to cut. Patience will be rewarded with clean, perfect squares.
- Add-ins: Get creative with additional ingredients! Swirl in softened cream cheese (or a cream cheese frosting mixture) before baking for a cheesecake swirl effect. Fold in white chocolate chips, dark chocolate chunks, chopped pecans, or even a hint of espresso powder to deepen the chocolate flavor.
- Enhance the Color: If your cake mix doesn’t yield the vibrant red you desire, a small amount of liquid or gel red food coloring can be added to the batter to achieve that iconic red velvet hue.
What to Serve with Red Velvet Brownies From Cake Mix
These incredibly versatile Red Velvet Brownies are a fantastic pick-me-up and a delightful ending to almost any meal. Their rich flavor pairs well with a variety of dishes. Here are some menu pairing suggestions to inspire you:
Perfect Sides:
- BLT Pasta Salad: A refreshing and savory pasta salad makes a great counterpoint to the sweet brownies.
- Air Fryer Brussels Sprouts & Air Fryer Asparagus: Healthy, crisp vegetables provide a light and earthy contrast.
- Sweet Potato Casserole with Canned Yams: A warm, comforting side that bridges the gap between savory and sweet.
- Southern Style Green Beans: Simple, flavorful green beans are a classic comfort food.
- Stuffed Acorn Squash with Sausage and Rice: A hearty and elegant side dish for a more substantial meal.
- Crockpot Bourbon Baked Beans & Crockpot Chicken & Stuffing & Crockpot Corn Pudding: These slow cooker dishes are perfect for a relaxed family meal.
Hearty Main Dishes:
- Pringles Chicken: A fun, crispy main course that kids and adults will love.
- Bacon Pot Pie: A savory, comforting pot pie for a filling meal.
- Crock Pot Ribs & Crock Pot Swedish Meatballs & Crock Pot French Dip Sandwich & Crock Pot Steak Stroganoff & Crock Pot Spinach Lasagna & Slow Cooker Chicken & Dumplings & Crockpot Mushroom Pasta Casserole: A variety of easy and delicious slow cooker main dishes that free up your time.
- Philly Cheesesteak Stuffed Peppers: A flavorful and satisfying low-carb option.
Complementary Desserts (if you need more sweets!):
- 2 Ingredient Lemon Bars: A bright and zesty treat to cleanse the palate.
- Cinnamon Rolls with Apple Pie Filling: A warm and comforting classic.
- Orange Dreamsicle Salad: A light, creamy, and nostalgic dessert.
- Bisquick Peach Cobbler: A rustic and fruity dessert.
- Oatmeal Raisin Cookies & Peanut Butter & Jelly Cookies: Classic cookies for every taste.
When to Serve These Delightful Brownies
The beauty of these Red Velvet Brownies is their versatility. They’re perfect for almost any occasion, big or small!
- Lunch & Dinner: A sweet finish to any meal.
- Dessert: The obvious choice, whether for a weeknight treat or a special occasion.
- Afternoon Snack: A wonderful pick-me-up with a cup of coffee or tea.
- Coffee or Tea Snack: The subtle cocoa and rich texture are ideal with your favorite hot beverage.
- Christmas & Holidays: Their vibrant red color makes them festive and visually appealing for holiday spreads.
- Valentine’s Day: Absolutely perfect for this romantic holiday, especially when cut into heart shapes.
- Potlucks and Gatherings: Easy to transport and always a crowd-pleaser.
- Birthday Parties: A fun and colorful addition to any celebration.
Other Great Valentine’s Day Desserts
If you’re planning a special Valentine’s Day celebration and need more sweet inspiration, these recipes are sure to impress:
- Valentine’s Day Cookies
- Chocolate Cherry Dump Cake
- Creme Brulee Cheesecake Bars
- Cherry Cake Bars
- Red Velvet Cool Whip Cookies
Do you love discovering new recipes? Be sure to explore our extensive collection of copycat recipes, delightful dessert recipes, and our incredibly convenient CrockPot Recipes.
Stay connected for all our latest culinary adventures and delicious recipe posts! Follow Tammilee Tips on MSN, Facebook, Instagram, and Pinterest.

Red Velvet Brownies with Cake Mix
How to make delicious Red Velvet Brownies with Cake Mix
No ratings yet
Print Recipe
Rate Recipe
Prep Time: 10 minutes
Cook Time: 25 minutes
Total Time: 35 minutes
Servings: 16
Calories: 187 kcal
Author: Tammilee Tips
Ingredients
- 1 box Red Velvet Cake Mix
- ½ Cup Butter (melted)
- ¼ Cup Brown Sugar
- 2 Eggs
Instructions
- Combine all ingredients together in a large mixing bowl. A stand mixer or hand mixer works best for this super thick batter.
- Pour batter evenly into a prepared 9×9 baking dish.
- Bake for 25-30 minutes at 375 degrees Fahrenheit. Allow to cool completely before slicing.
Kitchen Tools
- KitchenAid Mixer or Hand Mixer
- 9×9 Baking Pan
Nutrition
Calories from Fat 90
Love this recipe? Follow @TammileeTIps on Pinterest
Tried this recipe? Mention @TammileeTipsLife when you share a photo!
