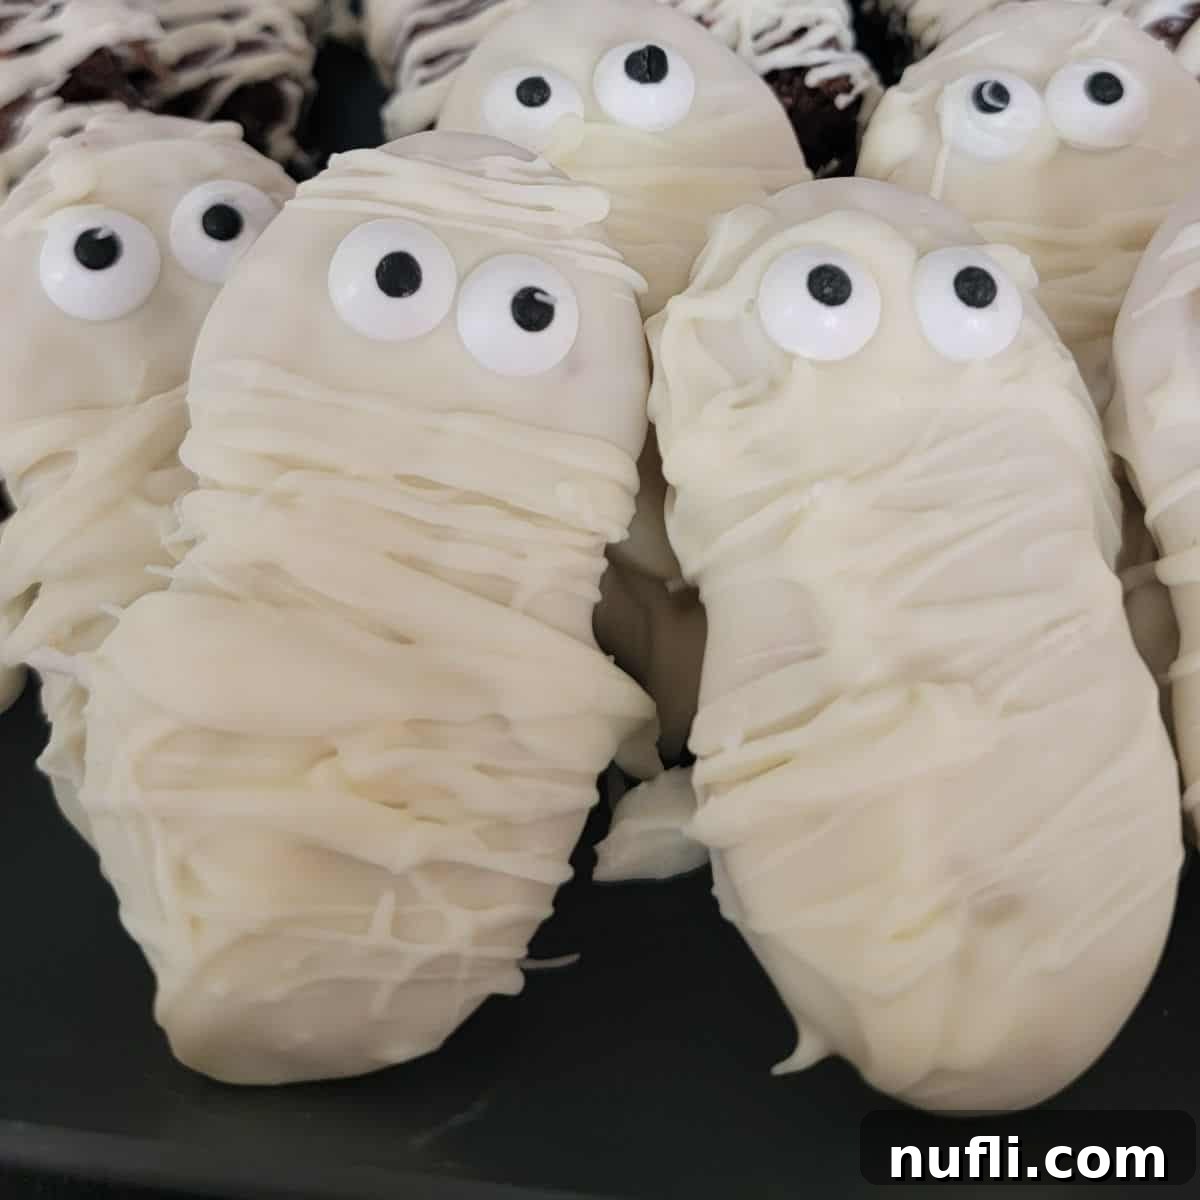
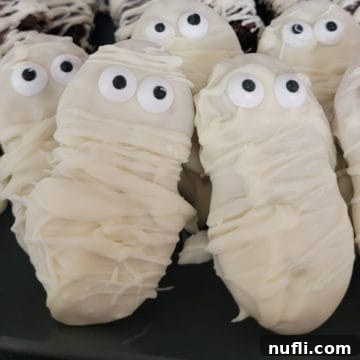
Get ready to unwrap some spooky fun with these incredibly easy Nutter Butter Mummies! Perfect for Halloween parties, school events, or simply as a delightful sweet treat, these no-bake cookies are a guaranteed hit. With minimal ingredients and a quick preparation time, you’ll have a batch of adorable, eerie delights ready in under 20 minutes. Forget complicated baking; this recipe focuses on maximum impact with minimal effort, making it ideal for busy families or last-minute party preparations.
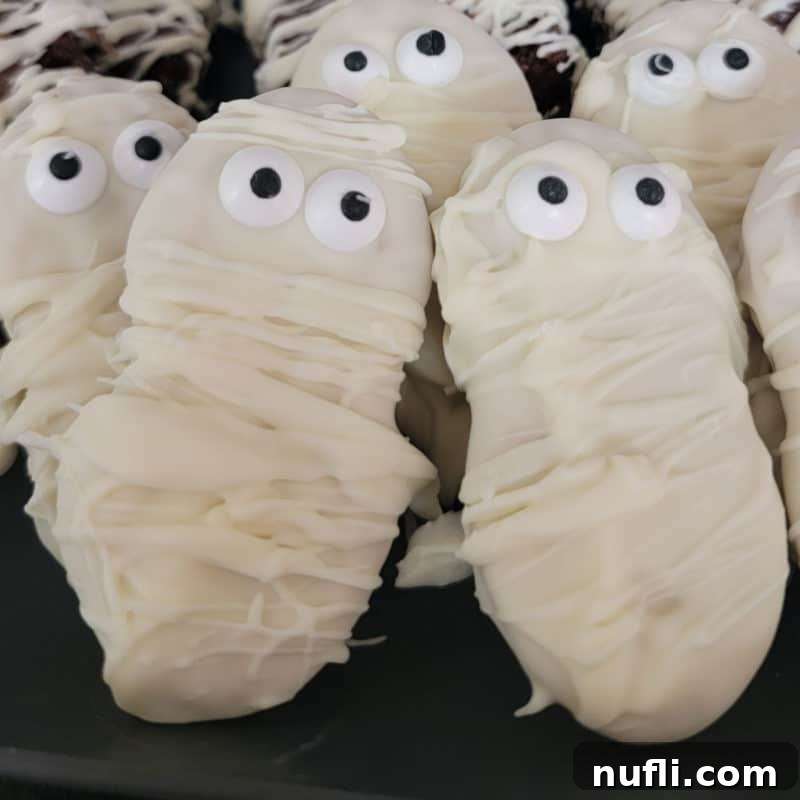
Nutter Butter Mummies: A Sweet & Spooky Halloween Classic
Halloween is all about embracing the spooky, the silly, and of course, the sweet! And when it comes to sweet, nothing beats a treat that’s both adorable and incredibly simple to make. Our Nutter Butter Mummies fit the bill perfectly, transforming a classic peanut butter cookie into a ghoulishly delightful character with just a few steps. These charming mummy cookies are an absolute joy to create, offering a fun activity for families and a delicious reward for everyone.
This recipe is a highlight in our collection of mummy-inspired Halloween creations, joining other favorites like:
- Mummy Crescent Dogs
- Mummy Donuts
- Mummy Twinkies
- Mummy Brownies
- Mummy Rice Krispie Treats
Each of these recipes brings its own unique twist to the mummy theme, but our Nutter Butter Mummies truly stand out for their delightful taste and impressive simplicity. They’re the ideal quick and easy Halloween treat, designed to bring smiles to kids’ faces with their cute appearance, while parents will appreciate that the total preparation time is incredibly short—often less than 15-20 minutes from start to finish. This makes them an excellent choice for a last-minute party snack or a fun afternoon activity with the little ones.
Essential Ingredients for Nutter Butter Mummies
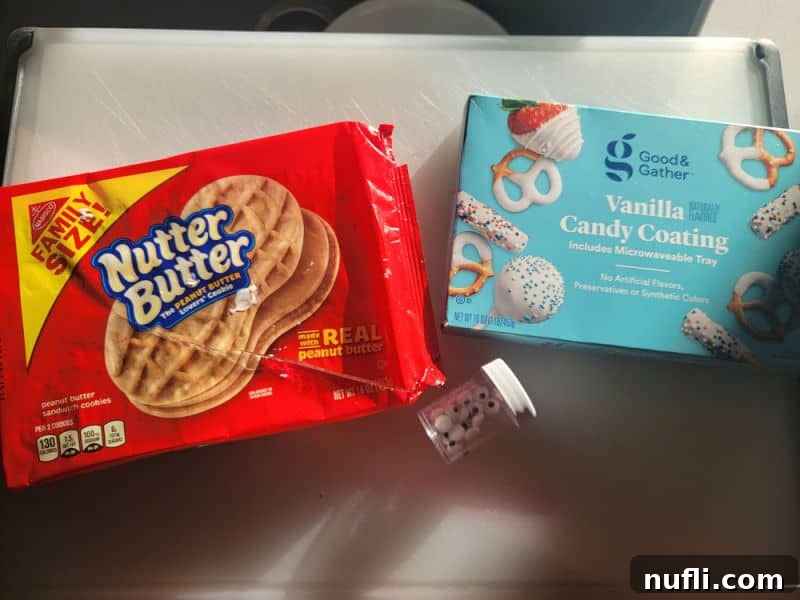
Creating these delightful mummy cookies couldn’t be simpler, thanks to a very short list of readily available ingredients. Here’s a detailed look at what you’ll need to transform ordinary peanut butter cookies into extraordinary Halloween characters:
- Nutter Butters or Similar Peanut Butter Cookies: The star of our show! Nutter Butter cookies are perfect due to their distinctive shape, which provides an excellent base for our mummy wrapping. Their rich peanut butter flavor also pairs wonderfully with the sweet white chocolate coating. If Nutter Butters aren’t available, any rectangular or oval-shaped peanut butter cookie will work as a fantastic substitute. Ensure they are sturdy enough to be dipped without breaking.
- White Candy Melts or White Chocolate Chips: This forms the mummy’s wrapping. Candy melts (also known as almond bark) are often preferred for their ease of melting and smooth, quick-setting finish, which is crucial for achieving that authentic “bandaged” look. White chocolate chips can also be used, though they might require a touch of shortening or coconut oil to achieve a smoother consistency for dipping and drizzling. Choose a good quality brand for the best results and flavor.
- Edible Candy Eyes: These are essential for bringing your mummies to life! Small candy eyeballs are widely available in baking aisles and craft stores, especially around Halloween. They instantly add character and a playful, slightly spooky charm to your treats, making them truly irresistible. You’ll need two for each mummy, so plan accordingly based on your batch size.
The beauty of this recipe lies in its simplicity and the minimal ingredient list, making it a budget-friendly and stress-free option for your Halloween festivities.
Recommended Equipment for Easy Preparation
While the recipe is incredibly simple, having the right tools can make the process even smoother and more enjoyable. Here’s a list of essential equipment that will help you craft perfect Nutter Butter Mummies:
- Large Microwave-Safe Mixing Bowl: This is where you’ll melt your candy coating. We highly recommend a glass batter bowl with a handle, as its size and design make it easy to fully dip the Nutter Butter cookies without getting chocolate all over your hands. Ensure the bowl is microwave-safe for convenient melting.
- Spoon or Squeeze Bottle/Piping Bag: You’ll need one of these to create the mummy’s bandages. A simple spoon allows for a rustic, hand-dripped look, while a squeeze bottle or a piping bag with a small round tip offers more control for creating cleaner, more uniform zigzag patterns. Choose whichever method you find most comfortable for drizzling.
- Baking Sheets with Sides: Essential for setting your mummies. Baking sheets with a raised edge prevent the coated cookies from sliding off the sides as you transfer them or move them around. This ensures your treats stay intact and mess-free while the chocolate sets.
- Parchment Paper or Wax Paper: Lining your baking sheets with parchment paper or wax paper is a game-changer for easy cleanup. It prevents the chocolate from sticking to the pan, ensuring your mummies can be lifted off cleanly once set. It truly makes the post-treat mess a breeze to handle.
- Cooling Rack/Drying Rack (Optional but Recommended): For those who prefer a professional finish, a drying rack allows any excess chocolate to drip off, creating a neater, less pooled base for your mummies. Place parchment paper underneath to catch any drips.
Gathering these items before you start will streamline your mummy-making process, making it even more enjoyable.
Step-by-Step Guide: How to Make Nutter Butter Mummies
Creating these adorable Nutter Butter Mummies is a straightforward process that’s perfect for all skill levels. Follow these simple steps to bring your spooky treats to life:
- Prepare Your Workspace: Start by gathering all your ingredients and equipment. Line your baking sheets with parchment paper or wax paper. This crucial first step ensures a smooth process and easy cleanup once your mummies are complete and setting.
- Melt the Candy Coating: Place your white candy melts or white chocolate chips into your microwave-safe mixing bowl. Microwave in 30-second intervals, stirring thoroughly after each interval. Continue this process until the chocolate is completely smooth and creamy, with no lumps remaining. Be careful not to overheat, as this can cause the chocolate to seize or burn.
- Dip the Nutter Butter Cookies: Carefully dip each Nutter Butter cookie into the melted white chocolate, ensuring the entire surface is fully coated. Allow any excess chocolate to drip off back into the bowl. You can gently tap the cookie against the side of the bowl or use a fork to help remove drips. Place the fully coated cookies onto your prepared parchment-lined baking sheet, leaving a small space between each.
- Add the Candy Eyeballs: While the first layer of white chocolate is still wet, carefully place two candy eyeballs onto the upper portion of each cookie. The melted chocolate will act as an adhesive, securing the eyes in place. Once the eyes are on, let this initial layer of chocolate set. You can speed this up by placing the baking sheet in the refrigerator for 5-10 minutes, but it’s not strictly necessary.
- Create the Mummy Bandages: Once the first layer of chocolate has set and the eyes are firmly in place, it’s time to add the signature mummy bandages. Using a spoon, drizzle additional melted white chocolate back and forth over the cookie in a zigzag pattern, intentionally leaving small gaps to resemble old, worn bandages and expose the cookie beneath. For more precision, you can transfer the melted chocolate into a squeeze bottle or a piping bag with a small round tip and pipe the lines. Allow the finished mummies to set completely at room temperature or in the refrigerator until the chocolate is firm.
And just like that, you’ll have a tray full of charming and delicious Nutter Butter Mummies ready to delight!
Preparation and Storage Tips for Perfect Mummies
To ensure your Nutter Butter Mummies are always at their best, consider these preparation and storage guidelines:
- Make Ahead: These treats are fantastic for making in advance! You can prepare your Nutter Butter Mummies a few days before your event. Store them in an airtight container at room temperature. This allows the chocolate to fully set and hardens, preventing any stickiness. They hold up beautifully for 3-4 days.
- Storage: Always store your finished mummies in an airtight container to maintain freshness and prevent them from absorbing odors or moisture. Keep them at room temperature for up to 3-4 days. While it might seem intuitive to refrigerate chocolate-covered items, storing these mummies in the refrigerator can cause the chocolate to “sweat” slightly when brought back to room temperature. This can lead to a slight change in texture and appearance, so room temperature is generally preferred unless your home is particularly warm.
- Freezing/How to Freeze: We generally do not recommend freezing finished Nutter Butter Mummies. Freezing can significantly alter the texture of the cookie, making it crumbly or soggy once thawed. The delicate nature of the chocolate coating might also be affected, leading to a less appealing finish. For the best taste and texture, enjoy them fresh or within a few days of preparation.
Recipe Variations & Dietary Considerations
This simple Nutter Butter Mummy recipe is incredibly versatile, allowing for creative adaptations and accommodating various dietary needs:
- Cookie Substitutions: While Nutter Butters are iconic, you’re not limited to them! Any sturdy, flat cookie can be transformed into a mummy. Consider using shortbread cookies, graham crackers, or even rectangular butter cookies for different flavor profiles and textures. The key is a cookie that can withstand being dipped and decorated.
- Chocolate Alternatives: For a different twist, you could experiment with milk chocolate or dark chocolate as the base coat, and then drizzle white chocolate for the bandages. This would create a darker, more dramatic mummy effect. Alternatively, colored candy melts (like green or purple) could be used to create monstrous or whimsical mummies!
- Vegetarian Option: This recipe is naturally vegetarian, making it suitable for a wide audience. All primary ingredients (Nutter Butters, candy melts, candy eyes) are typically vegetarian-friendly.
- Vegan Option: Nutter Butters are often considered “accidentally vegan” by many, as their primary ingredients do not contain animal products, though some sources debate the processing of sugar. For a strict vegan option, ensure you use a certified vegan peanut butter cookie brand and verify that your white candy melts or vegan white chocolate chips are also free from dairy and other animal-derived ingredients.
- Gluten-Free Option: Traditional Nutter Butters contain gluten. To make this recipe gluten-free, simply substitute the Nutter Butters with your favorite gluten-free peanut butter cookies or another suitable gluten-free cookie. Many excellent gluten-free cookie brands are available today that would work perfectly.
- Scaling the Recipe: This recipe is incredibly flexible. Whether you need just a couple of mummies for a quiet movie night or a hundred for a large school carnival, you can easily adjust the quantities. Just make sure you have enough melted chocolate and ample space to let your mummies set! The instructions remain the same regardless of the batch size.
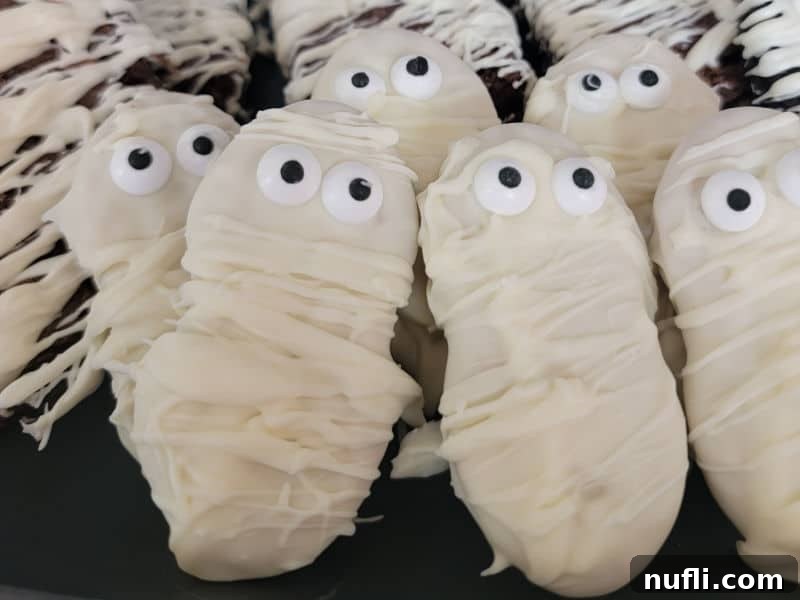
Serving Suggestions and When to Enjoy
These delightful Nutter Butter Mummies are more than just a treat; they’re a versatile addition to almost any Halloween-themed gathering or everyday snack occasion. Here are some ideal times and ways to serve them:
- Halloween Parties: The ultimate setting! These mummies are fantastic for dessert tables, adding a cute and edible decorative element.
- School Parties and Classroom Treats: Easy to transport and a hit with kids, making them perfect for class celebrations.
- Sweet Treat Any Time: Don’t wait for a party! Enjoy them as a fun, quick snack whenever you crave something sweet and festive.
- Trick-or-Treating Alternatives: Offer these as a homemade alternative to traditional candy for visiting trick-or-treaters (if individually wrapped and safe).
- Movie Night Fun: Elevate your Halloween movie marathon with these themed snacks.
- Fall Picnics: A cute addition to any autumn outdoor gathering.
- Office Parties: Bring some festive cheer to the workplace with these easy-to-share treats.
What to Serve Alongside Your Nutter Butter Halloween Cookies
To create a complete Halloween spread, consider pairing your Nutter Butter Mummies with these other spooky delights:
Snacks & Appetizers:
- Monster Munch
- Candy Corn and Peanuts Snack Mix
- Pretzel Bones
- Salted Caramel Popcorn
- Pumpkin Rice Krispie Treats
- Frankenstein Rice Krispie Treats
- Bloody Bandages
- Candy Corn Bark
- And, of course, a variety of Halloween Candy!
Main Dishes & Entrées:
- Halloween Pasta
- Mummy Dogs
- Mummy Quesadillas
Other Desserts:
- Pumpkin Rice Krispie Treats
- Frankenstein Rice Krispie Treats
- Witch Hat Cookies
- Reese’s Bats
- Marshmallow Ghosts
- Pretzel Skeleton Bones
- And, naturally, plenty of Halloween Candy!
Festive Drinks:
- Hot Chocolate
- Pumpkin Spice Latte
- Kool-Aid Slushie
- Oreo Milkshake
- Freckled Lemonade
- Sonic Ocean Water
More Great Halloween Recipes to Explore
Looking for more spooky inspiration? Don’t miss these other fantastic Halloween recipes from our collection:
- Candy Corn Cheesecake Mousse
- Slow Cooker Caramel Apples
- Crazy Eye Oreos
- Edible Fake Blood
- Bloody Bandages
Check out all of our Halloween Recipes for a complete guide to your festive culinary adventures!
Nutter Butter Mummies Recipe
Easy Nutter Butter Mummies perfect for Halloween Parties. A great easy no-bake Halloween Dessert.
Print Recipe |
Rate this Recipe
Prep Time: 20 minutes | Total Time: 20 minutes
Servings: 12
Calories: 65 kcal per serving
Author: Tammilee Tips
Ingredients
- 12 Nutter Butter cookies
- 24 Candy Eyes
- Vanilla Almond Bark (or white candy melts/white chocolate chips)
Instructions
- Gather all supplies and prep a baking sheet with parchment paper.
- Melt candy melts/almond bark in 30-second intervals, stirring thoroughly after every interval until smooth.
- Carefully dip the Nutter Butter Cookies into the white chocolate until fully coated. Place on the parchment-lined baking sheet.
- Immediately add Candy Eyeballs and let the top layer of chocolate set.
- Once the top layer is set, use a spoon to drizzle white chocolate in a zigzag pattern to create the mummy bandages.
Kitchen Tools
- Large Mixing Bowl
- Cookie Sheets
- Parchment Paper
Nutrition Facts
Nutrition Facts
Nutter Butter Mummies
Amount Per Serving
Calories 65 (Calories from Fat 27)
% Daily Value*
Fat 3g 5%
Saturated Fat 1g 6%
Polyunsaturated Fat 1g
Monounsaturated Fat 1g
Sodium 50mg 2%
Carbohydrates 10g 3%
Sugar 4g 4%
Protein 1g 2%
* Percent Daily Values are based on a 2000 calorie diet.
Love this recipe?
Follow @TammileeTIps on Pinterest for more delicious ideas!
Tried this recipe?
Mention @TammileeTipsLife when you share a photo on Instagram!
Do you love discovering new recipes? Be sure to check out our extensive collections, including a variety of copycat recipes, tempting dessert recipes, and effortless Crock Pot recipes.
Stay connected for all our latest recipe posts and culinary adventures! Follow Tammilee Tips on Facebook, Instagram, Pinterest, and Twitter.
