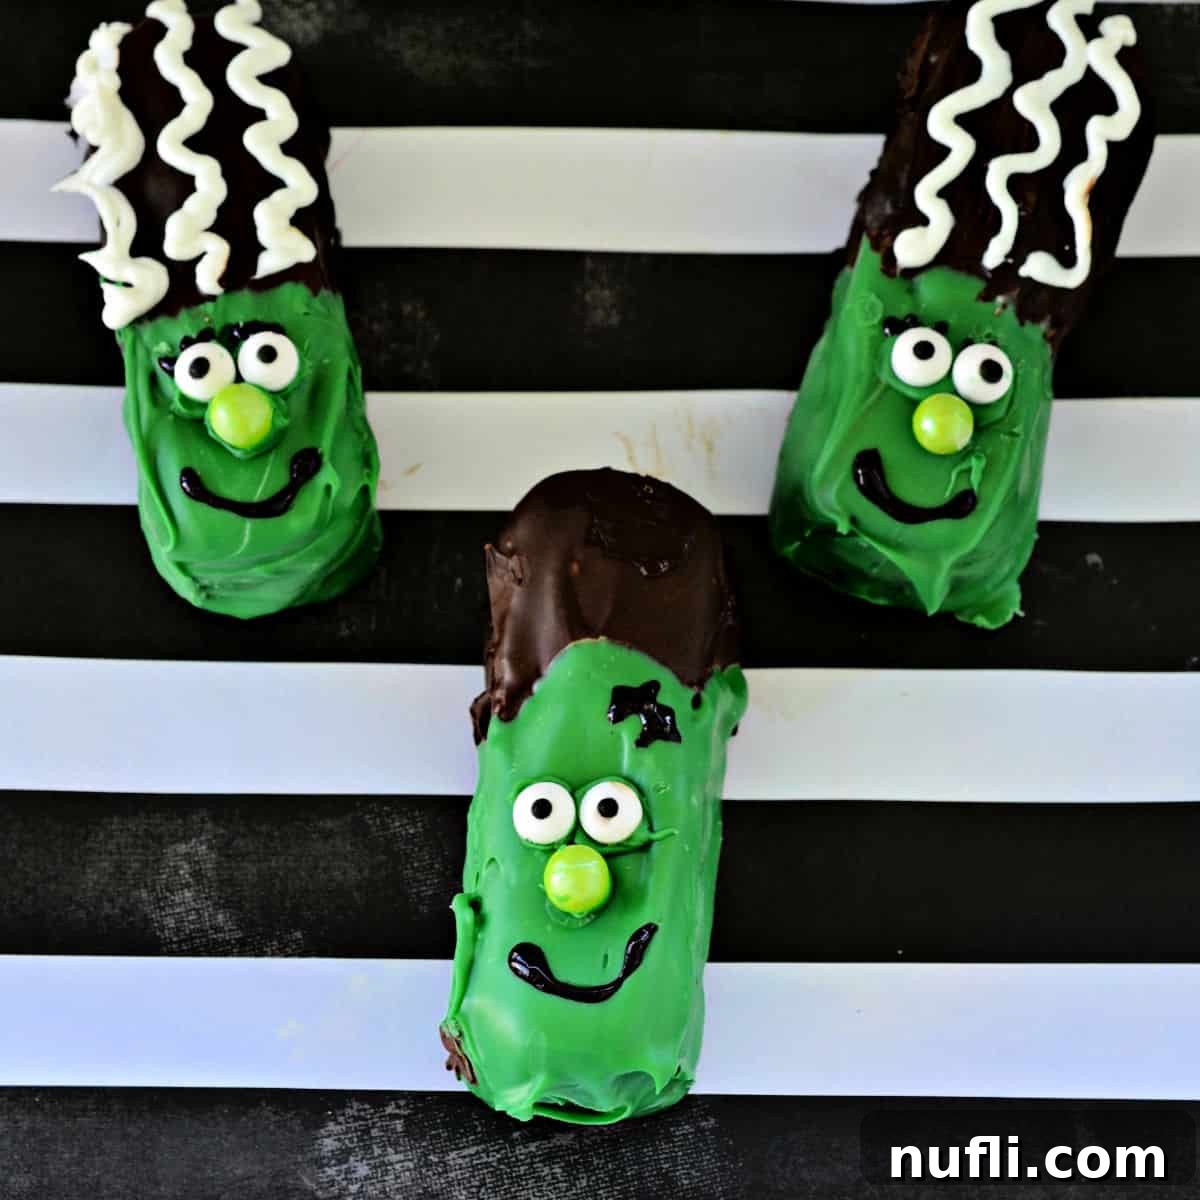
Get ready for some monstrously good fun this Halloween with our easy and super fun Frankenstein Twinkies! This delightful recipe offers a fantastic family Halloween activity that culminates in a spooky-sweet dessert everyone will adore. Forget complex baking; these no-bake treats are perfect for even the busiest ghouls and goblins, transforming simple snack cakes into iconic monster masterpieces. They are not only a joy to create but also a guaranteed hit at any Halloween party or a charming surprise in lunchboxes during the spooky season.
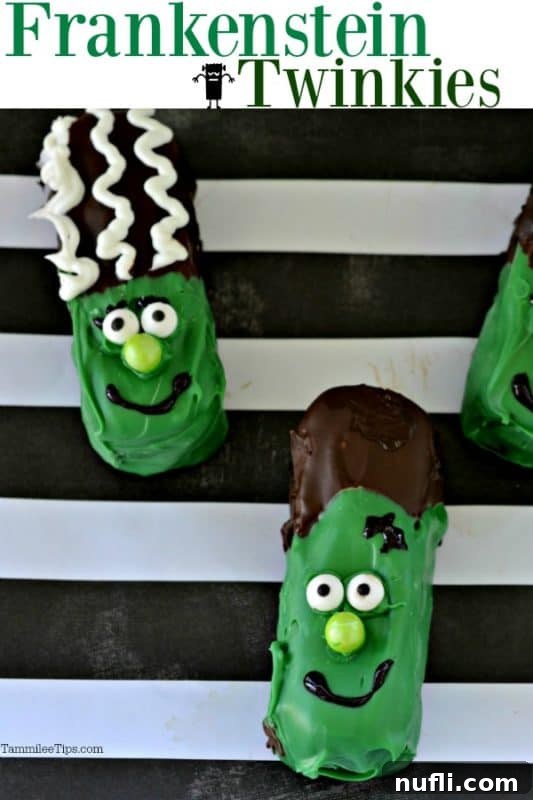
Frankenstein Twinkies: Your Go-To Halloween Treat
I absolutely adore crafting fun Halloween recipes! There’s something truly magical about turning everyday ingredients into themed treats that capture the spirit of the season. These “not-so-scary” Frankenstein Twinkies are an absolute favorite, blending simplicity with undeniable charm. They are the epitome of effortless Halloween baking, requiring no oven and minimal prep, making them an ideal project for families with young children or anyone looking for a quick yet impressive dessert.
While Halloween might still feel like a distant whisper on the wind, it’s never too early to start planning your spooktacular celebrations. Getting a head start on recipes like these Frankenstein Twinkies can help alleviate the last-minute rush, allowing you to truly savor the excitement leading up to October 31st. Whether you’re hosting a costume party, preparing for trick-or-treaters, or simply enjoying a cozy night in with a spooky movie, these treats fit perfectly into any Halloween scenario.
Why You’ll Love These Monster Treats
- Incredibly Easy: Perfect for beginners and seasoned decorators alike. No baking required!
- Kid-Friendly Fun: Little hands can easily participate in dipping, decorating, and creating their own monsters.
- Versatile: While Twinkies are classic, you can use various snack cakes to achieve different monster textures and sizes.
- Picture Perfect: These treats are utterly adorable and make fantastic additions to your Halloween party spread or social media feed.
- Delicious: Who doesn’t love a chocolate-covered snack cake? The combination of sweet cake, rich chocolate, and candy is irresistible.
A Spooktacular Family Activity
Halloween is a time for shared experiences and creating lasting memories. Making these Frankenstein Twinkies together is an excellent opportunity to bond with your family. Imagine the laughter and creativity as everyone designs their unique monster. It’s more than just a recipe; it’s an event! This hands-on activity encourages imagination and provides a sweet reward at the end. Plus, it’s a great way to introduce younger children to kitchen safety and simple cooking concepts in a fun, low-pressure environment.
As for our own Halloween plans, they are still up in the air! We might be embarking on some exciting travel adventures, and I can only imagine the delightful chaos that ensues at airport security during the weeks leading up to Halloween. Have you ever dressed up for Halloween, perhaps even while traveling? Sharing costume ideas and travel stories can add another layer of fun to the holiday anticipation. Regardless of where we end up, these Frankenstein Twinkies are definitely on the menu!
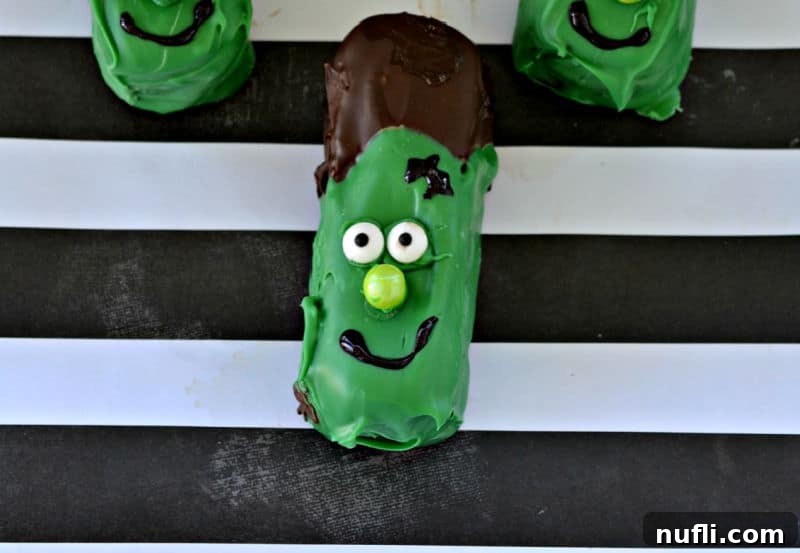
Gather Your Ghastly Ingredients
Creating these Frankenstein-inspired treats requires a few simple ingredients, most of which you can easily find at your local grocery store or craft supply shop. Quality ingredients ensure the best taste and a smooth decorating experience.
- Snack Cakes of Your Choice: The classic Twinkie is ideal for its oblong shape, but don’t hesitate to experiment! Sara Lee Devil’s Food Creme Cakes or similar cream-filled sponge cakes also work wonderfully, offering a slightly different texture and flavor profile.
- Semi-Sweet Chocolate or Candy Cocoa Melts: This will form the hair for your Frankenstein monsters. Semi-sweet chocolate chips melted down work great, but candy cocoa melts are often easier to work with, providing a smoother, more consistent coating without tempering.
- Green Melting Candy Wafers: These are crucial for creating Frankenstein’s iconic green skin. You can find them in various shades of green, so pick one that you feel best captures the monster’s look.
- Green Sixlets: These small, round candies are perfect for Frankenstein’s signature neck bolts or a cute nose. You could also use mini chocolate chips if you prefer a different look.
- Small Candy Eyes: These edible googly eyes bring your Frankenstein creations to life with minimal effort. They come in various sizes, so choose ones that fit your snack cakes best.
- Black Decorating Gel: Essential for drawing on smiles, stitches, scars, and even eyebrows, adding character to your monsters.
- White Frosting: Specifically needed if you plan to create the Bride of Frankenstein, for her signature white streaks in her hair. A ready-made tube of frosting with a fine tip works best.
Essential Equipment for Your Lab
Having the right tools can make this fun project even smoother and more enjoyable. These items are commonly found in most kitchens or are easily acquired for your Halloween crafting adventure.
- Large Mixing Bowl: While any microwave-safe bowl works for melting chocolate, a glass batter bowl with a handle can be incredibly convenient. It provides stability on the counter and makes dipping easier, especially when handling warm melts.
- Candy Dipper: This specialized tool is invaluable for cleanly dipping and retrieving the snack cakes from the melted candy. A fork can also work in a pinch, but a dipper minimizes mess and ensures an consistent coating.
- Parchment Paper: Absolutely essential for easy cleanup! Lining your baking sheets or counter with parchment paper prevents the coated snack cakes from sticking and makes transferring them a breeze.
- Baking Sheet: A sturdy baking sheet, ideally one with raised sides, provides a flat surface for your parchment paper-lined creations to set. The sides prevent any accidental slippage, a lesson learned the hard way!
- Halloween Serving Platter: For that extra touch of spooky charm, consider serving your finished Frankenstein Twinkies on a fun, themed platter. A coffin-shaped tray or a platter with bats and pumpkins can really enhance the presentation.
These treats also make wonderful gifts or party favors. Package them individually in small party bags tied with orange or black ribbons for a delightful take-home treat for your guests.
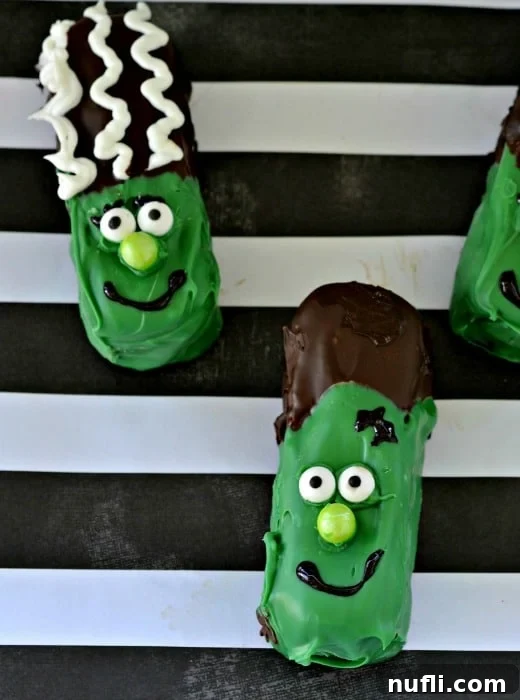
Step-by-Step: Crafting Your Frankenstein Twinkies
Follow these simple instructions to transform your snack cakes into adorable Halloween monsters. This recipe is designed for an assembly-line approach, making the process smooth and efficient for everyone involved.
- Prepare Your Workspace: Begin by laying a sheet of parchment paper over a baking sheet or directly onto your clean counter surface. This non-stick surface is crucial for the treats to harden without sticking. Also, open all your candy decorations (candy eyes, Sixlets, decorating gel) and place them into separate small bowls or on a plate within easy reach. An organized workspace makes decorating much easier!
- Melt the Chocolate (for hair): Place your semi-sweet chocolate or candy cocoa melts into a microwave-safe bowl. Heat according to the package instructions, typically in 30-second intervals, stirring well after each interval, until the chocolate is smooth and fully melted. Be careful not to overheat.
- Unwrap Snack Cakes: Carefully unwrap all your chosen snack cakes. Handle them gently to avoid breakage, as they can be delicate.
- Create the Hair: This is where your monsters start to take shape! Dip one end of each snack cake into the melted semi-sweet chocolate. For classic Frankenstein monsters, a simple dip of the end creates the messy hairline. For a “Bride of Frankenstein” look, dip about half of the snack cake to create a dramatic, swept-back hairstyle. You might use a small knife or an offset spatula to gently spread the chocolate evenly if needed.
- Allow Chocolate to Harden: Carefully place the chocolate-dipped snack cakes onto the parchment paper-lined baking sheet. Allow the chocolate to harden completely. You can speed this process up by placing the baking sheet in the refrigerator for 10-15 minutes.
- Melt the Green Candy Wafers (for face): While the chocolate hair is setting, melt the green candy wafers in a separate microwave-safe bowl, following the package instructions. Stir until smooth and lump-free.
- Dip for the Face: Once the chocolate hair has fully hardened, dip the opposite, undipped end of each snack cake into the melted green candy mixture. Ensure an even coating that meets the chocolate hairline to create Frankenstein’s distinct head. Place them back on the parchment paper to allow the green coating to set.
- Attach the Eyes: While the green coating is still slightly tacky (or after it has set, using a tiny dab of decorating gel or melted green candy), use the black decorating gel to attach two candy eyes onto each snack cake. Position them to give your monster a unique expression.
- Add the Nose (and optional bolts): Dip a green Sixlet (or a mini chocolate chip) into the green candy melts and gently press it onto the face to create a nose. For Frankenstein’s iconic neck bolts, you can also attach two Sixlets to the lower sides of the green-dipped portion of the snack cake using a dab of melted green candy.
- Draw on Features: Unleash your creativity with the black decorating gel! Draw on a smile, stitches across the forehead, scars, or menacing eyebrows to give your Frankenstein monsters personality.
- Bride of Frankenstein Details (Optional): If you’re making a Bride of Frankenstein, use a drawing tip or a ribbon tip on a tube of white frosting to create wavy, dramatic streaks or swirls in her chocolate hair, mimicking her famous white lightning bolt hairstyle.
Creative Variations & Serving Suggestions
The beauty of these Frankenstein Twinkies is how easily they can be customized. Feel free to unleash your inner mad scientist and experiment!
Frankenstein’s Bride & Other Monsters
Beyond the classic Frankenstein and his bride, consider other monster variations:
- Mummy Twinkies: Use white candy melts for the base, then drizzle thin lines of white candy melts across the cake to resemble bandages. Add candy eyes peeking out.
- Vampire Twinkies: Dip in red candy melts, add white candy fangs, and a touch of black gel for a widow’s peak.
- Zombie Twinkies: Use a duller green or gray candy melt, add some edible blood gel, and maybe even a few edible sprinkles for “brains.”
- Spider Twinkies: Dip in dark chocolate, add candy eyes, and use black decorating gel to draw eight spindly legs.
Presentation Perfect for Parties
How you present your treats can make all the difference. Arrange your Frankenstein Twinkies on a tiered serving tray for a dramatic effect, or scatter them amongst spooky decorations like plastic spiders, cobwebs, and dry ice (for visual effect, of course, not for consumption!). Individual cupcake liners can also make them easy for guests to grab. Don’t forget to take photos of your monstrous creations!
Beyond the Twinkies: More Halloween Fun
Halloween is a season for more than just treats; it’s a celebration of all things spooky and creative! From costume crafting to decorating your home, there are countless ways to immerse yourself in the holiday spirit.
- Costume Contests: Host a friendly competition for the best costume, offering small prizes.
- Spooky Movie Marathon: Cuddle up with classic horror films or family-friendly Halloween movies.
- Haunted House Decorating: Go all out with decorations to transform your home into a haunted haven.
- Pumpkin Carving: A timeless tradition that allows for endless artistic expression.
- Ghost Stories: Gather around a campfire or fireplace and share chilling tales.
Whatever your plans, remember that Halloween is about embracing the fun, the slightly eerie, and the opportunity to gather with loved ones.
Frequently Asked Questions about Frankenstein Twinkies
Can I use other types of snack cakes?
Absolutely! While Twinkies are a popular choice due to their classic shape, you can experiment with other cream-filled sponge cakes like Sara Lee Devil’s Food Creme Cakes, zebra cakes, or even Swiss rolls. The key is to pick a cake that holds its shape well when dipped.
How far in advance can I make these?
These Frankenstein Twinkies can be made 1-2 days in advance. Store them in an airtight container at room temperature to keep them fresh. If your home is very warm, you might store them in the refrigerator, but let them come to room temperature before serving for the best texture.
What if my chocolate or candy melts are too thick?
If your melts seem too thick for dipping, you can thin them slightly with a small amount of coconut oil or vegetable shortening (about 1 teaspoon per cup of melts). Stir well until you reach your desired consistency. Be careful not to add too much, or the melts might not set properly.
Can kids really help with this recipe?
Yes, this is a fantastic kid-friendly recipe! Children can help unwrap the cakes, dip them in the melted candies (with adult supervision for warm melts), attach the candy eyes and Sixlets, and get creative with the black decorating gel for the faces. It’s a fun and safe way to involve them in the kitchen.
How do I store leftover Frankenstein Twinkies?
Store any leftover treats in an airtight container at room temperature for up to 2-3 days. If you’ve used any fresh cream or dairy-based frosting that requires refrigeration, then they should be refrigerated.
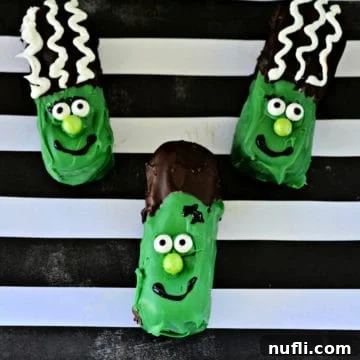
Frankenstein Twinkies for Halloween
How to make fun Frankenstein Twinkies perfect for Halloween parties and family activities.
Prep Time: 30 minutes
Total Time: 30 minutes
Author: Tammilee Tips
Print Recipe
Rate This Recipe
Ingredients
- Snack cakes of your choice (Twinkies, Sara Lee Devil’s Food Creme Cakes.)
- Semi-Sweet Chocolate or Candy Cocoa Melts
- Green Melting Candy Wafers
- Green Sixlets
- Small Candy Eyes
- Black Decorating Gel (You can find this online or at most major grocery stores)
- White icing
Instructions
- Put a sheet of parchment paper down on your counter. You will also want to open the candies and put them in their own bowl. This is a simple project, but it’s easiest to have it in an assembly line order.
- Melt the semi-sweet chocolate in a bowl according to the package’s instructions.
- Unwrap the snack cakes.
- Start with the hair. Dip one end of the snack cakes into the semi-sweet chocolates. For Frankenstein, we just dipped the ends. For the Brides of Frankenstein, we dipped about half of the snack cake in the semi-sweet chocolate. You may need a knife to help spread the chocolate.
- Lay the cakes on the parchment paper to allow to harden.
- Melt the green candy wafers according to package instructions into a bowl.
- Once the chocolate hair has hardened, dip the opposite corner of the snack cake in the green candy mixture.
- Using the decorating gel, attach two candy eyes on each snack.
- Dip a Sixlet in the green candy melts and attach it as a nose on each snack.
- Use the decorating gel to create a smile, eyelashes, or scar marks on your Frankensteins.
- For the Bride of Frankenstein, use a drawing tip or a ribbon tip and make some waves with white frosting on her hair.
Kitchen Tools
- Parchment Paper
- Cookie Sheets
Love this recipe? Follow @TammileeTIps on Pinterest!
Tried this recipe? Mention @TammileeTipsLife when you share a photo!
More Fang-tastic Halloween Recipes
If you enjoyed making these Frankenstein Twinkies, you’ll love exploring our other Halloween-themed recipes. From sweet treats to savory snacks, we have everything you need to make your holiday extra special!
- Bat Nutter Butters
- Candy Corn Bark
- Witches Broom Sticks
- Creepy Egg Eyes
- Crazy Eye Cookies
Check out all of our Halloween Recipes for more inspiration.
Do you love recipes? Be sure to explore our diverse collection of culinary delights, including our copycat recipes, irresistible dessert recipes, and convenient CrockPot Recipes, perfect for any occasion.
Follow Tammilee Tips on MSN, Facebook, Instagram, and Pinterest, for all our latest recipe posts and delicious ideas!
Recipe originally shared on September 25, 2015. Updated October 2020 and further expanded for SEO and clarity in [Current Year].
