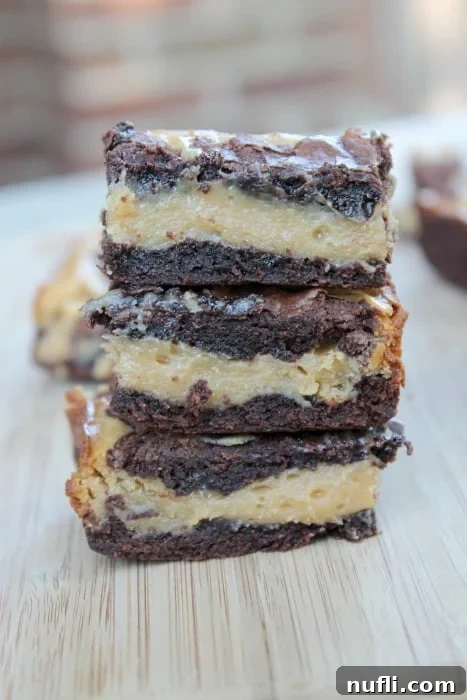
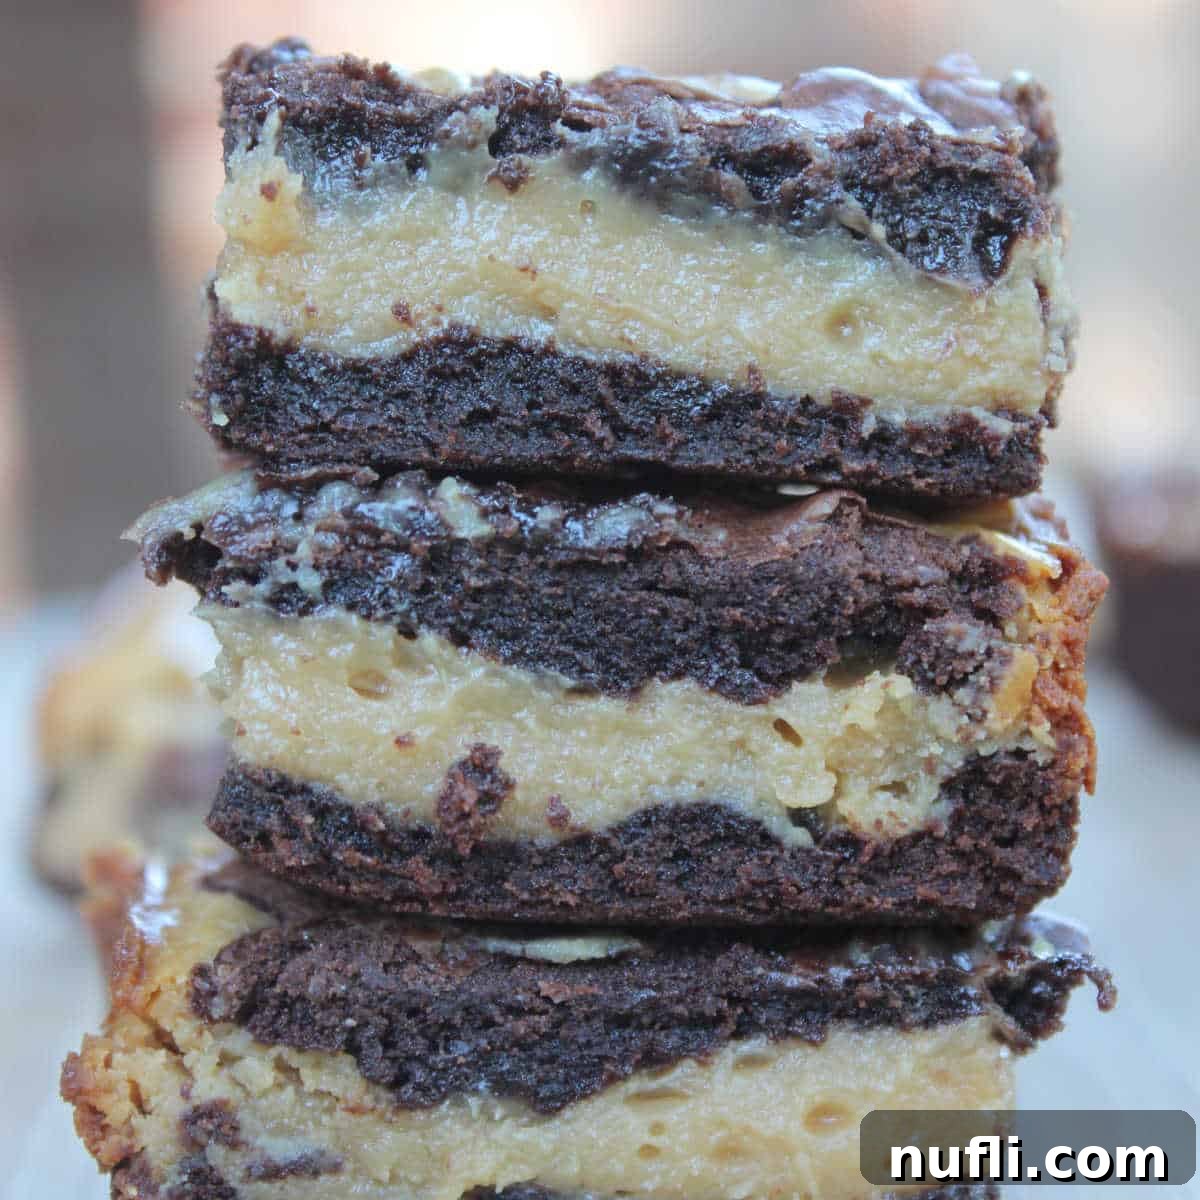
Indulge in the irresistible fusion of rich chocolate and creamy peanut butter with these decadent **Chocolate Peanut Butter Buckeye Bars**. Often celebrated as ‘Buckeye Bars’ due to their resemblance to the buckeye candy (a chocolate-dipped peanut butter ball with a small circle of peanut butter showing), these bars are a beloved treat that promises to be the star of any gathering. Perfect for potlucks, holiday celebrations, or simply as a delightful family dessert, their ease of preparation and deeply satisfying flavor make them an instant classic.

Unveiling the Charm of Buckeye Bars: A Delicious Heritage
The allure of Buckeye Bars lies not only in their exquisite taste but also in their nostalgic connection to American culture, particularly in the state of Ohio. The “Buckeye” moniker pays homage to the official state tree, the Ohio Buckeye, whose nuts resemble the classic peanut butter confection. For many, these bars evoke cherished memories and a sense of regional pride. Personally, these delicious chocolate peanut butter bars always remind me of my late Grandfather, a devoted Ohio State fan.
His unwavering passion for Ohio State Football was legendary. He had attended OSU and proudly displayed his Varsity O for the rifle team above his desk. Visiting my grandparents in Ohio meant more than just family time; it meant witnessing my Grandfather’s spirited transformation as he cheered on his beloved Buckeyes. These bars, with their layers of deep chocolate and smooth peanut butter, are a sweet tribute to his love for Ohio and his unforgettable team spirit. Every bite feels like a warm embrace of those treasured memories.
Why This Buckeye Bars Recipe Is a Must-Try
Beyond the sentiment, this recipe for Chocolate Peanut Butter Buckeye Bars stands out for its incredible simplicity and the profound satisfaction it delivers. You’ll be amazed at how quickly you can whip up this crowd-pleasing dessert, often with ingredients you already have stashed in your pantry. The foundation is a rich, fudgy chocolate brownie mix, which streamlines the baking process significantly. This eliminates the need for complex scratch-baking, making it an ideal choice for both novice and experienced bakers seeking a fuss-free yet impressive dessert.
The combination of a moist brownie base with a creamy, rich peanut butter layer creates a textural and flavor masterpiece. The sweetness of the chocolate perfectly complements the slightly salty depth of the peanut butter, resulting in a harmoniously balanced treat that appeals to nearly everyone. Whether you’re preparing for a holiday feast, a casual family get-together, or simply craving something sweet and comforting, these bars are a guaranteed hit. They’re not just “good”; they’re melt-in-your-mouth, ‘can I have another?’ good, a truly irresistible indulgence that you’ll want to make again and again.

Key Ingredients for Irresistible Chocolate Peanut Butter Buckeye Bars
Creating these sensational Buckeye Bars requires a handful of common ingredients, ensuring that they are as accessible as they are delicious. Here’s what you’ll need, along with some insights and optional additions to elevate your baking experience:
- Brownie Mix: A high-quality boxed brownie mix is your secret weapon for speed and consistency. While you can certainly use your favorite classic scratch-made chocolate brownie recipe, a mix makes this dessert remarkably quick to assemble.
- Eggs: Essential for binding the brownie batter and contributing to its fudgy texture.
- Vegetable Oil: Adds moisture and richness to the brownies, ensuring they remain tender.
- Water: Helps to achieve the perfect brownie batter consistency.
- Sweetened Condensed Milk: This is the magic ingredient for the creamy peanut butter layer. It provides sweetness and an incredibly smooth, melt-in-your-mouth texture that sets these bars apart. If you love recipes with sweetened condensed milk, explore more options here.
- Peanut Butter: The star of the show! Use your favorite creamy peanut butter for the smoothest layer. For an added textural contrast, feel free to use crunchy peanut butter or mix in a handful of chopped roasted peanuts into the peanut butter layer.
Optional Decadence: To make your Chocolate Peanut Butter Buckeye Bars even more indulgent, consider stirring chocolate chips into your brownie batter before baking. This extra burst of chocolate will delight any chocoholic!
Essential Equipment for Seamless Baking
Having the right tools can make all the difference in your baking journey. For these Buckeye Bars, a few key pieces of equipment will ensure a smooth and enjoyable process:
- 9×9 Baking Pan: I personally prefer a 9×9 inch pan because it yields a wonderfully thick brownie and peanut butter layer, creating a substantial and satisfying bar. If you’re looking to serve a larger crowd or prefer thinner bars, a 9×13 casserole baking dish is an excellent alternative.
- Hand Mixer or Stand Mixer: Either a hand mixer or a stand mixer will make quick work of combining your brownie ingredients and whisking together the peanut butter layer to perfect smoothness.
- Parchment Paper: A true game-changer for easy cleanup and serving! Lining your baking pan with parchment paper means you can effortlessly lift the cooled bars out of the pan for neat slicing.
- Heat-Resistant Potholders: Safety first! Investing in good heat-resistant potholders are a kitchen essential. A few years ago, we had a fire scare with a cloth potholder, and since then, we only trust silicone ones.

Chocolate Peanut Butter Buckeye Bars
Easy to make Chocolate Peanut Butter Bars, also known as Buckeye Bars. These bars feature a rich brownie base topped with a creamy peanut butter layer, making them absolutely delicious.
Rating: 3.82 from 48 votes
Print Recipe | Rate Recipe
- Prep Time: 10 minutes
- Cook Time: 30 minutes
- Total Time: 40 minutes
- Servings: 16
- Calories: 329 kcal
- Author: Tammilee Tips
Ingredients
- 19.5 Ounce Brownie Mix
- 2 Eggs
- ¼ cup Water
- ⅓ cup Vegetable Oil
- 14 Ounce Sweetened Condensed Milk
- ½ cup Peanut Butter
Instructions
- Preheat your oven to 350 degrees Fahrenheit (175 degrees Celsius). Prepare your 9×9 baking pan by lining it with parchment paper, leaving an overhang on two sides for easy removal later.
- In a large mixing bowl, combine the brownie mix, eggs, water, and vegetable oil. Beat with an electric mixer on medium speed until all ingredients are well combined and the batter is smooth. Do not overmix.
- Carefully remove about half of the brownie batter from the bowl and set it aside in a separate bowl. This will be used for the top layer of your bars.
- Spread the remaining half of the brownie batter evenly into the prepared baking pan. Use a spatula to ensure it reaches all corners.
- In a clean bowl, whisk together the sweetened condensed milk and peanut butter until the mixture is completely smooth and uniform. This should only take a couple of minutes.
- Pour the peanut butter mixture evenly over the brownie layer in the pan. Gently spread it to cover the entire surface, taking care not to disturb the brownie layer beneath.
- Now, take the reserved brownie mixture. Using your fingers or a spoon, separate it into small, random pieces. Flatten each piece slightly and then strategically place them on top of the peanut butter layer. The goal is to create a delightful mosaic of chocolate over the peanut butter, which will melt and create a beautiful marbled effect during baking.
- Bake for 25-30 minutes, or until the top of the bars is set and the edges are lightly golden brown. A toothpick inserted into the brownie portions should come out with moist crumbs, not wet batter.
- Allow the bars to cool completely in the pan on a wire rack before cutting them into squares. This is crucial for clean cuts and for the peanut butter layer to fully set. Once cooled, use the parchment paper overhang to lift the entire slab out of the pan, then slice into 16 perfect bars.
Kitchen Tools
- 9X9 Baking Pan
- KitchenAid Mixer (or Hand Mixer)
- Parchment Paper
Nutrition
Nutrition Facts
Chocolate Peanut Butter Buckeye Bars
Amount Per Serving
Calories 329 Calories from Fat 144
% Daily Value*
Fat 16g 25%
Saturated Fat 4g 25%
Cholesterol 29mg 10%
Sodium 177mg 8%
Potassium 152mg 4%
Carbohydrates 42g 14%
Fiber 1g 4%
Sugar 31g 34%
Protein 6g 12%
Vitamin A 96IU 2%
Vitamin C 1mg 1%
Calcium 77mg 8%
Iron 1mg 6%
* Percent Daily Values are based on a 2000 calorie diet.
Love this recipe? Follow @TammileeTIps on Pinterest!
Tried this recipe? Mention @TammileeTipsLife when you share a photo!
Tips for Achieving Buckeye Bar Perfection
While this recipe is incredibly straightforward, a few expert tips can ensure your Chocolate Peanut Butter Buckeye Bars turn out perfectly every time:
- Don’t Overmix the Brownie Batter: Overmixing can develop the gluten in the flour, leading to tougher brownies. Mix just until combined for a fudgier texture.
- Room Temperature Ingredients: For the peanut butter layer, having your sweetened condensed milk and peanut butter at room temperature will help them combine much more smoothly and easily.
- Even Spreading: Take your time to spread both the initial brownie layer and the peanut butter layer evenly. This ensures consistent thickness and flavor distribution in every bar.
- Cool Completely: Patience is a virtue, especially with these bars! Allowing them to cool completely before slicing is crucial. The peanut butter layer needs time to set firm, otherwise, your bars will be messy and difficult to cut neatly. Chilling them in the refrigerator for 30 minutes to an hour can further aid in setting and make for cleaner cuts.
- Sharp Knife: Use a sharp, clean knife for cutting. For extra neat slices, wipe the knife clean with a warm, damp cloth after each cut.
Creative Variations to Customize Your Buckeye Bars
These Chocolate Peanut Butter Buckeye Bars are fantastic as is, but they also serve as a wonderful canvas for customization. Here are some ideas to make them uniquely yours:
- Nutty Crunch: As mentioned, replace creamy peanut butter with crunchy peanut butter, or fold in 1/2 cup of chopped roasted peanuts into the peanut butter layer for extra texture.
- Chocolate Drizzle: Once cooled, melt some extra chocolate chips or dark chocolate and drizzle it decoratively over the top of the bars for an elegant finish and an extra chocolate kick.
- Sea Salt Sprinkle: A light sprinkle of flaky sea salt over the top before chilling can enhance the flavors and add a sophisticated touch, balancing the sweetness.
- Mini Buckeye Bites: Instead of cutting into large bars, slice them into smaller, bite-sized squares for a perfect party appetizer.
- Gluten-Free Option: Many excellent gluten-free brownie mixes are available. Simply use a certified gluten-free brownie mix to adapt this recipe for those with dietary restrictions.
Serving Suggestions and Storage
These Chocolate Peanut Butter Buckeye Bars are incredibly versatile for serving and easy to store:
- Serving: They are perfect served at room temperature, but a slight chill can enhance their fudgy texture. They make an excellent dessert for parties, holiday gatherings, potlucks, or a simple after-dinner treat. Pair them with a cold glass of milk, coffee, or a scoop of vanilla ice cream for an extra special indulgence.
- Storage: Store leftover Buckeye Bars in an airtight container at room temperature for up to 3-4 days, or in the refrigerator for up to a week. For longer storage, they freeze beautifully for up to 2-3 months. Just be sure to wrap them tightly in plastic wrap and then aluminum foil before freezing. Thaw at room temperature or in the refrigerator before serving.
Frequently Asked Questions About Buckeye Bars
Here are answers to some common questions about making and enjoying these delightful Chocolate Peanut Butter Buckeye Bars:
- Can I use natural peanut butter for this recipe?
- While you can, natural peanut butter (the kind that separates) tends to be oilier and can alter the texture of the peanut butter layer, making it less firm. For best results, use a creamy, no-stir peanut butter like Jif or Skippy.
- Do I have to use a brownie mix? Can I make the brownies from scratch?
- Absolutely! Using a brownie mix makes the recipe quicker and simpler, but if you have a favorite scratch brownie recipe, feel free to use it. Just ensure it yields a similar volume of batter for a 9×9 inch pan.
- How do I get clean cuts?
- The key to clean cuts is allowing the bars to cool completely and even chilling them in the refrigerator. Use a long, sharp knife, wiping the blade clean with a warm, damp cloth between each cut to prevent sticking and smudging.
- Can I double the recipe?
- Yes, you can easily double this recipe. You will need a larger baking dish, such as a 9×13 inch pan. Adjust baking time slightly, as a larger batch might take a few extra minutes.
- What if my peanut butter layer is too thin?
- If you used a larger pan than recommended, the layers might appear thinner. Sticking to a 9×9 inch pan ensures a thick, satisfying peanut butter layer. If you only have a larger pan, consider making 1.5 times the recipe to achieve thicker layers.
More Delightful Dessert Bar Recipes to Explore
If you love the convenience and deliciousness of dessert bars, be sure to check out some of our other easy and mouth-watering recipes:
- 2 Ingredient Lemon Bars
- Peanut Butter Cheerio Bars
- Golden Grahams Smores Bars
- Lemon Cheesecake Bars
- Peach Bars
Explore all of our easy cookie recipes for more sweet inspiration!
Do you love recipes? Check out our copycat recipes, dessert recipes, and our CrockPot Recipes.
Follow Tammilee Tips on MSN, Facebook, Instagram, and Pinterest for all of our latest recipe posts and culinary adventures.
Recipe originally shared on September 18, 2013. Updated on April 4, 2020.
