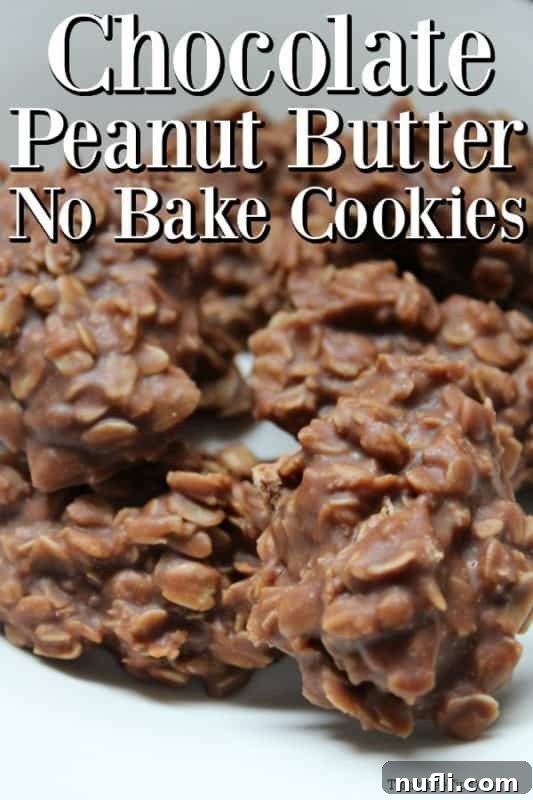
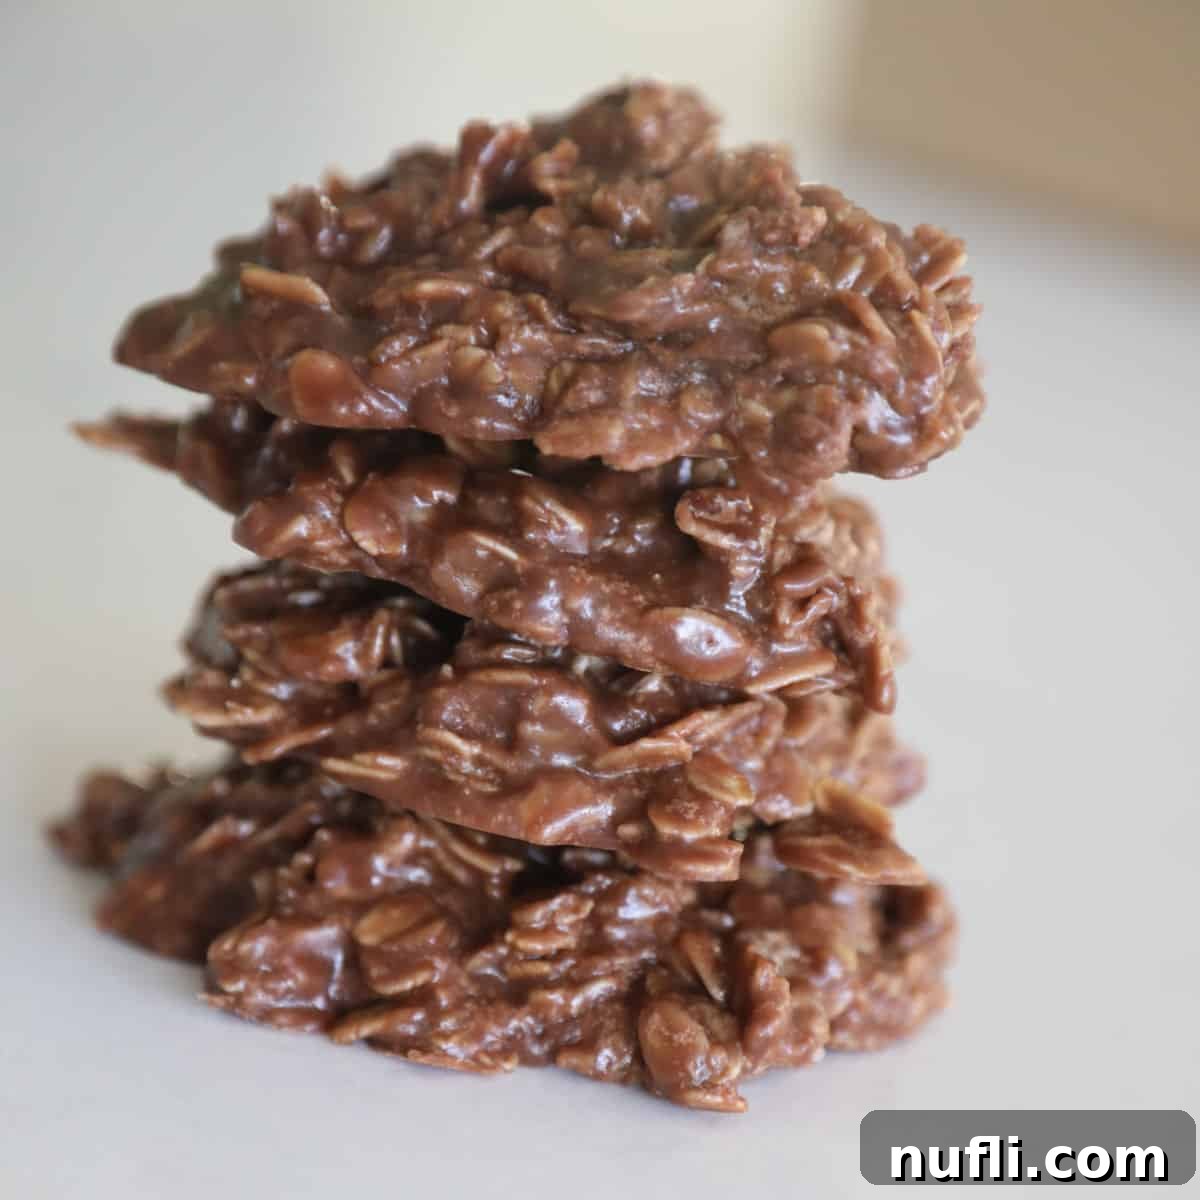
Forget the oven and embrace pure dessert bliss with these incredibly easy and utterly delicious Chocolate Peanut Butter No-Bake Cookies. Perfectly combining the rich, creamy goodness of peanut butter with decadent chocolate and hearty oats, these treats are a go-to for any sweet craving. Whether you’re a seasoned baker or a kitchen novice, this recipe guarantees a fantastic outcome every time, without turning on your oven!

If you’ve ever dreamt of a dessert that tastes gourmet but comes together in minutes with minimal fuss, your dream recipe has arrived. These no-bake cookies are a testament to how simple ingredients can create something truly extraordinary. They’re ideal for busy weeknights, summer parties when you want to avoid heating up the kitchen, or anytime you need a quick chocolate and peanut butter fix that will satisfy everyone’s sweet tooth.
Why You’ll Love These Chocolate Peanut Butter No-Bake Cookies
There’s a special kind of magic in no-bake desserts, and these chocolate peanut butter cookies are no exception. They offer a delightful chewiness from the oats, a comforting sweetness, and the unbeatable combination of chocolate and peanut butter that has captured hearts for generations. This recipe isn’t just easy; it’s foolproof, making it a favorite for home cooks of all skill levels, from beginners to seasoned dessert enthusiasts.
- Effortless Preparation: No oven required, saving you time, energy, and keeping your kitchen cool, especially during warmer months.
- Classic Flavor Duo: The timeless pairing of rich chocolate and creamy peanut butter creates an addictive taste that’s universally loved.
- Quick to Make: From gathering ingredients to dropping them on parchment paper, these cookies are ready in under 30 minutes of active preparation.
- Simple, Accessible Ingredients: Uses common pantry staples you likely already have on hand, making it a convenient last-minute dessert.
- Crowd-Pleaser: Loved by kids and adults alike, these cookies are perfect for school lunches, office potlucks, family gatherings, or just a delightful treat for yourself.
- Customizable: Easily adapt the recipe with various add-ins and flavor variations to suit your preferences.
The Story Behind Our Family’s Favorite No-Bake Cookies
It’s always an adventure when my husband, John, decides to take over the kitchen. While he’s a capable cook, I admit a slight apprehension sometimes creeps in when I hear the clanking of pots and pans and see him meticulously pulling out measuring cups. This particular day, however, was different. John was on a mission to create a batch of no-bake cookies, and the result was nothing short of spectacular: these amazing Chocolate Peanut Butter No-Bake Cookies!
His culinary escapade that day cemented this recipe as a household favorite. It’s incredibly simple to follow, yielding consistently fantastic results. The only part that truly requires your undivided attention, and where many new bakers might stumble, is achieving the perfect boil for the mixture. But don’t worry, with a few crucial tips and a timer, you’ll master this essential step in no time!
Mastering the Boil: The Secret to Perfectly Set No-Bake Cookies
The key to perfectly set no-bake cookies lies in precisely boiling the sugar, cocoa, butter, and milk mixture. This step is critical for ensuring your cookies harden properly and don’t turn into a delicious, yet un-cookie-like, crumbly mound. It’s a delicate balance: boil it for too short a time, and your cookies won’t set; boil it for too long, and they might become dry, crumbly, and brittle. Here’s how to get it right for consistent, chewy perfection:
- Bring to a Rolling Boil: Once your mixture of sugar, cocoa, butter, and milk comes to a boil, stir continuously. Make sure it’s a *rolling boil* – meaning it continues to boil vigorously even when stirred, with large bubbles breaking the surface.
- Set a Timer Instantly: As soon as the rolling boil is achieved, set a timer for exactly 1 minute. This is your golden window! Boiling for this specific duration allows the sugar to reach the correct temperature and consistency needed for the cookies to set perfectly.
- Avoid Over-boiling: Boiling for much longer than a minute can cause too much moisture to evaporate and the sugar to crystallize excessively, leading to dry, crumbly cookies. Stick strictly to that one-minute mark!
- Visual Cues: After one minute of vigorous boiling, the mixture should appear shiny and slightly thickened. Its color might also deepen slightly.
- Keep Stirring: Continue to stir throughout the boiling process to prevent the mixture from sticking to the bottom of the pan and burning, which can affect the flavor.
I always set a timer on my stove to guarantee I hit that crucial one-minute mark. This simple but precise step makes all the difference between a gooey, delicious mess (still edible with a spoon, of course!) and perfectly formed, chewy cookies ready for stacking and sharing. Don’t rush or extend this step, and you’ll be rewarded with fantastic results.
Ingredients for Irresistible Chocolate Peanut Butter No-Bake Cookies
Gathering your ingredients is the first step to success. This recipe uses simple, accessible items that combine to create a truly magical treat. For the best results, always use good quality ingredients:
- 2 Cups Granulated Sugar: This provides the essential sweetness and plays a critical role in the texture, helping the cookies set properly.
- 4 Tablespoons Unsweetened Cocoa Powder: The source of our rich chocolate flavor. Using a good quality cocoa powder will ensure a deeper, more pronounced chocolate taste.
- 1 Stick (½ Cup) Butter: Acts as a binding agent, contributing to the creamy texture and richness of the cookies. Unsalted butter is generally preferred for baking, but salted butter can also be used.
- ½ Cup Milk: Adds necessary moisture and helps dissolve the sugar, forming the base of the chocolate mixture. Any type of milk (dairy or non-dairy) typically works, though whole milk offers a slightly richer flavor.
- 1 Cup Creamy Peanut Butter: The star flavor! Opt for creamy peanut butter for a smooth, consistent texture throughout the cookie. If using natural peanut butter, stir it very well to incorporate any separated oils.
- 1 Tablespoon Pure Vanilla Extract: A crucial flavor enhancer that brings out the best in both the chocolate and peanut butter. Don’t skip this, as it adds warmth and depth!
- 2 Cups Quick-Cooking Oatmeal: The primary dry ingredient that gives these cookies their classic chewy texture and body. Quick oats absorb moisture faster than old-fashioned rolled oats, which is ideal for no-bake recipes to ensure proper setting.
Essential Kitchen Tools for No-Bake Success
While this recipe is incredibly simple, having the right tools makes the process even smoother and more enjoyable:
- Large Saucepan: A sturdy, heavy-bottomed saucepan is essential for combining and boiling the sugar mixture. Ensure it’s large enough to prevent boil-overs when the mixture is bubbling vigorously.
- Stirring Spoon or Whisk: To mix ingredients thoroughly and ensure even heating and prevent scorching during the boiling process.
- Measuring Cups and Spoons: Accurate measurements are crucial for the success of this recipe, particularly for the liquid and sugar components.
- Kitchen Timer: Absolutely critical for precisely timing the 1-minute boil. This is the make-or-break step!
- Parchment Paper or Wax Paper: Absolutely essential for dropping the hot cookie mixture onto. It prevents sticking and makes cleanup incredibly easy, ensuring your cookies lift off perfectly once set. We are huge fans of using parchment paper for easy handling and serving of these delightful treats.
Step-by-Step Instructions to Make Your No-Bake Cookies
Follow these simple steps for perfect Chocolate Peanut Butter No-Bake Cookies that will disappear faster than you can make them:

Chocolate Peanut Butter No-Bake Cookies Recipe
Easy and delicious Chocolate Peanut Butter No-Bake Cookies Recipe
Prep Time:
10 minutes
Cook Time:
15 minutes
Total Time:
25 minutes
Servings:
16
Calories:
271
kcal
Author:
Tammilee Tips
Ingredients
- 2 Cups White Sugar
- 4 tablespoons Cocoa Powder
- 1 stick Butter
- ½ Cup Milk
- 1 Cup Peanut Butter
- 1 Tablespoon Vanilla Extract
- 2 Cups Oatmeal
Instructions
- Step 1: Combine and Boil. In a large saucepan, combine 2 cups of granulated sugar, 4 tablespoons of unsweetened cocoa powder, 1 stick (½ cup) of butter, and ½ cup of milk. Bring this mixture to a rolling boil over medium heat, stirring constantly to prevent scorching.
- Step 2: Add Remaining Ingredients. Once the mixture reaches a rolling boil, continue to boil for exactly 1 minute, stirring frequently. Immediately remove the saucepan from the heat. Quickly stir in 1 cup of creamy peanut butter, 1 tablespoon of pure vanilla extract, and 2 cups of quick-cooking oatmeal. Mix well until all ingredients are thoroughly combined and the oats are fully coated.
- Step 3: Drop and Cool. Working quickly before the mixture sets, drop spoonfuls of the cookie mixture onto sheets of parchment paper or wax paper. You can use a regular spoon, a small cookie scoop, or even a small ice cream scoop for uniform sizes. Allow the cookies to cool completely at room temperature for about 30-60 minutes, or you can speed up the process by placing them in the refrigerator for 15-20 minutes until firm.
Kitchen Tools
- Saucepan
- Parchment Paper
Tips for No-Bake Cookie Success
Even though these cookies are famously easy, a few extra pointers can ensure your batch is absolutely perfect every time:
- Measure Accurately: Precision is key in baking, especially for the liquid ingredients and the crucial boiling time. Use proper measuring cups and spoons.
- Stir Constantly: While boiling the sugar mixture, keep stirring to prevent it from burning at the bottom of the pan, which can impart an unpleasant flavor.
- Work Quickly: Once you add the peanut butter, vanilla, and oats, the mixture will start to set very rapidly. Be prepared to drop the cookies onto parchment paper immediately after mixing.
- Parchment Paper is Your Best Friend: Seriously, do not skip this step! It ensures easy removal of the cooled cookies and makes cleanup virtually nonexistent.
- Even Sizing for Even Cooling: For consistent texture and a professional look, try to make your cookies roughly the same size when dropping them.
- Room Temperature Ingredients (Optional): While not strictly necessary for no-bakes, ensuring butter and milk are at room temperature can help them incorporate more smoothly.
Flavor Variations and Customizations
While the classic chocolate peanut butter combination is perfect as is, these no-bake cookies are also wonderfully adaptable. Feel free to experiment with these ideas to put your own unique spin on this delightful treat:
- Nutty Additions: For extra crunch and flavor, stir in ½ cup of chopped peanuts, walnuts, or pecans along with the oatmeal.
- Different Extracts: Swap vanilla extract for other flavorings like almond extract, peppermint extract (for a festive holiday twist), or even a touch of coffee extract to deepen the chocolate flavor.
- Extra Chocolate Boost: Fold in ½ cup of mini chocolate chips, chocolate chunks, or even white chocolate chips after removing the mixture from the heat for an even more intense chocolate experience.
- Coconut Delight: Add ½ cup of shredded coconut (sweetened or unsweetened) for a tropical twist and delightful texture.
- White Chocolate Drizzle: Once the cookies have cooled and set, melt some white chocolate chips and drizzle them over the top for an elegant finish and an extra layer of sweetness.
- Sea Salt Sprinkle: A tiny pinch of flaky sea salt sprinkled over the top of the still-warm cookies can enhance both the chocolate and peanut butter flavors beautifully.
Serving and Storing Your No-Bake Cookies
These cookies are best enjoyed once they have fully set and cooled, allowing their flavors and textures to develop perfectly. They make a fantastic anytime snack, a delightful dessert after dinner, or a wonderful addition to a potluck, bake sale, or party spread. Their portability and ease make them a host’s dream!
Storage: Store leftover Chocolate Peanut Butter No-Bake Cookies in an airtight container at room temperature for up to 3-5 days. If your kitchen is particularly warm, or if you prefer a firmer cookie, you can store them in the refrigerator, which can extend their freshness for up to a week. For longer storage, these cookies can also be frozen for up to 2-3 months in a freezer-safe container, separated by layers of parchment paper to prevent sticking. Thaw at room temperature before serving for the best texture.
Nutrition Information (Approximate per serving)
Calories from Fat 126
Frequently Asked Questions (FAQs)
Here are some common questions and answers to help you perfect your no-bake cookies:
Can I use old-fashioned oats instead of quick oats?
While quick oats are highly recommended for their ability to absorb moisture quickly and create the desired chewy, yet firm texture, old-fashioned rolled oats can be used as a substitute. However, be aware that they might result in a slightly chewier cookie and may require a tiny bit longer for the mixture to set properly. The overall texture will be a bit different, potentially less uniform.
My cookies are too sticky or don’t set. What went wrong?
This is almost always due to not boiling the sugar, cocoa, butter, and milk mixture for the correct duration. The sugar mixture needs to reach a certain temperature (the soft-ball stage, which is around 235-240°F or 113-116°C) for the cookies to set properly. Ensure you bring it to a full, rolling boil and time it for precisely 1 minute. Humidity in your kitchen can also sometimes slightly affect setting, but under-boiling is the primary culprit.
My cookies are dry and crumbly. How can I fix this?
Dry and crumbly cookies usually indicate that the mixture was boiled for too long. Over-boiling causes too much moisture to evaporate and the sugar to over-crystallize, leading to a brittle texture. For future batches, ensure you stick strictly to the 1-minute boiling time. Unfortunately, a batch that is already dry and crumbly cannot typically be salvaged back to a chewy consistency, but they’re still edible as a topping for ice cream or yogurt!
Can I make these cookies vegan?
Yes, absolutely! You can easily adapt this recipe to be vegan-friendly. Simply substitute plant-based butter (like a vegan stick butter alternative) for regular butter and use your preferred non-dairy milk (such as almond milk, oat milk, or soy milk). Ensure that your chosen peanut butter and cocoa powder are also certified vegan. The rest of the ingredients are typically plant-based. The texture might vary slightly depending on the substitutes used, but the resulting cookies should still be delicious.
More Delicious Cookie Recipes to Explore
If you loved these easy no-bake delights, you’ll definitely want to check out some of our other fantastic cookie recipes. From classic comfort foods to unique flavor combinations, there’s a cookie for everyone and every occasion!
- Peanut Butter and Jelly Cookie Bars
- Coconut Pineapple Drop Cookies
- Apple Oatmeal Raisin Cookies
- Chocolate Peanut Butter Cake Mix Cookie Bars
- Bacon Peanut Butter Cookies
Explore More of Our Delightful Recipes
Beyond cookies, our kitchen is always buzzing with new ideas and delicious creations! Dive into our extensive collection of recipes covering every meal and occasion:
- Copycat Recipes: Recreate your restaurant and fast-food favorites right at home with our easy-to-follow guides.
- Dessert Recipes: From comforting cakes and pies to innovative sweet treats and healthier options, find your next favorite dessert.
- Crock Pot Recipes: Discover effortless, slow-cooked meals that are perfect for busy days, delivering maximum flavor with minimal fuss.
Stay Connected with Tammilee Tips
Don’t miss out on our latest delicious recipes, kitchen adventures, and helpful cooking tips! Follow Tammilee Tips on your favorite social media platforms for daily inspiration and updates:
Recipe originally shared on March 14, 2013. Updated October 2020. This article was last revised and expanded in [Current Month, Year – e.g., May, 2024] to provide the most comprehensive guide to making perfect Chocolate Peanut Butter No-Bake Cookies, ensuring an enjoyable and successful baking experience for everyone.
