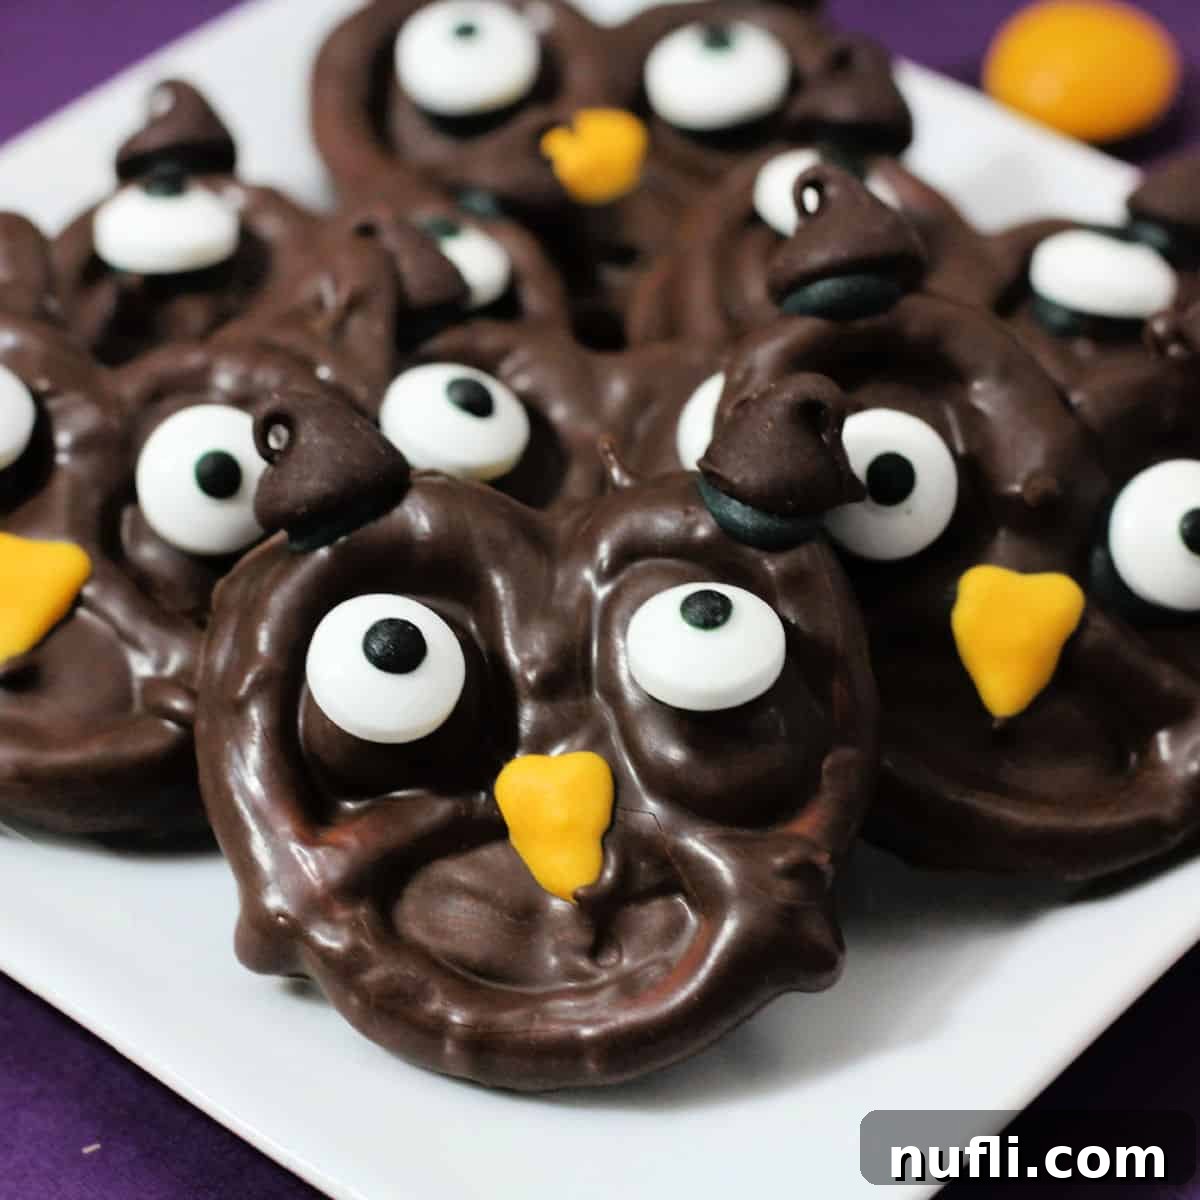
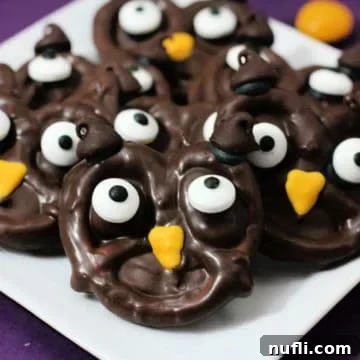
Get ready to add a sprinkle of spooky charm to your Halloween festivities with these absolutely adorable Halloween Owl Pretzels! These irresistible treats are not only a feast for the eyes but also delightfully simple to create, making them the perfect addition to any fall gathering, costume party, or a fun afternoon activity with the kids. Imagine bite-sized, crunchy pretzels lovingly dipped in rich chocolate, then transformed into wide-eyed, wise little owls using mini chocolate chip ears and bright candy eyes. To top it all off, a piped golden royal icing beak gives them that final touch of personality, making them almost too cute to eat!
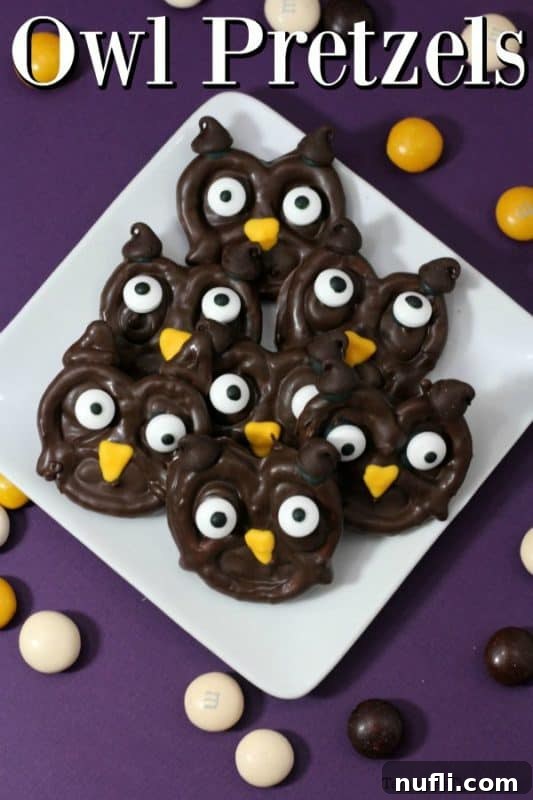
Crafting Spooktacularly Sweet: Easy Halloween Owl Pretzels Recipe
Halloween is a season synonymous with enchanting decorations, imaginative costumes, and, of course, an abundance of delectable treats. As the air turns crisp and vibrant autumn leaves fall, our kitchens become creative hubs for all things festive and fun. This year, we’re dedicated to sharing as many exciting and delicious Halloween recipes as possible, and these charming owl pretzels are certainly among our favorites. They embody everything we love about homemade holiday goodies: they’re incredibly enjoyable to make, visually captivating, and sure to bring smiles to faces of all ages.
There’s something truly special about a well-curated Halloween treat spread – one that not only satisfies your sweet tooth but also delights your senses with its whimsical appeal. While getting your hands on sweets during Halloween is hardly a challenge, creating your own adds an extra layer of magic and personal touch. These chocolate-covered owl pretzels offer a delightful blend of salty and sweet, crunchy and smooth, making them a standout snack or dessert. They’re a fantastic no-bake option for when you want to impress without the oven hassle, perfect for busy parents or enthusiastic bakers alike.
We’ve been deeply immersed in exploring everything from cozy pumpkin-infused recipes to an array of cute and spooky Halloween treats. Our mission is to inspire you to make this Halloween truly unforgettable, filled with homemade delights that create lasting memories. So, if you’re searching for a treat that’s both easy to execute and guaranteed to be a hit, look no further than these adorable pretzel owls.
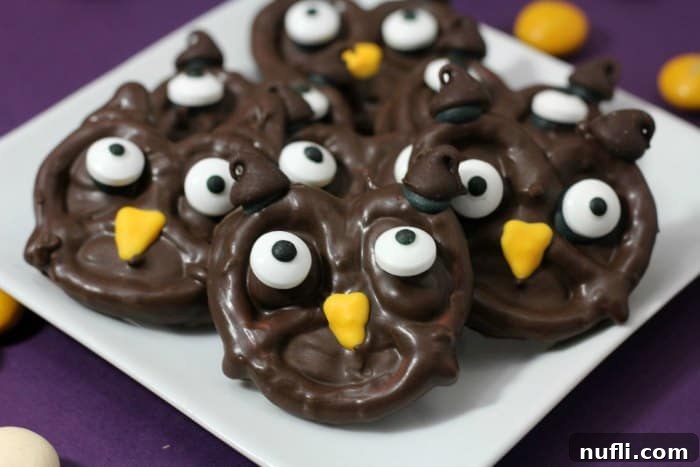
Why These Owl Pretzels Are a Must-Make for Halloween
These Halloween Owl Pretzels stand out as a fantastic choice for several compelling reasons. Firstly, their **simplicity** is unmatched. With no baking required, they’re a quick and efficient way to produce a large batch of treats. This makes them ideal for last-minute party preparations or when you want to involve younger children in the kitchen without complex steps or hot ovens.
Secondly, their **charming appearance** is a guaranteed crowd-pleaser. The combination of the classic pretzel shape, rich chocolate, and playful candy eyes instantly transforms a simple snack into an artistic, festive creation. They are perfectly sized for small hands, making them a favorite among kids, and their unique look makes them a great conversation starter at adult gatherings.
Finally, the **versatility** of this recipe allows for endless customization. Whether you prefer milk chocolate, dark chocolate, or even white chocolate, the base remains delightful. You can experiment with different colored icings for the beak or even use alternative decorations. This adaptability ensures that each batch can be uniquely tailored to your taste or party theme, making them suitable not just for Halloween but for any owl-themed event, like a Harry Potter party!
Gather Your Ingredients for Spooky Sweet Success
Creating these delightful owl pretzels requires just a handful of easily accessible ingredients. Each component plays a vital role in bringing our little edible owls to life, combining textures and flavors for a truly satisfying treat.
What You’ll Need: The Main Stars
- Tiny Twist Pretzels: The foundation of our owls! The classic tiny twist shape of these pretzels is essential for forming the owl’s body and providing the perfect nooks for its “ears.” Their salty crunch perfectly balances the sweetness of the chocolate and icing.
- Ghirardelli Chocolate Wafers: We recommend Ghirardelli for its superior melting quality and rich, smooth flavor, which ensures a beautifully coated pretzel. However, you can substitute with other high-quality melting chocolates or chocolate chips if preferred. The key is to use a chocolate that melts smoothly for easy dipping.
- Mini Chocolate Chips: These tiny treasures serve a dual purpose – they’re perfect for creating the owl’s distinctive ear tufts and add an extra layer of chocolatey goodness. Any brand of mini chocolate chips will work perfectly.
- Candy Eyes: Essential for giving our owls their charming, wide-eyed expressions! These edible googly eyes are readily available in baking aisles and craft stores, instantly bringing personality to your treats.
- Golden Yellow Royal Icing: This is used to pipe the adorable little beaks. You can use store-bought royal icing for convenience, or easily prepare a batch from scratch using the ingredients listed below for a truly homemade touch.
For the Perfect Royal Icing Beaks (Homemade Option)
If you choose to make your royal icing from scratch, here’s what you’ll need. Homemade royal icing offers a lovely consistency for piping and allows you to control the exact shade of yellow.
- Egg Whites: Fresh egg whites are key to the structure and stiffness of royal icing. Ensure they are at room temperature for best results.
- Powdered Sugar (Confectioners Sugar): This fine sugar is crucial for a smooth, lump-free icing. It dissolves easily into the egg whites to create a strong, pipeable consistency.
- Cream of Tartar: A common baking ingredient, cream of tartar acts as a stabilizer for the egg whites, helping them achieve and maintain stiff peaks, which is essential for royal icing.
- Golden Yellow Gel Food Coloring: Gel food coloring is highly concentrated, meaning you’ll achieve a vibrant golden yellow beak with just a few drops, without thinning out your icing.
Essential Equipment for Crafting Your Owl Pretzels
Having the right tools can make the process of crafting these owl pretzels even more enjoyable and mess-free. Here are the essential pieces of equipment we recommend:
- Large Mixing Bowl: A sturdy mixing bowl is essential for preparing your royal icing. We are particularly fond of glass batter bowls with a handle, as they offer stability on the counter during mixing and make pouring easier. For melting chocolate, a heat-safe bowl suitable for a double boiler or microwave is also needed.
- Candy Dipper or Fork: This specialized tool is incredibly useful for submerging pretzels into melted chocolate and retrieving them without making a mess. If you don’t have a candy dipper, a standard fork can work just as well – just be sure to let excess chocolate drip off before placing the pretzel down.
- Parchment Paper: A true lifesaver for any confectionary project! Lining your baking sheets with parchment paper ensures that your chocolate-covered pretzels won’t stick, making for incredibly easy cleanup and effortless removal once they’ve set.
- Baking Sheet: You’ll need a baking sheet to hold your newly dipped pretzels as they cool and set. We prefer baking sheets with a raised edge to prevent any clumsy mishaps (yes, it happens!) and keep your treats securely in place.
- Pastry Bag with Small Round Tip: For piping the royal icing beaks with precision. If you don’t have a pastry bag, you can improvise by snipping a tiny corner off a Ziploc bag.
Step-by-Step Guide: How to Make Halloween Owl Pretzels
Now, let’s dive into the simple steps to create these charming Halloween Owl Pretzels. The process is divided into two main parts: preparing the royal icing and then assembling the chocolate-dipped pretzels.
Crafting the Golden Royal Icing
- Combine Ingredients: In a large mixing bowl, combine your egg whites, confectioners powdered sugar, and cream of tartar. Using an electric mixer, beat these ingredients together on medium speed for approximately 4 minutes. You’re looking for a stiff consistency, where the icing holds its shape well.
- Adjust Consistency: If, after 4 minutes, your icing still feels too soft or runny, gradually add an additional ¼ cup of powdered sugar and continue beating until stiff peaks form. The perfect consistency is crucial for piping defined beaks.
- Color the Icing: Transfer the prepared white royal icing to a separate, clean bowl. Add several drops of golden yellow gel food coloring. Stir well with a spoon or spatula until the color is thoroughly mixed and achieves a vibrant, even golden hue. Gel food coloring is recommended for its intensity without affecting icing consistency.
- Prepare for Piping: Spoon the colored royal icing into a pastry bag that has been fitted with a small, round piping tip. If you don’t have a pastry bag, a sturdy Ziploc bag with a tiny corner snipped off will work in a pinch. Set aside, ensuring the tip is covered to prevent drying.
Assembling Your Chocolate Owl Pretzels
- Prepare Your Workspace: Begin by lining a baking sheet with parchment paper. This will be the landing spot for your dipped pretzels and will ensure they don’t stick, making cleanup a breeze.
- Melt the Chocolate: Set up a double boiler by placing a heat-safe bowl over a saucepan of simmering water (ensure the bottom of the bowl doesn’t touch the water). Add your Ghirardelli chocolate wafers to the top bowl. Stir gently and continuously as the chocolate melts, watching it carefully to prevent burning or seizing. Alternatively, you can melt the chocolate in a microwave-safe bowl in 30-second intervals, stirring thoroughly after each interval until completely smooth.
- Dip the Pretzels: Once the chocolate is perfectly smooth and melted, take one tiny twist pretzel and dip it completely into the chocolate. Use your candy dipper or fork to gently lift the pretzel out, allowing any excess chocolate to drip back into the bowl. Immediately place the chocolate-covered pretzel onto your parchment-lined baking sheet.
- Add Features While Warm: This step is time-sensitive! While the chocolate is still wet and warm on the pretzel, quickly place two mini chocolate chips onto the upper curves of the pretzel twists to form the owl’s ears. Directly below these “ears,” gently press two candy eyes onto the chocolate, ensuring they adhere well. The warm chocolate acts as a natural adhesive.
- Allow to Cool and Set: Once all your pretzels are dipped and adorned with ears and eyes, allow them to cool completely. You can let them sit at room temperature until the chocolate is firm, or for a quicker set, place the baking sheet in the refrigerator for about 10-15 minutes.
- Pipe the Beaks: After the chocolate has fully set, retrieve your pastry bag with the golden yellow royal icing. Carefully pipe a small triangle directly below the candy eyes on each owl, creating the beak. For a more defined look, you can outline the triangle first and then fill it in with more icing.
- Final Set: Let the royal icing set for at least 30 minutes, or until hardened, before handling or serving your delightful Halloween Owl Pretzels.
Creative Variations and Serving Ideas for Your Owl Pretzels
One of the best things about these Halloween Owl Pretzels is how adaptable they are. Here are some ideas to customize them and present them beautifully:
- White Chocolate Owls: For a striking alternative, substitute the dark chocolate wafers with white chocolate melting wafers. You can even tint the white chocolate with a drop of food coloring (like orange or purple) for even more festive owls!
- Alternative Beaks: While royal icing offers precision, you can simplify by using small pieces of candy corn for the beaks. Just press them gently into the wet chocolate before it sets. Alternatively, a small orange or yellow sprinkle could also work for a minimalist beak.
- Feathered Friends: For extra texture, sprinkle some dark chocolate or colored sprinkles over the chocolate-dipped pretzel before it sets. This can give the impression of feathers!
- Gluten-Free Option: Simply use your favorite brand of gluten-free pretzel twists to make this recipe accessible to everyone. The rest of the ingredients are typically gluten-free.
- Themed Parties: These aren’t just for Halloween! Change the color of the icing to blue or green for an enchanted forest theme, or stick with the classic brown for a magical Harry Potter-inspired gathering.
- Presentation Matters: Arrange your finished owl pretzels on a Halloween-themed platter alongside other spooky treats. They look fantastic nestled amongst candy corn, mini pumpkins, or even spooky spiderweb tablecloths.
- Party Favors & Gifts: Individually wrap these cute owl pretzels in small cellophane bags with a festive ribbon. They make charming party favors for guests or a delightful homemade gift for teachers, friends, and neighbors.
Halloween Fun for Everyone: Making Memories with Treats
Halloween is more than just a single day; it’s a season of imagination, family togetherness, and creating cherished traditions. Making treats like these Halloween Owl Pretzels is an excellent way to embrace the spirit of the holiday. It’s an opportunity to gather your loved ones in the kitchen, laugh over chocolate-covered fingers, and revel in the simple joy of creating something delicious and beautiful together.
The beauty of these pretzels lies in their ability to engage even the youngest helpers. Kids can easily assist with placing the mini chocolate chips and candy eyes, fostering their creativity and sense of accomplishment. These moments, spent dipping, decorating, and anticipating the first bite, are the ones that truly define the magic of Halloween. So, beyond just a recipe, think of this as an invitation to create lasting memories and cultivate a festive atmosphere in your home.
Once your delightful owl pretzels are complete and the chocolate and icing have fully set, they can be stored in an airtight container at room temperature for up to a week. For longer freshness, or if your home is particularly warm, you can keep them in the refrigerator. Cleanup is minimal thanks to the parchment paper, ensuring your post-treat-making experience is as sweet as the treats themselves.
More Spooktacular Halloween Recipes to Explore
If you loved making these owl pretzels and are eager for more festive culinary adventures, we have a treasure trove of other Halloween recipes that are just as fun and delicious. From eerie desserts to playful snacks, there’s something for every Halloween enthusiast:
- Frankenstein Twinkies: A classic snack transformed into a monstrously good treat.
- Pumpkin Rice Krispie Treats: Adorable and easy, these are perfect for little hands.
- Mummy Cake Pops: Spooky and sweet, these handheld delights are always a hit.
- Halloween Pinwheel Cookies: Visually stunning cookies that are surprisingly simple.
- Candy Corn Mousse: A light and fluffy dessert capturing the iconic Halloween candy.
Be sure to check out all of our Halloween Ideas for more inspiration! And if you love discovering new recipes, explore our copycat recipes, a wide array of dessert recipes, and our convenient CrockPot Recipes.
For even more delicious inspiration and daily dose of recipes, be sure to follow Tammilee Tips on MSN, Facebook, Instagram, and Pinterest!
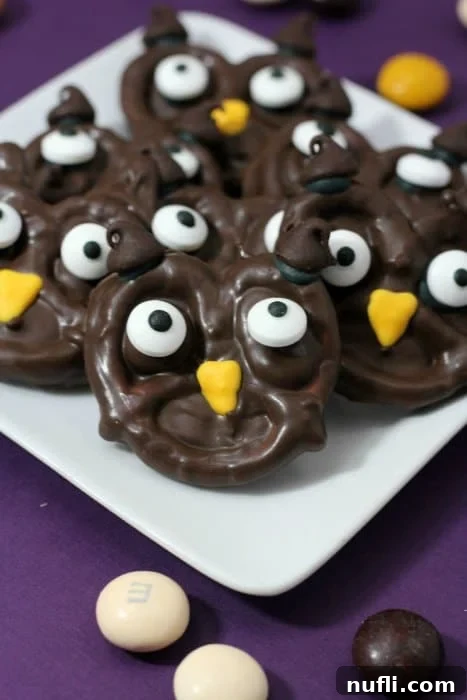
Owl Pretzels
Ingredients
- 1 bag Tiny Twist Pretzels
- 1 bag (approx. 10-12 oz) Ghirardelli chocolate wafers
- ½ cup Mini Chocolate chips
- Candy Eyes (2 per owl)
- Golden Yellow Royal Icing (see homemade recipe below or use store-bought)
Royal Icing (Homemade Option)
- 2 Large Egg Whites
- 1 Cup Confectioners Powdered Sugar
- ½ Teaspoon Cream of Tartar
- Golden yellow gel food coloring
Instructions
Royal Icing Preparation:
- In a large mixing bowl, combine egg whites, powdered sugar, and cream of tartar. Beat on medium speed for about 4 minutes until the mixture forms stiff peaks.
- If the icing consistency is too soft, add an additional ¼ cup of powdered sugar and beat until stiff.
- Transfer the white royal icing to a separate bowl. Add several drops of golden yellow gel food coloring and stir thoroughly until the color is evenly distributed and vibrant.
- Spoon the colored icing into a pastry bag fitted with a small, round tip for precision work.
Assembling Your Owl Pretzels:
- Line a baking sheet with parchment paper to prevent sticking and ensure easy cleanup.
- Using a double boiler (or a microwave-safe bowl in 30-second intervals, stirring between each), gently melt the Ghirardelli chocolate wafers until smooth and creamy. Be careful not to overheat.
- Dip each tiny twist pretzel into the melted chocolate, covering it completely. Use a candy dipper or fork to remove excess chocolate, then immediately place it on the parchment-lined baking sheet.
- While the chocolate on the pretzel is still wet and warm, gently press two mini chocolate chips onto the top curves of the pretzel to form the owl’s ears. Below them, carefully place two candy eyes, ensuring they adhere well to the chocolate.
- Allow the chocolate-covered pretzels to cool completely at room temperature or in the refrigerator until the chocolate is fully set.
- Once the chocolate is set, use the pastry bag with golden yellow icing to pipe a small triangle directly below the candy eyes, forming the owl’s beak. For a more defined beak, you can outline the triangle first and then fill it in.
- Let the royal icing set for at least 30 minutes before handling or serving.
Kitchen Tools You’ll Need
- Baking Sheets
- Parchment Paper
- Large Mixing Bowl
- Candy Dipper or Fork
- Pastry Bag with Small Round Tip
This recipe was originally published on October 11, 2015. It was last updated in October 2023 to provide enhanced instructions, additional tips, and a more comprehensive guide for creating the perfect Halloween Owl Pretzels.
