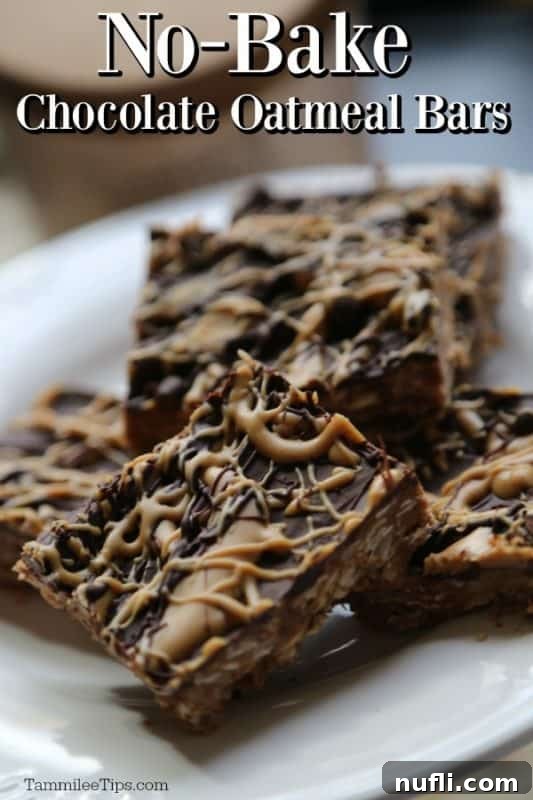
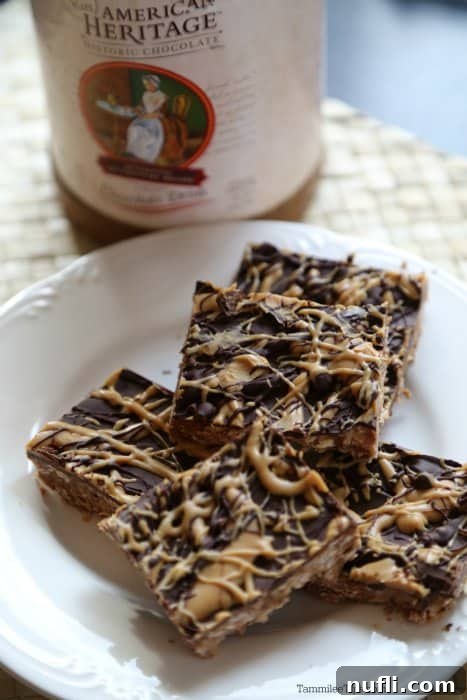
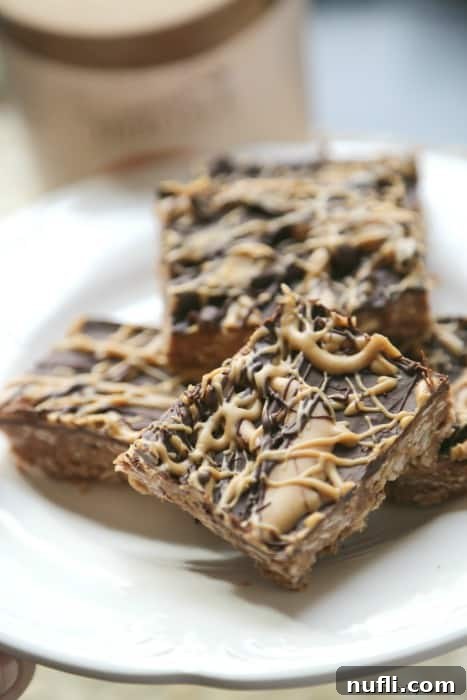
Indulge in Effortless Sweetness: Irresistible No-Bake Chocolate Oatmeal Bars
There’s a special kind of joy that comes with a perfectly crafted dessert, and when it requires no baking, that joy is amplified tenfold! Today, I’m thrilled to share an absolutely irresistible recipe for No-Bake Chocolate Oatmeal Bars that will quickly become a favorite in your household. These bars are a staple in my home, particularly because my partner, John, has an unwavering love for all things no-bake. I’m convinced I could invent a new no-bake treat every week, and he would never tire of them! This particular recipe stands out not only for its incredible flavor but also for its remarkable simplicity, making it a go-to for busy days or sudden sweet cravings.

The Allure of No-Bake Desserts: Convenience Meets Deliciousness
In today’s fast-paced world, finding recipes that are both delicious and time-efficient is a true gem. No-bake desserts fit this bill perfectly, offering a convenient way to satisfy your sweet tooth without the hassle of heating up the oven. These chocolate oatmeal bars are a prime example. They require minimal kitchen equipment, simple ingredients, and just a bit of chilling time to transform into a delightful treat. This makes them ideal for summer months when you want to avoid turning on the oven, or for those impromptu gatherings where you need a quick yet impressive dessert. Plus, they’re wonderfully kid-friendly, both in the making and the eating!
The beauty of no-bake recipes lies in their accessibility. Whether you’re a seasoned baker or just starting out, these bars are nearly foolproof. The process involves simple mixing and melting, followed by refrigeration to set. This ease makes them a fantastic project to do with children, teaching them basic kitchen skills and rewarding them with a delicious creation they helped make. Beyond their simplicity, no-bake desserts often have a unique texture—a delightful chewiness or a creamy consistency that can be incredibly satisfying. These chocolate oatmeal bars deliver on all fronts, providing a rich, satisfying texture combined with a comforting, familiar flavor profile.
A Glimpse into Chocolate’s Rich History: More Than Just a Sweet Treat
While these No-Bake Chocolate Oatmeal Bars are a modern delight, the history of chocolate itself is incredibly rich and fascinating. Just a few weeks ago, I had the incredible opportunity to explore this history during my trip to Washington D.C. with American Heritage Chocolate. During that journey, I not only learned a great deal about American Heritage Chocolate but also discovered the deep cultural significance of cocoa throughout history. It was during this trip that I also shared a delightful recipe for Boozy Hot Chocolate, which is truly a treat for the senses!
It’s truly amazing to consider how far chocolate has come. Did you know that chocolate was once revered as a sacred beverage and even used as currency in ancient civilizations? Its journey from a bitter ritualistic drink to the sweet confection we enjoy today is a testament to its enduring appeal. If you’re curious to delve deeper into this incredible journey, I highly recommend visiting the American Heritage Chocolate Website. Their extensive historical information paints a vivid picture of chocolate’s profound impact on society, from ancient Mesoamerica to colonial America.
Why American Heritage Chocolate?
American Heritage Chocolate is not just a brand; it’s a bridge to the past, allowing us to taste chocolate as it might have been enjoyed centuries ago. Their products are carefully developed from authentic 1750s chocolate recipes, aiming to capture the essence of what figures like Thomas Jefferson, George Washington, and Ben Franklin might have savored. This dedication to historical accuracy, combined with high-quality ingredients, makes it a unique choice for any chocolate enthusiast.
Here’s what makes American Heritage Chocolate truly special:
- Authentic Heritage: It’s an authentic historic line of products, meticulously developed from chocolate recipes dating back to the 1750s. This celebrates chocolate’s significant role in the lives of Americans during the 18th century, offering a taste reminiscent of what founding fathers might have enjoyed.
- Natural Ingredients: Made with only all-natural ingredients and absolutely no preservatives, ensuring a pure and wholesome chocolate experience.
- Rich Cacao Content: This artisanal dark chocolate contains 63% cacao, offering a robust and deep chocolate flavor that is both satisfying and complex.
- Exotic Spice Blend: It’s mildly spicy and subtly sweet, flavored with a thoughtful blend of spices commonly available during colonial times, including cinnamon, nutmeg, chili pepper, orange, anise, and vanilla. This unique combination adds an unparalleled depth to any recipe.
- Dietary Friendly: American Heritage Chocolate is Kosher-certified and crafted without dairy, wheat, peanuts, or tree nuts. It’s also produced in a facility that is free from peanuts and tree nuts, making it a safer option for those with specific dietary restrictions.
To learn more about their products and rich history, you can find American Heritage Chocolate on their Website, Facebook, Twitter, and Pinterest.

Crafting Your Perfect No-Bake Chocolate Oatmeal Bars
Creating these delightful bars is a straightforward process that yields incredibly delicious results. The combination of wholesome oats, sweet coconut, creamy peanut butter, and rich chocolate makes for a truly satisfying treat that everyone will adore. Let’s gather our ingredients and get ready to whip up a batch of these amazing no-bake wonders.
Ingredient Spotlight: What You’ll Need
Each ingredient in this recipe plays a crucial role in achieving the perfect texture and flavor. Understanding their purpose can help you appreciate the simplicity and genius of no-bake treats.
- Coconut Flakes: These add a lovely chewy texture and a subtle tropical sweetness that pairs wonderfully with chocolate. Choose unsweetened flakes if you prefer less sweetness, or sweetened for extra indulgence.
- Old-fashioned Oats: The heart of our oatmeal bars. Rolled oats provide structure and a hearty, wholesome base. Avoid instant oats, as they absorb liquid differently and may result in a mushy texture.
- Confectioners Powdered Sugar: This fine sugar dissolves easily, contributing to the smooth texture of the base without any grittiness. It also provides the perfect level of sweetness.
- Salt: A pinch of salt is essential to balance the sweetness and enhance the overall flavor of the chocolate and peanut butter. Don’t skip it!
- Unsalted Butter: The butter acts as a binder, helping to hold the oat mixture together while adding richness and flavor. Using unsalted butter gives you more control over the salt content of the bars.
- Peanut Butter: Creamy peanut butter is key for both flavor and texture, contributing to the bars’ fudgy consistency. The extra two tablespoons are for that beautiful drizzle on top.
- American Heritage Chocolate Drink Mix: This unique chocolate product, with its historical spice blend, provides a rich and distinctive chocolate layer that truly elevates these bars beyond the ordinary. Its meltability makes it ideal for a smooth topping.

No-Bake Chocolate Oat Bars Recipe
No-Bake Chocolate Oat Bars
Print Recipe
Rate Recipe
Ingredients
- 1 ½ cups Coconut Flakes
- 1 ½ cups old-fashioned oats
- 1 ¼ cups Confectioners Powdered Sugar
- ¼ Teaspoon Salt
- 5 oz Unsalted Butter, cut into pieces
- 1 ¾ cup peanut butter, plus 2 tablespoon peanut butter to the side
- 1 package American Heritage Chocolate Drink Mix
Instructions
- Coat a 9×13 baking pan with non-stick spray and line it with parchment paper. Ensure you leave a 2-inch overhang on the sides so you can easily lift the bars out of the pan once they’ve set.
- In a large mixing bowl, combine the coconut flakes, old-fashioned oats, confectioners sugar, and salt. Stir well to ensure all ingredients are evenly distributed, then set this dry mixture aside.
- In a saucepan, melt the unsalted butter over medium heat. Once the butter is fully melted, add 1 ¾ cup of peanut butter to the saucepan. Whisk continuously until the butter and peanut butter are thoroughly combined and smooth.
- Pour the warm butter and peanut butter mixture into the bowl with the dry oat mixture. Stir diligently until all the dry ingredients are fully coated and combined. Press this mixture firmly and evenly into the prepared 9×13 baking pan.
- Place the baking pan in the refrigerator for at least 30 minutes. This chilling time is crucial for the base layer to set properly, ensuring a firm foundation for the chocolate topping.
- While the base is chilling, prepare your chocolate topping. Take the American Heritage Chocolate Drink Mix and microwave it in 30-second intervals. Stir after each interval until the chocolate is completely melted and smooth. Be careful not to overheat.
- Once the chocolate is melted, retrieve the chilled oat base from the refrigerator. Pour the melted chocolate evenly over the pressed oat mixture in the pan. Use a spatula or the back of a spoon to spread the chocolate layer until it covers the entire surface smoothly.
- Return the pan to the refrigerator for another 15 minutes. This allows the chocolate layer to firm up slightly before the final drizzle.
- In a separate microwave-safe bowl, melt the reserved 2 tablespoons of peanut butter until it is runny enough to drizzle. You can also melt additional American Heritage chocolate if you desire a double chocolate drizzle.
- Remove the pan from the refrigerator. Drizzle the melted peanut butter generously over the top of the chocolate layer. If using, drizzle the additional melted American Heritage chocolate as well, creating an appealing marbled effect.
- Place the pan back into the refrigerator for a final 15 minutes to allow the drizzles to harden and the entire bar to become firm.
- Once fully chilled and set, use the parchment paper overhang to lift the entire slab of bars out of the baking pan. Place it on a cutting board and cut into squares or desired bar shapes. Enjoy!
Kitchen Tools
- 9×13 Pan
- Parchment Paper
- Large mixing bowl
- Saucepan
- Whisk
- Spatula
Nutrition
Calories from Fat 216
Tips for Success and Delicious Variations
Achieving the perfect no-bake bar is all about attention to a few simple details. First, ensure your butter and peanut butter mixture is thoroughly combined and smooth before adding it to the dry ingredients. This helps create a cohesive base. When pressing the mixture into the pan, apply firm, even pressure to prevent crumbly bars. A flat-bottomed glass or spatula can help achieve this. Patience during chilling times is also key; don’t rush the setting process, as it ensures your bars are firm and easy to cut.
These bars are also incredibly versatile! Feel free to experiment with different additions to customize them to your taste. Consider folding in some chopped nuts like pecans or walnuts into the oat base for an added crunch. Dried cranberries or cherries could introduce a delightful tartness. For a different flavor profile, you could swap out the peanut butter for almond butter or cashew butter, or even a sunflower seed butter for a nut-free option. If you don’t have American Heritage Chocolate, a good quality dark chocolate melted down will also work beautifully, though you’ll miss the unique spice notes. You can also sprinkle a pinch of flaky sea salt on top of the final chocolate layer for a gourmet touch that enhances the chocolate flavor.
Serving and Storage Suggestions
These No-Bake Chocolate Oatmeal Bars are best served chilled, straight from the refrigerator. Their firm, fudgy texture makes them a delight to bite into, especially on a warm day. They make an excellent addition to a dessert platter, a convenient snack for lunchboxes, or a simple after-dinner treat. For a truly decadent experience, serve them alongside a scoop of vanilla bean ice cream or a dollop of whipped cream.
Storing these bars is just as easy as making them. Keep them in an airtight container in the refrigerator for up to a week. If you want to prepare a larger batch or keep them fresh for longer, they also freeze beautifully. Simply wrap individual bars tightly in plastic wrap, then place them in a freezer-safe bag or container. They can be stored in the freezer for up to three months. When you’re ready to enjoy, simply take them out of the freezer and let them thaw at room temperature for a few minutes, or enjoy them directly from frozen for a chewy, frosty treat.
More Dessert Inspiration & Connection
If you’ve enjoyed these delicious no-bake bars, you’re in for a treat with our other fantastic dessert recipes. Be sure to check out some of these crowd-pleasers:
- Buckeye Bars
- No-Bake Peanut Butter Fudge
- Chocolate No-Bake Cookies
- Peanut Butter Bacon Cookies
- Old Fashioned Molasses Cookies
Do you love discovering new recipes? We have a vast collection spanning various categories! Explore our copycat recipes for your favorite restaurant dishes, dive into more delightful dessert recipes, or simplify your meal prep with our extensive list of CrockPot Recipes.
Stay connected with Tammilee Tips for all our latest recipe posts and culinary adventures! Follow us on Facebook, Instagram, and Pinterest. We love seeing your creations, so don’t forget to share your photos!
Today’s post is sponsored. All opinions expressed are our own.
Love this recipe?
Follow @TammileeTIps on Pinterest
Tried this recipe?
Mention @TammileeTipsLife when you share a photo!
Recipe originally shared on October 25, 2015. Updated October 2020.
