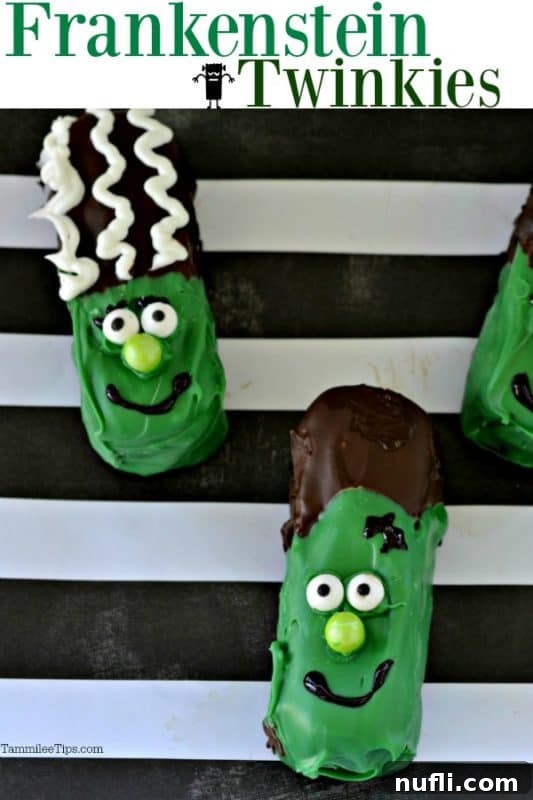
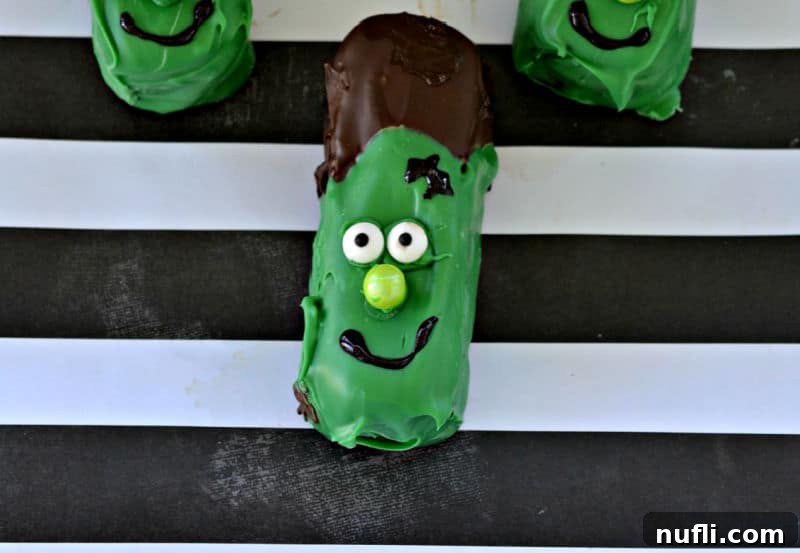
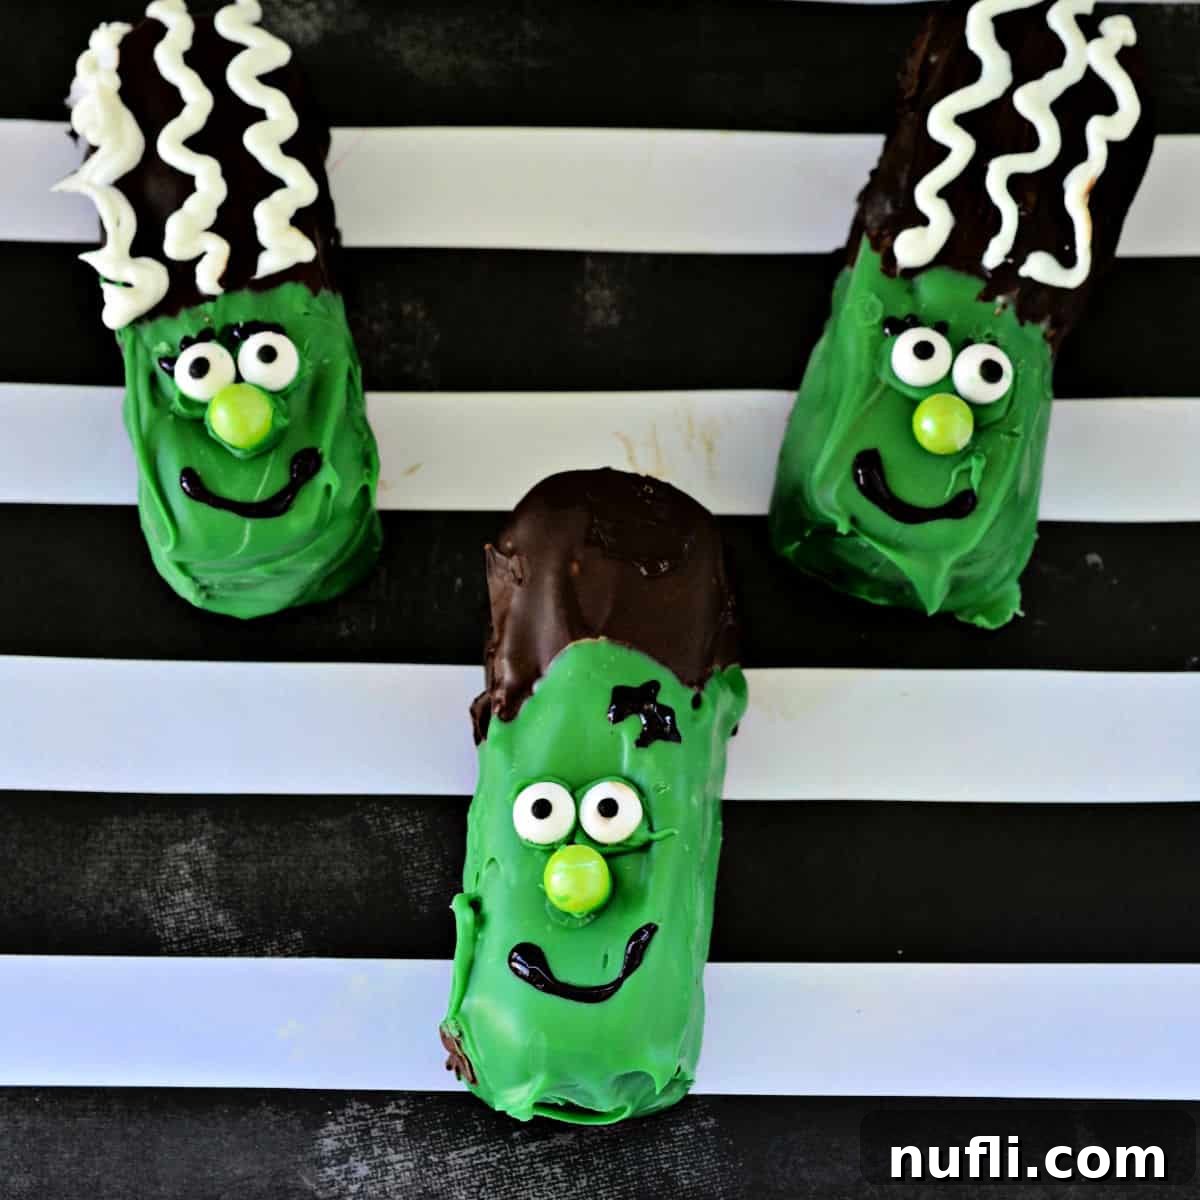
Get ready to unleash your inner mad scientist this Halloween with these incredibly fun and deliciously spooky Frankenstein Twinkies! Far more delightful than frightful, these sweet treats are the perfect centerpiece for any Halloween party, a delightful after-school snack, or a fantastic family activity. Imagine transforming ordinary snack cakes into iconic green monsters with just a few simple ingredients and a dash of creativity. This isn’t just a recipe; it’s an invitation to create lasting holiday memories with your loved ones, blending the joy of crafting with the satisfaction of a homemade dessert.

Crafting Spooky Sweetness: Frankenstein Twinkies
Halloween is a time for ghoulish fun, thrilling costumes, and, of course, an abundance of creative Halloween recipes! While elaborate dishes have their place, there’s something truly special about simple, no-bake treats that bring a smile to everyone’s face. Our Frankenstein Twinkies embody this spirit perfectly. They’re quick to assemble, require no baking, and the decorating process is incredibly engaging for all ages, making them an ideal project for a cozy autumn afternoon.
The beauty of these Frankenstein treats lies in their simplicity and visual impact. With their iconic green faces, chocolate hair, and comical candy eyes, they instantly evoke the playful side of Halloween without being overly scary. They’re a wonderful way to kick off the spooky season, whether you’re planning a full-blown monster bash or just looking for a fun way to celebrate at home. Plus, who can resist the creamy, golden goodness of a Twinkie disguised as a classic horror character?
As the leaves begin to turn and the air grows crisp, anticipation for Halloween builds. It’s never too early to start planning your festive activities and menu. These Frankenstein Twinkies offer a fantastic head start, ensuring you have a go-to treat that’s guaranteed to be a hit. Don’t let the last-minute rush of October catch you off guard; embrace the joy of preparing early and savoring the creative process. Whether you’re traveling for Halloween or hosting a neighborhood gathering, these treats are easily transportable and universally loved.

Gather Your Ghastly Good Ingredients
Creating these delightful monster cakes is surprisingly straightforward, relying on readily available ingredients that transform ordinary snack cakes into extraordinary Halloween masterpieces. Here’s what you’ll need to bring your Frankenstein creations to life:
- Snack Cakes of Your Choice: While Twinkies are the classic choice, their elongated shape makes them perfect for Frankenstein’s head. Feel free to experiment with other cream-filled sponge cakes like Sara Lee Devil’s Food Creme Cakes for a darker base, or even pound cake slices cut into appropriate shapes. The key is finding a stable base for dipping.
- Semi-Sweet Chocolate or Candy Cocoa Melts: This will form Frankenstein’s iconic dark hair. Candy melts are often easier to work with as they set quickly and provide a smooth finish, but good quality semi-sweet chocolate chips or melting wafers will also do the trick. Ensure you have enough for dipping!
- Green Melting Candy Wafers: This is the crucial ingredient for Frankenstein’s signature green skin. Green candy melts are specifically designed for easy melting and dipping, offering vibrant color and a smooth, quick-setting coating. Look for them in craft stores, baking supply sections, or online.
- Green Sixlets: These small, candy-coated chocolates will serve as the “bolts” on Frankenstein’s neck, adding a charming, edible detail. You can also use other small, round green candies or even chocolate-covered sunflower seeds.
- Small Candy Eyes: These edible eyeballs instantly give your monsters personality and a touch of silliness. They come in various sizes; choose smaller ones for a more proportional look on your snack cakes.
- Black Decorating Gel: Essential for drawing mouths, scars, and adding details to the chocolate hair. A fine-tipped gel tube allows for precision, helping you create expressive faces for each Frankenstein.
- White Frosting (optional, for Bride of Frankenstein): If you plan to create a Bride of Frankenstein, white frosting will be needed for her distinctive wavy hair. A piping bag with a small star or round tip will help achieve the desired effect.
Essential Equipment for Your Monster Lab
Having the right tools makes any culinary project smoother, and these Halloween treats are no exception. While most items are common kitchen staples, a few specialized pieces can make the dipping and decorating process even easier:
- Large Microwave-Safe Mixing Bowl: A sturdy glass bowl with a handle is ideal for melting your candy melts or chocolate. The handle provides a secure grip while dipping, and glass ensures even heating in the microwave.
- Candy Dipping Tools or Forks: These specialized tools make dipping and retrieving the snack cakes from melted candy a breeze, minimizing mess and ensuring an even coating. If you don’t have one, two forks can work in tandem.
- Parchment Paper: Your best friend for easy cleanup! Lining your workspace and baking sheets with parchment paper prevents sticking and makes transferring the finished treats effortless.
- Baking Sheets with Sides: A baking sheet provides a flat, stable surface for your dipped treats to set. Using one with a raised edge helps prevent any accidental rolls or spills, keeping your kitchen tidy.
- Halloween Serving Platter (Optional): To truly elevate your presentation, dish up these cute Frankenstein Twinkies on a fun, themed platter. A coffin-shaped tray or a classic Halloween-themed plate will add to the festive ambiance.
- Party Bags (Optional): If you’re sharing these treats, consider packaging them in individual party bags for a delightful and hygienic handout.

More Spooktacular Halloween Recipes
If you’re looking to expand your Halloween treat repertoire, we have plenty of other fun and easy ideas to explore:
- Bat Nutter Butters: Adorable and crunchy bat-shaped cookies.
- Candy Corn Bark: A vibrant, sweet, and easy-to-make dessert.
- Witches Broom Sticks: A savory and playful snack for your Halloween party.
- Creepy Egg Eyes: A truly unsettling (and delicious) appetizer.
- Crazy Eye Cookies: Simple cookies adorned with a multitude of candy eyes.
Discover all our hauntingly good Halloween Recipes for more inspiration!
Beyond Halloween, we love sharing a wide array of recipes. Explore our copycat recipes to recreate your restaurant favorites, indulge in our delightful dessert recipes, and simplify dinner with our fantastic CrockPot Recipes.
Stay connected for daily recipe inspiration and more! Follow Tammilee Tips on MSN, Facebook, Instagram, and Pinterest.

Frankenstein Twinkies for Halloween
How to make fun Frankenstein Twinkies great for Halloween.
Print Recipe
Prep Time: 30 minutes
Total Time: 30 minutes
Author: Tammilee Tips
Ingredients
- Snack cakes of your choice (Twinkies, Sara Lee Devil’s Food Creme Cakes are great options.)
- Semi-Sweet Chocolate or Candy Cocoa Melts
- Green Melting Candy Wafers
- Green Sixlets
- Candy Eyes
- Black Decorating Gel (Widely available online or at major grocery stores.)
- White Icing (for Bride of Frankenstein variation)
Instructions
- Begin by laying a sheet of parchment paper on your counter. Unwrap all candies and place them in separate small bowls, creating an organized assembly line for easier decorating.
- Melt the semi-sweet chocolate or cocoa candy melts in a microwave-safe bowl according to the package instructions. Heat in short intervals, stirring frequently, until smooth.
- Carefully unwrap each snack cake, preparing them for transformation.
- Start by creating the hair. Dip one end of each snack cake into the melted semi-sweet chocolate. For classic Frankenstein monsters, dip just the ends to create a neat hairline. For Bride of Frankenstein, dip about half of the snack cake to form a fuller hairstyle. A small knife or spoon can help spread the chocolate evenly if needed.
- Place the chocolate-dipped snack cakes on the parchment paper-lined baking sheet and allow the chocolate to harden completely. This can be expedited by placing them in the refrigerator for a few minutes.
- While the chocolate hair is setting, melt the green candy wafers in a separate microwave-safe bowl following package directions. Stir until perfectly smooth.
- Once the chocolate hair has hardened, carefully dip the opposite end of each snack cake into the melted green candy wafers. Ensure a generous, even coating for Frankenstein’s green face.
- Return the green-dipped cakes to the parchment paper to allow the green candy coating to set.
- As the green candy begins to firm up but is still slightly tacky, attach two candy eyes to each snack cake, using a tiny dot of decorating gel as “glue” if necessary.
- Dip one green Sixlet into the melted green candy and gently press it onto the side of each Frankenstein’s “neck” to create the iconic bolts. You can also press them into the snack cake without dipping if the green coating is still soft.
- Using the black decorating gel, draw a distinctive smile, various stitches, or scar marks on your Frankenstein creations. Get creative with different expressions!
- For the Bride of Frankenstein, once her chocolate hair has hardened, use white frosting with a fine drawing tip or a small star tip to create elegant waves or streaks in her hair, adding a touch of spooky glamour.
- Allow all decorations to fully set before serving or packaging. Enjoy your homemade monster treats!
Kitchen Tools
- Parchment Paper
- Baking Sheets
- Microwave-Safe Mixing Bowls
- Candy Dipping Tools or Forks
- Small Knife or Spoon (for spreading)
Love this recipe? Follow @TammileeTIps on Pinterest for more fantastic ideas!
Tried this recipe? Share your creations! Mention @TammileeTipsLife on Instagram when you share a photo!
Recipe originally shared on September 25, 2015. Updated for clarity, additional tips, and improved user experience in October 2020 and further enhanced for SEO and content expansion in 2023.
