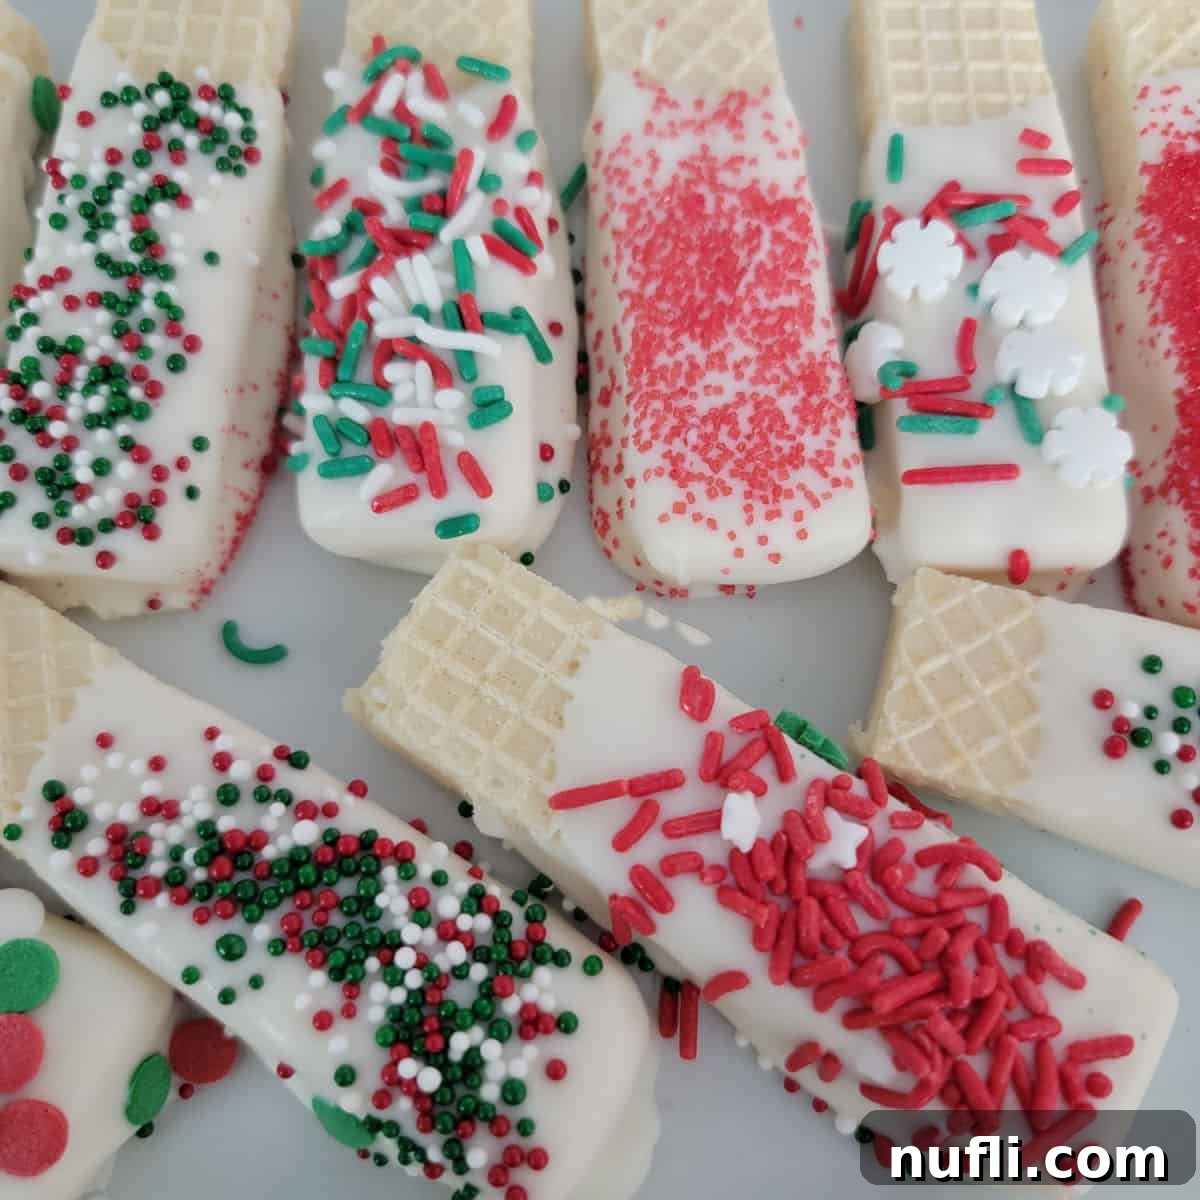
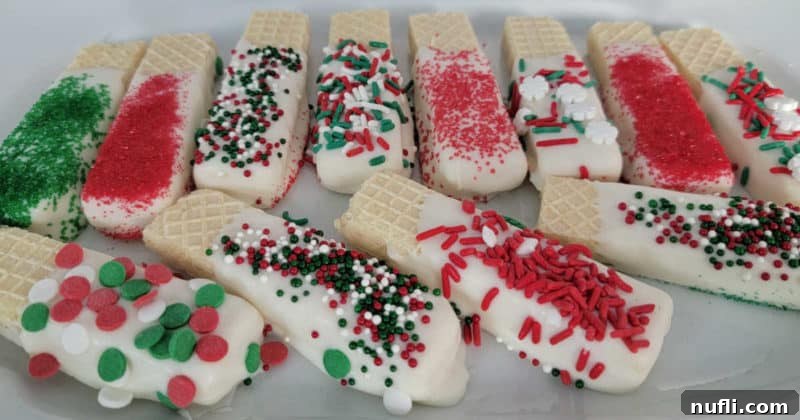
Dive into the delightful world of homemade sweets with our incredibly simple White Chocolate Dipped Sugar Wafers! This recipe is a true holiday gem, perfect for bringing joy and festive cheer to any gathering. Not only are these treats irresistibly delicious, but they’re also a fantastic family activity, allowing everyone from little ones to adults to participate in the magic of creating a beautiful, edible masterpiece. Prepare to impress with minimal effort!
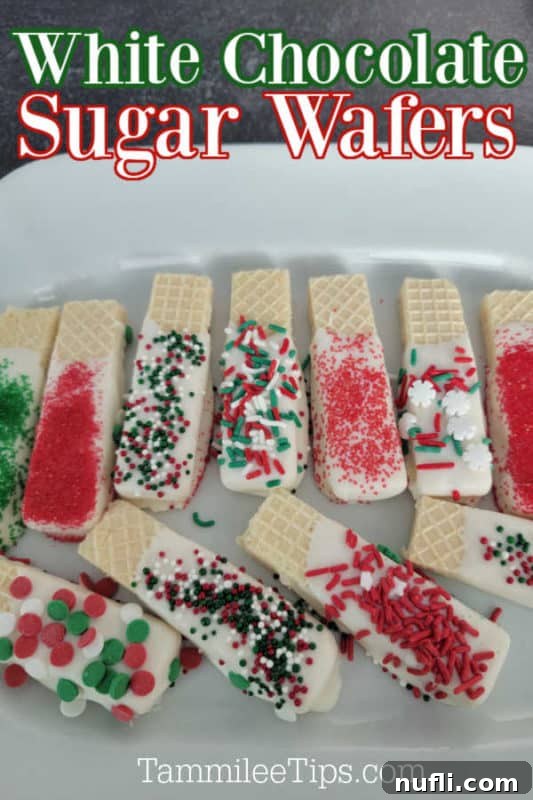
Effortless Elegance: Crafting Perfect White Chocolate Dipped Sugar Wafers for Every Celebration
As the holiday season draws near, the air fills with anticipation, warmth, and the sweet aroma of festive baking. While this time of year is undeniably magical, it can also bring a whirlwind of tasks, making quick and delightful recipes an absolute lifesaver. That’s where our White Chocolate Dipped Sugar Wafers step in – a brilliant solution for anyone seeking a fast, fun, and utterly delicious dessert that requires minimal effort but delivers maximum impact. These homemade delights are a testament to how simple ingredients can create something truly special.
These charming chocolate-coated wafers aren’t just reserved for Christmas; their incredible versatility means they can be customized for virtually any holiday or special occasion throughout the year. Imagine vibrant pastel sprinkles for Easter celebrations, spooky orange and black designs for Halloween parties, or romantic reds and pinks for Valentine’s Day. The possibilities are truly endless, making them a go-to treat for spontaneous celebrations, school events, or carefully planned festivities. Their adaptability ensures they’ll always be a hit, no matter the season.
What makes these treats truly stand out is their universal appeal and remarkable ease of preparation. This isn’t just a recipe; it’s an invitation for shared moments and cherished memories in the kitchen. Kids adore dipping the crispy wafers into the smooth chocolate and showering them with a colorful array of sprinkles, turning dessert-making into a cherished holiday tradition. From the initial melt of the chocolate to the final flourish of sprinkles, every step is designed to be enjoyable, engaging, and delightfully stress-free for all ages. It’s the perfect way to get the whole family involved in creating something delicious together.
Why You’ll Adore This White Chocolate Dipped Wafer Recipe
These white chocolate dipped sugar wafers offer a multitude of benefits that make them an ideal choice for any occasion:
- Incredibly Simple & Quick: With just a few basic ingredients and straightforward steps, even novice bakers can achieve stunning, professional-looking results in under 30 minutes. This recipe is your secret weapon for last-minute desserts.
- Family-Friendly Fun: This is a fantastic hands-on activity for children and adults alike. Kids will love the dipping and decorating process, fostering creativity and a love for baking without complicated techniques.
- Infinitely Customizable: Adapt flavors, colors, and sprinkles to match any holiday theme, party palette, or personal preference. The creative opportunities are limitless, allowing you to tailor them for birthdays, baby showers, or any special event.
- Deliciously Versatile: Ideal for holiday cookie exchanges, dessert tables, school treats, or simply enjoying as an everyday snack with a cup of hot cocoa or coffee. The combination of crispy wafer and smooth chocolate is truly irresistible.
- Perfect for Gifting: Elegantly packaged, these homemade treats make thoughtful and impressive gifts for neighbors, teachers, colleagues, or friends during the festive season.
Beyond their ease and decorative potential, these chocolate-dipped wonders are genuinely tasty! The delicate crunch of the sugar wafer combined with the smooth, sweet white chocolate coating creates a delightful texture and flavor contrast that’s hard to resist. While classic vanilla wafers are a timeless choice, don’t hesitate to experiment with different wafer flavors like zesty lemon, rich chocolate, sweet strawberry, or even tropical banana or key lime for an unexpected and exciting twist. For a touch of gourmet authenticity, consider using European-style wafers, like the delightful Manner Wafer Cookies that we first fell in love with during our travels to Switzerland. My husband often seeks them out at CostPlus World Market, a testament to their delicious appeal, ensuring his lunch treats are always a little extraordinary.
Gather Your Ingredients for Sweet Success
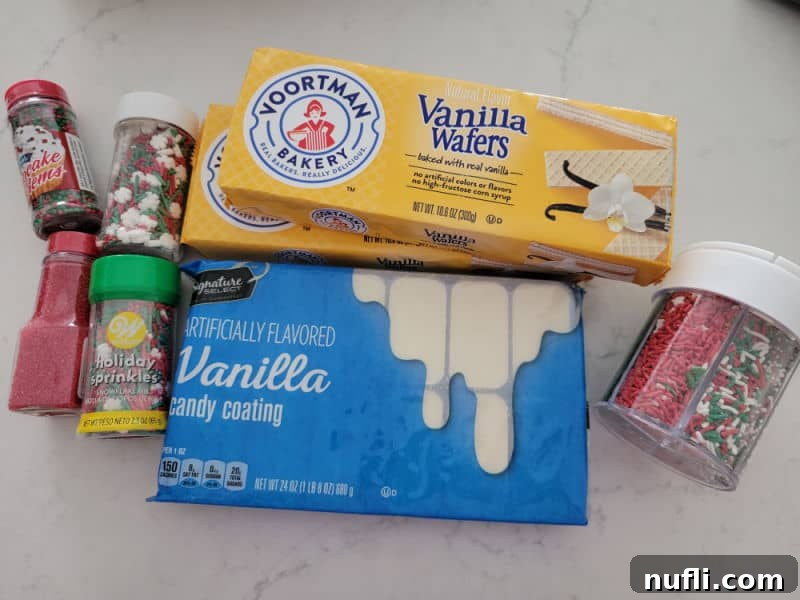
One of the best aspects of this recipe is its minimal ingredient list. You don’t need a pantry full of specialty items; just a few key components will transform into a delightful dessert. Quality ingredients, though few, will make a significant difference in the final taste and texture of your dipped wafers.
- Sugar Wafer Cookies: These form the crispy foundation of our treats. While vanilla wafers are a common and beloved choice, the beauty of this recipe lies in its flexibility. Feel free to explore lemon wafers for a zesty kick, chocolate wafers for double decadence, strawberry wafers for a fruity tang, or even key lime or orange wafers for seasonal variations. Any flavor you enjoy will pair wonderfully with the sweet white chocolate.
- White Candy Bark Coating (or White Chocolate Chips): For that perfectly smooth, quick-setting coating, candy bark (often labeled as almond bark or candy melts) is highly recommended. It melts effortlessly into a silky consistency and hardens quickly, ensuring your treats are ready in no time with a beautiful, shiny finish. If you prefer to use white chocolate chips, opt for high-quality brands and consider adding a teaspoon of shortening or coconut oil while melting to achieve a similarly fluid consistency for easier dipping.
- Assorted Sprinkles: This is where the magic truly happens and you can personalize your wafers! A vibrant assortment of sprinkles can instantly transform your treats to suit any occasion. For Christmas, think classic red, green, and white nonpareils, festive jimmies, sparkling edible glitter, or whimsical snowflake shapes. Birthdays call for bright rainbow sprinkles, while Halloween could feature spooky orange, purple, and black. Having a multi-compartment sprinkle container on hand will make decorating a breeze and unleash your inner artist.
- Optional: Additional Candy Melts for Color: If you wish to introduce different colored coatings or create artistic drizzles, candy melts in various hues are a fantastic option. Melt them just like the white candy bark and use them to create multi-colored dipped wafers or drizzle intricate patterns for extra flair and visual appeal.
Essential Equipment for Easy Dipping and Decorating
Having the right tools makes any baking project smoother, and this recipe is no exception. These items will ensure a seamless and enjoyable dipping experience, helping you achieve perfect results every time:
- Large Microwave-Safe Mixing Bowl: A sturdy glass bowl with a handle is ideal for melting chocolate, allowing for easy stirring and safe handling. Ensure the bowl is completely dry before adding chocolate to prevent seizing.
- Sturdy Spoon or Spatula: Essential for stirring the melting chocolate until it’s perfectly smooth and free of lumps.
- Parchment Paper: An absolute must for lining your baking sheets. It prevents the dipped wafers from sticking as they set and makes cleanup a cinch. Parchment paper is superior to wax paper when working with chocolate, as chocolate tends to stick less.
- Jelly Roll Pan or Cookie Sheet with Sides: Provides a flat, contained surface for cooling your chocolate-dipped treats. The raised edges help prevent sprinkles from scattering too widely across your countertop.
- Fork or Dipping Tool: A simple kitchen fork works perfectly for dipping wafers, allowing excess chocolate to drip off easily. Specialty dipping tools are also available if you prefer.
Step-by-Step Guide: How to Craft Your Delicious White Chocolate Dipped Sugar Wafers
Step 1: Perfectly Melt Your White Chocolate Coating
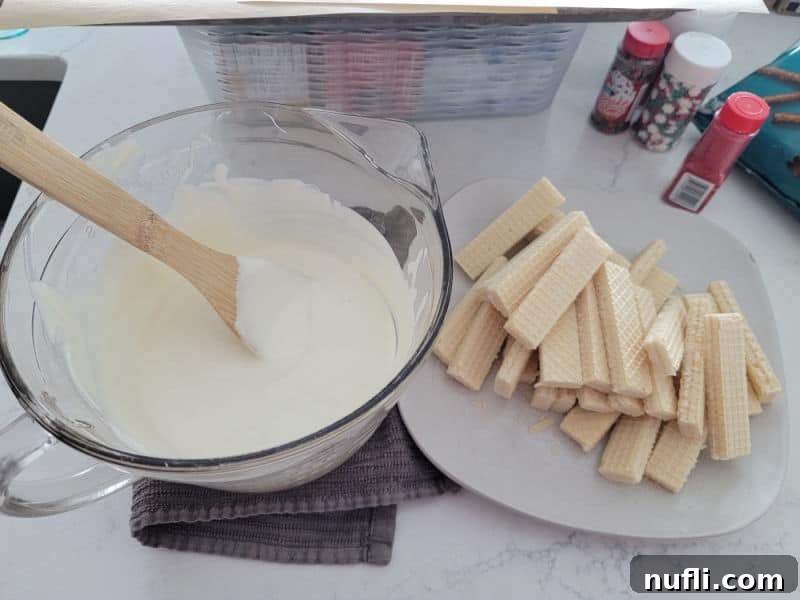
Begin by placing your white candy bark coating (or white chocolate chips) into a large, microwave-safe mixing bowl. It is absolutely crucial that your bowl and any utensils are completely dry; even a tiny drop of water can cause the chocolate to seize and become thick, grainy, and unusable. Microwave the chocolate in short, 30-second intervals. After each interval, remove the bowl and stir the chocolate thoroughly with a sturdy spoon or spatula. This method of intermittent stirring prevents hot spots and helps the chocolate melt smoothly and evenly without burning.
Continue this process until the chocolate is about 70-80% melted, with a few small lumps remaining. At this point, remove it from the microwave and continue stirring vigorously. The residual heat from the already melted chocolate will typically be enough to melt the remaining pieces, resulting in a perfectly smooth, glossy, and flowing consistency. This technique significantly reduces the risk of burning the chocolate, which can impart an unpleasant, bitter taste. You want a velvety, flowing chocolate that’s easy to dip and coats smoothly.
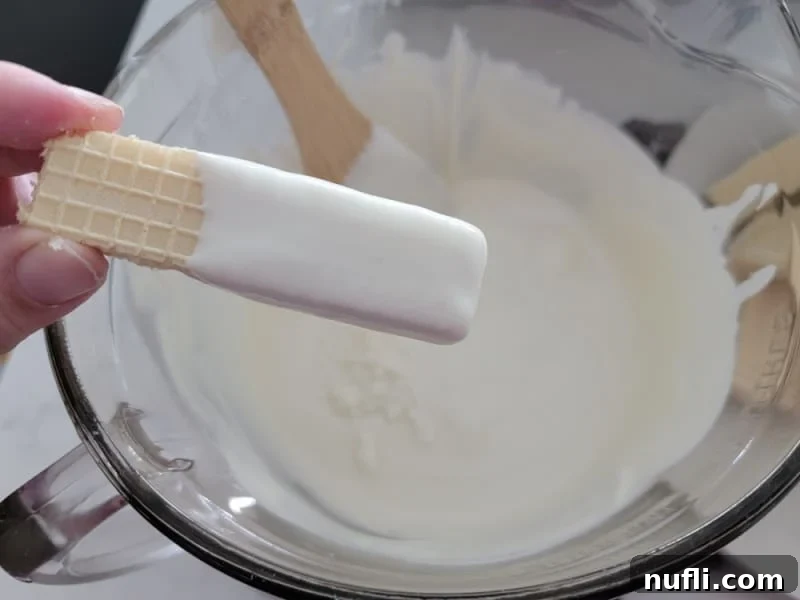
Step 2: Dip and Evenly Coat Your Sugar Wafers
Once your white chocolate is perfectly melted and smooth, it’s time for the fun and creative part: dipping the sugar wafers! Gently hold a sugar wafer by one end and immerse it into the melted chocolate. You have full creative control over how much of the wafer you cover. You can opt for a full dip for maximum indulgence, cover them three-quarters of the way for a classic look, or simply coat just the ends for a more minimalist and elegant design. Use a fork or a dedicated dipping tool to carefully lift the wafer from the chocolate.
Crucially, allow any excess chocolate to drip back into the bowl. This step ensures that your wafers are evenly coated without being overly thick or messy, resulting in a clean, professional finish. A gentle tap of the fork against the side of the bowl can help dislodge any extra chocolate, creating a smooth and appealing surface. Work efficiently, as the chocolate will begin to set.
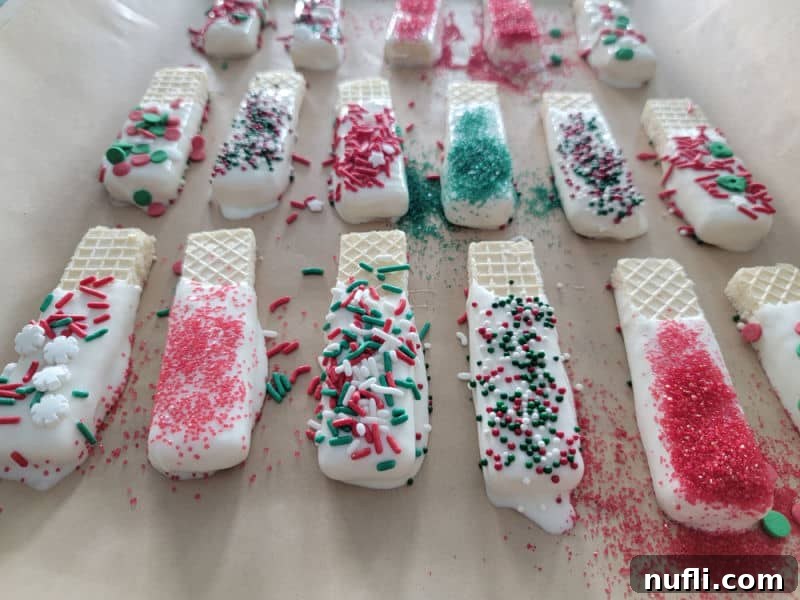
Step 3: Decorate with Sprinkles and Allow to Set
Immediately after dipping each sugar wafer, carefully place it onto a sheet of parchment paper laid out on your baking sheet. Without delay, generously sprinkle your chosen festive sprinkles, colored sugar, or edible glitter over the chocolate-coated portion. Timing is absolutely key here: if you wait too long, the chocolate will begin to harden and set, and the sprinkles won’t adhere properly, leading to disappointment and a less vibrant treat. Be quick and liberal with your decorating!
Once all your wafers are dipped and decorated, allow them to set completely. This can be done at room temperature, which typically takes about 15-20 minutes depending on your room’s temperature and humidity. For a quicker set, you can carefully place the baking sheet in the refrigerator for approximately 5-10 minutes. Once the chocolate is firm and no longer sticky to the touch, your beautiful and delicious white chocolate dipped sugar wafers are ready to serve, share, or store!
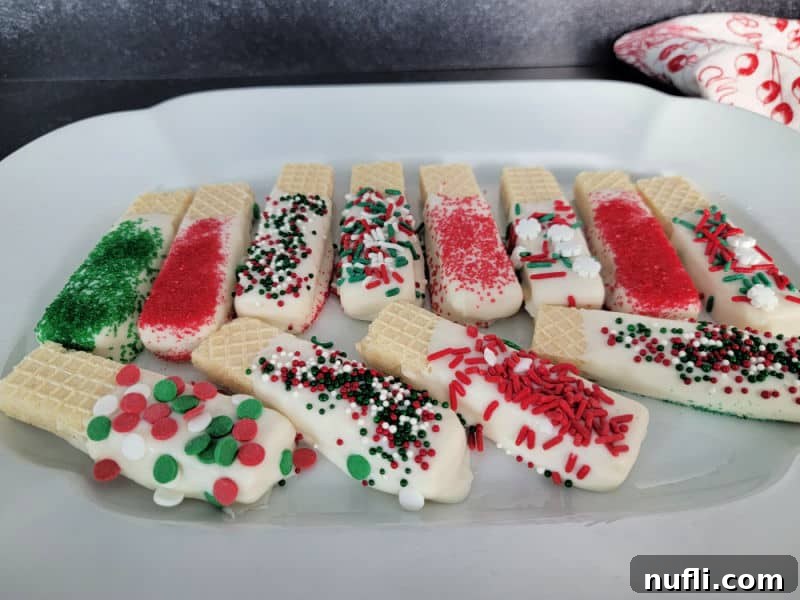
Expert Tips for Perfect White Chocolate Dipped Wafers Every Time
Achieving perfect results with your chocolate-dipped wafers is easy with these helpful tips and tricks:
- Mind the Temperature: When melting chocolate, avoid overheating at all costs. Chocolate burns easily, which will cause it to seize and turn grainy or even bitter. Always melt it slowly in short bursts in the microwave or use a gentle double boiler method for consistent, smooth results.
- Ensure Everything is Dry: As mentioned, water is chocolate’s enemy. Ensure all your bowls, spatulas, and spoons are completely dry before they touch the melted chocolate. Even a tiny bit of moisture can ruin the consistency.
- Get Creative with Wafer Flavors: Don’t limit yourself to just vanilla sugar wafers. Strawberry, lemon, chocolate, or even peanut butter wafers can create exciting and unique flavor combinations with the sweet white chocolate coating.
- Experiment with Dipping Styles: Beyond a full or half dip, consider drizzling melted colored candy melts over the set white chocolate for an artistic flair. Use a fork or a piping bag with a tiny hole to create thin lines, zigzags, or other patterns.
- Organize Your Sprinkles: Keep your chosen sprinkles in an open bowl or shaker close by, ready for immediate application after dipping. Consider working over a tray with raised edges to catch fallen sprinkles for easy cleanup and even reuse.
- Proper Storage: Store your finished white chocolate-dipped sugar wafers in an airtight container at room temperature. They will remain fresh and delicious for up to a week. Avoid refrigeration unless you need them to set very quickly, as condensation can sometimes affect the chocolate’s appearance.
- Gifting Presentation: These elegant treats make wonderful homemade gifts. Arrange them beautifully in small decorative boxes or clear cellophane bags tied with a festive ribbon for a thoughtful and much-appreciated present for neighbors, teachers, or friends.
- Parchment Paper is Best: Always opt for parchment paper when working with chocolate. Its superior non-stick properties ensure your delicate wafers release easily without leaving behind any residue, unlike wax paper which can sometimes cause sticking.
Recipe Card: White Chocolate Dipped Sugar Wafers
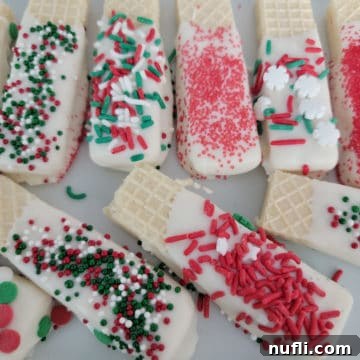
White Chocolate Dipped Sugar Wafers
How to make easy chocolate dipped sugar wafers perfect for the holidays and any festive gathering.
Prep Time: 20 minutes
Total Time: 20 minutes
Yields: 32 servings
Calories: 181 kcal
Author: Tammilee Tips
Ingredients
- 32 Sugar Wafer Cookies (any flavor)
- 24 Ounce Vanilla Almond Bark (or white candy coating)
- Assorted Sprinkles (for decoration)
Instructions
- Melt White Chocolate: Place vanilla almond bark in a microwave-safe mixing bowl. Microwave in 30-second intervals, stirring thoroughly between each interval, until the chocolate is completely melted and smooth. Ensure your bowl is completely dry before starting.
- Dip Wafers: Gently dip each sugar wafer into the melted chocolate. Allow any excess chocolate to drip off, ensuring an even coating.
- Decorate Immediately: Place the dipped wafers onto parchment paper. Immediately and generously decorate with your favorite sprinkles before the chocolate has a chance to set.
- Set and Serve: Allow the wafers to set at room temperature for 15-20 minutes, or refrigerate for 5-10 minutes until the chocolate is firm. Once set, they are ready to enjoy!
Kitchen Tools
- Large Microwave-Safe Mixing Bowl
- Parchment Paper
- Cookie Sheets (with sides)
- Sturdy Spoon or Spatula
- Fork or Dipping Tool
Notes
Store finished White Chocolate Dipped Sugar Wafers in an airtight container at room temperature for optimal freshness, for up to one week.
Nutrition Facts (per serving)
Calories: 181 kcal
Fat: 7g (11% Daily Value)
Saturated Fat: 6g (38% Daily Value)
Sodium: 98mg (4% Daily Value)
Potassium: 25mg (1% Daily Value)
Carbohydrates: 26g (9% Daily Value)
Fiber: 1g (4% Daily Value)
Sugar: 18g (20% Daily Value)
Protein: 1g (2% Daily Value)
Calcium: 11mg (1% Daily Value)
Iron: 1mg (6% Daily Value)
* Percent Daily Values are based on a 2000 calorie diet. Nutritional information may vary depending on specific brands and ingredients used.
More Festive Treat Ideas You’ll Love
If you enjoyed making these White Chocolate Dipped Sugar Wafers, you’ll surely love exploring these other delightful and easy holiday recipes from our collection:
- Grinch Bark: A whimsical and colorful treat inspired by the beloved holiday character, perfect for themed parties.
- Hot Chocolate Dip: A decadent and creamy dessert dip that tastes just like your favorite comforting winter beverage.
- Reindeer Chow: A fun and addictive snack mix, also famously known as Muddy Buddies, ideal for sharing.
- 2 Ingredient Oreo Bark: Simplicity at its best with delicious results – a quick fix for chocolate cravings.
- No Bake Peanut Butter Pie: A creamy, dreamy dessert that’s incredibly easy to make without ever turning on your oven.
- Eggnog Latte: A warm and comforting drink to savor during the festive season, perfect for cozy mornings.
- Sugared Cranberries: Elegant and tart, these sparkling cranberries are perfect for garnishing desserts or enjoying as a festive snack.
For more delicious culinary inspiration, be sure to explore our extensive collection of copycat recipes, irresistible dessert recipes, and convenient Crock Pot Recipes for every meal and occasion.
Stay connected and never miss a new recipe or tip! Follow Tammilee Tips on Facebook, Instagram, and Pinterest for all our latest updates and delicious ideas.
