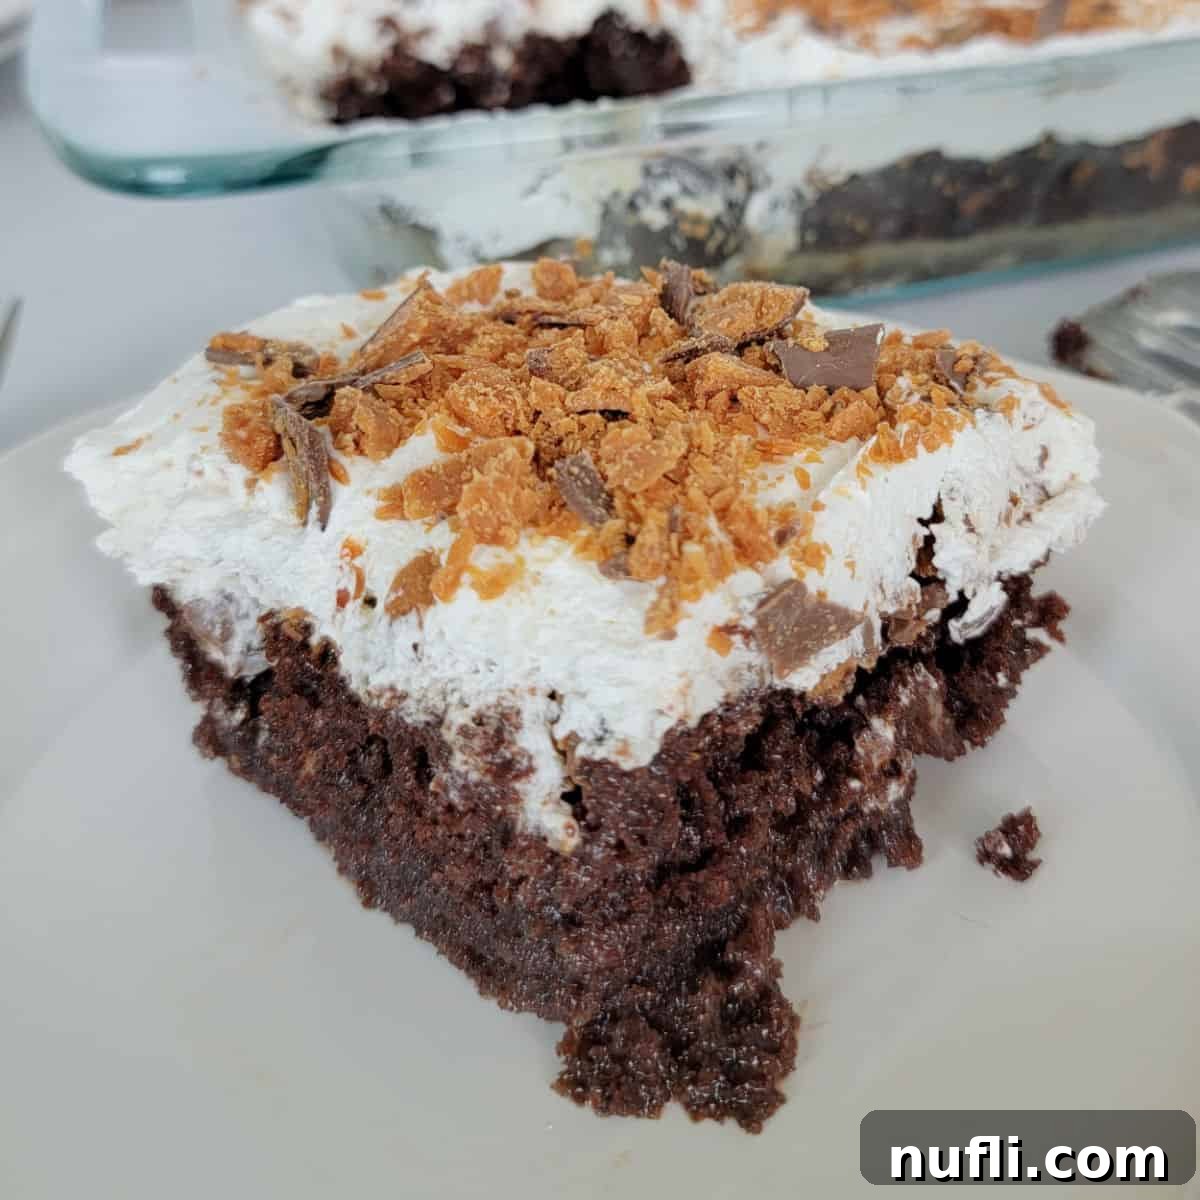
Decadent Butterfinger Poke Cake: Your Ultimate Guide to a Crowd-Pleasing Dessert
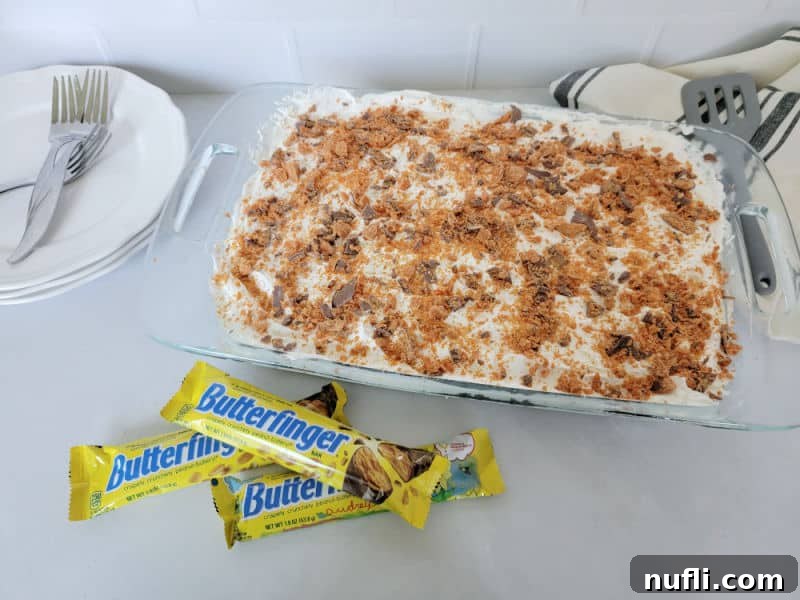
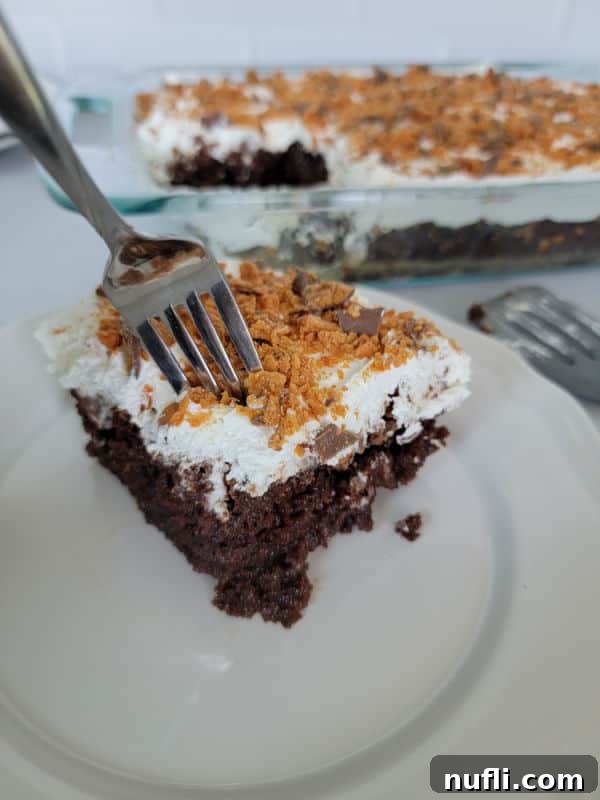
Prepare to delight your taste buds with this incredibly easy and utterly delicious Butterfinger Cake! This perfect poke cake recipe combines a super moist chocolate cake with layers of rich caramel, sweet condensed milk, and the irresistible crunch of Butterfinger candy bars, all topped with a light and fluffy whipped topping. It’s a dessert that consistently earns rave reviews and is surprisingly simple to make, making it ideal for seasoned bakers and beginners alike.
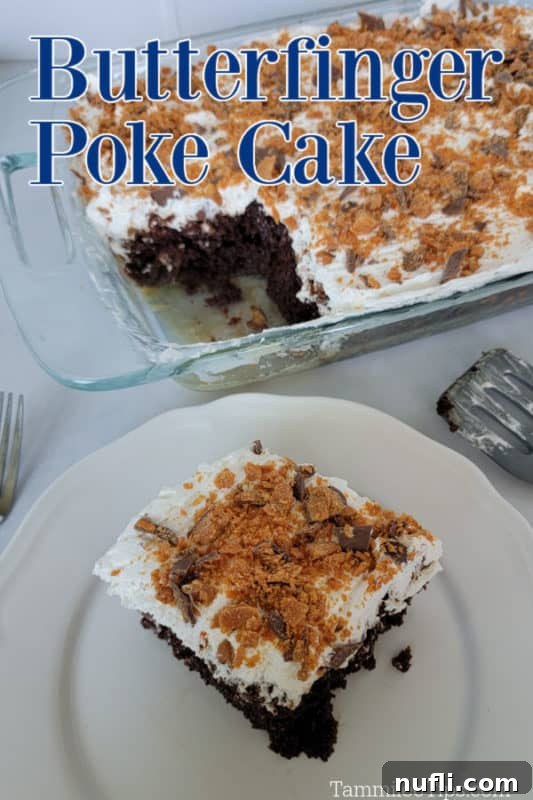
The Butterfinger Poke Cake holds a special place in our hearts – it’s an absolute favorite, especially for my husband! This dessert masterfully blends the softness of a well-saturated cake with the satisfying crispiness of Butterfinger pieces, creating a truly unique and memorable experience with every bite. The combination of chocolate and peanut butter, elevated by the creamy sweetness of condensed milk and caramel, is simply divine. You’ll want to savor every decadent mouthful!
Why You’ll Love This Butterfinger Poke Cake Recipe
There are countless reasons why this Butterfinger Poke Cake will become a staple in your recipe collection:
- Effortless Preparation: Starting with a boxed cake mix streamlines the process significantly. No complex measuring or scratch baking required, making it perfect for busy schedules.
- Irresistible Flavor Profile: The classic pairing of rich chocolate, salty-sweet peanut butter, and buttery caramel creates a harmonious blend that’s universally loved.
- Sensational Texture: The moist, tender cake absorbs the luscious caramel-condensed milk mixture, while crushed Butterfingers add an exciting, crisp counterpoint.
- Crowd-Pleaser: This cake is a guaranteed hit at any gathering. Whether it’s a potluck, family dinner, or holiday celebration, guests will be asking for the recipe.
- Make-Ahead Friendly: It actually tastes better the longer it sits, allowing the flavors to meld and the cake to become even more moist. This makes it perfect for preparing in advance.
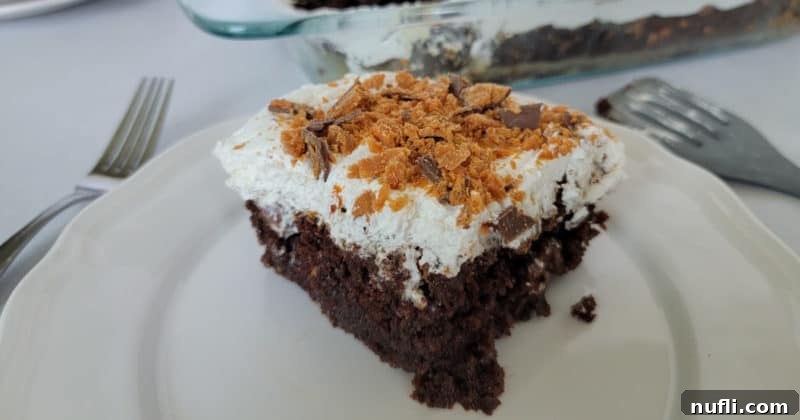
- Visually Appealing: Layers of cake, caramel, candy, and whipped topping make for a beautiful presentation that’s as inviting as it is delicious.
This dessert isn’t just a cake; it’s an experience. Forget the calories for a moment and allow yourself to truly enjoy the incredible depth of flavor and texture this Butterfinger Poke Cake offers. It’s truly too good to resist!
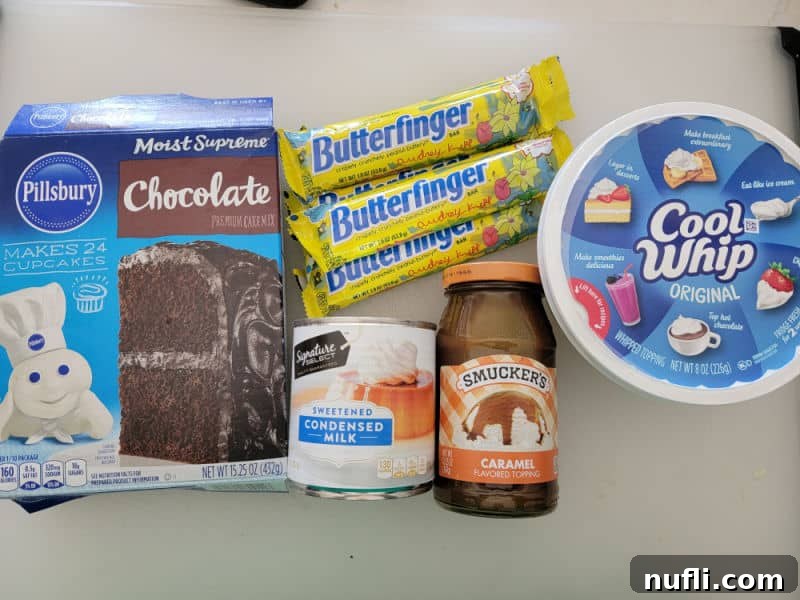
Essential Ingredients for Your Butterfinger Poke Cake
Crafting this epic Butterfinger Poke Cake requires just a few simple ingredients, many of which you likely already have in your pantry. The beauty of this recipe lies in its straightforward nature, yielding spectacular results without fuss. For precise measurements and detailed steps, refer to the full recipe card below.
- Chocolate Cake Mix: We typically opt for a classic chocolate cake mix to enhance the richness and complement the peanut butter flavor of Butterfingers. However, don’t hesitate to experiment! A yellow cake mix or white cake mix can offer a lighter base, while a fudge marble cake mix could introduce even more chocolatey goodness. Any standard 15.25-ounce box will work perfectly.
- Caramel Sauce/Caramel Topping: A good quality store-bought caramel sauce works wonders here. It provides that irresistible sweet, buttery, and slightly salty note that perfectly ties all the flavors together. You can also use a homemade crockpot caramel sauce for an extra touch of gourmet flavor.
- Sweetened Condensed Milk: This ingredient is the secret to the poke cake’s incredible moisture and indulgent sweetness. When combined with the caramel, it creates a luscious mixture that seeps into every crevice of the cake, ensuring a tender, flavor-packed bite.
- Butterfinger Candy Bars: The star of the show! These iconic candy bars bring a unique peanut buttery flavor and a delightful crisp-crunchy texture that no other ingredient can replicate. You’ll need enough to create layers both within and on top of the cake.
- Cool Whip Whipped Topping: For the perfect light and airy finish, Cool Whip is our preferred choice over homemade whipped cream. Its stability means it won’t weep or deflate, keeping your cake looking beautiful and tasting fresh for longer, especially when making ahead. If you’re a fan of Cool Whip recipes, you’ll love it here!
- Cake Mix Packaging Ingredients: Don’t forget the additional items required to prepare your chosen cake mix, typically eggs, oil, and water or milk. Always follow the specific instructions on your cake mix box.
Recommended Equipment for Baking Success
Having the right tools can make all the difference in ensuring your Butterfinger Poke Cake comes out perfectly. Here’s what you’ll need:
- 9×13 Casserole Baking Dish: This standard size is ideal for most boxed cake mixes and ensures your poke cake has enough surface area for all those delicious toppings. A sturdy ceramic or glass dish works best for even baking.
- Large Mixing Bowl: A spacious bowl is essential for comfortably mixing your cake batter. We’re particularly fond of glass batter bowls with a handle, as they offer stability on the counter and make pouring easy.
- Hand Mixer or Stand Mixer: While you can mix by hand, an electric mixer will ensure your cake batter is smooth, lump-free, and perfectly aerated, contributing to a lighter cake texture.
- Non-Stick Cooking Spray: Absolutely crucial for ensuring your cake doesn’t stick to the pan, allowing for easy removal and clean slices.
- Wooden Spoon Handle or Fork: The key to a successful poke cake! A wooden spoon handle creates perfectly sized holes for the caramel and condensed milk mixture to seep into. If a wooden spoon isn’t available, a sturdy fork can also be used to create multiple smaller holes. Ensure the cake has cooled slightly before poking to prevent it from tearing.
- Heat-Resistant Potholders: Safety first! Always use reliable, heat-resistant potholders when handling hot baking dishes. A few years ago, we had a close call with a cloth potholder catching fire, so we’ve since switched to silicone or other fire-resistant options.
Step-by-Step: How to Make a Butterfinger Poke Cake
Creating this irresistible Butterfinger Poke Cake is a breeze. Follow these simple steps for a dessert that’s guaranteed to impress. Remember to consult the full printable recipe card at the bottom of the post for exact details and timings.
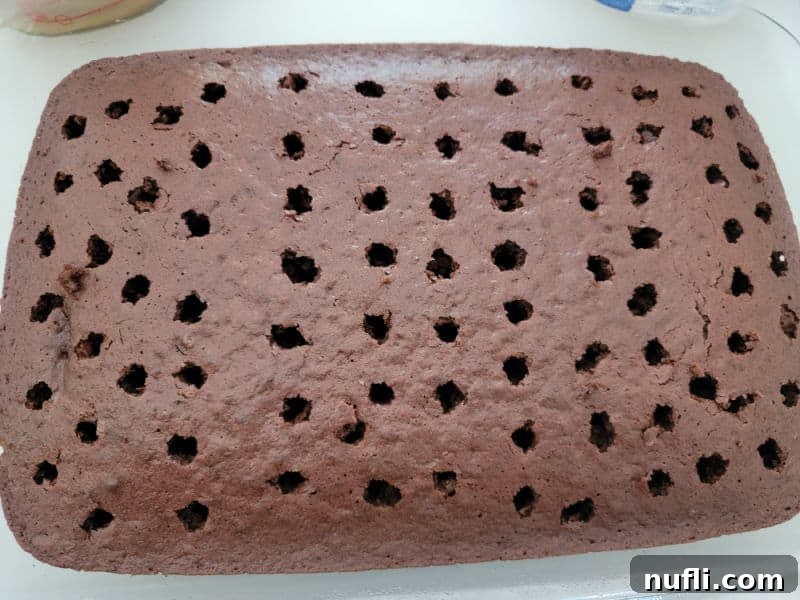
Step 1: Bake Your Cake Base. Begin by preheating your oven according to the instructions on your chocolate cake mix package. Prepare the cake batter as directed, then pour it into your greased 9×13 baking dish. Bake until a toothpick inserted into the center comes out clean. Once baked, allow the cake to cool on a wire rack for about 10-15 minutes. This slight cooling period is important – the cake should still be warm to absorb the liquid mixture effectively, but not so hot that it crumbles when poked.
Once slightly cooled, use the handle of a wooden spoon (or a fork) to generously poke holes all over the surface of the cake. Aim for holes that go almost all the way to the bottom of the pan to ensure maximum flavor penetration. Distribute the holes evenly, about an inch apart, so every slice gets a good infusion of the delicious filling.
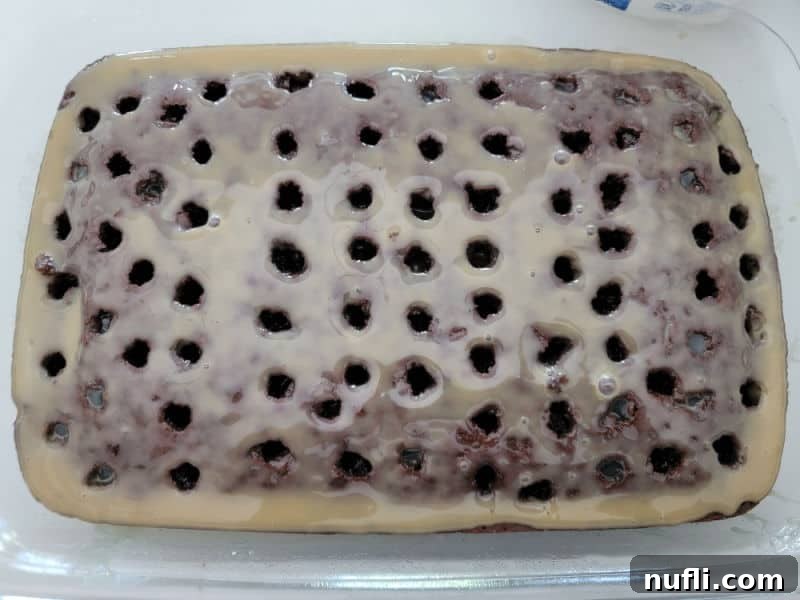
Step 2: Infuse with Caramel Goodness. In a medium bowl, combine the sweetened condensed milk and caramel sauce, stirring until thoroughly mixed. This creates the rich, gooey filling that will transform your cake. Carefully and evenly pour this decadent caramel-condensed milk mixture over the entire surface of the warm, poked cake. Watch as the golden liquid seeps into all the holes. Allow it to soak in for at least 5-10 minutes, ensuring every part of the cake is drenched in flavor. During this time, the cake will become incredibly moist and intensely flavorful.
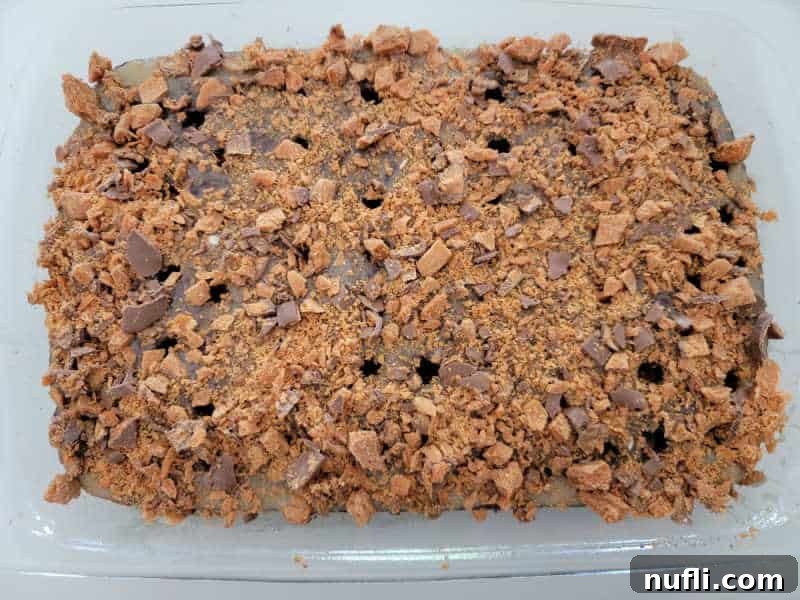
Step 3: Add the Signature Crunch. While the caramel mixture is soaking, prepare your Butterfinger candy bars. Crush them into small, bite-sized pieces. A simple way to do this is to place them in a large Ziploc bag and gently crush them with a rolling pin or the flat side of a meat tenderizer. This method keeps the mess contained. Once crushed, evenly spread about half of the chopped Butterfinger candy bars over the top of the cake, creating a delightful layer of crunch.
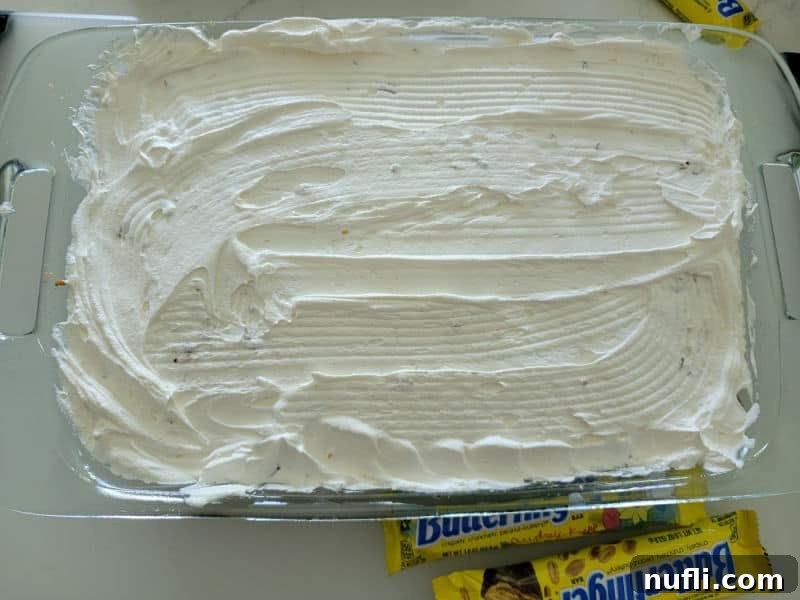
Step 4: Top with Cool Whip. Once the cake has fully cooled to room temperature (this is important to prevent the Cool Whip from melting), gently spread the entire container of Cool Whip evenly over the layer of crushed Butterfingers. Use an offset spatula or the back of a spoon to create a smooth, cloud-like topping. The Cool Whip adds a refreshing, light contrast to the rich cake and candy layers.
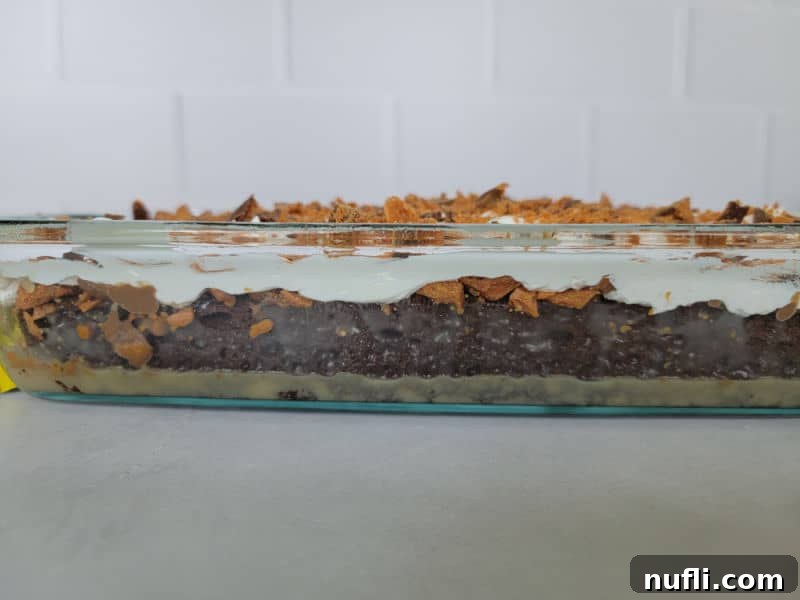
Step 5: Final Flourish and Chill. Sprinkle the remaining half of the crushed Butterfinger pieces over the top of the Cool Whip layer. This not only adds more flavor and crunch but also makes for a beautiful presentation. For the best results and to allow all the flavors to fully meld and the cake to set, cover the baking dish loosely with plastic wrap or aluminum foil and refrigerate the cake for at least 4 hours, or ideally, overnight. The longer it chills, the more moist and flavorful it will become!
Pro Tips for the Best Butterfinger Poke Cake
- Don’t Overbake: Overbaking can lead to a dry cake, which defeats the purpose of a moist poke cake. Keep an eye on it and remove it from the oven as soon as a toothpick comes out clean.
- Warm Cake, Not Hot: The caramel mixture absorbs best into a cake that’s warm, but not fresh-out-of-the-oven hot. Letting it cool for 10-15 minutes allows the cake structure to firm up slightly while still being receptive to the liquid.
- Poke Deeply and Evenly: Ensure your holes are deep enough to reach almost the bottom of the pan and are well-distributed across the entire cake surface. This guarantees every bite is infused with caramel goodness.
- Chill Time is Crucial: While tempting to dive in immediately, refrigerating the cake for at least 4 hours (preferably overnight) allows the liquid to fully soak in, the flavors to deepen, and the cake to achieve its optimal moist and tender texture.
- Crush Candy to Your Liking: Whether you prefer finely crushed pieces or larger chunks for more bite, adjust how you crush your Butterfingers. A Ziploc bag and a rolling pin are excellent for this task.
- Garnish Generously: Don’t be shy with the final sprinkle of Butterfinger pieces. It adds visual appeal and an extra burst of flavor and crunch.
- Serving Temperature: This cake is best served chilled. If you’re serving it outdoors, try to keep it cool to maintain the texture of the Cool Whip.
Preparation and Storage Guidelines
One of the many advantages of this Butterfinger Poke Cake is its flexibility when it comes to preparation and storage. You can easily make it ahead of time, which makes it perfect for parties and events.
- Make Ahead: This Butterfinger Poke Cake is a fantastic make-ahead dessert! You can bake the cake and poke the holes, then cover it and store it at room temperature for up to a day. Alternatively, you can complete steps 1 and 2 (bake, poke, and pour caramel/condensed milk) and refrigerate the cake, covered, for up to three days. When you’re ready to serve, simply add the Cool Whip and remaining Butterfingers.
- Storage: To maintain its freshness and deliciousness, refrigerate any leftover Butterfinger Poke Cake in an airtight container. It will stay wonderfully moist and flavorful for four to five days.
- Freezing/How to Freeze: Cakes generally freeze exceptionally well, and this decadent candy-inspired creation is no exception. To freeze, ensure the cake is fully assembled and chilled. Wrap individual slices or the entire cake (if planning to thaw and serve whole) tightly in plastic wrap, then an additional layer of aluminum foil. Place in an airtight freezer-safe container. Enjoy within three months. To thaw, simply transfer frozen portions to the refrigerator overnight, or let them sit on your kitchen countertop for an hour or two for a chilled, ready-to-eat treat.
Creative Recipe Variations
While this Butterfinger Poke Cake is perfect as is, it’s also wonderfully adaptable! Feel free to get creative with these delicious variations:
- Cake Mix Substitutions: While chocolate is classic, feel free to switch up the cake base. A yellow or white cake mix will offer a milder flavor profile, letting the Butterfinger and caramel shine even more. For a super indulgent twist, try a dark chocolate fudge mix!
- Candy Bar Alternatives: The “poke cake” concept works beautifully with other candy bars.
- Heath Bar: For a toffee crunch, swap Butterfingers for Heath bars.
- Snickers: Introduce peanuts, nougat, and caramel by using chopped Snickers.
- Twix: For a shortbread crunch, try chopped Twix bars.
- Reese’s Peanut Butter Cups: Double down on the peanut butter flavor with chopped Reese’s.
- Additional Drizzle: For an even richer experience, drizzle some extra chocolate syrup or an additional swirl of caramel topping over the Cool Whip layer before adding the final Butterfinger crunch.
- Nutty Addition: Sprinkle some chopped peanuts or pecans on top for an extra layer of texture and flavor that complements the peanut buttery notes of the Butterfingers.
- Topping Swaps: While Cool Whip is recommended for stability, if serving immediately, you could use homemade whipped cream. For an even more decadent topping, consider a light cream cheese frosting.
Dietary Considerations
- Vegetarian Option: This is a delicious vegetarian-safe dessert recipe, as all main ingredients (cake mix, dairy, candy) are typically vegetarian.
- Vegan Option: Unfortunately, due to the dairy in Butterfinger candy bars, sweetened condensed milk, and Cool Whip, this recipe is not vegan-friendly.
- Gluten-Free: Good news for gluten-free eaters! According to Butterfinger’s official website, most of their candy varieties are gluten-free. Just ensure you select a certified gluten-free chocolate cake mix to make this a safe and delicious option for those with gluten sensitivities.
- Larger Group/More Servings: This recipe utilizes one standard box of cake mix and yields one 9×13 inch cake, typically providing 12 generous servings. For larger gatherings, simply double the recipe and use two 9×13 pans or a larger sheet pan if available, adjusting baking times as needed.
- Sugar-Free: While sugar-free cake mixes and sugar-free caramel sauces are available, achieving a truly sugar-free Butterfinger Poke Cake is challenging, as Butterfinger candy bars do not come in a sugar-free variety.
Frequently Asked Questions About Butterfinger Poke Cake
- What exactly is a poke cake?
- A poke cake is a type of cake that involves baking a sheet cake, then “poking” holes into it (usually with a wooden spoon handle or fork). These holes are then filled with a liquid or creamy mixture, such as sweetened condensed milk, pudding, or gelatin, which soaks into the cake, making it incredibly moist and flavorful. It’s often topped with whipped cream or frosting.
- Can I use a homemade cake instead of a boxed mix?
- Absolutely! While this recipe emphasizes convenience with a boxed mix, you can certainly use your favorite homemade chocolate cake recipe. Just ensure it’s baked in a 9×13 inch pan and allowed to cool slightly before poking holes and adding the caramel mixture.
- Why do you recommend Cool Whip instead of homemade whipped cream?
- Cool Whip is recommended for its stability. It holds its shape much longer than homemade whipped cream, especially when stored in the refrigerator or served at room temperature for extended periods. This prevents the topping from weeping or deflating, keeping your cake looking fresh and appealing.
- How long does Butterfinger Poke Cake last in the refrigerator?
- When stored properly in an airtight container in the refrigerator, Butterfinger Poke Cake will stay fresh and delicious for 4 to 5 days. The flavors often deepen and meld even more after the first day.
- Can I use other types of candy bars?
- Yes, absolutely! The poke cake concept is very versatile. Other great options include Heath bars (for a toffee crunch), Snickers (for more caramel and nuts), or chopped Reese’s Peanut Butter Cups for an extra peanut butter kick. Experiment with your favorites!
- What’s the best way to crush Butterfinger bars?
- The easiest way is to place them in a large Ziploc bag, seal it, and then gently crush them using a rolling pin, the bottom of a heavy pan, or a meat tenderizer. This method keeps the mess contained and allows you to control the size of the pieces.
When to Serve and What to Serve With Butterfinger Poke Cake
This candy-inspired chocolate, peanut, and caramel cake is an absolute showstopper, perfect for making a grand entrance at your next potluck, backyard barbecue, or family gathering. Its rich flavors and satisfying textures make it versatile enough to pair with a variety of meals.
Main Course Pairings
For a hearty meal that leads up to this delicious dessert, consider:
- Chicken Spaghetti with Rotel: A comforting and flavorful pasta dish.
- Bisquick Impossible Cheeseburger Pie: A quick and easy savory pie that’s a family favorite.
- Chicken Bacon Ranch Casserole: Creamy, cheesy, and utterly satisfying.
- Dr. Pepper Pulled Pork: Tender, sweet, and savory pulled pork, perfect for sandwiches.
- Homemade Hot Dog Chili: Classic comfort food that’s ideal for casual gatherings.
- Philly Cheesesteak Casserole: All the flavors of a cheesesteak in an easy-to-make casserole.
Side Dish Suggestions
Complement your main course with these delectable sides:
- Easy Hasselback Potatoes: Crispy, tender, and beautifully presented potatoes.
- Funeral Potatoes: A creamy, cheesy, and crunchy potato casserole everyone loves.
- BLT Pasta Salad: A fresh and flavorful pasta salad with classic BLT ingredients.
- Southern Fried Cabbage with Bacon: A simple, savory, and comforting vegetable dish.
- Sauerkraut Salad: A tangy and refreshing salad to cut through richer dishes.
- Jiffy Cornbread with Sour Cream: Moist and flavorful cornbread, perfect alongside stews or chilis.
- Crockpot Bourbon Baked Beans: Sweet, savory, and slow-cooked to perfection.
Refreshing Beverage Ideas
Balance the sweetness of the cake with these delightful drinks:
- Coke Slushie: A fizzy, icy treat that’s perfect on a warm day.
- Kool-Aid Slushie: A fun and fruity option for all ages.
- Red Robin Freckled Lemonade: A sweet and tart classic with a twist.
- Copycat Starbucks Passion Tea Lemonade: A refreshing, vibrant, and slightly exotic drink.
More Decadent Dessert Recipes to Explore
If you loved this Butterfinger Poke Cake, you’re in for a treat! We have a wide array of other fantastic dessert recipes that are just as easy and delicious. Don’t miss out on these:
- Carrot Cake with Pineapple, Coconut, and Port Wine
- Pig Pickin Cake
- Peanut Butter and Jelly Cake
- Mountain Dew Cake
- Lemon Dump Cake
- Ooey Gooey Butter Cake
And for even more convenience, explore our collection of easy cake mix recipes. We also have a dedicated section for copycat recipes, a wide range of dessert recipes, and our beloved Crock Pot Recipes for every meal of the day.
Stay connected with Tammilee Tips for all our latest recipe posts by following us on Facebook, Instagram, Pinterest, and Twitter.
Butterfinger Poke Cake Recipe
Learn how to make this incredibly easy and delicious Butterfinger Poke Cake. It’s a perfect dessert for any occasion!
Prep Time: 15 minutes
Cook Time: 30 minutes
Total Time: 45 minutes
Servings: 12
Calories: 460 kcal per serving
Author: Tammilee Tips
Ingredients
- 1 box Chocolate Cake Mix (+eggs, oil, and water/milk as directed on package)
- 8 Ounce Caramel Sauce (or caramel topping)
- 14 Ounce Sweetened Condensed Milk
- 4 Butterfinger Candy Bars (standard size)
- 16 Ounce Cool Whip Whipped Topping (thawed)
Instructions
- Preheat your oven to the temperature specified on the chocolate cake mix box. Lightly grease a 9×13 inch baking dish with non-stick spray.
- Prepare the cake batter according to the directions on the cake mix box. Pour the batter into the prepared baking dish and bake as directed until a toothpick inserted into the center comes out clean.
- Remove the cake from the oven and allow it to cool on a wire rack for about 10-15 minutes. While still warm, use the handle of a wooden spoon or a fork to poke holes evenly across the entire surface of the cake, going almost to the bottom of the pan.
- In a medium bowl, combine the sweetened condensed milk and caramel sauce. Whisk until well combined. Evenly pour this mixture over the warm, poked cake, ensuring the liquid seeps into all the holes. Let the cake sit for a few minutes to absorb the mixture.
- While the cake is soaking, unwrap the Butterfinger candy bars and place them in a large Ziploc bag. Gently crush them into small pieces using a rolling pin or the back of a spoon.
- Sprinkle approximately half of the crushed Butterfinger pieces evenly over the top of the cake.
- Allow the cake to cool completely to room temperature. Once cooled, gently spread the thawed Cool Whip whipped topping evenly over the layer of crushed Butterfingers.
- Finally, sprinkle the remaining crushed Butterfinger pieces over the Cool Whip for garnish.
- Cover the cake loosely with plastic wrap and refrigerate for at least 4 hours, or preferably overnight, to allow the flavors to meld and the cake to become perfectly moist. Store any leftovers in the refrigerator.
Kitchen Tools
- 9X13 Baking Pan
- Large Mixing Bowl
- Hand Mixer or Stand Mixer
- Wooden Spoon (for poking holes)
- Non-Stick Spray
Nutrition Facts
Calories from Fat 90
Love this recipe? Follow @TammileeTIps on Pinterest for more delicious ideas!
Tried this recipe? Mention @TammileeTipsLife when you share a photo on Instagram!
