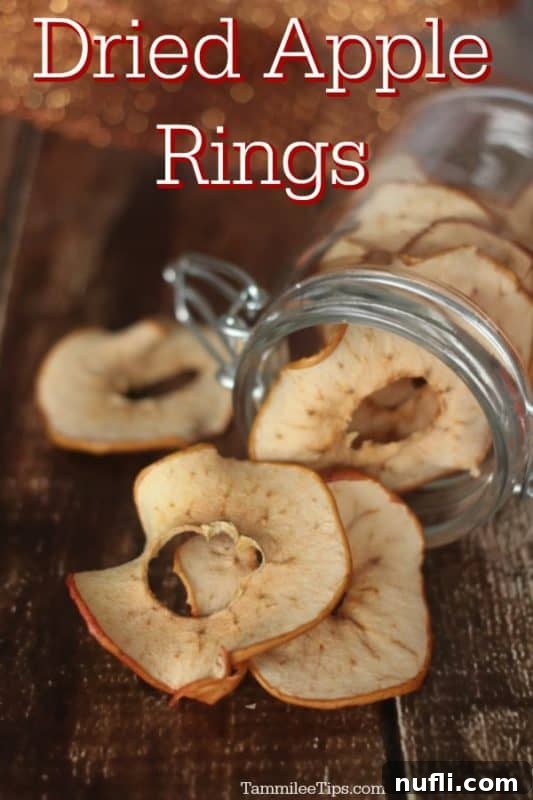
The crisp air and vibrant colors of autumn in the Northwest are truly something special. As the seasons change, so do the offerings from our local farms, bringing an abundance of fresh, delicious produce. One of the highlights for me is the incredible bounty of local apples, which are perfect for a wide array of culinary creations. While there are countless ways to enjoy these versatile fruits, one of my absolute favorites is transforming them into wholesome, delightful Dried Apple Slices right in my own oven.

Homemade Dried Apples: A Wholesome Oven-Baked Snack
There’s a unique satisfaction that comes from making your own snacks, and oven-dried apples are no exception. Store-bought apple rings can be surprisingly expensive, often loaded with added sugars or preservatives. But with just a few simple ingredients and a little patience, you can create a budget-friendly, naturally sweet treat that’s far superior in taste and nutrition. These homemade dried apple slices are an excellent snack for kids and adults alike, perfect for lunchboxes, hiking trips, or simply curbing those afternoon cravings. I often pack them for my husband, John, and they’re always a hit!
Why Make Your Own Dried Apples?
Beyond the sheer joy of a DIY project, there are numerous compelling reasons to dry your own apples at home:
- Cost-Effective: When apples are in season, especially from local farms, they are incredibly affordable. Turning them into dried snacks at home is significantly cheaper than buying pre-packaged versions.
- Healthier Choice: You have complete control over the ingredients. No artificial preservatives, no excessive added sugars—just pure, natural apple goodness. This makes them an ideal healthy snack for anyone mindful of their diet.
- Customizable Flavors: While plain dried apples are delicious, you can easily experiment with various spices to create unique flavor profiles that suit your preferences.
- Food Preservation: Drying apples is an ancient and effective method of preservation. It allows you to enjoy the taste of fresh autumn apples long after the season has passed.
- Reduced Food Waste: If you find yourself with an abundance of apples, drying them is a fantastic way to prevent them from going bad, ensuring every delicious fruit gets enjoyed.
Choosing the Perfect Apples for Drying
While almost any apple variety can be dried, some yield better results than others. For the best homemade dried apple slices, look for varieties that are:
- Firm: Apples that hold their shape well during slicing and drying are ideal.
- Slightly Tart to Sweet: A good balance of flavor ensures a delicious end product. Too bland an apple might result in less flavorful dried slices.
- Good for Baking: Varieties commonly used in pies and crumbles often work well for drying too.
Some of my top recommendations include:
- Fuji: Sweet, crisp, and holds its shape.
- Honeycrisp: Known for its exceptional crunch and balanced sweetness.
- Gala: Mildly sweet and aromatic, a crowd-pleaser.
- Granny Smith: If you prefer a tart snack, this green apple is fantastic and provides a lovely contrast with cinnamon.
- Pink Lady: Sweet-tart with a crisp texture.
Aim for fresh, unblemished apples to ensure the highest quality dried fruit.
Essential Ingredients for Oven-Dried Apples
Making epic dried apples in your oven requires surprisingly few ingredients. The beauty lies in their simplicity!
- Apples: Your primary ingredient! Choose your favorite variety as described above.
- Fresh Lemon Juice: Crucial for preventing oxidation (browning) of the apple slices. It helps maintain their appealing golden color.
- Optional Spices for Flavoring:
- Cinnamon
- Brown Sugar (or a sugar-free alternative)
- Pumpkin Pie Spice
- Ground Ginger
- Chai Seasoning
The exact measurements for lemon juice and spices, along with step-by-step instructions, are detailed in the recipe card below.
Tools You’ll Need
Having the right equipment can make the drying process much smoother and more efficient, especially when it comes to preparing the apples.
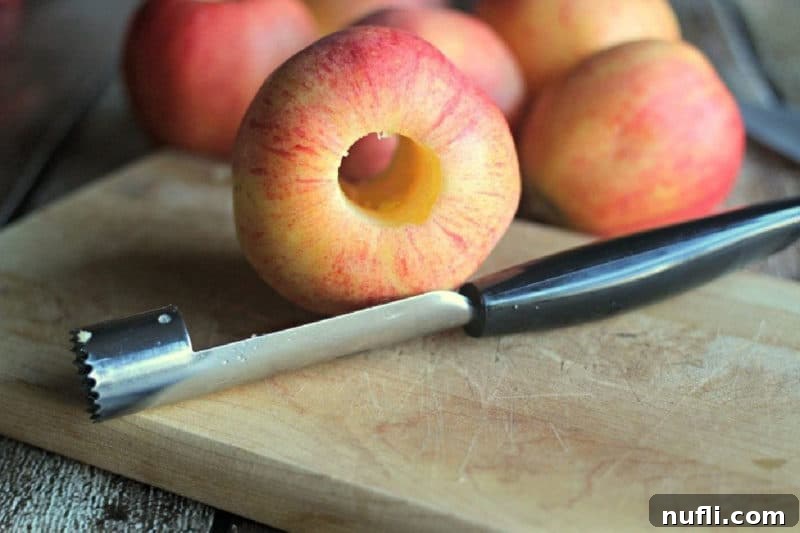
- Apple Corer: This handy tool makes quick work of removing the apple’s core, leaving you with perfect rings.
- Mandoline Slicer: While a sharp knife works, a mandoline slicer is highly recommended. It ensures consistently thin, even slices, which is key for uniform drying. If slices are of different thicknesses, some will dry faster than others, leading to uneven results. Always use the safety guard when operating a mandoline!
- Baking Sheets with Sides: Using baking sheets with a raised edge is a smart choice. It prevents any accidental mishaps where your precious apple slices might slide off the sheet and onto the oven floor – a lesson some of us learn the hard way!
- Wire Racks: Placing wire racks on your baking sheets allows air to circulate around all sides of the apple slices, promoting more even and efficient drying. This is preferred over drying directly on parchment paper if you want crispier results.
- Heat-Resistant Potholders or Silicone Oven Mitts: Safety first! Handling hot baking sheets requires reliable protection. I exclusively use heat-resistant silicone potholders after a scary incident with a cloth one catching fire. They offer superior protection and peace of mind.
- Clean Kitchen Towel: For patting dry the apple slices before they go into the oven. This step is more important than you might think!

Step-by-Step Guide to Making Dried Apples in Your Oven
Drying apples in the oven is a straightforward process, but attention to detail ensures the best outcome. Follow these steps for perfectly dried apple slices:
- Preheat Oven: Set your oven to the lowest possible temperature, typically around 140-170°F (60-77°C). A very low temperature is essential to dehydrate the apples slowly rather than cook them.
- Prepare Apples: Wash your apples thoroughly. Then, using an apple corer, remove the core from each apple.
- Slice Evenly: Slice the cored apples into thin, even rings, approximately ¼ inch thick. A mandoline slicer is incredibly helpful for achieving uniform thickness, which is crucial for consistent drying. Discard the very top and bottom slices, as they usually have too much skin and can dry unevenly.
- Prevent Browning (Lemon Bath): In a medium bowl, combine 2 tablespoons of fresh lemon juice with 2 cups of water. Immediately drop the apple slices into this lemon water bath. Let them soak for about 5-10 minutes. The acidity of the lemon juice helps prevent the apples from oxidizing and turning brown, preserving their appealing color.
- Pat Dry: Remove the apple slices from the lemon water and pat them thoroughly dry with a clean kitchen towel. This step is important as excess moisture will prolong the drying time and can hinder proper dehydration.
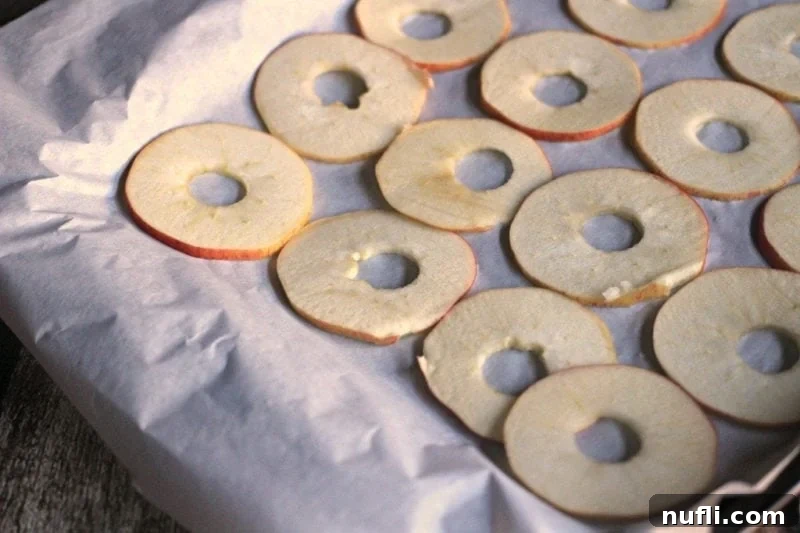
- Arrange on Racks: Place wire racks on your baking sheets. Arrange the patted-dry apple slices in a single layer on the wire racks, ensuring they do not overlap. This allows for optimal air circulation during drying. If you don’t have wire racks, you can place them directly on parchment-lined baking sheets, but you may need to turn them more frequently.
- Optional Seasoning: If desired, sprinkle the apple slices lightly with cinnamon, a mix of cinnamon and brown sugar, or your preferred spices at this stage.
- Begin Drying: Place the baking sheets in your preheated oven. The drying time can vary significantly, from 2 to 10 hours, depending on your oven’s exact temperature, the thickness of your slices, and your desired level of dryness.
- Turn Occasionally: Every 1-2 hours, gently turn the apple slices to ensure even drying. This helps prevent sticking and promotes uniform dehydration.
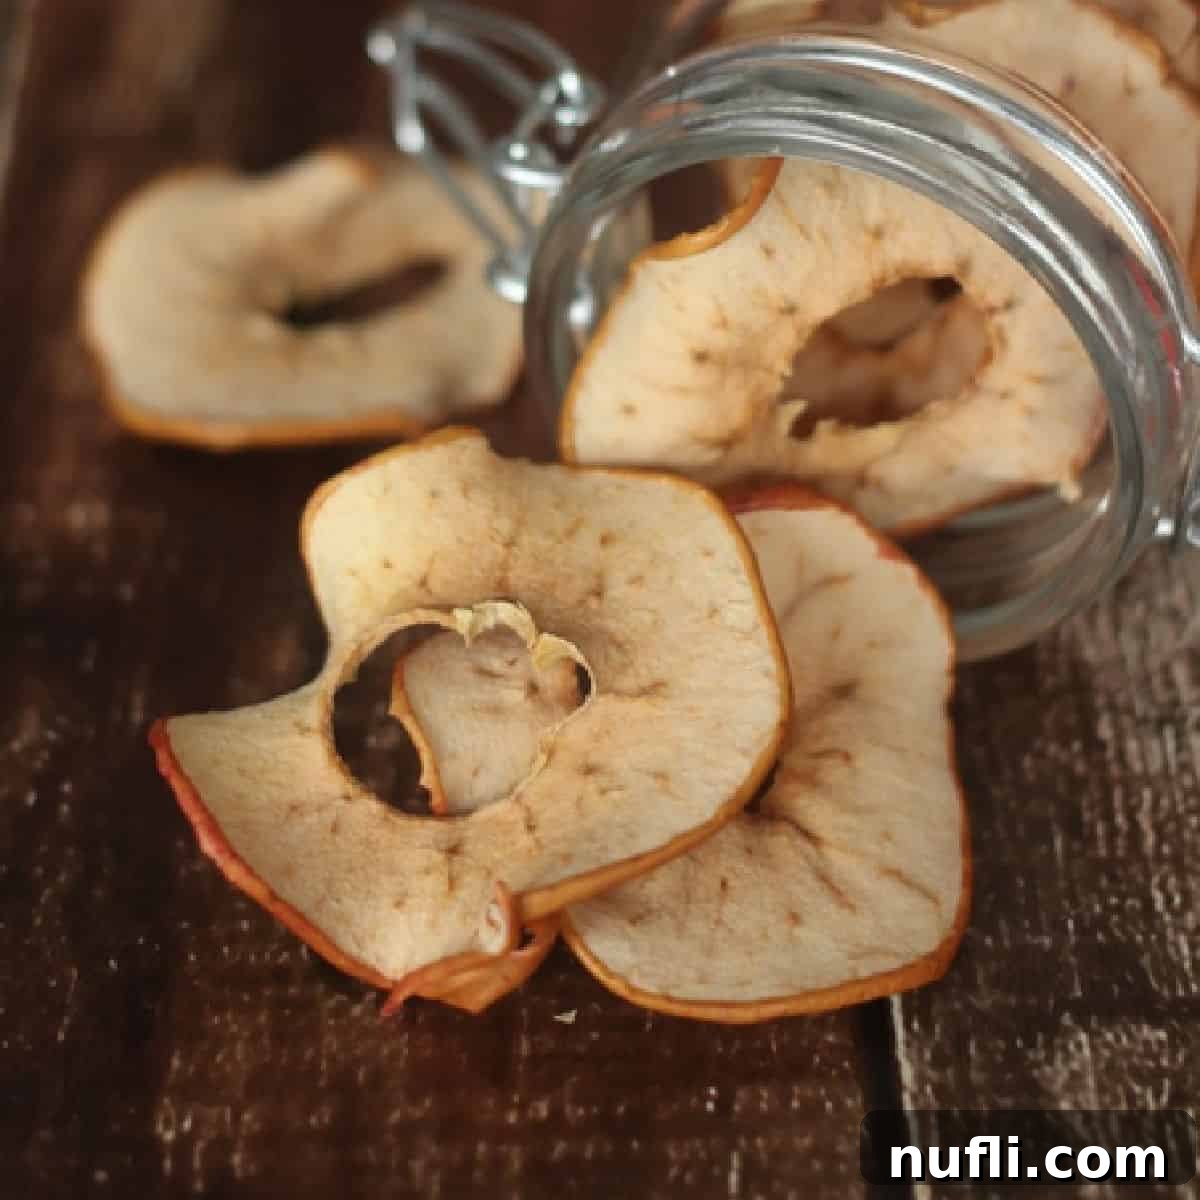
- Check for Doneness: The apples are done when they are leathery and pliable but no longer moist or sticky. For crispier slices, you can continue drying them for a longer period until they snap when bent. For softer, chewier slices, stop sooner.
- Cool Completely: Once dried to your liking, remove the apple slices from the oven and transfer them to a wire rack to cool completely at room temperature. This final cooling stage is essential, as the apples will continue to crisp up as they cool and any residual warmth can lead to condensation and mold if stored immediately.
- Store Properly: Once entirely cool and dry, store your homemade dried apples in airtight containers.

Expert Tips for Perfect Oven-Dried Apples
Achieving consistently perfect dried apples takes a little practice, but these tips will help you get there faster:
- Uniform Slicing is Key: This cannot be stressed enough. Apple slices of varying thickness will dry at different rates. Thin slices will become crispy faster, while thicker ones will remain chewier. Use a mandoline for the best results.
- To Peel or Not to Peel: The choice is yours! Keeping the skin on adds a rustic touch, fiber, and some nutrients. However, if slices are cut too thick and the skin is left on, it can become tough and overly chewy when dried. For thinner slices, skin on is fine. If you prefer a more uniform, tender chew, peel all your apples before slicing.
- Thoroughly Dry Before Baking: After the lemon juice bath, ensure you pat the apple slices very dry with a clean kitchen towel or even let them air dry on a wire rack for a short while before placing them in the oven. Eliminating surface moisture is critical for efficient drying and preventing mold.
- Low and Slow: The secret to drying, not cooking, the apples is a very low oven temperature (140-170°F). Patience is a virtue here!
- Air Circulation: Using wire racks over baking sheets allows hot air to circulate all around the apple slices, promoting more even drying. If you only have baking sheets, parchment paper helps prevent sticking, but you’ll need to turn the slices more frequently.
- Don’t Rush the Cooling: Always allow your dried apples to cool completely at room temperature before storing them. They will continue to crisp up as they cool, and storing them while still warm can trap moisture, leading to spoilage.
- Check Periodically: Drying times are estimates. Keep an eye on your apples, especially towards the end, as oven temperatures can fluctuate and slice thickness varies.
Storing Your Homemade Dried Apples
Proper storage is essential to keep your oven-dried apples fresh, flavorful, and free from mold.
- Airtight Containers: Once completely cool, store your dried apples in airtight containers. Mason jars are an excellent choice, as they provide an effective seal. You can also use resealable plastic bags or other food-grade airtight containers.
- Cool, Dry, Dark Place: For optimal freshness, keep your stored dried apples in a cool, dry, and dark location, such as a pantry cabinet or a cellar. Avoid areas with high humidity or direct sunlight, which can compromise their quality and shelf life.
- Shelf Life: When stored correctly, homemade dried apples can remain fresh and enjoyable for about a week at room temperature. For longer storage, consider freezing them.
- Freezing for Extended Preservation: Freezing is a fantastic way to extend the shelf life of your dried apple rings significantly. Place them in an airtight, freezer-safe container or freezer bag. They will remain delicious for up to a year when stored in the freezer.
- Thawing: Dried apples do not require reheating. Simply thaw them at room temperature until they reach your desired softness and enjoy!
- Prevent Sticking: If storing in jars or containers, leave a little headspace and give them a quick shake now and then to prevent them from sticking together.

Creative Ways to Enjoy Dried Apples
While dried apple slices are a perfect grab-and-go snack on their own, their versatility extends far beyond simple snacking. Here are some creative ways to incorporate them into your meals and treats:
- Breakfast Booster: Chop them into smaller bits and add them to oatmeal, yogurt, or cold cereal for a burst of natural sweetness and chewiness.
- Homemade Trail Mix: Combine with nuts, seeds, other dried fruits, and a few chocolate chips for a custom energy-boosting snack.
- Baking Ingredient: Rehydrate them slightly by soaking in warm water for 10-15 minutes, then chop and add to muffins, scones, quick breads, or even apple pie.
- Savory Dishes: Surprising but true! Dried apples can add a wonderful sweet-tart note to savory dishes like pork roasts, stuffings, or chicken salads.
- Salad Topping: Roughly chop and sprinkle over green salads, especially those with goat cheese, walnuts, or a vinaigrette dressing.
- Tea Infusion: Add a few slices to hot water for a naturally flavored apple tea.
- Garnish: Use whole dried apple rings as an edible garnish for desserts, charcuterie boards, or seasonal cocktails.
Flavorful Variations for Your Dried Apples
One of the best aspects of making homemade dried apples is the ability to customize their flavor. While a simple dusting of cinnamon is always a winner, don’t hesitate to explore other exciting options:
- Classic Cinnamon & Brown Sugar: A timeless combination that enhances the apple’s natural sweetness and warmth.
- Pumpkin Pie Spice: For an ultimate fall flavor, sprinkle with pumpkin pie spice mix before drying. It includes cinnamon, nutmeg, ginger, and cloves.
- Ginger & Nutmeg: A cozy, aromatic blend that pairs wonderfully with apples.
- Chai Seasoning: For an exotic twist, use a chai spice blend containing cardamom, ginger, cinnamon, and cloves.
- Spicy Kick: If you enjoy a bit of heat, try dusting your apples with a tiny pinch of cayenne pepper, chili powder, or the popular Mexican fruit seasoning, Tajín (a blend of chili peppers, lime, and sea salt).
- Sugar-Free Option: The base recipe is naturally low in sugar, with most coming from the apples themselves. To make them completely sugar-free, simply omit any brown sugar or replace it with a sugar-free alternative like erythritol or stevia.
Experiment with small batches to find your favorite flavor combinations!
Health Benefits of Dried Apples
Beyond being a delicious treat, dried apples offer several health benefits, making them a smart snack choice:
- Rich in Fiber: Apples, and by extension dried apples, are a good source of dietary fiber. Fiber is crucial for digestive health, helps regulate blood sugar levels, and can contribute to feelings of fullness, aiding in weight management.
- Vitamins and Minerals: Dried apples retain a good portion of the vitamins and minerals found in fresh apples, including Vitamin C (though some is lost during drying), Vitamin K, and potassium.
- Antioxidants: Apples contain various antioxidants, which help protect your body’s cells from damage by free radicals.
- Natural Sweetness: They provide natural sugars for energy without the need for artificial sweeteners, making them a better choice than many processed snacks.
- Portability: Dried apples are easy to carry and don’t require refrigeration, making them a convenient and healthy snack option on the go.
Keep in mind that while dried apples are healthy, their nutrients and sugars are more concentrated than in fresh apples, so mindful portion control is always a good idea.
Frequently Asked Questions (FAQs)
Here are answers to some common questions about making dried apples:
Q: What kind of apples are best for drying?
A: Firm, crisp apples with a good balance of sweet and tart flavors work best. Varieties like Fuji, Honeycrisp, Gala, and Granny Smith are excellent choices for their texture and flavor retention.
Q: Do I need to peel the apples before drying?
A: Peeling is optional. Leaving the skin on adds fiber and a rustic look. However, if your slices are thick, the skin can become tough when dried. For very thin slices, the skin usually dries well. If you prefer a more uniformly tender chew, peeling is recommended.
Q: How long do oven-dried apples last?
A: When stored in an airtight container in a cool, dry, dark place, they can last for about one week at room temperature. For longer storage, you can freeze them for up to a year in a freezer-safe, airtight container.
Q: Can I use a food dehydrator instead of an oven?
A: Absolutely! A food dehydrator is specifically designed for this purpose and often provides more consistent results with less energy consumption. Follow your dehydrator’s instructions for drying apples, typically at a similar low temperature setting.
Q: Why did my dried apples turn brown?
A: Browning usually occurs due to oxidation. To prevent this, always soak your apple slices in a solution of lemon juice and water immediately after slicing. Ensuring they are fully submerged helps preserve their color.
Q: My dried apples are still chewy/sticky after drying. What happened?
A: This means they haven’t been dried long enough or at a low enough temperature. Return them to the oven for additional drying time, checking every 30 minutes until they reach your desired consistency. Make sure they are patted dry before going into the oven and not overcrowded.
Q: How many apples do I need for a good batch?
A: The original recipe yields 36 servings from 8 apples. However, this can vary greatly based on apple size and how thinly you slice them. It’s best to scale the recipe based on the number of apples you have and your desired yield.
Serving Suggestions: What Pairs Well with Dried Apples?
Dried apples are a versatile ingredient that can complement a variety of dishes, adding a touch of sweetness and texture.
Sides: Kale & Apple Potato Salad, Air Fryer Chickpeas, Pumpkin Spice Pumpkin Seeds, CrockPot Sugared Candied Walnuts, Southwest Black Bean & Corn Salad, Orzo Pasta Salad with Bacon & Parmesan Vinaigrette, Air Fryer Baked Potato, Sauerkraut Salad, Broccoli Slaw, Grilled Avocado.
Main Dishes: Funeral Sandwiches, CrockPot Stuffed Tomatoes, CrockPot Stuffed Peppers, CrockPot Mushroom Pasta Casserole, CrockPot Carrot Cake Oatmeal, CrockPot Banana Oatmeal, Stuffed Acorn Squash with Sausage & Rice, CrockPot Asian Chicken Lettuce Wraps.
When to Serve Dried Apples
- Breakfast (mixed into oatmeal or yogurt)
- Lunch (as a healthy side or in a sandwich)
- Healthy Snack (perfect for any time of day)
- Fall Apple Season (to celebrate the harvest!)
- Road Trips (an ideal portable snack)
Other Delicious Apple Recipes to Try This Fall
If you’re looking for more ways to enjoy the season’s apple bounty, here are some other fantastic recipes:
- Apple Pie Dumplings
- Slow Cooker Apple Cinnamon Oatmeal
- Slow Cooker Sweet potatoes and Apples
- Slow Cooker Applesauce
- Slow Cooker Fried Apples
What is your favorite apple recipe for the fall?
Recipe: Oven-Dried Apple Slices
How to make delicious, low-calorie dried apple slices right in your oven.
Prep Time: 15 minutes
Cook Time: 2-10 hours (depending on desired crispness)
Servings: Approximately 36 (from 8 medium apples)
Calories per serving: 21 kcal (estimated)
Ingredients
- 8 medium-sized Apples (Fuji, Honeycrisp, Gala, or Granny Smith recommended)
- 2 Tablespoons Freshly Squeezed Lemon Juice
- 2 cups Water (for lemon bath)
- Optional: Cinnamon, Brown Sugar, Pumpkin Pie Spice, or other desired spices for flavoring
Instructions
- Preheat your oven to its lowest setting, typically around 140-170°F (60-77°C).
- Wash the apples thoroughly. Using an apple corer, remove the core from each apple.
- Slice the cored apples into uniform ¼ inch rings. A mandoline slicer makes this process much easier and ensures even drying. Discard the top and bottom rings that mostly consist of skin.
- In a bowl, combine the fresh lemon juice with 2 cups of water. Immerse the apple slices in this solution for 5-10 minutes to prevent browning.
- Remove the apple slices from the lemon water and pat them completely dry with a clean kitchen towel.
- Arrange the dried apple slices in a single layer on wire racks placed over baking sheets, ensuring no slices overlap.
- If desired, sprinkle the apple slices with your chosen spices like cinnamon or a cinnamon-brown sugar mix.
- Place the baking sheets in the preheated oven. Dry the apples for 2-10 hours, depending on your oven and desired crispness. Turn the slices occasionally (every 1-2 hours) to promote even drying.
- The apples are ready when they are leathery and pliable (for chewy slices) or crisp and breakable (for crunchy slices). They should not be moist or sticky.
- Remove the slices from the oven and allow them to cool completely on the wire racks at room temperature. This is crucial for achieving the final texture and preventing condensation.
- Once thoroughly cooled and dry, store your homemade dried apple slices in sterilized, airtight jars or containers in a cool, dark, and dry place.
Kitchen Tools
- Apple Corer
- Mandoline Slicer (optional, but highly recommended)
- Baking Sheets with Rims
- Wire Racks
- Heat-Resistant Potholders or Silicone Oven Mitts
Nutrition Information (per serving, estimated)
- Calories: 21 kcal
- Fat: 1g (Saturated Fat 1g)
- Sodium: 1mg
- Potassium: 43mg
- Carbohydrates: 6g (Fiber 1g, Sugar 4g)
- Protein: 1g
- Vitamin A: 22 IU
- Vitamin C: 2mg
- Calcium: 2mg
- Iron: 1mg
* Percent Daily Values are based on a 2000 calorie diet. Nutritional values may vary based on specific products used and portion sizes.
Conclusion
Making your own dried apples in the oven is a rewarding experience that connects you with the bounty of the season and provides a wholesome, delicious snack. It’s a simple, frugal, and healthy alternative to store-bought options, allowing you to control every ingredient and flavor. Embrace the flavors of fall and enjoy this easy-to-make treat!
This recipe is featured in our Road Trip Snacks Collection.
Do you love recipes? Check out our copycat recipes, dessert recipes, and our CrockPot Recipes.
Follow Tammilee Tips on Facebook, Instagram, and Pinterest for all of our recipe posts.
