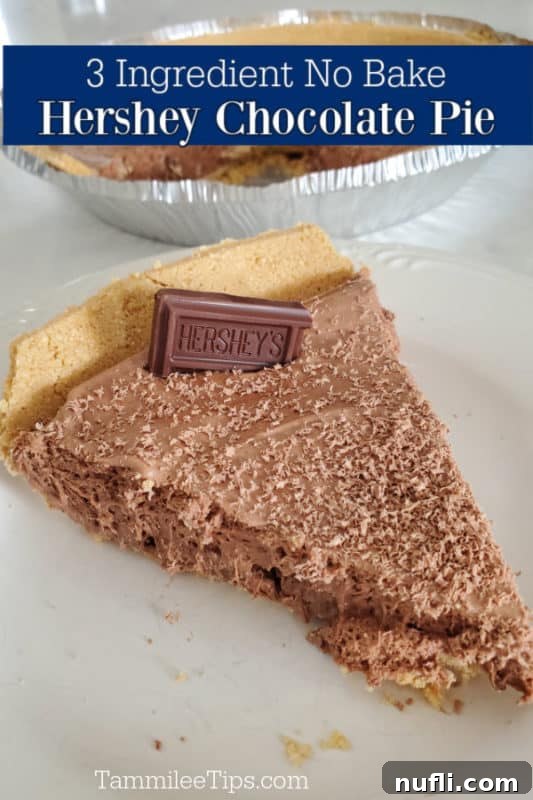
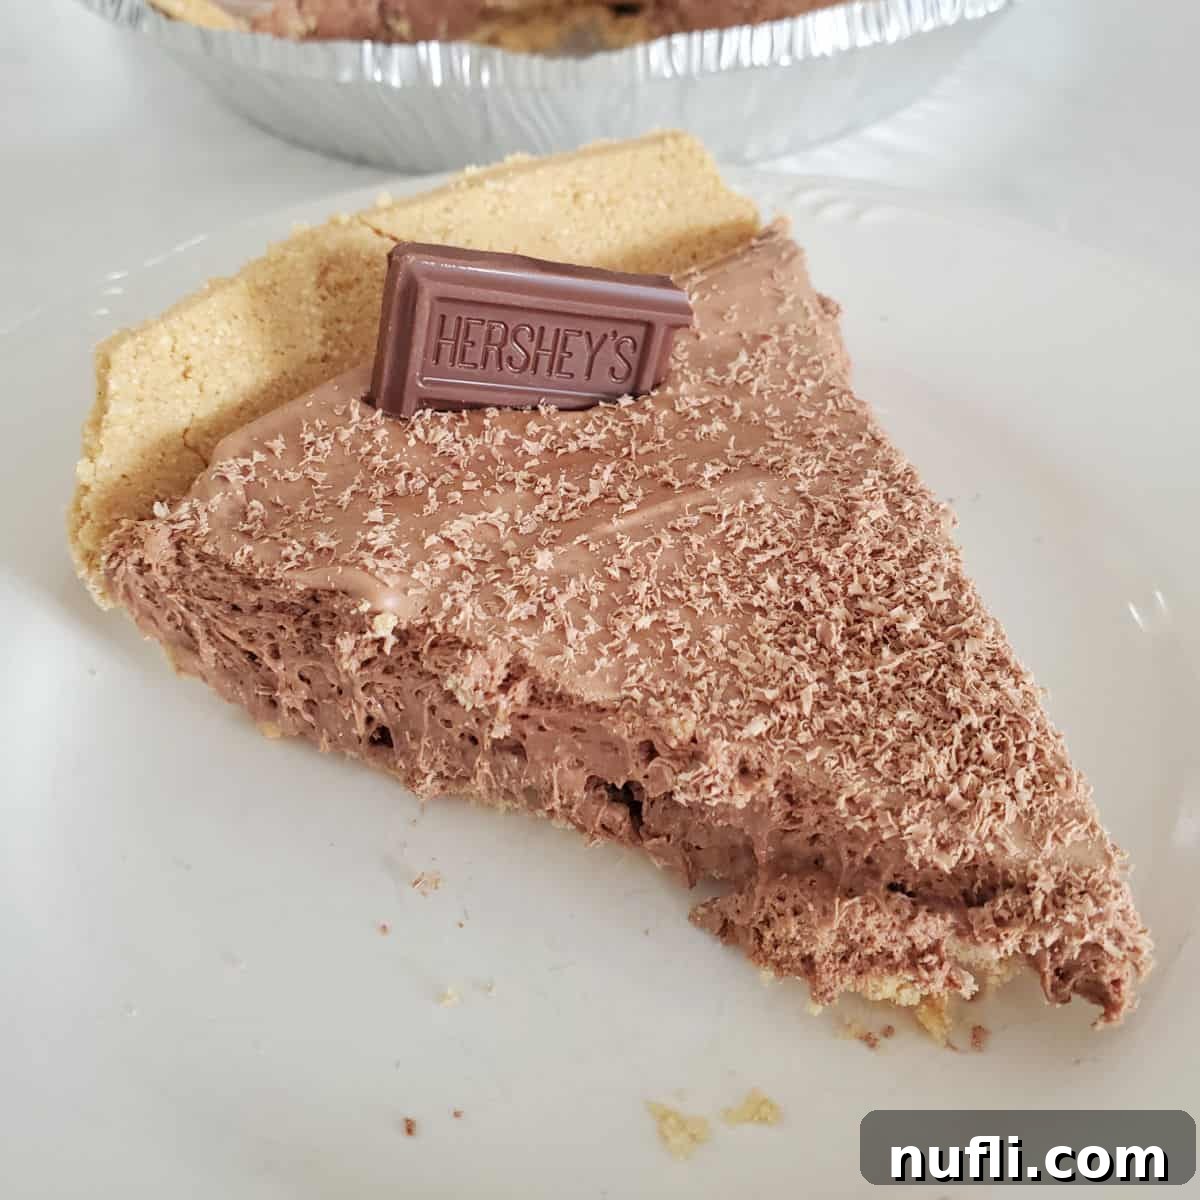
Indulge in pure chocolate bliss with this incredibly easy 3-Ingredient No-Bake Hershey’s Pie. A dream come true for dessert lovers and busy cooks alike, this recipe delivers a rich, creamy chocolate experience without ever turning on your oven. All you need are classic Hershey’s Chocolate Bars, luscious Cool Whip, and a convenient graham cracker crust to create a dessert that tastes like it took hours, but comes together in mere minutes. Perfect for any occasion, from casual weeknight treats to elegant dinner parties, this pie promises a delightful escape into the world of effortless decadence.

Effortless Elegance: The Magic of 3-Ingredient No-Bake Hershey’s Pie
Life can be hectic, but dessert doesn’t have to be. This remarkable 3-ingredient no-bake chocolate pie is the quintessential solution for those moments when you crave something sweet and satisfying, but time is of the essence. It’s an ideal choice for any day that calls for a quick, fuss-free dessert, requiring minimal effort to assemble. The most challenging aspect of this entire recipe is undoubtedly the wait – allowing the pie to chill and set perfectly in the refrigerator for a couple of hours. This crucial refrigeration period transforms a simple mixture into a smooth, incredibly creamy, and utterly irresistible chocolate pie that’s worth every second of anticipation.
While the beauty of this recipe lies in its simplicity, it also offers a canvas for creativity. If you’re feeling ambitious, you can certainly elevate it by preparing a homemade graham cracker crust from scratch, or by adding elaborate decorations. However, the core recipe remains wonderfully straightforward, allowing you to decide just how fancy or simple you want your Hershey’s Pie to be. Whether you opt for a minimalist presentation or a gourmet flourish, the rich chocolate flavor and velvety texture are guaranteed to impress.

Unlocking the Flavor: The Three Core Ingredients
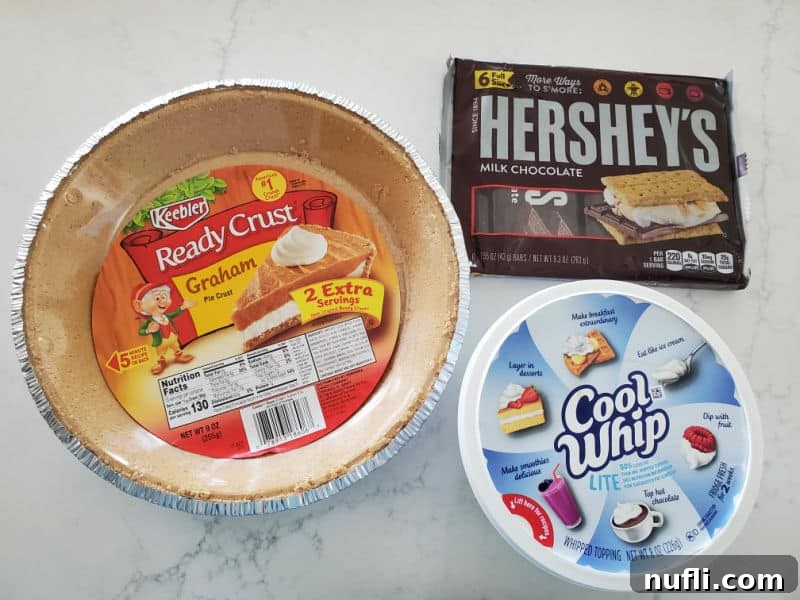
The secret to this unbelievably delicious dessert lies in its trio of perfectly paired ingredients, each playing a vital role in creating its signature taste and texture. When combined, these three simple components transform into a rich, decadent, and utterly satisfying chocolate pie that will have everyone asking for more. Let’s delve into what makes each ingredient essential:
- Hershey’s Chocolate Bars: The star of the show! Hershey’s chocolate offers that classic, nostalgic milk chocolate flavor that is universally loved. Its consistent melting properties make it an ideal choice for a smooth, homogenous filling. For an even richer pie, you could experiment with Hershey’s Special Dark chocolate bars, or combine milk and dark chocolate for a more complex profile. These iconic bars provide the deep, comforting chocolate essence that defines this pie.
- Cool Whip: This airy, whipped topping brings a light, creamy texture and a subtle sweetness that perfectly balances the chocolate. Cool Whip is the ultimate shortcut, eliminating the need for whipping fresh cream and ensuring a stable, consistent consistency for your pie filling. It’s essential for achieving that delightful, mousse-like mouthfeel without any fuss.
- Graham Cracker Crust: The foundation of our pie, a pre-made graham cracker crust provides a wonderfully crisp and buttery contrast to the smooth chocolate filling. Its slight sweetness and satisfying crunch elevate each bite. While a store-bought crust makes this recipe incredibly fast, you can also easily prepare your own graham cracker crust for a homemade touch, customizing the thickness and flavor.

Essential Kitchen Tools for Your No-Bake Adventure
While this recipe is incredibly simple, having a few basic kitchen tools on hand will make the preparation even smoother and more enjoyable. You likely already own most of these, highlighting just how accessible this decadent dessert truly is:
- Microwave-Safe Bowl: A sturdy, microwave-safe bowl is crucial for melting the Hershey’s chocolate. I personally find a large 4-cup measuring cup with a handle to be ideal. Its size prevents spills, and the handle makes it easy to hold while stirring. Using a glass or ceramic bowl is recommended for even heating and to prevent any plastic flavors from leaching into your chocolate.
- Spatula: A flexible rubber or silicone spatula is your best friend for this recipe. It works wonders for scraping every last bit of melted chocolate from the sides of your bowl, ensuring no deliciousness goes to waste. It’s also perfect for gently stirring the chocolate as it melts and for folding in the Cool Whip, helping to maintain its airy texture.
- Zester or Fine Grater (Optional, for Garnish): If you plan to add a beautiful finishing touch to your pie, a zester or a fine grater is indispensable. It allows you to shave delicate curls or fine sprinkles of Hershey’s chocolate over the top of the pie, adding an elegant visual appeal and an extra burst of chocolate flavor. This simple garnish can elevate the presentation from humble to gourmet in seconds.
- Pie Plate (if making your own crust): If you decide to go the extra mile and make your own graham cracker crust, a standard 9-inch pie plate will be needed to press the crust mixture into shape. Even with a pre-made crust, you’ll want to ensure it’s sitting securely in a sturdy pie plate for easy handling and refrigeration.
Mastering Your No-Bake Hershey’s Pie: Expert Tips for Success
While this 3-ingredient no-bake Hershey’s pie is famously simple, a few expert tips can ensure your dessert turns out perfectly every time, delivering maximum flavor and an irresistible texture:
- Chocolate Reserve for Garnish: Always remember to save a portion of your Hershey’s chocolate for garnish. Whether you choose to shave it, chop it into small pieces, or even create decorative curls, a chocolate topping adds visual appeal and an extra layer of chocolatey goodness. Consider purchasing one or two extra Hershey’s bars if you love generous garnishes or want to experiment with different topping styles.
- Double the Decadence: For those who believe more chocolate is always better, you can easily double the amount of Cool Whip and melted chocolate. This creates a much thicker, taller, and even more luxurious no-bake chocolate pie that will truly be a showstopper. Just ensure your pie crust can accommodate the extra volume!
- Elegant Additions for a Fancier Presentation: To transform this simple pie into an elegant dessert, consider adding dollops of freshly whipped cream to each slice just before serving. A bright red maraschino cherry on top of each whipped cream dollop adds a pop of color and a touch of classic charm, making your pie party-ready.
- Crust Customization: While a graham cracker crust is traditional and delicious, don’t hesitate to experiment with other bases. An Oreo cookie crust or a chocolate wafer crust will amplify the chocolate flavor, creating an even more intense and cohesive chocolate experience. You can also use shortbread cookie crumbs for a buttery, less sweet alternative.
- Layered Perfection: For a dessert with multiple textures and layers, spread a thin layer of plain Cool Whip over the set chocolate filling. Then, top this white layer with chocolate shavings, cocoa powder, or even mini chocolate chips. This creates a beautiful contrast and an extra creamy element.
- Controlled Melting is Key: When melting your Hershey’s chocolate, patience is a virtue. Microwave in short bursts (20-second increments) and stir thoroughly after each interval. Chocolate can scorch easily, leading to a grainy texture. Slow and steady melting ensures a silky-smooth chocolate base.
- Gentle Folding: Once your chocolate is perfectly melted and slightly cooled (but still pourable), gently fold it into the Cool Whip. Overmixing can deflate the Cool Whip, resulting in a denser, less airy pie. Aim for just combined, with no streaks of white.
- Optimal Chill Time: Resist the urge to cut into your pie too early! The minimum 2-hour refrigeration time is crucial for the pie to set properly, ensuring clean slices and a firm, creamy texture. For best results and a truly solid pie, overnight chilling is highly recommended.
- Room Temperature Ingredients (Except Cool Whip): Ensure your Hershey’s bars are at room temperature before melting. This helps them melt more evenly and prevents shocking the chocolate. The Cool Whip, however, should be thawed but still very cold from the refrigerator.

Versatility and Serving Suggestions
This easy no-bake dessert is incredibly versatile and can be customized to suit any occasion or personal preference. Its simplicity makes it a go-to recipe for a wide range of gatherings:
- Potlucks and Picnics: Its no-bake nature means no last-minute oven space struggles, and it transports beautifully once chilled. A perfect crowd-pleaser for any shared meal.
- Family Dinners: A comforting and delicious end to any weeknight or Sunday family meal, satisfying everyone’s sweet tooth with minimal effort.
- Summer Barbecues: Ideal for warm weather since it requires no baking and serves chilled, offering a refreshing contrast to grilled foods.
- Holiday Celebrations: Easily dressed up for holidays with themed garnishes like peppermint pieces for Christmas or candy corn for Halloween.
- Any Day Craving: Sometimes, you just need a chocolate pie in your life! This recipe ensures you can satisfy that craving quickly and effortlessly.
Beyond the simple chocolate shavings, consider these serving suggestions:
- Fresh Fruit: Sliced strawberries, raspberries, or banana slices pair wonderfully with chocolate.
- Caramel or Chocolate Sauce: A drizzle of warm caramel or extra chocolate syrup can take it to the next level.
- Chopped Nuts: Toasted pecans, walnuts, or almonds add a lovely crunch.
- Mini Marshmallows: A sprinkle of mini marshmallows for a s’mores-like feel.
- Coffee or Liqueur Infusion: For adult palates, a tiny splash of coffee liqueur or espresso powder can deepen the chocolate flavor in the filling.
Storage and Longevity
Proper storage is key to enjoying your 3-Ingredient No-Bake Hershey’s Pie for days to come. Once the pie has fully set, cover it loosely with plastic wrap or aluminum foil. Store it in the refrigerator. This pie is best enjoyed within 3-4 days. While technically you can freeze this pie (it holds up quite well!), the texture of the Cool Whip might change slightly upon thawing. If freezing, wrap it tightly in plastic wrap and then in foil. Thaw in the refrigerator for several hours before serving. Freezing can extend its life for up to a month.
Frequently Asked Questions (FAQs) About No-Bake Chocolate Pie
Here are answers to some common questions you might have about making this incredibly easy and delicious no-bake pie:
- Can I use real whipped cream instead of Cool Whip?
Yes, you absolutely can! If you prefer real whipped cream, ensure it’s stabilized whipped cream (often made with a little gelatin or cream cheese) to prevent it from deflating and making the pie watery. You’ll need about 2 cups of heavy cream, whipped with powdered sugar and vanilla, to replace the 8 ounces of Cool Whip. The texture will be slightly different, perhaps a bit lighter. - How long does the pie really need to chill?
While 2 hours is the minimum to get it to set, we highly recommend chilling it for at least 4 hours, or even better, overnight. This extended chilling time ensures the pie is perfectly firm, easy to slice, and has the best creamy texture. - Can I use other types of chocolate bars?
Yes, feel free to experiment! While Hershey’s milk chocolate provides that classic flavor, you can use other brands of chocolate bars, including semi-sweet, dark chocolate, or even white chocolate (though white chocolate will give a very different flavor profile). Just make sure they melt smoothly. Chocolate chips can also work, but they might contain stabilizers that make them slightly more challenging to melt into a silky consistency. - Can I make this pie in individual servings?
Absolutely! This recipe adapts beautifully to individual portions. Simply use mini graham cracker crusts or layer the chocolate mixture and Cool Whip into small ramekins, mason jars, or dessert cups. Chill as directed. This is perfect for parties or portion control. - Is this pie gluten-free?
The Cool Whip and Hershey’s chocolate bars are typically gluten-free, but you must ensure your graham cracker crust is certified gluten-free. Many brands offer GF graham crackers or pre-made GF crusts. Always check labels if gluten is a concern. - Can I add other mix-ins to the filling?
Yes, this is a great way to customize! Consider folding in mini chocolate chips, chopped nuts, a teaspoon of vanilla extract, a pinch of instant espresso powder to enhance chocolate flavor, or even a tablespoon of peanut butter for a chocolate-peanut butter twist. Add these after the chocolate and Cool Whip are combined.
Discover More Irresistible No-Bake Desserts
If you’ve fallen in love with the ease and deliciousness of this no-bake pie, you’re in for a treat! There’s a whole world of quick and simple no-bake recipes waiting for you. Here are some of our other favorite hassle-free desserts:
- No-Bake Peanut Butter Balls: A delightful combination of sweet and salty, these bite-sized treats are perfect for parties or a quick snack.
- No-Bake Peanut Butter Fudge: Creamy, rich, and utterly addictive, this fudge recipe delivers classic peanut butter flavor without the need for complex candy-making techniques.
- Chocolate Peanut Butter No-Bake Cookies: A timeless classic that comes together in minutes, these chewy cookies are packed with oats, chocolate, and peanut butter goodness.
- No-Bake Pumpkin Butterscotch Pie: A seasonal delight that combines the warm spices of pumpkin with the sweet notes of butterscotch, perfect for fall gatherings.
- No-Bake Raspberry Pie: Light, fruity, and refreshing, this pie is bursting with vibrant raspberry flavor, making it an excellent choice for summer.
- Cookies and Cream Fudge (3-Ingredient Oreo Fudge): Indulge in the beloved combination of cookies and cream in a simple, rich fudge form that requires just three ingredients.
Explore all of our amazing Cool Whip Desserts for more creamy, dreamy inspirations. And if you’re a passionate home cook, don’t miss our diverse collection of copycat recipes, a wide array of dessert recipes for every craving, and our incredibly convenient Crock Pot Recipes.

3 Ingredient No Bake Hershey Pie
Print
Rate
10 minutes
2 hours
2 hours
10 minutes
8
166
kcal
Tammilee Tips
Ingredients
-
Graham Cracker Crust
-
8
Ounce
Cool Whip -
7
Hershey Chocolate Bars
regular size
Instructions
- Break up 6 Hershey Chocolate Bars into a microwave safe bowl. Microwave in 20 second increments until the chocolate is melted. Stir well after each interval to prevent scorching and ensure smoothness.
- Allow the melted chocolate to cool slightly (about 5 minutes), then gently fold it into the thawed Cool Whip until evenly combined and no white streaks remain. Be careful not to overmix, which can deflate the Cool Whip.
- Pour the creamy chocolate mixture into the premade graham cracker crust. Smooth the top with a spatula. Refrigerate for at least 2 hours, or ideally overnight, until the pie is completely set.
- Before serving, garnish your delicious pie with shavings from the remaining Hershey Chocolate Bar or sprinkle with small chocolate pieces for an appealing finish.
Nutrition
Calories from Fat 90
15%
38%
2%
1%
3%
7%
4%
19%
4%
1%
4%
6%
Love this recipe?
Follow @TammileeTIps on Pinterest
Tried this recipe?
Mention @TammileeTipsLife when you share a photo!
