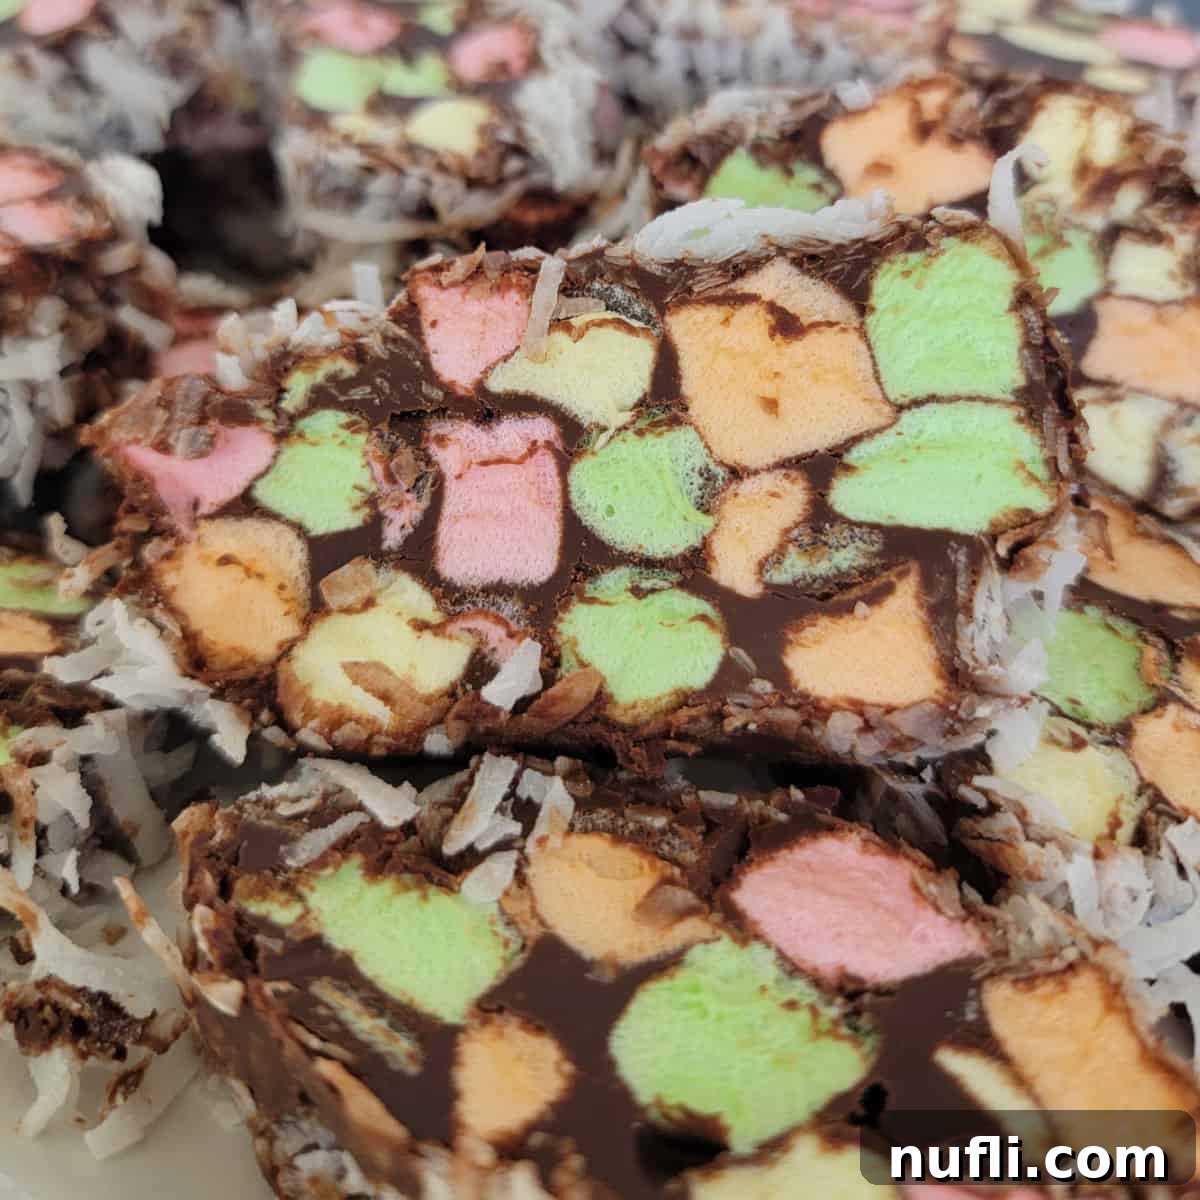
Step into a world of vibrant color and nostalgic charm with these delightful **No Bake Church Window Cookies**. Also affectionately known as Stained Glass Window Cookies, Cathedral Window Cookies, Marshmallow Yule Logs, or Stained Glass Candy, these classic American treats are a visual and culinary masterpiece, requiring no oven and minimal effort. Perfect for festive holiday gatherings, thoughtful homemade gifts, or simply a fun baking project with kids, their beautiful, jewel-like appearance mimics the intricate patterns of stained glass, making them truly special.
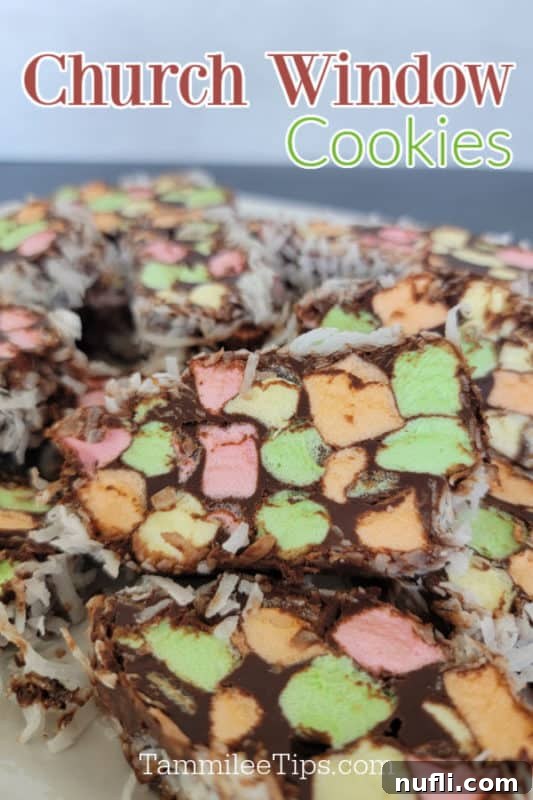
Discover the Magic of Church Window Cookies
There’s something uniquely comforting about a vintage recipe that transports you back to simpler times. These no-bake sliced cookies evoke cherished memories of grandmothers’ kitchens and festive holiday seasons. Their appeal lies not only in their ease of preparation but also in their playful and captivating appearance. The pastel-colored mini marshmallows, suspended in a rich chocolate matrix, truly bring the “stained glass” effect to life, making them an instant favorite for all ages.
Planning for holidays often starts earlier than expected, and while testing Christmas recipes in the heat of summer might seem unconventional, the joy of creating these beautiful cookies transcends seasonality. Imagine the delight of working with chocolate and sweet marshmallows, even when the thermometer climbs over 100 degrees! These cookies are a testament to simple pleasures and the magic of homemade treats, proving that deliciousness doesn’t always require an oven.
Why You’ll Adore This No-Bake Recipe
These Church Window Cookies offer numerous advantages that make them a must-try for any home baker, whether novice or experienced. Firstly, their “no-bake” nature is a huge time-saver, freeing up your oven for other holiday dishes or simply allowing you to enjoy a quick, delicious dessert without heating up your kitchen. Secondly, the recipe is incredibly forgiving and perfect for involving children, who will revel in mixing the colorful marshmallows and shaping the logs. The vibrant appearance is a showstopper, effortlessly elevating any dessert platter. Plus, they’re highly customizable, allowing you to tailor them to your taste or dietary needs. It’s a fantastic way to create memorable holiday treats without the usual fuss.
Gather Your Simple Ingredients
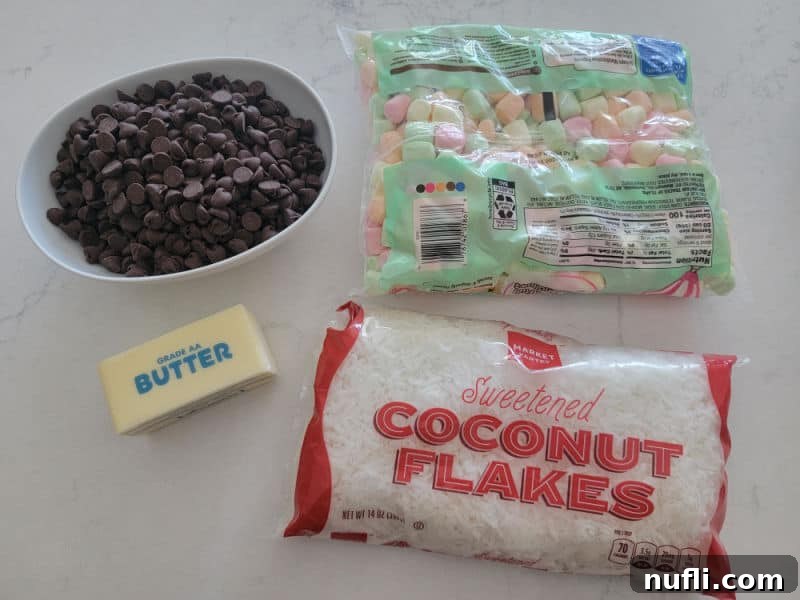
One of the best aspects of these exquisite cookies is the simplicity of their ingredients. You won’t need a pantry full of exotic items; just a few basic staples are enough to create this stunning confection. Here’s a quick overview of what you’ll need. Specific measurements are detailed in the full recipe card below.
- Milk Chocolate Chips or Semi-Sweet Chocolate Chips: The foundation of our rich chocolate base. Milk chocolate offers a sweeter, creamier profile, while semi-sweet provides a deeper, more intense chocolate flavor. Choose your preference, or even combine them for a nuanced taste.
- Unsalted Butter: Essential for achieving that silky-smooth chocolate mixture and adding a delightful richness to the cookies. Using unsalted butter allows you to control the overall sodium content.
- Pastel Colored Mini Marshmallows: These are the stars of the show, creating the stunning “stained glass” effect. Their vibrant colors pop beautifully against the dark chocolate. Brands like Kraft and Jet-Puffed often offer fruit-flavored pastel marshmallows in delightful shades of orange, strawberry, lemon, and lime.
- Sweetened Shredded Coconut: This adds a lovely texture and tropical sweetness, serving as a delicious coating that completes the cookie’s appearance and flavor.
Optional Add-ins: For an extra layer of flavor and crunch, consider incorporating toasted chopped walnuts, chopped almonds, or your favorite nuts into the mixture before shaping.
Essential Equipment for Success
Just as the ingredients are simple, the necessary kitchen tools are minimal and likely already in your home. No fancy gadgets or specialized equipment required!
- Heavy Saucepan: For melting the chocolate and butter evenly over low heat, preventing scorching.
- Measuring Cups: To ensure accurate ingredient proportions for the best results.
- Large Mixing Bowl: Crucial for combining the melted chocolate with the marshmallows without a mess.
- Wax Paper or Parchment Paper: Indispensable for spreading the coconut and shaping the cookie logs, preventing sticking and making cleanup a breeze.
- Saran Wrap (Plastic Wrap): For tightly wrapping the logs, helping them set properly in the refrigerator.
- Sharp Knife: Essential for cleanly slicing the chilled logs into beautiful, uniform cookies.
How to Craft Your Church Window Cookies: A Step-by-Step Guide
Creating these beautiful no-bake cookies is a straightforward process that yields impressive results. Follow these simple steps for perfectly formed, delicious treats:
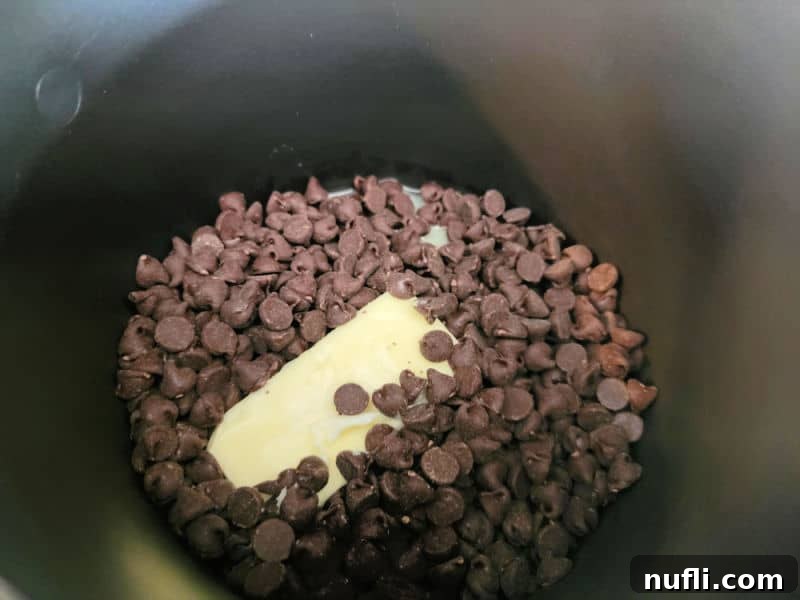
Step 1: Melt the Chocolatey Goodness. In a heavy saucepan, combine your chosen chocolate chips and butter. Place the saucepan over low heat, stirring continuously until the chocolate and butter are fully melted and smoothly integrated. The key here is low heat to prevent the chocolate from burning or seizing. Once melted, remove the mixture from the heat and allow it to cool for about 4-5 minutes. This cooling period is crucial; if the chocolate is too hot, it will melt the marshmallows, compromising the “stained glass” effect.
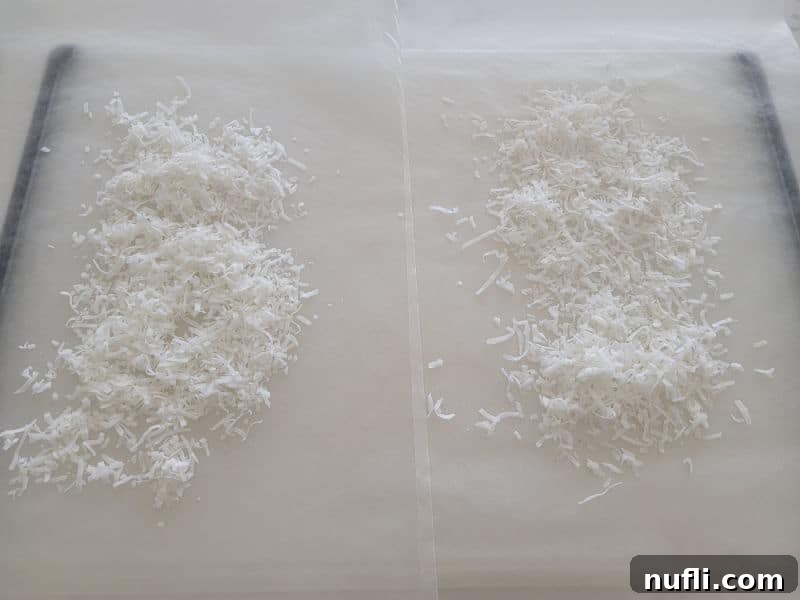
Step 2: Prepare Your Work Surface with Coconut. Lay out two large pieces of waxed paper or parchment paper on your counter. Evenly sprinkle about half of your sweetened shredded coconut in a generous, uniform line down the middle of each piece of paper. This will serve as the initial coating for your cookie logs.
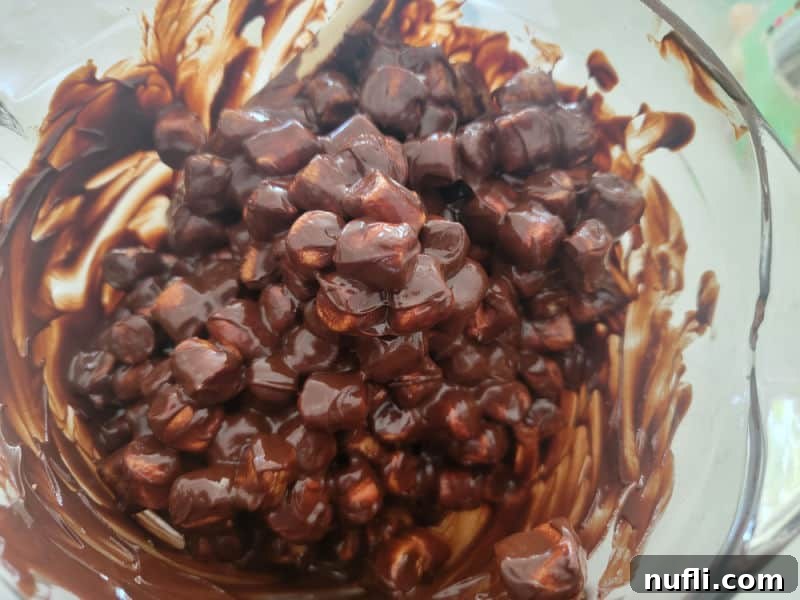
Step 3: Combine Marshmallows and Chocolate. Pour the pastel mini marshmallows into a large mixing bowl. Once the melted chocolate mixture has cooled slightly but is still pourable and stirrable, add it over the marshmallows. Gently fold and stir the mixture until all the marshmallows are thoroughly and evenly coated in chocolate. Be careful not to overmix, as you want the marshmallows to retain their distinct shapes.
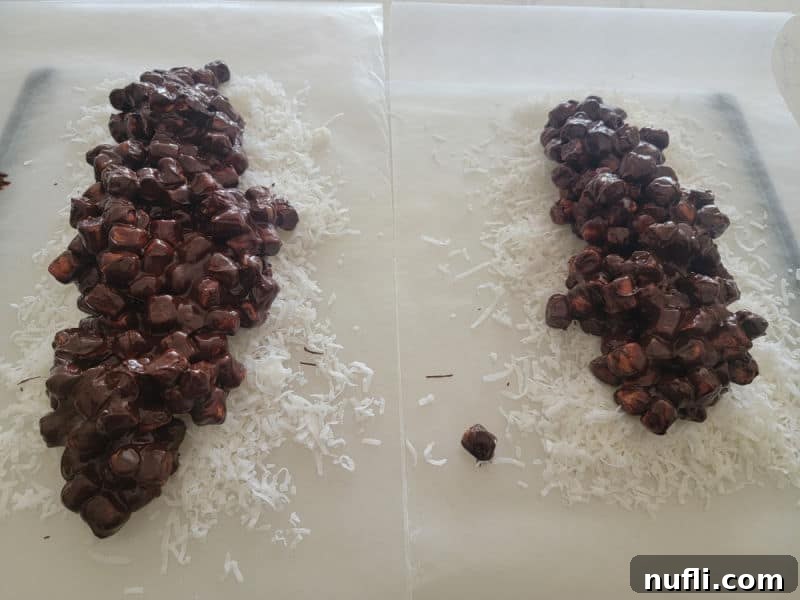
Step 4: Shape Your Cookie Logs. Divide the chocolate-marshmallow mixture onto the prepared waxed paper, placing it on top of the coconut lines you’ve created. Using the waxed paper to help, shape the mixture into two compact logs, about 1.5 to 2 inches in diameter. Roll the logs gently in the remaining coconut, ensuring they are coated evenly on all sides. The coconut will adhere readily to the sticky chocolate mixture, forming a beautiful, textured exterior.
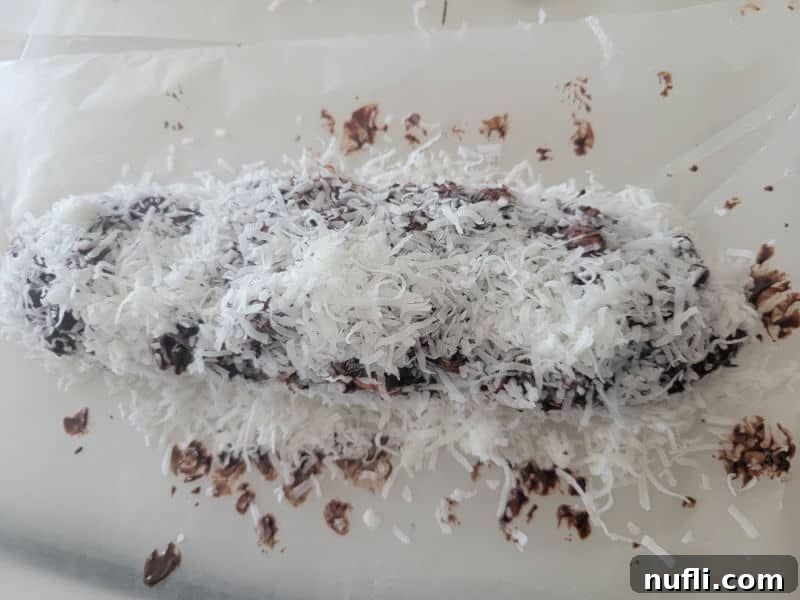
Step 5: Chill for Perfection. Once your logs are perfectly shaped and coated, wrap each one tightly in the waxed paper, then secure them further with a layer of plastic wrap (Saran wrap). This double wrapping helps maintain their shape and prevents them from absorbing refrigerator odors. Place the wrapped logs in the refrigerator for at least two hours, or preferably overnight. Proper chilling is essential for the cookies to firm up and for the chocolate to set completely, making them easy to slice.
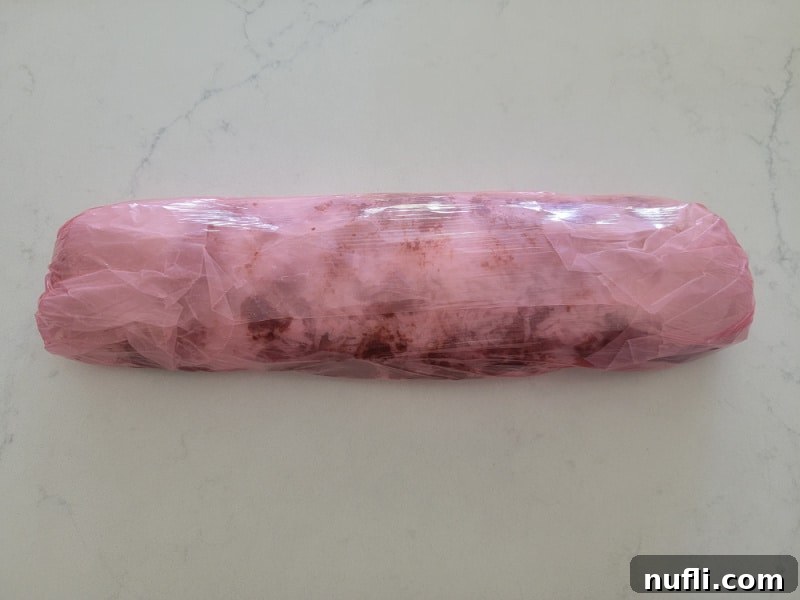
Step 6: Slice and Serve. When you’re ready to enjoy your beautiful creations, unwrap the chilled logs. Using a sharp knife, cut them into ¼ to ½ inch thick slices. Each slice will reveal the stunning “stained glass” pattern of colorful marshmallows suspended in chocolate. Arrange them on a platter and watch them disappear!
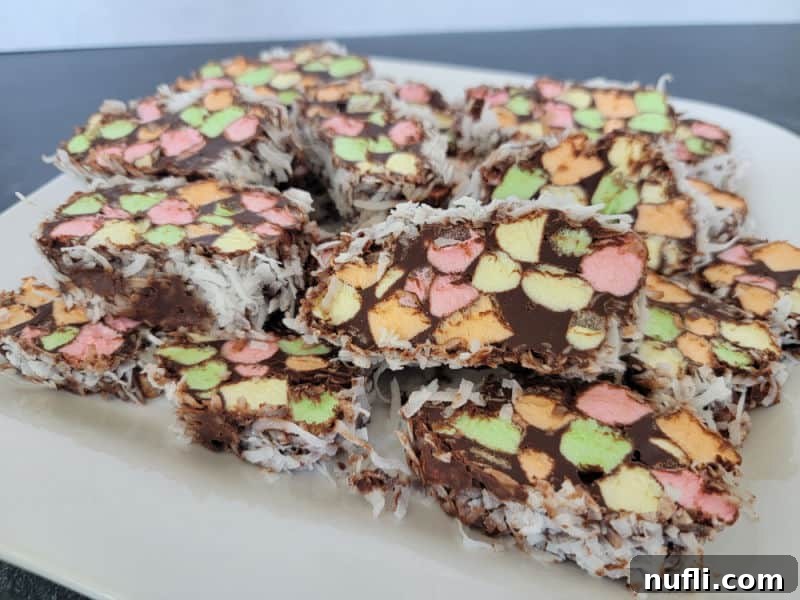
Preparation and Storage Tips
These No Bake Church Window Cookies are not only delicious but also remarkably convenient for advance preparation and storage, making them ideal for busy holiday seasons or last-minute entertaining.
- Make Ahead: You can easily prepare these cookies a couple of days in advance. Store the wrapped logs or sliced cookies in an airtight container in the refrigerator. Their flavor often deepens slightly overnight, making them even more enjoyable.
- Storage: Once sliced, store the cookies in an airtight container in the refrigerator. To prevent them from sticking together, layer them with pieces of parchment paper. They will remain fresh and delicious for up to a week.
- Freezing Instructions: These stained glass cookies freeze beautifully! For best results, wrap the entire log tightly in wax paper, then place it in a freezer-safe bag or an airtight container. They can be frozen for up to 3 months. When ready to serve, simply thaw them in the refrigerator for a few hours before slicing and enjoying. You can also slice them before freezing, separating layers with parchment paper for easy access to individual servings.
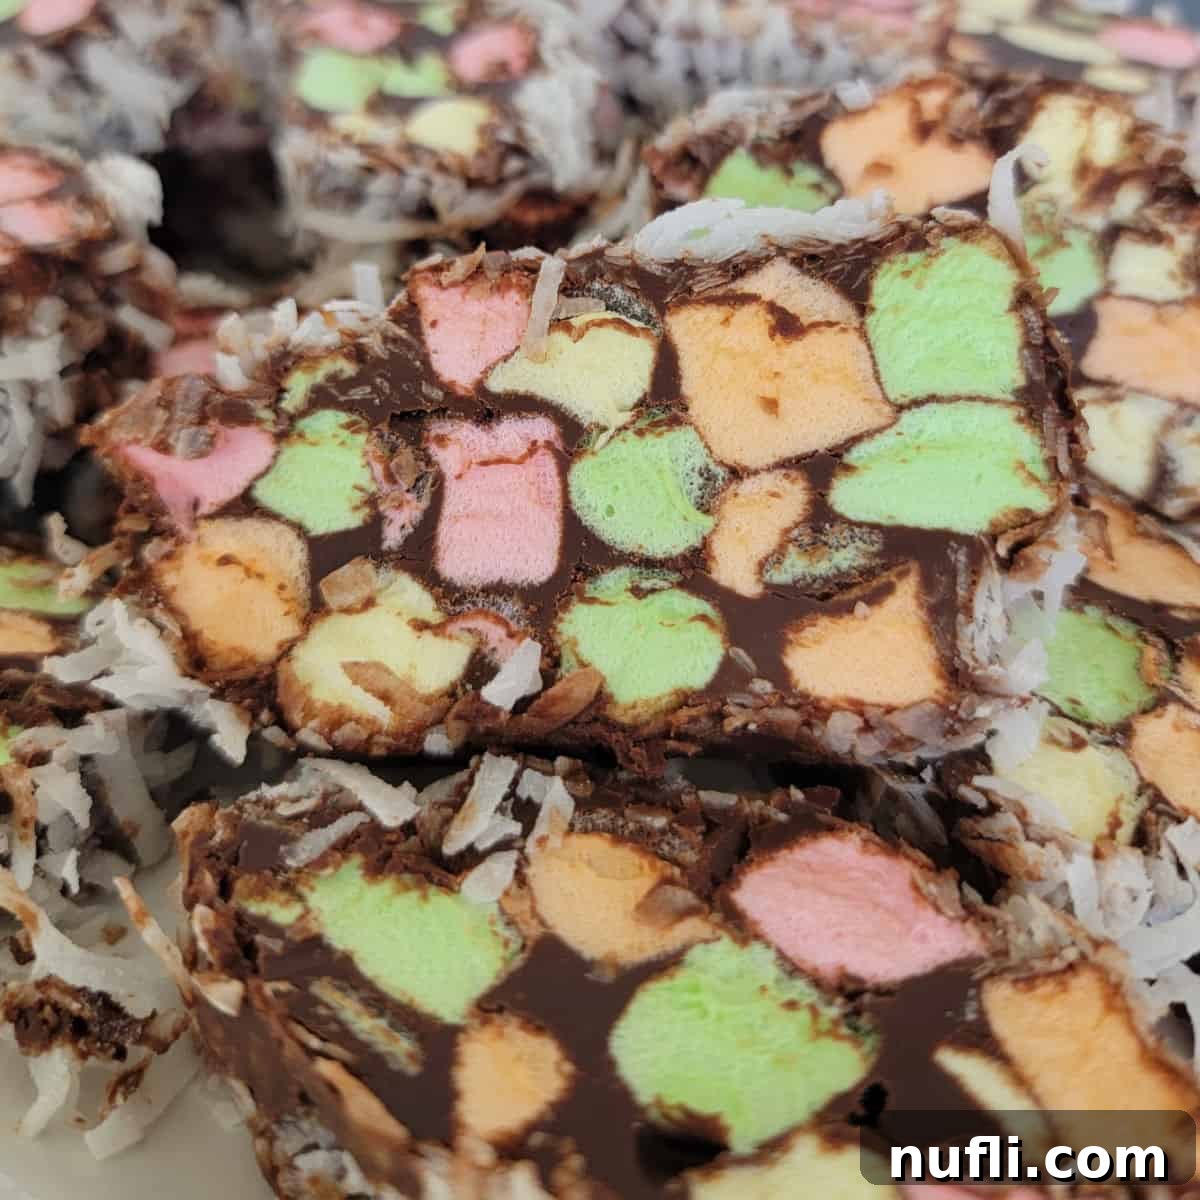
Recipe Variations and Customization
One of the joys of this recipe is its adaptability. Feel free to get creative and customize your Church Window Cookies to suit your preferences or what you have on hand.
- Marshmallow Alternatives: While pastel marshmallows are key for the “stained glass” look, you can certainly use regular white mini marshmallows for a more classic, snowy appearance. Larger marshmallows can also be used if cut into smaller pieces.
- Coating Options: Don’t limit yourself to coconut! Explore other delicious coatings:
- Chopped Nuts: Finely chopped pecans, walnuts, or almonds add a nutty crunch.
- Powdered Sugar: For a delicate, sweet finish.
- Graham Cracker Crumbs: A comforting, classic flavor pairing.
- Cocoa Powder: For an extra chocolatey kick.
- Crushed Peppermint Candy Canes: Ideal for a festive, minty flavor during the Christmas season.
- Sprinkles: A fun and colorful option, especially for birthday parties.
- Flavor Additions:
- Stir in a teaspoon of vanilla extract or almond extract with the chocolate for added depth.
- For an adult twist, a splash of liqueur like Kahlua or rum can be added to the chocolate (once cooled slightly).
- Mini chocolate chips or other small candy bits can be mixed in with the marshmallows.
Dietary Adaptations:
- Vegetarian Option: This recipe is inherently vegetarian, but ensure your marshmallows are gelatin-free if that’s a concern. Many brands offer vegetarian mini marshmallows.
- Vegan Option: To make these cookies fully vegan, use vegan mini marshmallows (typically made with plant-based gelling agents) and ensure you use dairy-free chocolate chips and plant-based butter.
- Gluten-Free: This recipe is naturally gluten-free, provided your chocolate chips and marshmallows do not contain hidden gluten-containing ingredients. Always check labels if you have severe sensitivities.
Adjusting Serving Sizes:
- Smaller Serving: The recipe card below can easily be halved or even quartered if you wish to make a smaller batch.
- Larger Group/More Servings: While you could double the recipe, it often proves easier to make multiple batches rather than trying to fit a very large quantity into one bowl or saucepan. This ensures proper mixing and cooling.
Pro Tips for Perfect Church Window Cookies
Achieving the best results with these no-bake cookies is simple with a few key tips:
- Don’t Overheat the Chocolate: Use low heat and stir constantly when melting the chocolate and butter. Overheated chocolate can become grainy or seize.
- Cool the Chocolate Properly: This is perhaps the most critical step. If the chocolate is too hot, it will melt the marshmallows, leading to a muddy appearance rather than distinct “windows.” Let it cool for 4-5 minutes, or until it’s warm but not hot to the touch.
- Work Quickly: Once the chocolate is mixed with the marshmallows, it will start to set. Work relatively quickly to spread and shape the logs before the mixture becomes too stiff.
- Tight Wrapping is Key: Ensure your logs are wrapped very tightly in both wax paper and plastic wrap. This helps them maintain their cylindrical shape and compress the mixture for a denser cookie.
- Thorough Chilling: Resist the urge to cut too soon! A minimum of 2 hours is good, but overnight chilling yields the firmest logs and the cleanest slices.
- Use a Sharp Knife: For clean, crisp slices that highlight the “stained glass” effect, use a sharp, thin knife. You can even run the knife under hot water and wipe it dry between slices to prevent sticking.
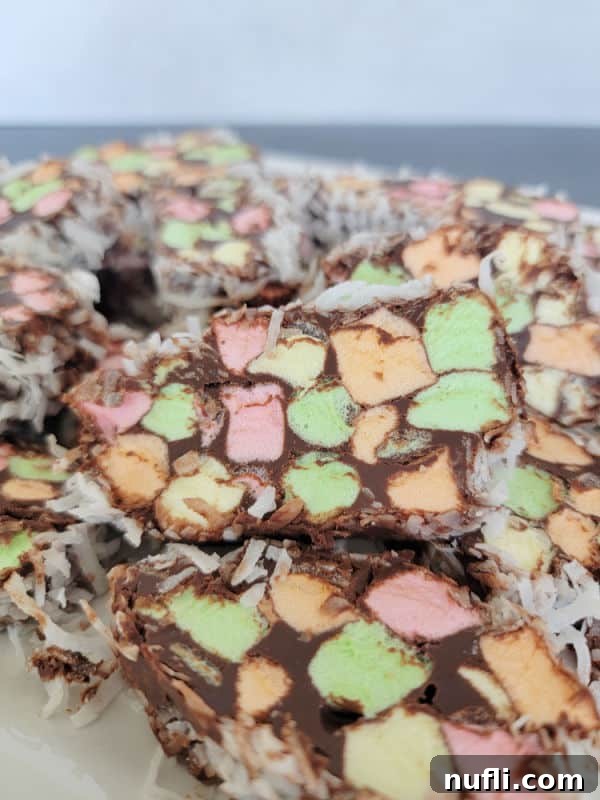
What to Serve with Your Stained Glass Treats
These sweet and visually appealing cookies pair wonderfully with a variety of beverages and are suitable for numerous occasions.
- Warm Drinks: Nothing beats pairing these with a comforting mug of hot chocolate, a classic cup of coffee, or a soothing tea.
- Cold Beverages: For a refreshing contrast, serve them alongside a cold glass of milk, a tangy lemonade, or a delightful frosted coffee or iced chai latte.
Perfect Occasions to Serve Church Window Cookies
Their festive appearance and delightful taste make these cookies suitable for a wide array of events throughout the year.
- Christmas & Holiday Parties
- Cookie Exchanges (they’re always a hit!)
- Potlucks & Gatherings
- Easter Celebrations
- Bridal or Baby Showers
- Birthdays
- Church Events or Sunday Dinners
- Anytime you need an easy, impressive dessert!
More Great Cookie Recipes to Explore
If you love easy and delicious cookies, be sure to check out some of our other fantastic recipes:
- Tropical No Bake Truffles
- Snowball Cookies (Mexican Wedding Cookies)
- White Chocolate Coconut Macadamia Nut Cookies
- Air Fryer Cookies
- 4-Ingredient Pie Crust Cookies
For even more culinary inspiration, explore our diverse collection of copycat recipes, irresistible dessert recipes, and convenient Crock Pot recipes. Don’t forget to connect with us on Facebook, Instagram, Pinterest, and Twitter for the latest recipe posts and culinary adventures!
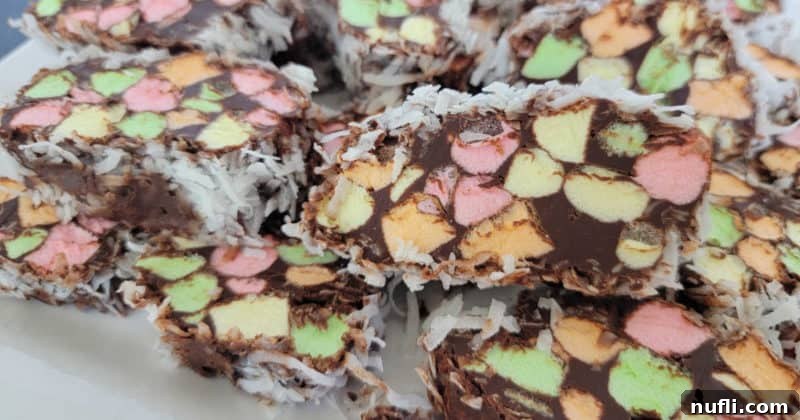
No Bake Church Window Cookies
Easy No Bake Church Window Cookies are the perfect holiday no-bake cookie that’s as beautiful as it is delicious.
15 minutes
15 minutes (plus chilling)
30 cookies
155 kcal
Tammilee Tips
Ingredients
- 2.5 cups Milk Chocolate Chips or Semi-sweet chocolate chips
- ½ cup Unsalted Butter
- 10 Ounce bag Pastel Mini Marshmallows
- 1.5 cups Sweetened Shredded Coconut
- Optional: Chopped nuts (walnuts, almonds, pecans)
Instructions
- Melt chocolate chips and butter in a heavy saucepan over low heat, stirring constantly, until fully melted and smooth. Remove from heat and set aside to cool for 4-5 minutes.
- While chocolate cools, spread two large pieces of wax paper or parchment paper on your counter. Evenly sprinkle about ¼ of the shredded coconut in a line down the middle of each sheet.
- Add the pastel mini marshmallows to a large mixing bowl. Pour the slightly cooled chocolate mixture over the marshmallows.
- Gently stir until the marshmallows are evenly coated with chocolate.
- Divide the chocolate marshmallow mixture onto the two prepared wax paper sheets, placing it on top of the coconut lines. Shape each portion into a compact log. Roll the logs in the remaining coconut to fully coat all sides.
- Tightly wrap each chocolate log in the wax paper, then wrap again securely with plastic wrap (Saran wrap). Refrigerate for a minimum of 2 hours, or ideally overnight, until firm.
- Once chilled and firm, unwrap the logs. Use a sharp knife to cut them into ¼ to ½-inch thick slices. Serve immediately and enjoy your beautiful Church Window Cookies!
Kitchen Tools
- Heavy Saucepan
- Measuring Cups
- Large Mixing Bowl (e.g., Glass Batter Bowl)
- Wax Paper / Parchment Paper
- Saran Wrap (Plastic Wrap)
- Sharp Knife
Nutrition Facts
Nutrition Facts
No Bake Church Window Cookies
Amount Per Serving
Calories 155 Calories from Fat 72
% Daily Value*
Fat 8g 12%
- Saturated Fat 6g 38%
- Trans Fat 0.2g
- Polyunsaturated Fat 0.1g
- Monounsaturated Fat 1g
Cholesterol 10mg 3%
Sodium 54mg 2%
Potassium 17mg 0%
Carbohydrates 20g 7%
- Fiber 1g 4%
- Sugar 17g 19%
Protein 1g 2%
- Vitamin A 128IU 3%
- Vitamin C 0.1mg 0%
- Calcium 19mg 2%
- Iron 0.3mg 2%
* Percent Daily Values are based on a 2000 calorie diet.
We hope you enjoy making and sharing these beautiful No Bake Church Window Cookies as much as we do. They are a timeless treat that brings smiles and a touch of colorful magic to any occasion. Happy no-baking!
