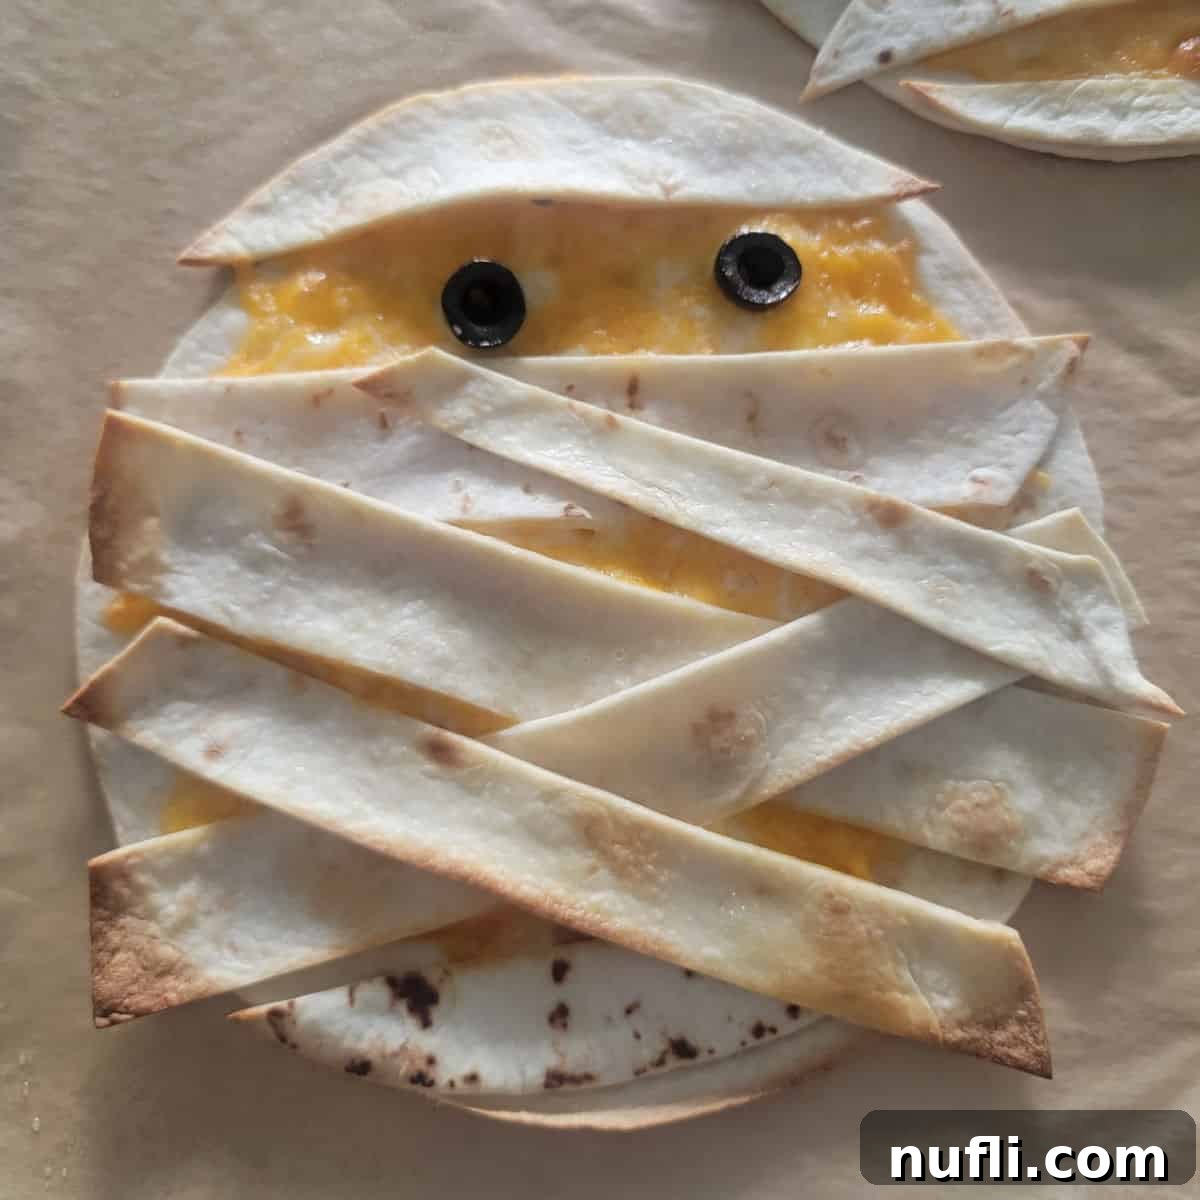
Transform your Halloween mealtime into a delightful, spooky spectacle with our incredibly easy Mummy Quesadillas! This recipe is the perfect blend of simple ingredients, quick preparation, and maximum fun, making it an absolute must-try for your upcoming Halloween festivities. Whether you’re planning a cozy family dinner before heading out for trick-or-treating or need a standout appetizer for a ghoulishly good party, these adorable and delicious quesadillas are guaranteed to be a monstrous hit. Say goodbye to complicated culinary nightmares and hello to a fuss-free, fantastically festive dish that will leave everyone smiling (and maybe a little startled!).
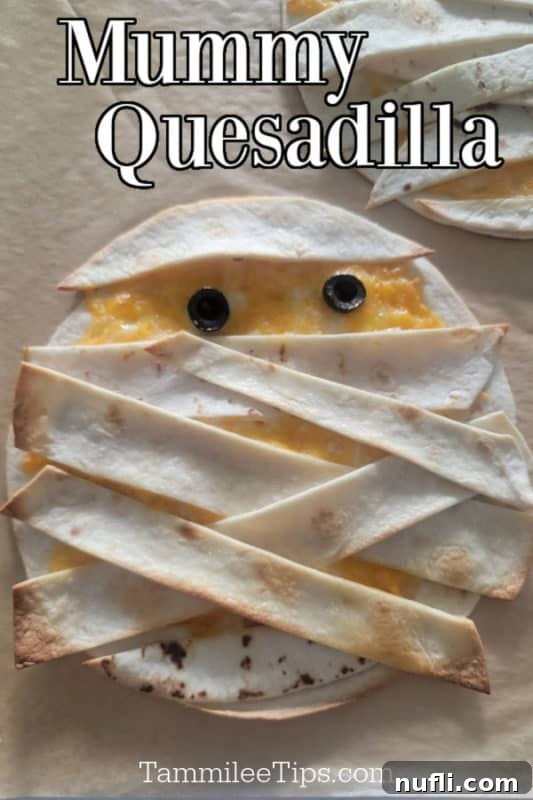
Mummy Quesadilla: Your Ultimate Easy Halloween Dinner!
This year, we are absolutely thrilled to dive headfirst into all things Halloween! After a few quieter seasons, it feels wonderful to embrace the joy and excitement that this spooky holiday brings. And what better way to kick off the festivities than with a themed meal that’s as entertaining to make as it is to eat? Our Mummy Quesadillas are more than just a recipe; they’re an invitation to create unforgettable Halloween memories with your loved ones.
Imagine the gleeful expressions on the faces of your kids, friends, and family when these charming, cheese-filled mummies emerge from the oven. This dish is designed to be the ultimate easy Halloween dinner, offering a quick and satisfying meal that won’t cut into your precious trick-or-treating time. It’s also an excellent choice for a fun-filled Halloween party appetizer, a themed school lunch, or a cozy snack during a spooky movie marathon. The versatility of these quesadillas means they can be tailored with your child’s favorite fillings, ensuring that even the pickiest eaters and older kids will find them utterly irresistible.
While we perfect other eerie culinary creations, such as vibrant pumpkin-shaped quesadillas and even a challenging quesadilla spider, these mummy masterpieces remain a firm favorite. Their simplicity and universal appeal make them a Halloween staple year after year. If you’re as enchanted by mummy-themed treats as we are, you might remember our dedicated week of sweet mummy Halloween delights we shared recently. Here’s a quick reminder of some other fantastic mummy recipes to inspire your holiday spread:
- Mummy Crescent Dogs: A savory and classic Halloween party food.
- Mummy Donuts: Sweet, frosted, and delightfully adorable.
- Mummy Twinkies: An iconic snack transformed into a spooky treat.
- Mummy Brownies: Rich, fudgy brownies wrapped in edible white chocolate bandages.
- Mummy Rice Krispie Treats: Crispy, chewy, and fun for all ages to decorate.
- Mummy Nutter Butters: Simple, peanut butter-packed, and perfectly mummified.
- Mummy Oreos: An effortlessly spooky no-bake treat that everyone loves.
These Mummy Quesadillas fit seamlessly into any Halloween feast, ensuring a full spread of themed fun!
Gather Your Ingredients for Spooky Quesadilla Fun
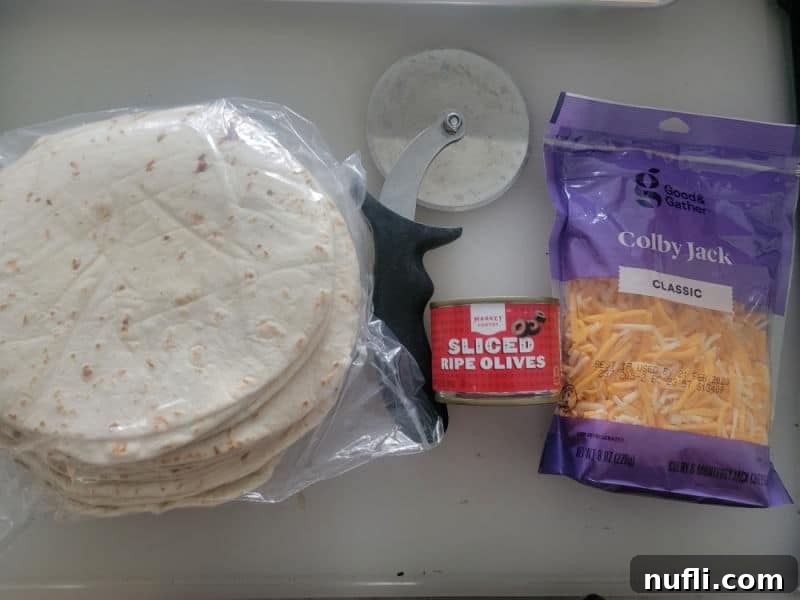
Creating these Mummy Quesadillas is a wonderfully simple process, requiring only a handful of everyday kitchen staples. The beauty of this recipe lies in its straightforward nature and how easily it can be adapted to suit various tastes and dietary preferences. Below, you’ll find a detailed breakdown of the core ingredients needed, alongside fantastic optional additions to truly personalize and elevate your Halloween creation.
Essential Ingredients for Your Mummies:
- Flour Tortillas: These will serve as the canvas for your mummies. We highly recommend using 6-inch flour tortillas for individual, perfectly sized servings. However, larger 8-inch or 10-inch tortillas can also be used; you can make one larger mummy or cut them into several smaller shapes. Flour tortillas are ideal due to their soft, pliable texture, which makes them easy to cut into strips and ensures they crisp up beautifully in the oven.
- Shredded Cheddar Cheese: The gooey, delicious heart of every great quesadilla! Cheddar cheese provides a wonderfully sharp flavor and melts perfectly, creating that irresistible, stringy texture we all crave. You can opt for pre-shredded cheese for ultimate convenience or shred a block of cheese yourself for an even creamier, smoother melt. Other excellent cheese choices include Colby Jack, Monterey Jack, or a flavorful Mexican cheese blend.
- Sliced Black Olives: These are the key to giving your mummies their iconic, eerie eyes! Their deep, dark color offers a striking contrast against the golden-brown tortilla and melted cheese. Simply halve them lengthwise to create the perfect oval shape for the eyes. If black olives aren’t a family favorite, consider using small pieces of green bell pepper, tiny circles of red bell pepper, diced jalapeños (for a spicy mummy!), or even a small dab of sour cream with a tiny edible candy eye placed on top.
- Olive Oil Spray: A light mist of olive oil spray is your secret weapon for achieving that coveted golden-brown crispness on your tortillas in the oven. It enhances both the texture and the subtle savory flavor of the quesadilla. If you don’t have spray, a light brushing of olive oil or melted butter with a pastry brush will also work effectively.
Optional Fillings to Boost Flavor and Make it a Full Meal:
While a simple cheese mummy is fantastically delicious, don’t hesitate to unleash your culinary creativity with additional fillings. These optional ingredients can transform your Mummy Quesadilla from a snack into a hearty and satisfying Halloween meal:
- Cooked Chicken: Shredded rotisserie chicken or leftover grilled chicken can significantly boost the protein content and make the quesadilla more filling. Ensure the chicken is finely shredded or diced so it doesn’t make the quesadilla too bulky or difficult to cut.
- Avocado or Guacamole: For a creamy, fresh, and wholesome element, spread a thin layer of mashed avocado or a spoonful of your favorite guacamole inside the tortilla before adding the cheese.
- Black Beans: Rinsed and thoroughly drained black beans add a wonderful earthy flavor, a good source of fiber, and a satisfying texture that pairs beautifully with the melted cheese.
- Salsa: A mild or medium salsa can be added sparingly as an internal layer for a burst of zesty flavor, or served on the side as a delicious dipping sauce.
- Diced Peppers (Bell Peppers or Jalapeños): Finely diced bell peppers add vibrant color and a mild crunch, while finely diced jalapeños provide a delightful kick for those who enjoy a bit of spice. Ensure they are diced small enough to cook quickly and not overpower the quesadilla.
- Your Favorite Quesadilla Fillings: Feel free to think outside the box! Other fantastic additions could include cooked corn kernels, a light sprinkle of taco seasoning, a very thin layer of refried beans, or even some sautéed onions and mushrooms. The possibilities are endless when it comes to customizing your mummy!
Essential Equipment for Your Mummy Quesadilla Masterpiece
You won’t need a cauldron full of complex kitchen gadgets to bring these Mummy Quesadillas to life. Most of the tools required are probably already lurking in your kitchen cupboards, ready for action!
- Pizza Wheel Cutter / Kitchen Scissors / Sharp Knife: These are your indispensable tools for creating the mummy’s iconic “bandages.” A pizza cutter makes quick, straight, and clean strips, which is ideal for efficiency. Kitchen scissors offer excellent precision for more intricate cuts or for smaller tortillas. A sharp kitchen knife works perfectly well if you don’t have the other two, just be sure to use it on a stable cutting board.
- Baking Sheet (with sides): An essential piece of equipment for baking your quesadillas evenly and safely. We highly recommend using baking sheets with raised sides. This clever design prevents any deliciously melty cheese from dripping off the edges and making a sticky mess in your oven. The sturdy construction of a good baking sheet also ensures consistent heat distribution, which is crucial for achieving perfectly golden and crispy tortillas.
- Parchment Paper: Consider this your secret weapon for effortless cleanup! Lining your baking sheet with parchment paper is a game-changer. It creates a non-stick surface, ensuring your mummy quesadillas slide right off without any fuss. It also helps prevent the bottom of the tortillas from getting overly dark or burnt. While you can lightly grease the pan with vegetable cooking spray as an alternative, parchment paper truly makes cleanup an absolute breeze, allowing you more time to enjoy your Halloween.
- Heat-Resistant Potholders/Oven Mitts: Safety should always be your top priority in the kitchen! A quick personal anecdote: a few years ago, we experienced a minor fire scare when a regular cloth potholder accidentally came into contact with a hot stovetop burner. Thankfully, we noticed the smoke immediately and were able to extinguish it ourselves. Since then, we have exclusively switched to using heat-resistant silicone potholders. They offer superior protection and invaluable peace of mind when handling hot baking sheets and oven trays. Please, always ensure you use proper heat protection when cooking to prevent accidents.
- Cutting Board: A sturdy cutting board is essential for safely slicing your black olives and any optional fillings you decide to include, ensuring stability and protecting your countertops.
How to Craft Your Spooky Mummy Quesadilla: A Step-by-Step Guide
Creating these festive Mummy Quesadillas is a fun, easy, and engaging process. Follow these detailed steps to bring your cheesy mummies to life and impress everyone at your Halloween gathering!
Step 1: Preheat Oven and Prepare Your Station
First things first, preheat your oven to a piping hot 450°F (232°C). This high temperature is absolutely essential for achieving that perfect, quick golden crispness on your tortillas. While the oven heats up, take a moment to gather all your ingredients and necessary equipment. Efficiency is key here! Line a large baking sheet with a sheet of parchment paper. This simple step is vital for preventing your quesadillas from sticking and will make cleanup incredibly easy. Ensure everything you need is within easy reach for a seamless cooking experience.
Step 2: Lay the Cheesy Foundation
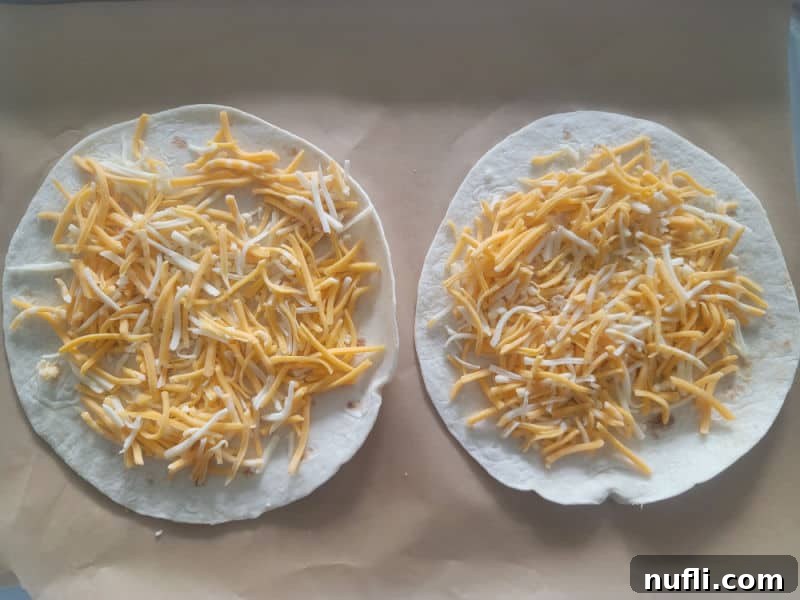
Carefully place one whole flour tortilla flat onto your prepared parchment-lined baking sheet. This tortilla will serve as the sturdy base of your mummy. Evenly sprinkle a generous amount of shredded cheddar cheese over the entire surface of the tortilla, making sure to leave a small, uncovered border around the very edge. If you’ve chosen to add any optional fillings, such as cooked chicken, black beans, or finely diced peppers, distribute them evenly over this initial layer of cheese now. The melted cheese will act as a delicious “glue,” holding all your fillings securely in place.
Step 3: Craft the Mummy Bandages
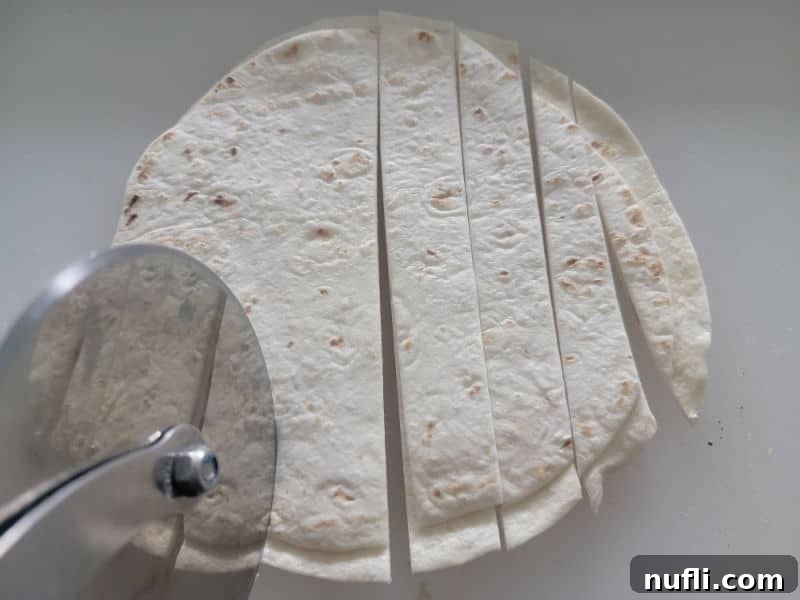
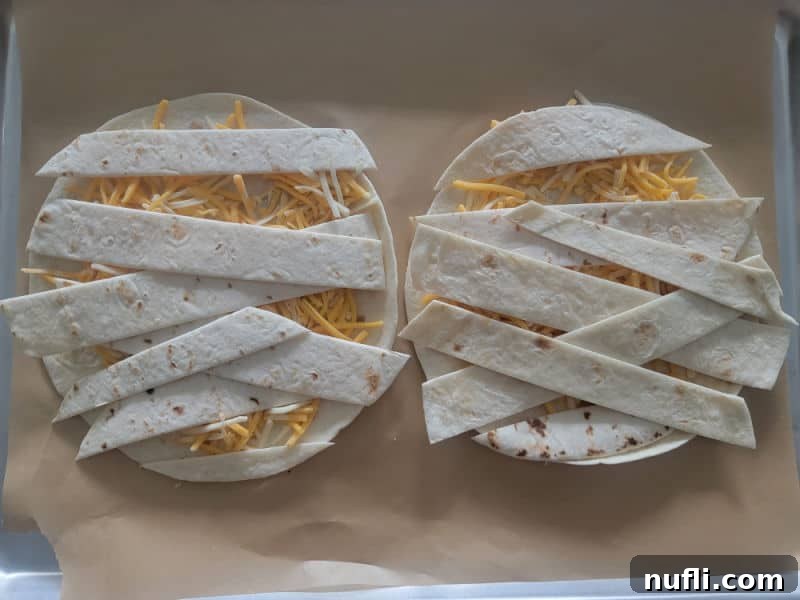
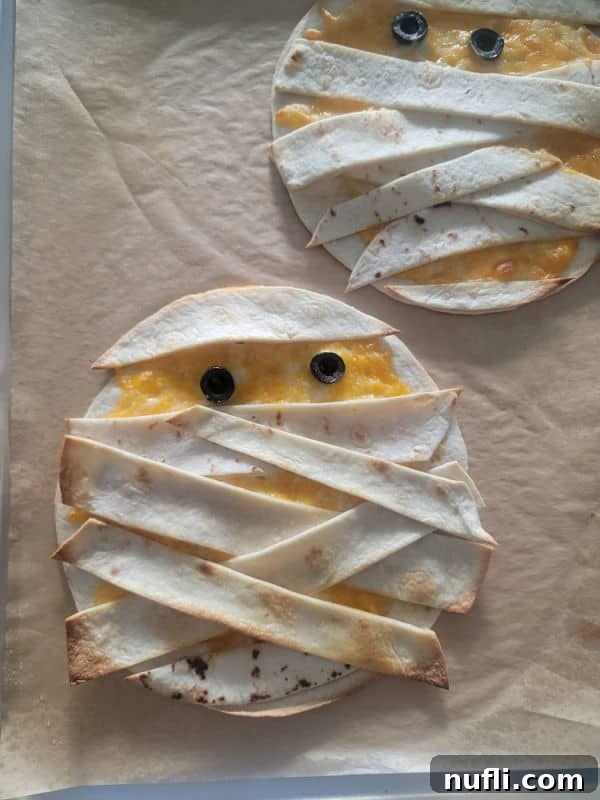
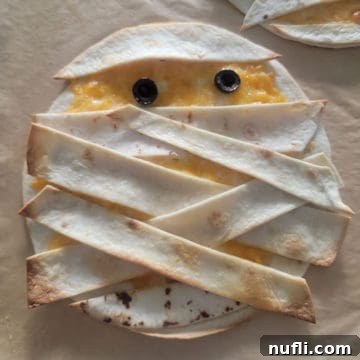
Now for the creative part! Take a second flour tortilla and, using your chosen tool – a pizza cutter, a pair of sharp kitchen scissors, or a sharp knife – cut it into thin strips. These strips will become your mummy’s distinctive bandages. Aim for strips that are roughly ½ to ¾ inch wide. Once you have a good pile of strips, begin arranging them in a criss-cross, slightly haphazard pattern over the cheese-covered base tortilla. Don’t worry about making them perfectly uniform; mummies are meant to look a little ancient and disheveled! Remember to leave a small, clear gap near the top of the tortilla where the mummy’s “eyes” will soon be placed.
Step 4: Add the Spooky Eyes and a Golden Touch
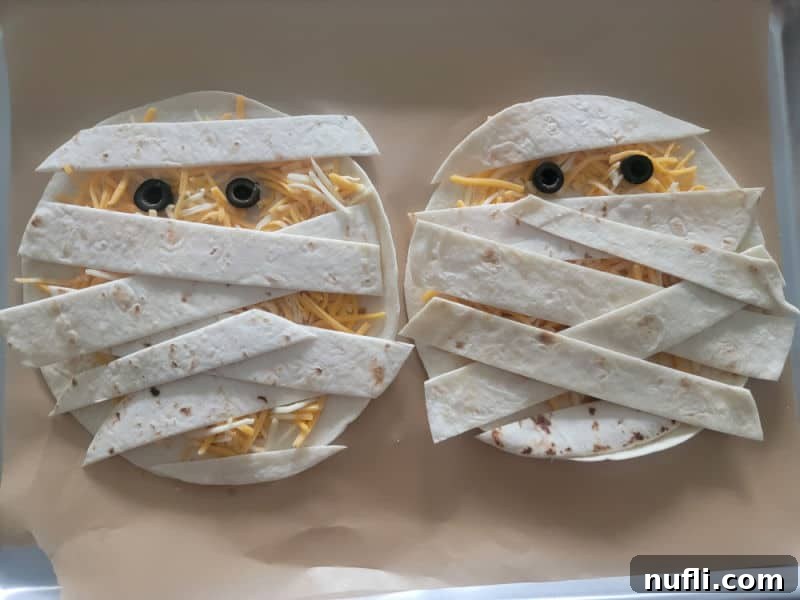
It’s time to give your mummy some personality! Carefully place two halved sliced black olives into the small gap you left near the top of the quesadilla. Position them to resemble the mummy’s watchful, slightly eerie eyes. For an extra touch of golden crispness and an even more delicious flavor, lightly spray the entire top surface of the quesadilla (paying special attention to the tortilla strips) with olive oil spray. This step is optional but highly recommended as it contributes significantly to a superior texture and appetizing appearance.
Step 5: Bake to Golden Perfection
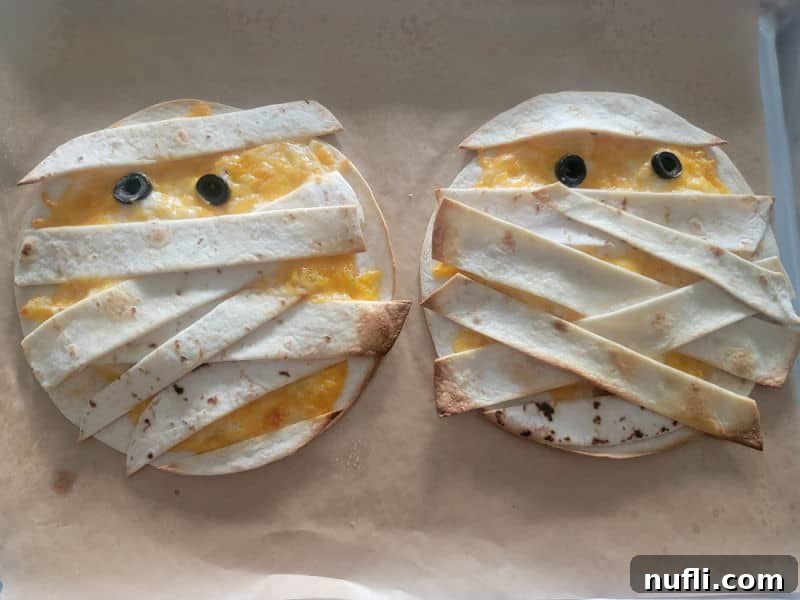
With your mummies assembled, carefully transfer the baking sheet to your preheated oven. Bake for approximately 5-6 minutes. The exact baking time may vary slightly depending on your oven, so keep a close eye on them! You’re looking for the cheese to be gloriously melted and bubbly, and for the tortilla strips to turn a beautiful golden brown and become slightly crispy. Once they reach this perfect stage, carefully remove the baking sheet from the oven (using those heat-resistant potholders!). Allow them to cool for just a minute or two on the baking sheet before serving. They’re best enjoyed warm and fresh!
Recipe Tips and Tricks for Perfect Mummy Quesadillas
To ensure your Mummy Quesadillas are nothing short of spectacular every single time, here are some invaluable tips and tricks:
- Baking vs. Microwave: The Texture Debate: While we highly recommend baking these Halloween quesadillas for that irresistible golden crispness and perfectly melted, slightly browned cheese, you technically *could* cook them in a microwave for sheer speed. However, be forewarned: microwaved quesadillas will lack the crispy tortilla texture and the cheese won’t achieve that lovely bubbly, golden crust. For the absolute best flavor and texture experience, always opt for the oven!
- Tortilla Size Matters for Presentation: Our recipe primarily utilizes 6-inch tortillas, which are wonderfully suited for individual servings and make managing the mummy design quite straightforward. Nevertheless, feel free to use larger 8-inch or 10-inch tortillas if those are what you have on hand. You can even get creative by cutting larger tortillas into unique smaller circles or rectangles to craft different mummy shapes or create mini-mummies for bite-sized party snacks.
- Understanding Nutrition Information: Please keep in mind that any nutrition information provided, including estimated calorie counts, will inherently vary based on the specific brands and types of ingredients you choose to use. Factors like full-fat versus low-fat cheese, different tortilla brands (e.g., whole wheat vs. white flour), and the addition of optional fillings will all impact the final nutritional values. For the most precise figures tailored to your specific ingredients, we strongly recommend inputting them into a reliable online nutrition calculator.
- Achieving Even Cheese Melting: To ensure your cheese melts beautifully and uniformly, make sure to spread your shredded cheese in a relatively even layer across the base tortilla. If you’re using block cheese and shredding it yourself, this often results in a superior melt compared to some pre-packaged shredded varieties, which can sometimes contain anti-caking agents that affect melt consistency.
- Preventing Overloading for Crispness: It can be tempting to pile on all the delicious fillings, but resist the urge to overload your quesadilla! Too many fillings can hinder the tortilla from crisping up properly and might also make the quesadilla difficult to handle and cut, potentially compromising the mummy design. A moderate amount ensures even cooking and a delightful texture.
- Prepping for Success: Having all your ingredients prepped (cheese shredded, olives halved, any additional fillings diced) before you start assembly will make the entire process much smoother and more enjoyable, especially when cooking with kids.
Preparation & Storage: Keeping Your Mummies Fresh
While planning ahead can definitely save you time in the kitchen, for these Mummy Quesadillas, some steps are truly best performed fresh to capture their optimal deliciousness.
- Make Ahead Considerations: We generally do not suggest making these quesadillas completely ahead of time. The magical essence of a perfectly cooked quesadilla lies in its delightful combination of warm, gooey, melty cheese and a wonderfully crispy tortilla. If fully assembled and left to sit for an extended period, the tortillas tend to lose their crispness and can become soggy, and the cheese won’t retain that wonderfully molten, freshly melted quality. However, you can absolutely prep your ingredients in advance! Shred the cheese, halve the olives, and pre-cut any optional fillings like cooked chicken or peppers. Store these prepped ingredients separately in airtight containers in the refrigerator, ready for quick assembly just before you plan to bake and serve.
- Storage of Leftovers: Should you be lucky enough to have any delicious Mummy Quesadilla leftovers (which is a rare occurrence, we admit!), store them promptly in an airtight container. Place them in the refrigerator, where they will keep well for approximately 1-2 days. For best quality, consume them as soon as possible.
- Freezing/How to Freeze: While we haven’t extensively tested freezing these specific quesadillas, if you wish to try, here’s our best advice: Ensure the quesadillas are completely cooled to room temperature after baking. Wrap each individual quesadilla tightly in plastic wrap, then place them into a freezer-safe bag or an airtight container. They should maintain their quality in the freezer for up to 1 month. When you’re ready to enjoy them, thaw them overnight in the refrigerator before proceeding to reheat. Please be aware that the texture of the tortilla might undergo a slight change after freezing and thawing, potentially becoming a bit less crispy than when fresh.
- How to Reheat: For the best results and to regain some of that coveted crispness, we recommend reheating leftover Mummy Quesadillas in the oven. Place them on a baking sheet and bake at 350°F (175°C) for about 5-10 minutes, or until they are heated through and the tortilla has crisped up again. As an alternative, you can reheat them quickly in the microwave for 30-60 seconds, but do note that they will not achieve the same original crispy texture this way.
Recipe Variations: Unleash Your Inner Mad Scientist Chef!
The true beauty of the Mummy Quesadilla lies in its incredible adaptability. Don’t be afraid to experiment with these delicious variations to suit your taste, dietary needs, or just to try something new!
- Cheese Substitutions: While cheddar is classic, don’t limit yourself! Try pepper jack for a spicy kick, mozzarella for an epic, stringy cheese pull, a vibrant Mexican blend for complex savory notes, or even a smoked gouda for a unique and sophisticated twist. Mix and match your favorites!
- Vegetarian Option: This recipe is naturally vegetarian, making it a perfect choice for meatless meals! You can simply stick to the delightful cheese and olive base, or load it up with even more delicious veggies like finely diced bell peppers, sweet corn kernels, fresh spinach, or sautéed mushrooms for extra flavor and nutrients.
- Vegan Option: Easily transform this spooky delight into a vegan-friendly treat! Simply swap out traditional dairy cheese for your favorite brand of dairy-free shredded cheese. It’s also crucial to remember to double-check the ingredients list on your chosen tortillas, as some brands may contain animal products (like lard) that make them non-vegan.
- Gluten-Free Version: For those with gluten sensitivities or dietary preferences, transforming this into a gluten-free meal is straightforward. Simply swap out traditional flour tortillas for high-quality gluten-free tortillas. Most major grocery stores now offer excellent gluten-free alternatives that hold up remarkably well to baking and maintain a good texture.
- Scaling Serving Sizes (Smaller or Larger): This recipe is wonderfully scalable! Whether you’re whipping up a single Mummy Quesadilla for a personal, quick Halloween treat or preparing a hundred for a massive Halloween bash, simply adjust the ingredient quantities proportionally. Bake them in batches as needed to accommodate your crowd.
- Make it Spicy: For those who crave a fiery kick, there are several ways to spice up your mummy! Sprinkle a generous pinch of chili powder or a dash of your favorite hot sauce over the cheese before adding the tortilla strips. You can also use thin slices of jalapeño or serrano peppers not just as mummy “eyes,” but also finely diced and mixed into the cheese layer for an internal burst of heat.
- Protein Power-Up: For a more substantial and protein-packed meal, consider adding cooked and shredded chicken, seasoned ground beef, savory black beans, or even crumbled plant-based meat substitutes as an additional layer to your quesadilla filling.
- Sweet Mummy Twist: For a dessert take on the mummy theme, use dessert tortillas (often found in the ethnic foods aisle) or even regular tortillas lightly brushed with melted butter and sprinkled with cinnamon sugar. Fill them with a mixture of cream cheese and fruit preserves, and use slivered almonds or mini chocolate chips for the mummy’s sweet eyes.
What to Serve with Your Mummy Quesadillas
Complete your hauntingly delicious Halloween feast with these perfect pairings for your Mummy Quesadillas:
Spooky Sips (Drinks):
- Warm & Cozy Hot Chocolate: A comforting classic, perfect for a crisp autumn evening.
- Creamy Pumpkin Spice Latte: Embrace the quintessential flavors of fall with this seasonal favorite.
- Vibrant Kool-Aid Slushie: A colorful, frosty, and incredibly fun treat for kids (and nostalgic adults!).
- Decadent Oreo Milkshake: A rich, sweet indulgence that’s perfect for a treat.
- Refreshing Freckled Lemonade Copycat: A zesty, sweet, and tangy option to cut through the richness.
- Mysterious Sonic Ocean Water Copycat: A fun, blue-hued drink to perfectly match the spooky theme of your meal.
- Bloody Punch: For a non-alcoholic option, mix cranberry juice, ginger ale, and a splash of lime juice for a frightfully festive red punch. Add some gummy worms for extra creepiness!
Frightfully Good Sides & Snacks:
- Halloween Monster Munch: A delightful sweet and savory snack mix that’s easy to customize.
- Candy Corn and Peanuts Snack Mix: A simple, addictive, and classic Halloween combination.
- Crunchy Pretzel Bones: Easy to make, perfectly salty, and wonderfully themed for the season.
- Sweet & Salty Caramel Popcorn: An absolute movie night essential that’s perfect for a cozy Halloween evening.
- Jack-O-Lantern Pumpkin Rice Krispie Treats: Adorable, festive, and a delicious no-bake dessert option.
- Frankenstein Rice Krispie Treats: Another fun and creative take on a beloved classic.
- Spooky Bloody Bandages: A creative and slightly gruesome snack that’s sure to get a reaction.
- Festive Candy Corn Bark: A colorful, easy-to-make chocolate bark dessert that screams Halloween.
- Fresh Green Salad: A simple, crisp green salad with a light vinaigrette can offer a refreshing and healthy contrast to the cheesy quesadillas.
- Dipping Sauces: Elevate the quesadilla experience by serving with extra salsa, a dollop of sour cream, or a generous scoop of homemade guacamole.
- And of course, no Halloween spread is complete without a generous assortment of Halloween Candy for dessert!
Complementary Main Dishes (If You’re Hosting a Larger Halloween Feast):
- Spooky Green Halloween Pasta: A vibrant and fun main course that perfectly fits the theme.
- Classic Mummy Dogs: These savory hot dog mummies are a fantastic complement, almost like a twin to our quesadilla mummies!
When to Unleash Your Mummy Quesadillas
These versatile and fun Mummy Quesadillas are the perfect dish for a wide variety of Halloween occasions. Their ease of preparation and universal appeal make them suitable for almost any festive gathering:
- Before Trick-or-Treating: A quick, energy-boosting, and satisfying meal to fuel up the little ghosts and goblins before their big candy hunt.
- Halloween Family Dinner: Make it a new festive tradition! Gather the family for a fun and interactive meal that everyone will look forward to.
- Potlucks & Gatherings: Always a crowd-pleaser and incredibly easy to transport, making them ideal for school events or friend get-togethers.
- Halloween Movie Night: The ultimate spooky snack for a cozy night in, perfect for munching during your favorite horror flicks or family-friendly Halloween movies.
- Themed Lunch: Surprise the kids with a fun lunchbox treat or serve them as a special spooky lunch at home.
- Halloween Party: A unique, edible, and interactive centerpiece for your snack table that will impress all your guests.
- After-School Snack: A delightful and exciting way to kick off the Halloween spirit as soon as school lets out.
Explore More Frightfully Delicious Halloween Recipes
The Halloween fun truly doesn’t stop with these amazing mummies! Dive into our extensive collection of other fantastic Halloween-themed recipes to make your celebration even more special and delicious:
- Creepy Crawly Spider Donuts: A sweet treat with a spooky twist.
- Adorable Reese’s Bats: Easy, chocolaty, and perfectly themed.
- Colorful Candy Corn Jello: A vibrant and fun layered dessert.
- Simple Mummy Oreos: A quick no-bake favorite for all ages.
Be sure to check out all of our Halloween Recipes for even more spooky inspiration, creative ideas, and delicious dishes!
Do you love discovering new recipes that are easy to make and bursting with flavor? We’ve got you covered! Explore our extensive categories including mouth-watering copycat recipes to recreate your restaurant favorites at home, indulgent dessert recipes for every sweet craving, and our incredibly convenient CrockPot Recipes for effortless weeknight meals.
Stay connected and ensure you never miss a delicious update or a new recipe! Follow Tammilee Tips on Facebook, Instagram, Pinterest, and Twitter for all our latest recipe posts, culinary adventures, and behind-the-scenes fun.
Mummy Quesadilla Recipe Card
Mummy Quesadilla
3 minutes
5 minutes
8 minutes
2
645
kcal
Tammilee Tips
Ingredients
- 4 Flour Tortillas
- 2 Cups Shredded Cheddar Cheese
- 4 Sliced Olives (halved)
- Olive Oil Spray
Instructions
- Preheat oven to 450°F (232°C). Prep all ingredients and line a baking sheet with parchment paper.
- Place one whole tortilla on the parchment-lined baking sheet. Top generously with shredded cheese, leaving a small border.
- Cut a second tortilla into thin strips (about ½ to ¾ inch wide) using a pizza cutter, kitchen scissors, or sharp knife. These are your mummy bandages.
- Arrange the tortilla strips in a criss-cross pattern over the cheese on the base tortilla, leaving a small gap for the eyes near the top.
- Place two olive halves in the eye gap to create the mummy’s eyes. Lightly spray the entire top of the quesadilla with olive oil spray for crispness (optional, but recommended).
- Bake for approximately 5-6 minutes, or until the cheese is melted and bubbly, and the tortilla strips are golden brown and slightly crispy. Serve immediately.
Kitchen Tools
- Baking Sheet
- Parchment Paper
- Pizza Cutter
- Heat Resistant Potholders/Oven Mitts
Nutrition Information
Calories from Fat 387
Love this recipe?
Follow @TammileeTIps on Pinterest
Tried this recipe?
Mention @TammileeTipsLife when you share a photo!
We truly hope you have an absolutely spooktacular and wonderfully delicious time making and enjoying these Mummy Quesadillas! They are a simple, creative, and incredibly fun way to celebrate Halloween with your loved ones, transforming mealtime into a memorable part of the festivities. Don’t forget to share your eerie and impressive culinary creations with us on social media – we absolutely love seeing how you bring our recipes to life in your own kitchens. Happy Halloween, and happy cooking!
