Get ready to summon the cutest spooks this Halloween with these incredibly easy Nutter Butter Ghosts! This delightful recipe requires just a handful of simple ingredients and a few minutes of your time, making it the ultimate sweet treat for Halloween parties, school events, or a fun family activity. Forget complicated baking; these charming ghost cookies are all about effortless fun and festive flavor, guaranteed to bring smiles and a touch of spooky sweetness to any celebration.
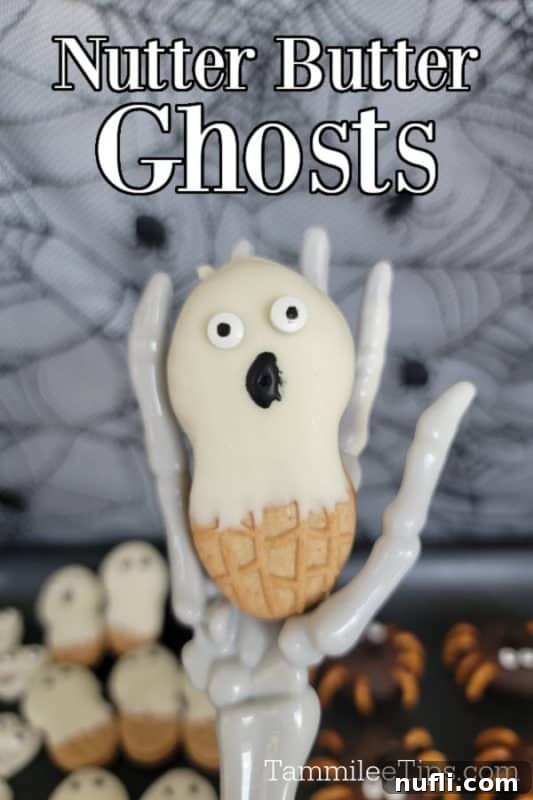
Easy Nutter Butter Ghosts: Your Ultimate Halloween Treat
There’s nothing quite like a simple, yet utterly charming Halloween treat, and these Nutter Butter Ghost Cookies fit the bill perfectly. I absolutely adore how quickly these come together, transforming ordinary peanut butter sandwich cookies into adorable, edible apparitions in mere minutes. They are the quintessential Halloween dessert, not just because they’re delicious, but because the process is so straightforward that anyone, even novice bakers or children, can join in the fun. Imagine the joy of customizing each little ghost with whimsical candy eyes, giving them their own unique personalities!
These ghostly delights are incredibly versatile and can be the star of your Halloween dessert platter. For an extra special presentation, consider pairing them with other creative Nutter Butter creations like our festive Nutter Butter Mummies and playful Nutter Butter Bats. Creating a themed platter with these peanut butter cookie transformations instantly elevates your party spread and offers a variety of spooky characters for your guests to enjoy. This year, our kitchen has been a hub of Halloween creativity, and these Nutter Butter Ghosts are definitely a highlight, proving that the best Halloween party food doesn’t have to be complicated to be spectacular.
Essential Ingredients for Your Spooky Treats
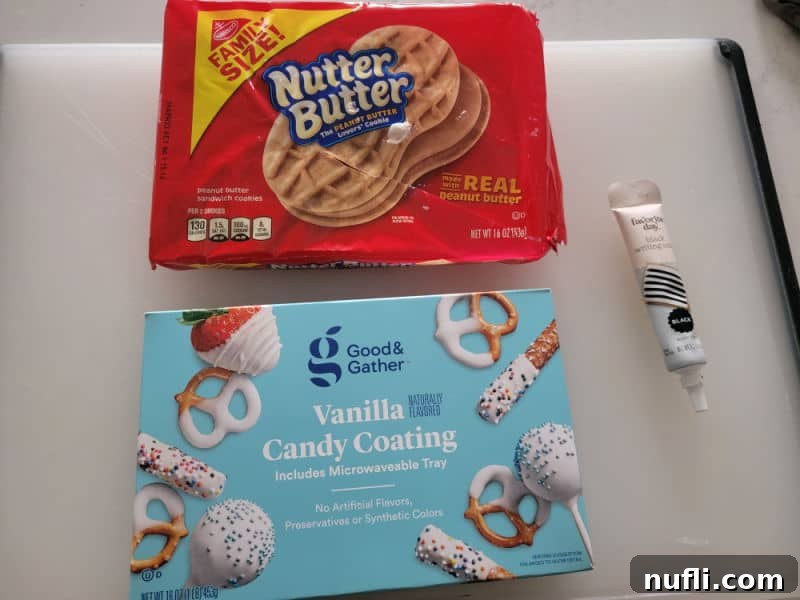
Crafting these adorable Nutter Butter Ghosts is delightfully simple, relying on a small selection of readily available ingredients. Here’s a quick overview of what you’ll need, along with tips for making the best choices. Specific measurements and detailed instructions are, of course, included in the full recipe card further down the page.
- Nutter Butter Cookies: These iconic peanut butter sandwich cookies are the backbone of our ghost treats. Their classic oval shape is absolutely perfect for mimicking a ghostly form. While Nutter Butters are ideal, you could also experiment with other oval-shaped peanut butter cookies or even shortbread cookies if you’re looking for a different flavor profile or texture. The key is to find a cookie with the right silhouette to become your spooky specter.
- White Chocolate Chips / White Candy Melts / Vanilla Almond Bark: For that perfectly smooth, bright white ghost coating, white candy melts or vanilla almond bark are often preferred over standard white chocolate chips. Candy melts and almond bark are specifically designed to melt smoothly and harden quickly with a glossy finish, making them much easier to work with for dipping. If using white chocolate chips, you might need to add a teaspoon of coconut oil or shortening to achieve a desirable dipping consistency.
- Mini Chocolate Chips / Black Icing Pen / Candy Eyeballs: This is where the magic happens for giving your ghosts personality! Candy eyeballs are the easiest and most charming option, instantly adding character. Mini chocolate chips can be used for simple, classic eyes. Alternatively, a black icing pen allows for more creative expressions, from wide-eyed surprised ghosts to spooky, slitted eyes.
Tools You’ll Need for Ghostly Creations
Making Nutter Butter Ghosts is not just about the ingredients; having the right tools makes the process even smoother and more enjoyable. You likely have most of these items in your kitchen already!
- Large Microwave-Safe Mixing Bowl: A spacious bowl is crucial for easy dipping. We particularly love a glass batter bowl with a handle, as it provides ample room to fully submerge the Nutter Butters without getting chocolate all over your hands. Ensure your chosen bowl is microwave-safe for melting your candy coating efficiently and safely.
- Baking Sheets: These are essential for holding your freshly dipped cookies as they set. We are huge fans of baking sheets with raised sides, as they help contain any drips and ensure everything stays neat, making cleanup a breeze. You’ll want at least one, possibly two, depending on how many ghosts you plan to make.
- Parchment Paper or Wax Paper: Lining your baking sheets with parchment paper is a game-changer for this recipe. It prevents the cookies from sticking and makes transferring them once set incredibly easy. Plus, it simplifies cleanup significantly. Wax paper works just as effectively if you don’t have parchment paper on hand.
Crafting Your Nutter Butter Ghosts: Step-by-Step Guide
Get ready to transform simple cookies into spooky delights! While complete, detailed instructions are provided in the printable recipe card at the bottom of this post, here’s a quick, comprehensive guide to help you create your adorable Nutter Butter Ghosts with ease.
Step 1: Prepare Your Workspace and Gather Supplies
Before you begin melting anything, ensure your workspace is clean and organized. Line one or two baking sheets with parchment paper or wax paper. This crucial step will prevent your dipped cookies from sticking and allow for easy removal once they’ve set. Lay out your Nutter Butter cookies, candy melts/almond bark, and your chosen decorations (candy eyeballs, mini chocolate chips, or icing pen) within easy reach. Having everything prepped makes the dipping process much smoother.
Step 2: Melt the Candy Coating to Perfection
Pour your white candy melting wafers or almond bark into your large, microwave-safe mixing bowl. Place the bowl in the microwave and heat the coating in 30-second intervals. After each interval, remove the bowl and stir the coating thoroughly, even if it doesn’t look fully melted. Stirring helps distribute the heat evenly and prevents scorching. Continue this process until the coating is completely smooth, lump-free, and has a fluid, dippable consistency. A perfectly melted coating is key to achieving a professional-looking ghost.
Step 3: Dip and Coat Your Nutter Butters
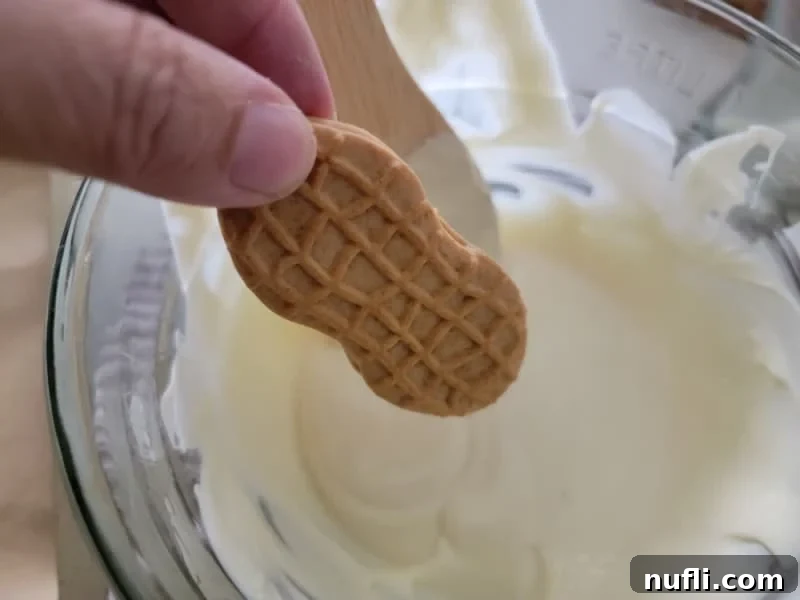
Now for the fun part! Carefully take a Nutter Butter cookie. There are two primary methods for dipping: you can hold the bottom third of the Nutter Butter with your fingers and dip the top two-thirds into the melted white candy coating, or for a cleaner approach, gently insert a fork into the cookie and use it to lower the cookie into the bowl. Swirl the cookie gently to ensure it’s coated evenly. Once adequately covered, lift the cookie out and gently tap the fork against the side of the bowl (or lightly shake the cookie) to allow any excess coating to drip off. For a super smooth back, you can also use the back of a knife to carefully scrape off any large drips. This ensures your ghost lays flat on the baking sheet.
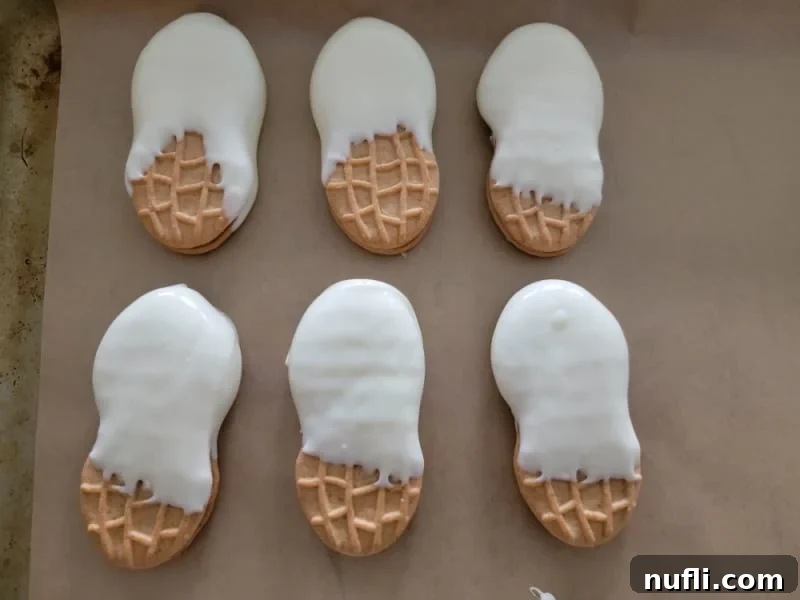
Once dipped and excess coating removed, carefully place the coated Nutter Butter onto your parchment-lined baking sheet. Allow a little space between each cookie to prevent them from sticking together as they set.
Step 4: Decorate and Let Them Set
This is where your ghosts truly come to life! Immediately after placing a dipped cookie on the parchment paper, while the coating is still wet, gently press two candy eyeballs into the upper portion of the ghost’s body. If you’re using mini chocolate chips, place them similarly. If you’re opting for a black icing pen, you might wait a few minutes until the white coating has slightly firmed up but is still pliable enough for the pen to adhere without smearing. Get creative with different expressions – some can be happy, some spooky, some even a little goofy! Once all your ghosts are decorated, let them set completely at room temperature. This can take anywhere from 15 minutes to an hour, depending on the thickness of the coating and your room’s temperature and humidity. For quicker setting, you can place the baking sheet in the refrigerator for 5-10 minutes, but be mindful of condensation forming if leaving them in too long.
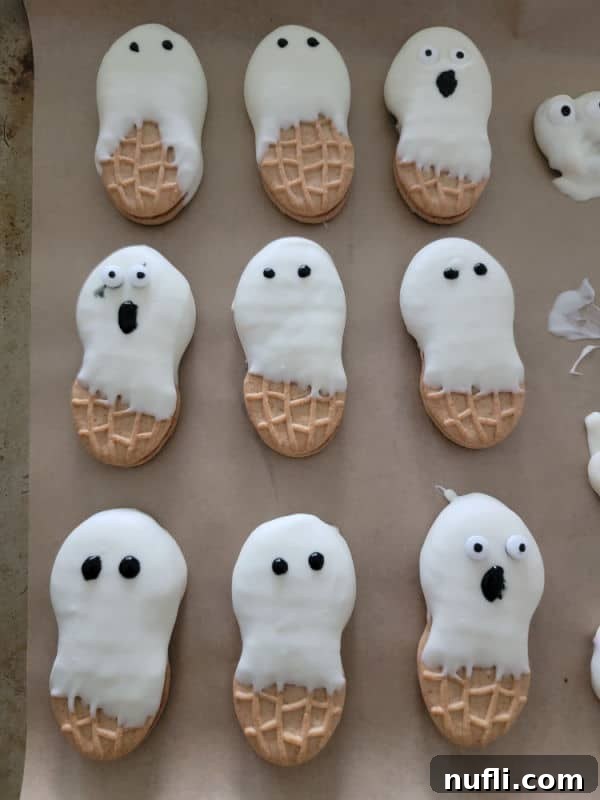
Preparation and Storage Tips
One of the many advantages of Nutter Butter Ghosts is how well they keep, making them an excellent choice for planning ahead for your Halloween festivities.
Make Ahead: These delightful treats can be prepared several days in advance of your event. Making them ahead not only saves you time on party day but also allows the coating to fully set and the flavors to meld beautifully. Simply follow the recipe, ensure they are completely hardened, and store them properly.
Storage: To maintain their freshness, texture, and appearance, store your finished Nutter Butter Ghosts in an airtight container at room temperature. Avoid direct sunlight or warm environments, as this can cause the candy coating to soften or melt. Layer them carefully, separated by parchment paper if necessary, to prevent sticking and damage to the decorations. They typically stay fresh for up to 1-2 weeks.
Freezing: Yes, you can freeze Nutter Butter Ghosts! This is a fantastic option if you’ve made a large batch or want to enjoy them beyond the Halloween season. To freeze, place the fully set ghosts in a single layer on a baking sheet and freeze for about an hour until solid. Then, transfer them to a freezer-safe, airtight container or heavy-duty freezer bag, again, layering with parchment paper to prevent them from sticking together. This protection is crucial to prevent moisture from seeping in and affecting their texture or appearance. They can be frozen for up to 1-2 months. When ready to enjoy, simply thaw them at room temperature for an hour or two before serving.
Creative Variations for Your Ghostly Delights
While the classic white Nutter Butter Ghost is undeniably charming, don’t hesitate to unleash your creativity and experiment with different variations to make your treats truly unique!
- Color and Flavor Swaps: Instead of traditional white candy coating, try using different colored candy melts. Orange, green, or purple coating can create vibrant, fun monster cookies, or a combination of colors can make a “tie-dye” ghost effect. You can also add a drop or two of food-grade flavor extracts (like peppermint or almond) to your melted coating for an extra taste dimension.
- Dietary Adaptations: For those with dietary restrictions, there are several ways to adapt this recipe.
- Vegan Option: While Nutter Butters are generally considered “accidentally vegan” by many, always double-check the ingredient list to ensure they align with your specific comfort level and dietary standards. Pair them with vegan-friendly white chocolate or candy melts.
- Gluten-Free: Traditional Nutter Butters are not gluten-free. However, many brands now offer excellent gluten-free peanut butter sandwich cookies that can be used as a fantastic substitute. Alternatively, you could try making homemade gluten-free peanut butter cookies in the right shape.
- Smaller or Larger Servings: This recipe is incredibly flexible. Whether you need just a couple of ghosts for a quiet movie night or a hundred for a massive Halloween bash, simply adjust the quantity of Nutter Butter cookies and candy coating accordingly. The method remains the same, making it easy to scale up or down as needed without compromising on quality or fun. Just melt the amount of candy coating you need for your desired number of cookies.
- Extra Embellishments: Beyond candy eyes, consider adding sprinkles (Halloween-themed, naturally!), edible glitter, or drawing mouths with a finer icing pen for different expressions. A drizzle of melted milk or dark chocolate can also add contrast and a touch of gourmet flair.
Expert Tips for Flawless Nutter Butter Ghosts
Achieving perfect Nutter Butter Ghosts is easy, but a few expert tips can make all the difference:
- Maintain Optimal Coating Temperature: If your candy coating starts to thicken while you’re dipping, simply microwave it for another 10-15 seconds and stir until smooth again. Don’t overheat, as this can cause it to seize.
- Work Quickly: Candy melts and almond bark set relatively fast. Have your cookies and decorations ready so you can dip and decorate each ghost before the coating hardens.
- Humidity Matters: On very humid days, candy coating can be more challenging to work with. If possible, make these on a dry day to prevent stickiness and ensure a smooth set.
- Involve the Kids: This recipe is incredibly kid-friendly. Let children help with pressing on the candy eyes – it’s a great way to encourage their creativity and get them excited about cooking.
- Cleanup Aid: If you don’t have parchment or wax paper, a cooling rack placed over a baking sheet works. The rack allows excess coating to drip through, and the baking sheet underneath catches it for easier cleanup.
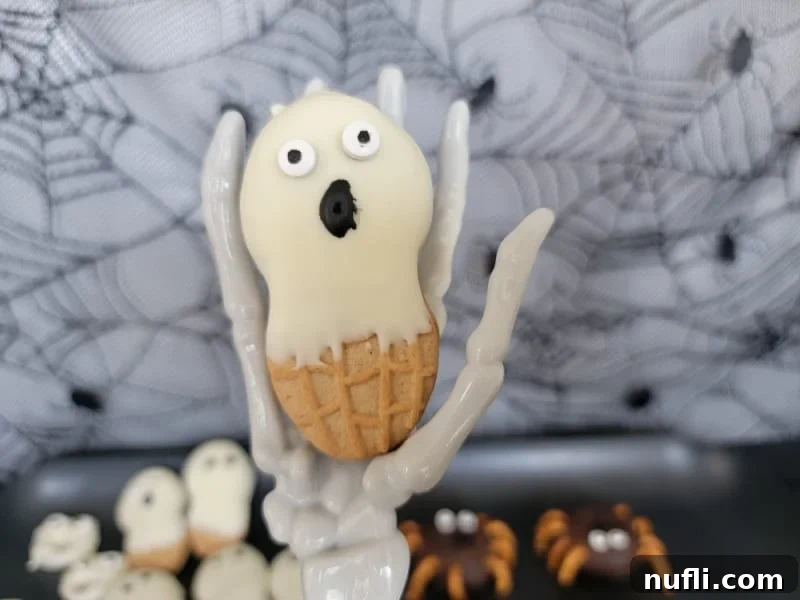
What to Serve with Nutter Butter Ghosts
These Nutter Butter Ghosts are fantastic on their own, but they also pair wonderfully with a variety of Halloween-themed snacks and beverages to complete your spooky spread.
Drinks: Complement their sweetness with comforting or festive beverages. Imagine sipping on a warm Hot Chocolate, a cozy Pumpkin Spice Latte, or something fun and colorful like Kool Aid Slushies. For a creamy treat, an Oreo Milkshake is always a hit, or try a refreshing Freckled Lemonade or Sonic Ocean Water to balance the rich sweetness.
Main Dish/Entrée: Balance your sweet ghosts with savory Halloween mains. A playful Mummy Quesadilla or vibrant Halloween Pasta make for a fun and easy dinner before diving into desserts.
Snacks: For a varied snack table, pair your Nutter Butter Ghosts with other festive bites. A Monster Munch mix, a classic combination of Candy Corn and Peanuts, or even unique Kool Aid Pickles offer a diverse flavor profile. And, of course, a bowl of Salted Caramel Popcorn and plenty of Halloween candy are always essential!
When to Unleash Your Nutter Butter Ghosts
These versatile and adorable Nutter Butter Ghosts are perfect for almost any occasion where a touch of Halloween cheer (and a delicious treat!) is desired. We think they are the absolute perfect Halloween party food, but their appeal extends far beyond just one night.
- Halloween Parties: The ultimate crowd-pleaser for any spooky gathering, delighting guests of all ages.
- School Parties: Easy to transport and a hit with kids, making them perfect for classroom celebrations.
- Sweet Treat: A simple, satisfying dessert for any day you crave a little spooky sweetness.
- Trick or Treating: A homemade addition to your Halloween candy stash, or a special treat to hand out.
- Movie Night: Enhance your cozy fall movie night with these themed snacks.
- Fall Picnics: A festive and portable dessert for outdoor autumn adventures.
- Office Parties: Bring some festive spirit to the workplace with these charming and easy-to-share cookies.
More Fun Halloween Recipes
If you’re looking for more ways to celebrate the spooky season with delicious treats, explore some of our other favorite Halloween recipes:
Reeses Bats
Monster Munch
Spider Doughnuts
Witches Hat Cookies
Band-Aid Cookies
Don’t stop there! Check out our full collection of Great Halloween Recipes for even more inspiration to make your holiday deliciously memorable.
Love exploring new recipes? Dive into our extensive library of copycat recipes, indulge your sweet tooth with our diverse dessert recipes, and discover effortless meal solutions with our fantastic Crock Pot Recipes.
Stay connected and never miss a delicious update! Follow Tammilee Tips on Facebook, Instagram, Pinterest, and Twitter for all our latest recipe posts, travel tips, and more!
Nutter Butter Ghosts
Easy Nutter Butter Ghosts are the perfect Halloween Treat!
Prep Time: 10 minutes
Total Time: 10 minutes
Servings: 12
Calories: 335 kcal
Author: Tammilee Tips
Ingredients
- 12 Nutter Butter cookies
- 1 package Vanilla Almond Bark (or White Chocolate Chips/White Candy Melts)
- 24 Candy Eyes (or Mini Chocolate Chips/Icing Pen)
Instructions
- Gather all of the supplies and prep the baking sheet with parchment paper.
- Melt candy melting wafers/almond bark in 30-second intervals making sure to stir after every interval until smooth.
- Carefully dip the Nutter Butter Cookies into the white candy coating until ⅔ of the cookie is coated.
- You can hold the bottom of the Nutter Butter Halloween Ghost Cookies or insert a fork into the cookie and lower it into the bowl.
- Use a knife to remove any excess chocolate from the back of the coated cookie.
- Place on the parchment-lined baking sheet.
- Add Candy Eyeballs or draw chocolate eyes and let the top layer set completely.
Kitchen Tools
- Large Mixing Bowl
- Parchment Paper
- Cookie Sheets
Nutrition Facts
Nutter Butter Ghosts
Amount Per Serving
- Calories 335
- Calories from Fat 144
- Fat 16g (25% Daily Value*)
- Saturated Fat 14g (88% Daily Value*)
- Polyunsaturated Fat 1g
- Monounsaturated Fat 1g
- Sodium 64mg (3% Daily Value*)
- Carbohydrates 43g (14% Daily Value*)
- Sugar 38g (42% Daily Value*)
- Protein 1g (2% Daily Value*)
* Percent Daily Values are based on a 2000 calorie diet.
Love this recipe? Follow @TammileeTIps on Pinterest!
Tried this recipe? Mention @TammileeTipsLife when you share a photo!
