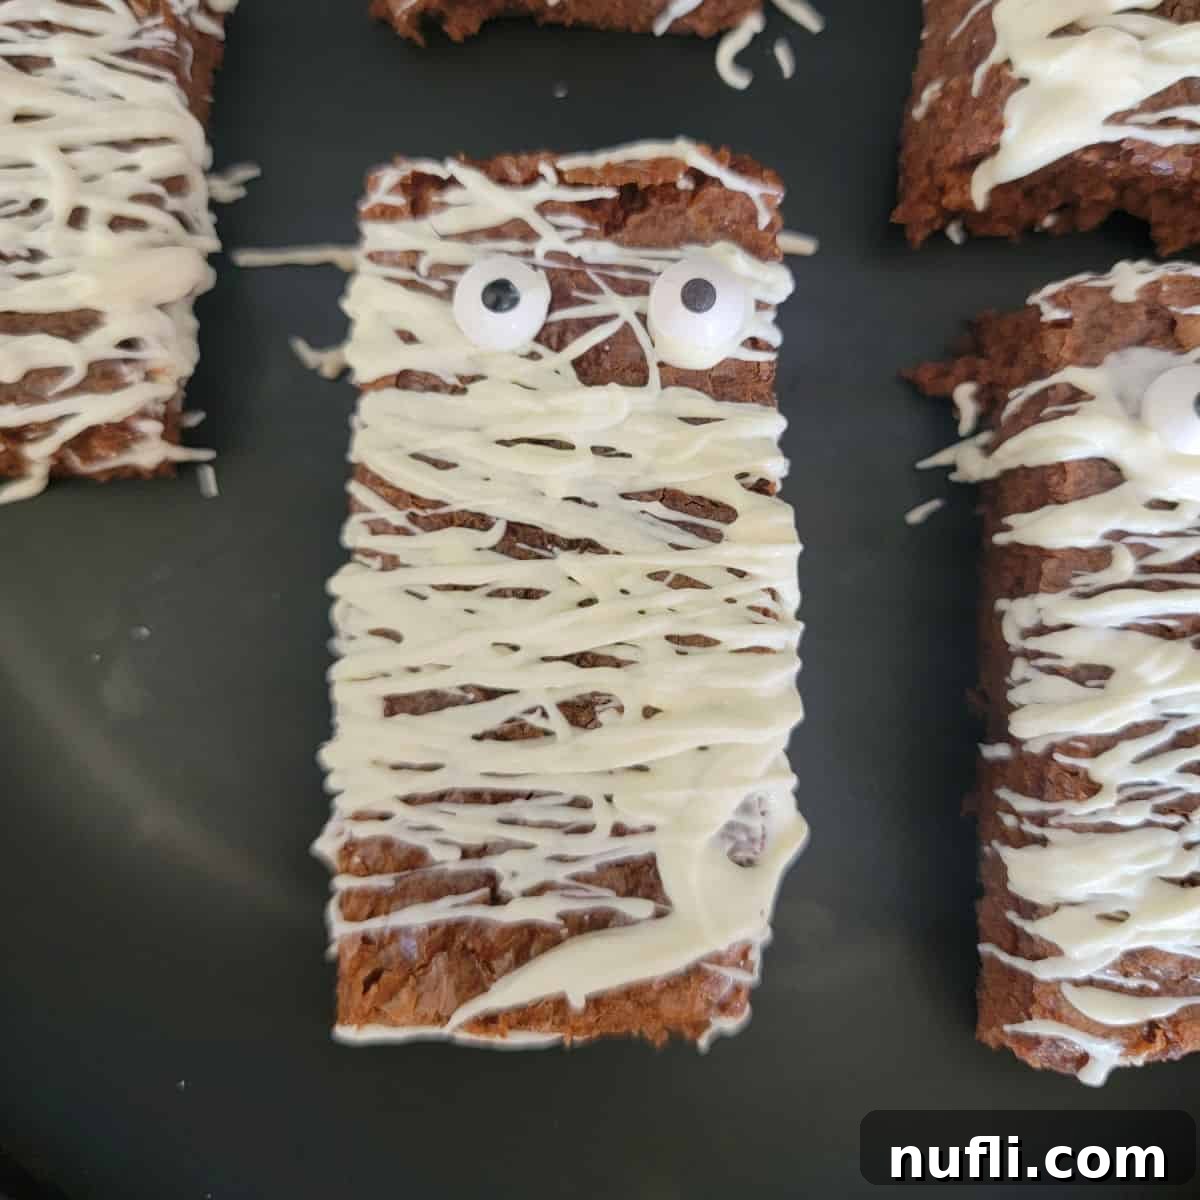
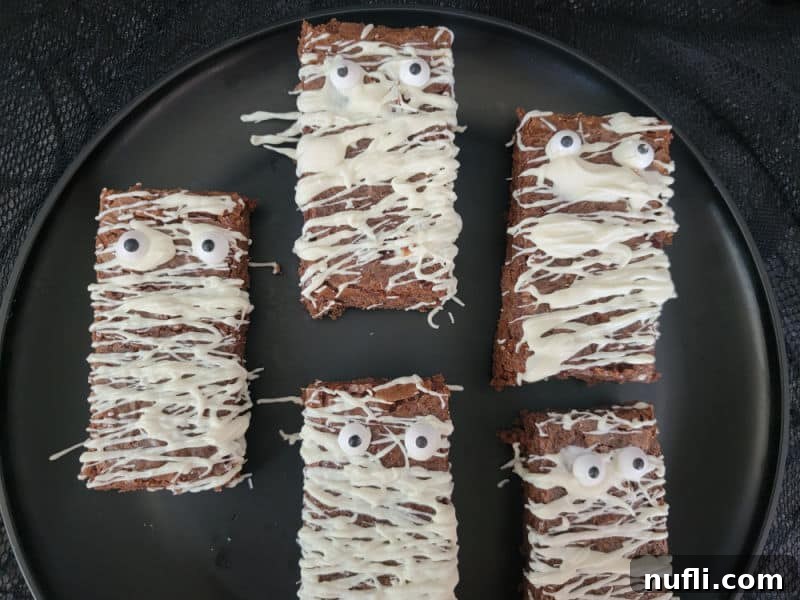
Get ready for a hauntingly good time with these incredibly easy Mummy Brownies, the ultimate spooky treat for any Halloween celebration! Whether you’re a seasoned baker or prefer the convenience of a boxed mix, these festive brownies come together with minimal effort, making them perfect for busy parents, party hosts, or anyone craving a dose of spooky sweetness. Imagine rich, fudgy brownies adorned with ghostly white “bandages” and adorable candy eyes, creating a dessert that’s as delightful to look at as it is to eat. These mummy brownies are not just a treat; they’re a fun, interactive baking project that kids and adults alike will adore, bringing smiles and a touch of Halloween magic to your kitchen.
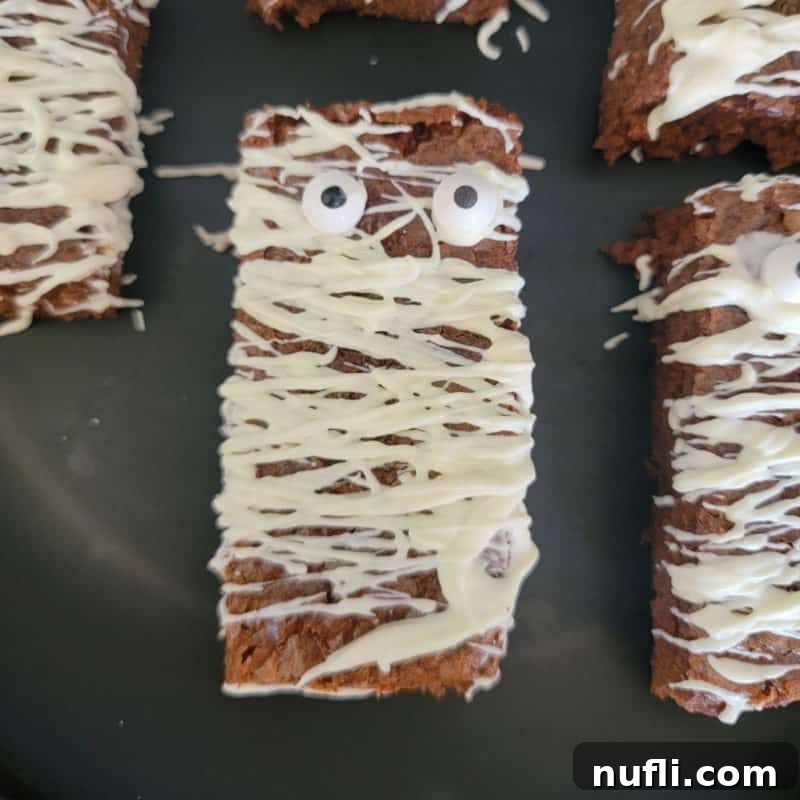
Mummy Brownies: Your Go-To Halloween Dessert
Halloween is a time for costumes, candy, and, of course, captivating treats! This year, make your dessert table unforgettable with our incredibly simple yet effective Mummy Brownies. This recipe is a highlight of our “Mummy Week” series, a challenge born from a playful dare about running out of spooky ideas. So far, we’ve transformed everything from Mummy Hot Dogs to Mummy Donuts and even Mummy Quesadillas into festive, wrapped delights, proving that creativity knows no bounds when it comes to Halloween fun.
These brownies stand out because they perfectly blend ease with impressive visual appeal. You don’t need expert baking skills or elaborate tools to create these adorable, slightly eerie confections. They are designed for maximum impact with minimum fuss, ideal for anyone looking to whip up a batch of spooky goodness without spending hours in the kitchen. Whether you’re preparing for a school party, a neighborhood gathering, or just a fun family movie night, Mummy Brownies are a surefire hit that everyone will rave about. This year, let’s make Halloween extra special with treats that are both delicious and delightfully thematic!
Why These Mummy Brownies Are a Must-Make for Halloween
There are countless reasons why these Mummy Brownies will become your favorite Halloween baking tradition. Firstly, their simplicity is unmatched. You can choose to bake your brownies from scratch for that homemade touch or opt for a convenient boxed mix when time is tight. Either way, the decorating process is straightforward and incredibly fun, even for little hands that want to help out. Secondly, the visual appeal is undeniable. The contrast of dark chocolate brownies with stark white “bandages” and playful candy eyes creates an iconic Halloween motif that captures the spirit of the season perfectly. They look intricate but are surprisingly easy to achieve.
Beyond their ease and charm, these brownies are incredibly versatile. You can customize them with different brownie bases – from super fudgy to cake-like, or even specialty versions like black bean brownies for a healthier twist. They’re also a fantastic opportunity for personalization; experiment with different patterns for the mummy bandages or add a dash of food coloring to your white chocolate for a spooky hue. These treats aren’t just for kids; they appeal to all ages and are guaranteed to be a conversation starter at any Halloween gathering. So, prepare to delight your guests and family with these irresistible, ghoulishly good Mummy Brownies!
Simple Ingredients for Spooky Sweetness
Crafting these adorable Mummy Brownies requires only a handful of readily available ingredients. The beauty of this recipe lies in its flexibility, allowing you to tailor it to your preferences and schedule. Here’s a closer look at what you’ll need:
- Brownies: The foundation of our mummy masterpiece! You have several excellent choices here.
- Homemade Brownies: For the ultimate rich and fudgy experience, consider making your brownies from scratch. Our Classic Scratch-Made Chocolate Brownie Recipe offers a deep chocolate flavor and perfect texture. You could also try our unique Black Bean Brownies for a healthier, yet equally delicious, alternative.
- Boxed Brownie Mix: If you’re short on time, a good quality boxed brownie mix is your best friend. Simply follow the package instructions to bake them. This option saves time without sacrificing much flavor, making it a popular choice for quick Halloween treats.
- White Candy Melts or White Chocolate: This is what forms the iconic mummy “bandages.”
- White Candy Melts (Almond Bark): These are often preferred for their easy melting consistency and quick setting time. They typically contain vegetable oils, which makes them less prone to seizing than traditional white chocolate and creates a smoother, more manageable drizzle.
- White Chocolate: If using white chocolate, choose a good quality bar or chips. Be mindful that white chocolate can be more temperamental to melt, often requiring lower heat and careful stirring to prevent it from seizing or burning. Add a teaspoon of vegetable shortening or coconut oil if it seems too thick for drizzling.
- Candy Eyes: These small, edible eyes bring your mummies to life! They are readily available in most grocery stores or craft stores around Halloween. Make sure to have plenty on hand – you might find yourself wanting to mummify everything!
With these simple components, you’re just a few steps away from creating a batch of Mummy Brownies that will be the star of any Halloween gathering.
Essential Equipment for Effortless Mummy Making
Having the right tools can make all the difference in ensuring your Mummy Brownies come out perfectly. While you don’t need a professional kitchen setup, a few key items will streamline the process and ensure a successful baking and decorating experience.
- 9×13 Casserole Baking Dish: This standard size is perfect for baking a typical batch of brownies. If you prefer thicker, fudgier brownies, you might opt for a slightly smaller 8×8 or 9×9 inch baking dish. Remember to line your chosen dish with parchment paper for easy removal and cleanup.
- Large Mixing Bowl: Essential for preparing your brownie batter (if baking from scratch) and for melting the white candy melts or chocolate. We highly recommend a glass batter bowl with a handle, as it provides stability on the counter while mixing and makes pouring batter a breeze.
- Wooden Spoon or Rubber Spatula: You’ll need a sturdy utensil for mixing brownie batter and for stirring the melted white chocolate. A wooden spoon is excellent for heavy mixing, while a rubber spatula is ideal for scraping down the sides of bowls and for gently folding ingredients.
- Parchment Paper: A true kitchen hero! Lining your baking dish with parchment paper not only prevents sticking but also makes lifting the cooled brownies out of the pan incredibly easy. It also serves as a non-stick surface for cooling and decorating your cut brownies.
- Heat Resistant Potholders: Safety first! Protect your hands from hot baking dishes. Investing in quality silicone or heat-resistant potholders is a smart move. After a scary incident where a cloth potholder caught fire on a forgotten hot burner, we exclusively use these for peace of mind.
- Baking Sheets with Sides: Perfect for cooling and arranging your cut brownies before decorating. The raised edges on these baking sheets ensure that your brownies don’t accidentally slide off, making the decorating process much less messy.
Gathering these items before you begin will ensure a smooth and enjoyable experience as you bring your Mummy Brownies to life!
How to Create Your Delicious Brownie Mummies: A Step-by-Step Guide
Now for the fun part – transforming ordinary brownies into adorable Halloween mummies! Follow these easy steps to create your spooky treats.
- Bake and Cool the Brownies:
- First, prepare your brownies according to your chosen recipe (homemade or boxed mix). Pour the batter into your parchment-lined baking dish and bake until a toothpick inserted into the center comes out with moist crumbs.
- Once baked, allow the brownies to cool completely in the pan on a wire rack. This step is crucial; attempting to cut or decorate warm brownies will lead to crumbling and melting chocolate. Patience here ensures perfect mummies!
- Cut and Arrange Brownies:
- Once fully cooled, use the parchment paper to lift the entire brownie slab out of the baking dish onto a cutting board.
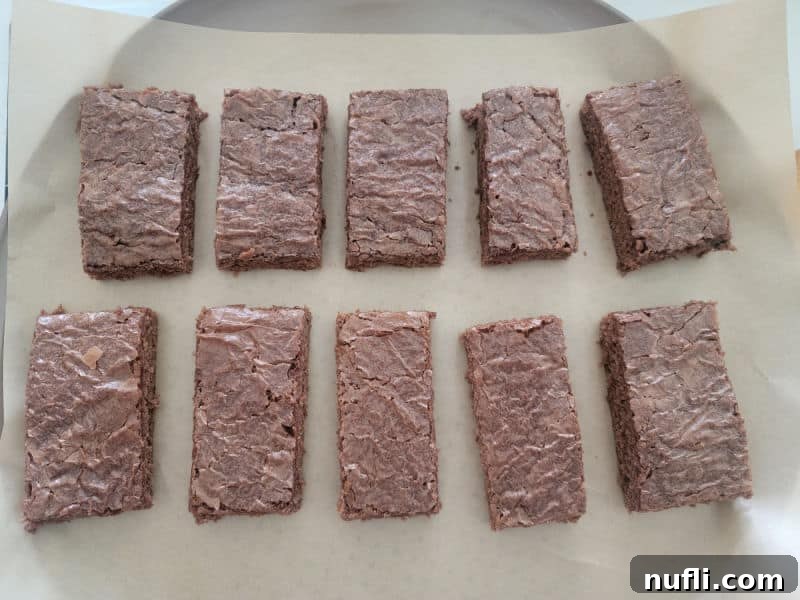
- Cut the brownies into even squares or rectangles. We often opt for rectangles, as they provide more surface area for creating those charming mummy bandages. Aim for pieces that are roughly 2-3 inches in size.
- Carefully transfer the cut brownie pieces to a parchment-lined baking sheet. Arrange them in a single layer with a little space between each piece to make decorating easier.
- Melt the White Chocolate/Candy Melts:
- Place your white candy melts or white chocolate in a microwave-safe bowl.
- Melt in 30-second intervals, stirring thoroughly after each interval. Continue until the chocolate is smooth and fully melted. Be careful not to overheat, as this can cause the chocolate to seize or burn.
- Create Mummy Bandages:
- Once the chocolate is melted, it’s time to get creative! You can either use a spoon and drizzle the chocolate back and forth in a zigzag motion over each brownie to create a random, bandaged effect.
- For more control and uniform lines, transfer the melted chocolate to a piping bag with a small round tip (or a Ziploc bag with a corner snipped off). Pipe thin lines across the brownies, leaving a small gap near the top for the eyes. Don’t worry about perfection – rustic bandages add to their charm!
- Add Candy Eyeballs and Set:
- While the white chocolate is still wet, gently press two candy eyeballs onto each brownie, placing them in the gap you left. The melted chocolate will act as an adhesive.
- Allow the decorated brownies to sit at room temperature for about 15-30 minutes, or until the white chocolate has fully set and hardened. For a quicker set, you can place the baking sheet in the refrigerator for 10-15 minutes.
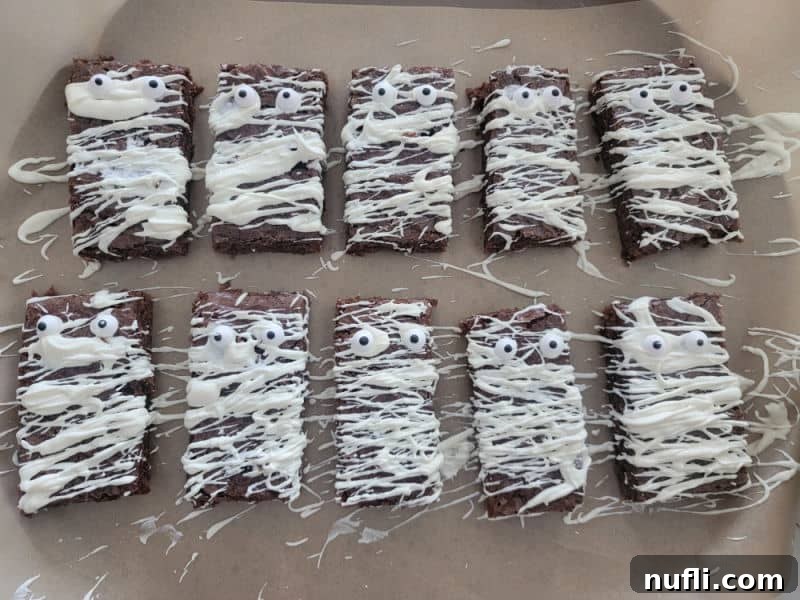
And just like that, your spooky and delicious Mummy Brownies are ready to enjoy! These treats are sure to be a hit at any Halloween gathering.
Expert Tips for the Best Mummy Brownies Every Time
While making Mummy Brownies is inherently simple, a few expert tips can elevate your results and ensure a smooth, stress-free experience:
- Cool Brownies are Key: This cannot be emphasized enough! Ensure your brownies are completely cooled before you begin cutting or decorating. Warm brownies will melt the white chocolate, leading to a messy, un-mummy-like appearance. If you’re in a hurry, you can place the baked brownies in the refrigerator for about 30 minutes to speed up the cooling process.
- Melting Chocolate Mastery: When melting white candy melts or white chocolate, always use short intervals (30 seconds) in the microwave and stir diligently in between. Overheating can cause the chocolate to seize and become clumpy and unusable. If it seems too thick, add a tiny bit of vegetable shortening or coconut oil (about ½ teaspoon) to thin it out slightly, but be careful not to add too much, which can make it greasy. A double boiler method is also a great alternative for more controlled melting.
- Bandage Techniques:
- Spoon Drizzling: For a rustic and authentic mummy look, a simple spoon works wonders. Dip the spoon into the melted chocolate and wave it back and forth over the brownies, creating irregular lines.
- Piping Bag Precision: If you prefer more uniform lines, transfer the melted chocolate into a piping bag fitted with a small round tip, or simply use a plastic sandwich bag with a tiny corner snipped off. This gives you more control over the thickness and placement of your “bandages.”
- Secure the Eyes: Press the candy eyeballs gently but firmly into the wet white chocolate. The chocolate acts as glue, ensuring they stay put as the bandages set. If the chocolate has already started to harden, dab a tiny bit more melted chocolate on the back of the eyes before placing them.
- Optional Frosting Layer: For an extra layer of decadence, you can spread a thin layer of chocolate frosting over the cooled brownies before adding the white chocolate bandages. This adds richness and a delightful texture contrast.
- Flavor Variations: Don’t limit yourself to just white chocolate! For a different flavor profile, you can gently melt cream cheese frosting and use that to create the mummy bandages. Ensure it’s not too warm, or it will melt the brownie surface.
- Nutritional Considerations: Keep in mind that the nutritional information (calories, carbohydrates, fats, protein, etc.) for these brownies will vary significantly depending on whether you use a homemade recipe (and its specific ingredients) or a boxed brownie mix (and the additional ingredients required by the box, like oil and eggs). Always refer to the specific products you use for accurate details.
By following these tips, your Mummy Brownies will not only look fantastic but will taste incredible too, making them a cherished part of your Halloween celebrations.
Preparation and Storage Tips for Your Mummy Brownies
Ensuring your Mummy Brownies stay fresh and delicious is key to enjoying them throughout the Halloween season. Here are some guidelines for preparation and storage:
- Make Ahead: Mummy Brownies are an excellent make-ahead treat! You can prepare them a day or two in advance of your event. Once fully decorated and set, store them in an airtight container at room temperature. This allows the flavors to meld and ensures you have one less thing to worry about on party day.
- Storage: Store your finished Mummy Brownies in an airtight container at room temperature for up to 3-4 days. While they can be stored in the refrigerator, this can sometimes cause brownies to dry out and the white chocolate bandages to become very hard. If you do refrigerate them, allow them to come to room temperature for about 15-20 minutes before serving for the best texture.
- Freezing: Brownies freeze remarkably well, allowing you to enjoy them long after Halloween.
- To freeze, first ensure the brownies are completely cooled and the white chocolate has fully set.
- Wrap individual brownies or small portions tightly in plastic wrap, then place them in a freezer-safe airtight container or a heavy-duty freezer bag. This double layer of protection helps prevent freezer burn.
- Brownies can be frozen for up to 3 months.
- To thaw, simply transfer them from the freezer to room temperature for a few hours before serving. Do not microwave, as this can alter the texture of the brownie and the white chocolate.
Creative Recipe Variations & Dietary Adaptations
One of the joys of these Mummy Brownies is how easily they can be customized to suit different tastes, occasions, or dietary needs. Here are some ideas to inspire your creativity:
- Base Substitutions: While brownies are classic, feel free to experiment with other treats as your mummy base!
- Chocolate Cake: Cut slices of chocolate cake into rectangles for a softer, lighter mummy.
- Rice Krispie Treats: Form Rice Krispie treats into rectangles, then decorate them like mummies for a chewy, crunchy alternative.
- Blondies: Use blondies for a vanilla-flavored mummy base, offering a different color contrast.
- Vegetarian Option: This recipe is inherently vegetarian, as it does not contain meat, poultry, or fish products. Simply ensure all your chosen brownie ingredients (mix, eggs, oil, etc.) are free from animal-derived ingredients if you have specific concerns.
- Vegan Option: Making vegan mummy brownies is simple with a few substitutions:
- Vegan Brownie Mix: Opt for a certified vegan brownie mix. Popular brands like King Arthur, Miss Jones, or Better Batter often offer excellent vegan options. Follow the package instructions, typically substituting eggs with a flax egg or other vegan egg replacer, and using plant-based milk and oil.
- Dark Chocolate Vegan Brownie Recipe: Many fantastic vegan brownie recipes use dark chocolate and plant-based ingredients to achieve a rich, fudgy texture.
- Vegan White Chocolate: Ensure your “white candy melts” are dairy-free. Many brands now offer vegan white chocolate chips or melts made with cocoa butter and plant-based milk alternatives.
- Gluten-Free Option: Easily adapt this recipe for those with gluten sensitivities:
- Gluten-Free Brownie Mix: Use a high-quality gluten-free brownie mix. Ensure all other ingredients you add (like flour if baking from scratch) are also gluten-free.
- Adjusting Serving Size:
- Smaller Batch: If you only need a few mummies, you can bake a full batch of brownies and freeze a portion of the plain brownies for later use. Then, only decorate the amount you need for your immediate gathering.
- Larger Group: This recipe doubles or even triples easily for bigger parties or events. Just ensure you have larger baking dishes or multiple smaller ones.
These variations ensure that everyone can enjoy the fun and deliciousness of Mummy Brownies, regardless of their dietary needs or desired flavor profile.
What to Serve with Mummy Brownies: Perfect Pairings
Mummy Brownies are fantastic on their own, but pairing them with other Halloween-themed treats and drinks can create an unforgettable party spread. Here are some complementary ideas:
Spooky Sips (Drinks)
- Hot Chocolate: A classic comfort, especially on a chilly Halloween night.
- Pumpkin Spice Latte: Embrace the autumn flavors with this festive drink.
- Kool-Aid Slushies: Offer vibrant, kid-friendly options like “Monster Green” or “Vampire Red.”
- Oreo Milkshake: A rich, creamy treat that pairs perfectly with chocolate.
- Freckled Lemonade: A refreshing and colorful option.
- Sonic Ocean Water: For a bright blue, “potion-like” drink.
Ghoulish Goodies (Snacks)
- Monster Munch: A sweet and salty snack mix, perfect for munching.
- Candy Corn and Peanuts: A simple, traditional Halloween snack combination.
- Pretzel Bones: Easy, salty, and adorable skeletal snacks.
- Salted Caramel Popcorn: A gourmet twist on a movie-night favorite.
- Jack-O-Lantern Pumpkin Rice Krispie Treats and Frankenstein Rice Krispie Treats: More themed rice Krispie treats add to the fun.
- Bloody Bandages: Another gruesome but delicious treat.
- Candy Corn Bark: A colorful and crunchy sweet.
- And, of course, a lot of Halloween Candy!
Spooky Suppers (Main Dishes/Entrées)
- Halloween Pasta: Dye pasta green or black for a spooky main course.
- Mummy Dogs: Hot dogs wrapped in pastry “bandages,” a savory counterpart to your brownies.
- Mummy Quesadillas: A fun, cheesy meal that continues the mummy theme.
More Haunted Desserts
- Witch Hat Cookies: Simple cookies decorated to look like witch hats.
- Reese’s Bats: Combining chocolate and peanut butter in a cute bat shape.
- Marshmallow Ghosts: Light and airy, a perfect contrast to fudgy brownies.
- Pretzel Skeleton Bones: Salty-sweet and easy to make.
When to Serve Your Spooktacular Mummy Brownies
These versatile Mummy Brownies are perfect for a wide range of occasions throughout the Halloween season:
- Halloween Parties: The ultimate party food, both decorative and delicious.
- School Parties: A homemade touch that’s sure to be a hit with classmates and teachers.
- Sweet Treat: Anytime you need a quick, festive dessert.
- Trick or Treating Fuel: Serve them before or after trick-or-treating for a sugar boost.
- Movie Night: Perfect for a spooky movie marathon with the family.
- Fall Picnics: A delightful seasonal treat for outdoor gatherings.
- Office Parties: Bring a smile to your colleagues’ faces with these charming brownies.
- Kids After-School Snack: A fun surprise to brighten up an ordinary afternoon.
More Fantastic Halloween Recipes to Explore
If you loved making these Mummy Brownies, you’ll surely enjoy exploring more of our creative and delicious Halloween recipes:
- Graham Cracker Owls
- Creepy Egg Eyes
- Halloween Pinwheel Cookies
- Bloody Colada Recipe
- Candy Corn and Peanuts Snack Mix
Don’t forget to check out all of our Halloween Recipes for more inspiration!
Craving more culinary adventures? Dive into our diverse recipe categories: explore our clever copycat recipes for restaurant favorites, indulge in our extensive collection of dessert recipes, and discover the convenience of our CrockPot Recipes for easy weeknight meals. Follow Tammilee Tips on Facebook, Instagram, Pinterest, and Twitter to stay updated with all our latest recipe posts and culinary tips.
Mummy Brownies Recipe Card
Mummy Brownies
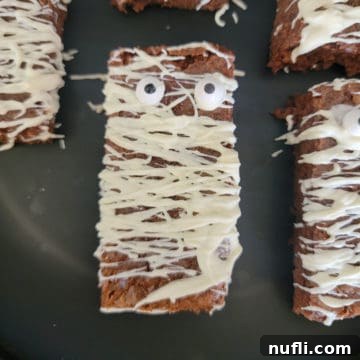
Easy Mummy Brownies are a fantastic Halloween treat or snack that everyone will love!
Prep Time: 20 minutes
Total Time: 20 minutes
Servings: 12
Calories: 187 kcal
Author: Tammilee Tips
Ingredients
- 1 box Brownie Mix (plus ingredients like Eggs, Oil, Water as per package)
- Candy Eyes
- Vanilla Almond Bark (or white candy melts/white chocolate)
Instructions
- Bake brownies of choice according to package or recipe instructions. Allow to cool completely.
- Cut brownies into even squares or rectangles. Rectangles often provide more space for mummy bandages.
- Spread the cut brownies on a parchment-lined baking sheet on a flat surface.
- Melt almond bark/white chocolate bark in the microwave in 30-second intervals in a microwave-safe bowl, stirring after every interval until smooth.
- Create mummy bandages with the melted chocolate. Use a spoon to drizzle in a zigzag motion for a random pattern, or use a piping bag for more controlled lines.
- While the chocolate is still wet, add candy eyeballs to each brownie and allow the chocolate to set completely.
Kitchen Tools
- Cookie Sheets (or baking sheets with sides)
- Parchment Paper
- Large Mixing Bowl
Nutrition Facts
Nutrition Facts
Mummy Brownies
Amount Per Serving
Calories 187 | Calories from Fat 45
% Daily Value*
Fat 5g 8%
Saturated Fat 1g 6%
Polyunsaturated Fat 0.3g
Monounsaturated Fat 3g
Sodium 124mg 5%
Carbohydrates 33g 11%
Sugar 21g 23%
Protein 2g 4%
Iron 1mg 6%
* Percent Daily Values are based on a 2000 calorie diet.
