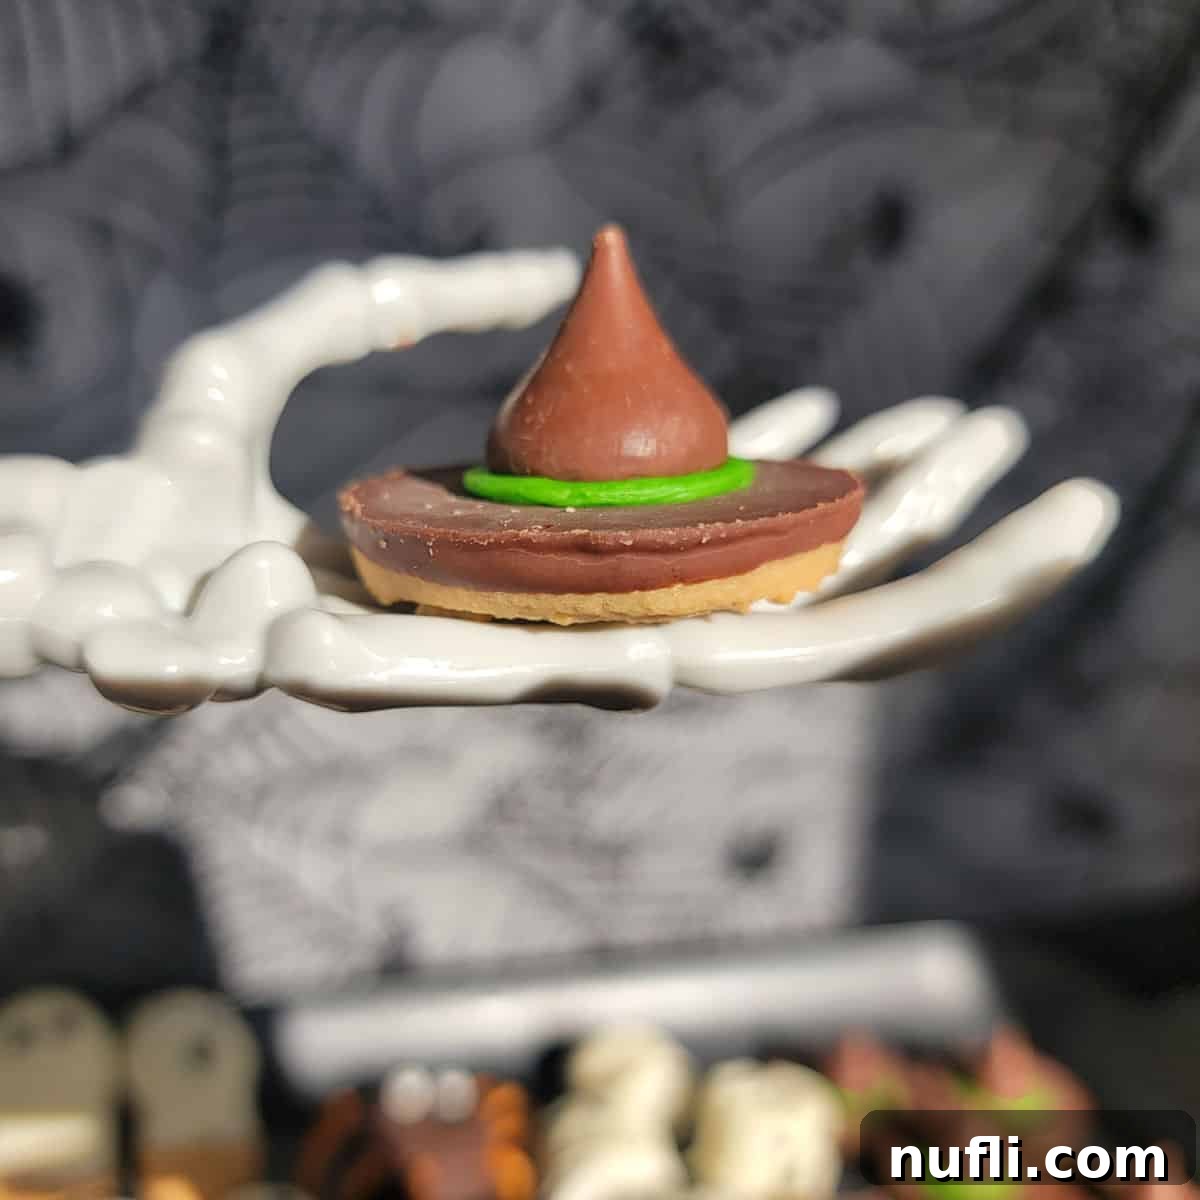
Get ready to conjure up some magic in your kitchen with these incredibly easy-to-make Witch Hat Cookies! Halloween is all about spooky fun and delicious treats, and these delightful cookies perfectly blend both. Requiring just three simple ingredients and minimal effort, they are the quintessential no-bake Halloween dessert, perfect for busy parents, enthusiastic kids, or anyone looking for a quick, charming addition to their holiday festivities.
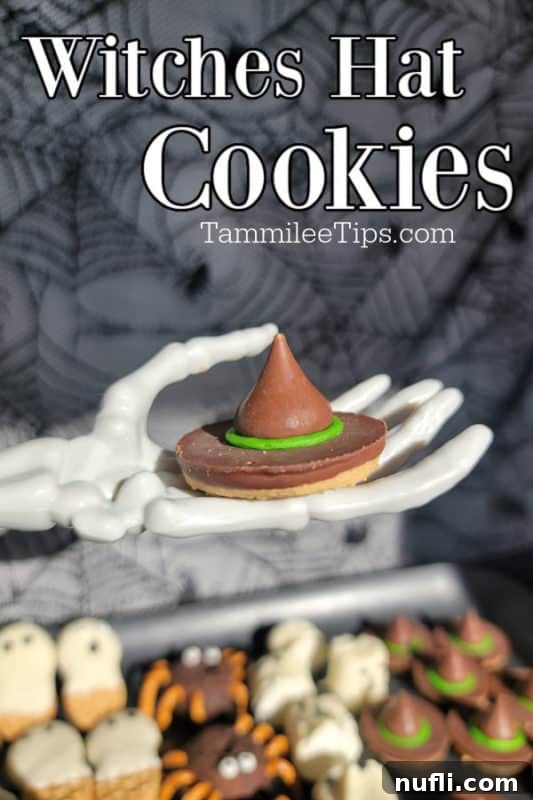
Unleash Halloween Magic: Easy Witch Hat Cookies
Halloween has a special charm, filled with costumes, decorations, and, of course, an abundance of sweet treats. While elaborate baking projects can be fun, the holiday season often leaves us short on time. That’s precisely why we love sharing recipes like these Witch Hat Cookies – they deliver maximum festive impact with minimum fuss. Our goal is to ensure you have a wealth of options for effortless Halloween desserts that allow you to enjoy the celebrations rather than being stuck in the kitchen for hours.
These cookies are not just easy; they’re incredibly versatile, allowing you to customize them to your heart’s content based on ingredients you already have or seasonal favorites you find. Whether you’re assembling a spooky charcuterie board, preparing for a school party, or simply looking for a fun activity to do with the kids, these Witch Hat Cookies are a guaranteed hit. Imagine them nestled amongst other holiday treats, adding a pop of color and whimsy. We once crafted a mummy-themed dessert board featuring our favorite mummy-inspired sweets, and these witch hats would have fit right in!
Kids especially adore helping with this recipe because it involves simple assembly and decoration, making it a perfect hands-on project for little ghouls and goblins. They’re ideal for any Halloween gathering, from a casual family movie night to a big party with friends. Let’s dive into how you can create these enchanting confections with absolute ease.
The Simple Ingredients You’ll Need
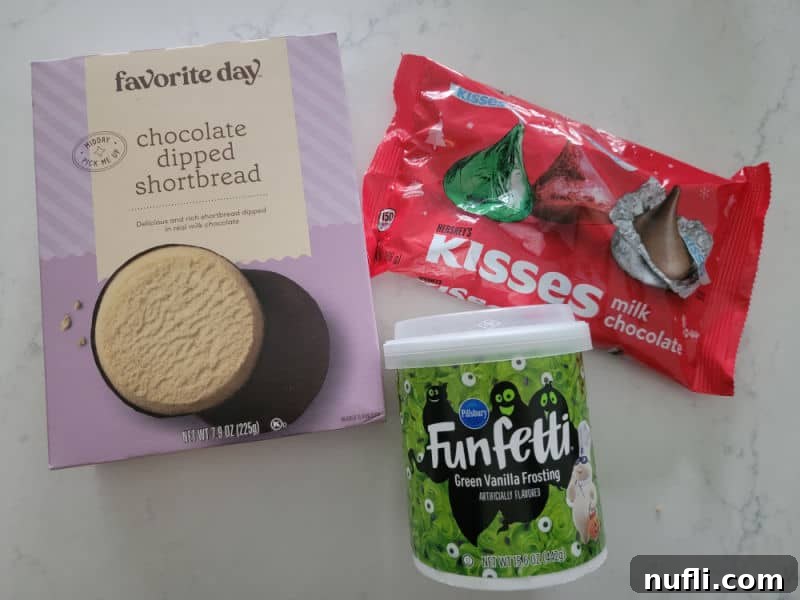
One of the best features of these Witch Hat Cookies is their minimalistic ingredient list. You only need three core items, which are widely available at any grocery store, especially during the fall season. This section provides a quick overview, but remember, the full detailed recipe with specific measurements and step-by-step instructions can be found in the printable recipe card towards the end of this article.
Core Ingredients:
- Chocolate Cookies: The base of our witch hat.
- Hershey Kisses: These create the iconic pointed top of the hat.
- Green Icing/Frosting: Essential for attaching the “hat” and adding a vibrant, spooky flair.
Optional Enhancements:
- Halloween Sprinkles: To add extra sparkle and festive fun.
- Additional Icing Colors: For creating a “buckle” detail or experimenting with different hat colors.
Ingredient Spotlight & Customization Ideas:
Chocolate Cookies: The beauty of this recipe lies in its flexibility. You can use almost any type of flat, circular chocolate cookie as your base. Some fantastic options include:
- Fudge Strip Cookies: The chocolate and fudge combination is already a winner.
- Chocolate-Covered Shortbreads: Offer a delightful buttery crunch with a rich chocolate coating.
- Chocolate-Covered Oreo Cookies: A classic favorite, providing a substantial base.
- Plain Chocolate Wafer Cookies: Simple and elegant.
- Peanut Butter Cookies: For a twist, use a round peanut butter cookie and pair it with a chocolate Kiss for a flavor combination reminiscent of a popular candy bar.
- Homemade Cookies: If you enjoy baking from scratch, feel free to use your favorite round cookie recipe, ensuring it’s fully cooled before assembly.
Don’t be afraid to experiment with your favorite store-bought cookies to truly make these unique!
Hershey Kisses: We opted for the classic milk chocolate Hershey’s Kisses for their iconic shape and universally loved flavor. However, the world of Hershey’s Kisses is vast and exciting! Consider these delicious alternatives to truly personalize your witch hats:
- Special Dark Kisses: For those who prefer a richer, less sweet chocolate.
- Peanut Butter Kisses: If you’re using a chocolate cookie base, these add a fantastic nutty flavor.
- Caramel Kisses: A gooey, sweet surprise inside!
- Mint Kisses: Perfect for a refreshing twist, especially when paired with dark chocolate cookies.
- Seasonal Flavors: Keep an eye out for limited-edition Halloween or fall-themed Kisses for an extra special touch.
Any conical-shaped chocolate candy can work here, so feel free to get creative with what’s available.
Icing: We chose vibrant green icing to give our witch hats that classic, spooky glow. Store-bought tubes of icing are incredibly convenient for this recipe, as they come with fine tips perfect for application. However, you can certainly use:
- Different Colors: Purple, orange, black, or even white icing would look fantastic. You can match your party theme or just pick your favorite Halloween hues.
- Homemade Buttercream or Royal Icing: If you prefer to make your own frosting, a simple buttercream tinted with food coloring works beautifully. Royal icing offers a crisper finish if you want a more defined “brim.”
Essential Equipment for Cookie Construction
The beauty of these no-bake cookies is that they require very minimal specialized equipment. Most of what you need, you likely already have in your kitchen, simplifying the preparation process even further.
- Baking Sheet: A standard baking sheet with raised sides is ideal for assembling your cookies. It keeps all the ingredients contained and makes for easy transport from your work surface to the fridge if you choose to chill them. You can also use a large cutting board or a cooling rack placed over a sheet of parchment paper.
- Parchment Paper: We highly recommend lining your baking sheet with parchment paper. This prevents the cookies from sticking, makes cleanup incredibly easy, and allows you to slide the finished cookies off the tray without damage. Wax paper is also a suitable alternative for this no-bake recipe.
Crafting Your Witch Hat Cookies: Step-by-Step
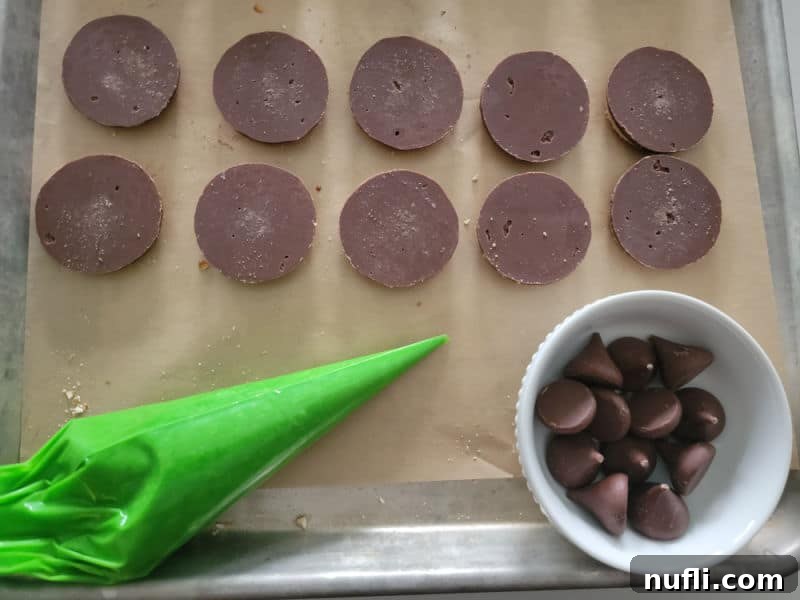
Creating these magical Halloween treats is so straightforward, you’ll wonder why you haven’t made them sooner! Here’s a quick guide to the process. Full, detailed instructions are provided in the printable recipe card below.
Step-by-Step Instructions:
- Prepare Your Workspace: Begin by gathering all your ingredients and placing them on a clean, parchment-lined baking sheet. This organization makes the assembly process incredibly smooth and helps contain any potential mess. Having everything within reach will speed things up significantly.
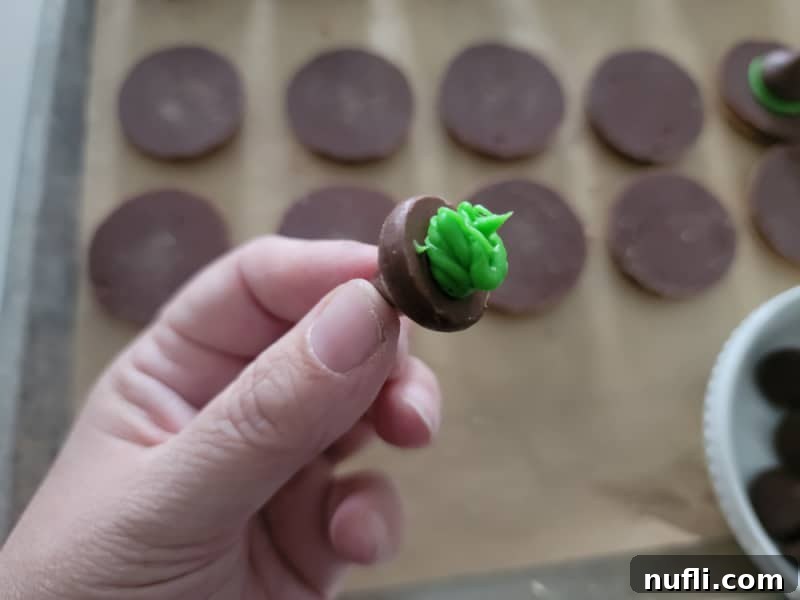
- Apply the Icing to the Hershey’s Kiss: Take one Hershey’s Kiss and gently spread a dollop or a thin layer of your chosen icing (we used green!) onto its flat base. You can use a butter knife, a small offset spatula, or even just the tip of your icing tube for this. Alternatively, you can place a small dollop of icing directly onto the center of your chocolate cookie. The goal is to create an adhesive layer that also forms the “brim” of the witch hat.
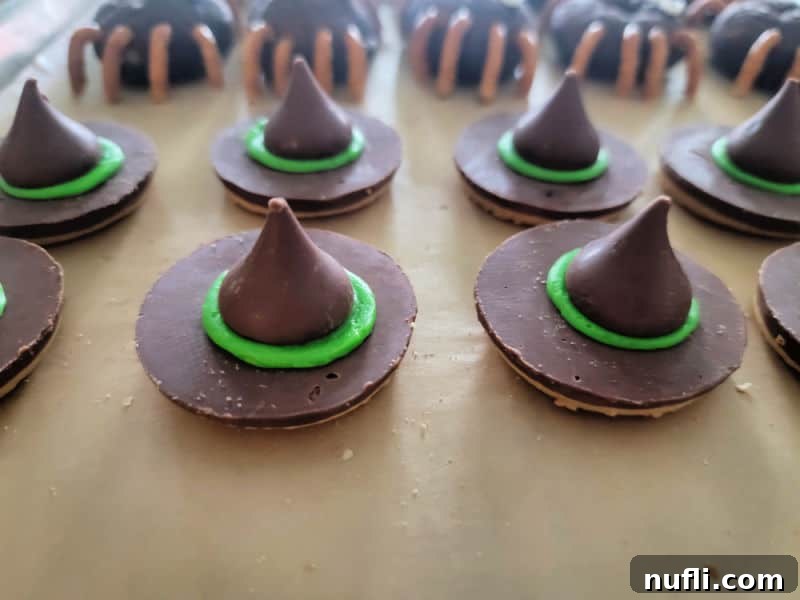
- Assemble the Hat: Carefully take the iced Hershey’s Kiss and firmly press it into the center of a chocolate cookie. Apply enough pressure so that the icing spreads outwards, creating a visible, layered “rim” or “brim” around the base of the Kiss. This gives your cookie the authentic look of a miniature witch’s hat. Make sure the Kiss is securely attached to prevent it from toppling over.
- Optional Decorations: If desired, immediately add Halloween sprinkles to the wet icing brim for extra festivity. For a classic buckle look, you can use a small dab of yellow or orange icing, or even a tiny piece of candy, applied to the front of the green brim. Allow the icing to set for a few minutes before handling extensively.
Preparation and Storage Tips:
- Make Ahead: These cookies are fantastic for making ahead of time. Their simple construction means they hold up well, which is a huge advantage during the busy Halloween season. Prepare them a day or two in advance to alleviate last-minute stress.
- Storage: To maintain freshness and prevent them from drying out or getting damaged, store your Witch Hat Cookies in an airtight container or a sealable bag at room temperature. They should last for several days.
- Freezing: If you wish to store them for an extended period, these cookies can be frozen. Place them in a single layer on a baking sheet to freeze solid, then transfer them to an airtight freezer-safe container or bag. This method prevents them from sticking together. Ensure the container is truly airtight to protect against freezer burn and moisture infiltration. Thaw at room temperature before serving.
Creative Recipe Variations & Customizations:
This recipe is a blank canvas for your Halloween imagination! Don’t be afraid to stray from the original and make these cookies uniquely yours.
- Cookie Base Substitutions: While chocolate cookies are traditional, consider using vanilla wafers, ginger snaps, or even round graham crackers for a different flavor profile. For a lighter, more delicate hat, shortbread cookies work wonderfully.
- Icing Color and Type: Experiment with a rainbow of Halloween colors! Purple, orange, black, or even bright pink icing can create a fun, whimsical look. You could also use different types of icing – a thinner glaze for a more subtle brim, or a thicker buttercream for a more pronounced effect.
- Hershey Kiss Flavors: As mentioned before, the variety of Hershey’s Kisses available is truly epic! Beyond the classics, try peanut butter, caramel, mint, or even seasonal varieties for unique flavor combinations.
- Sprinkle Spectacle: Halloween sprinkles are a must! Ghost shapes, bat shapes, traditional orange and black jimmies, or edible glitter can add that extra festive sparkle. Apply them immediately after pressing the Kiss onto the icing for best adhesion.
- “Buckle” Details: Instead of just plain icing, create a small buckle on the brim using a contrasting color of icing, a small square of yellow or orange candy melt, or even a tiny piece of licorice.
- Flavor Extravaganza: For even more flavor, drizzle melted white chocolate or another color of candy melt over the assembled cookies for a striped effect.
Dietary Adaptations:
- Vegetarian Option: This recipe is naturally vegetarian, making it suitable for a wide audience.
- Vegan Option: Easily adapt these by choosing vegan-friendly chocolate cookies and vegan chocolate kisses (many brands offer these now!). Ensure your icing is also vegan, or make a simple powdered sugar and plant-based milk glaze.
- Gluten-Free: Opt for gluten-free circle cookies. Many brands offer delicious chocolate gluten-free alternatives that work perfectly as the base for these hats.
- Nut-Free: Select nut-free cookies, Kisses, and icing. Always check ingredient labels carefully to ensure no cross-contamination.
Serving Size Adjustments:
- Smaller Serving Size: Need just a couple of treats? This recipe is infinitely scalable. Feel free to make just 1 or 2 Witch Hat Cookies for a quick snack or a smaller gathering.
- Larger Groups/More Servings: Planning a big Halloween party? This recipe can easily be doubled, tripled, or scaled up even further, making it the perfect crowd-pleasing Halloween treat. Just ensure you have enough baking sheets to hold all your creations.
Expert Tips for Perfect Witch Hat Cookies:
- Consistent Icing Application: For a neat and even brim, aim for a consistent amount of icing on each Hershey’s Kiss or cookie. This creates a uniform look across all your witch hats.
- Using Candy Melts for Detail: If you want to create a more defined band or buckle on the hat, melted candy melts (chocolate, yellow, orange) are an excellent option. Simply melt them in a microwave-safe bowl (follow package instructions for heating), and use a small piping bag or a toothpick to draw designs.
- No Oven, No Stand Mixer: One of the biggest advantages of this recipe is that it requires absolutely no baking! This cuts down significantly on prep time and overall kitchen mess, meaning you don’t have to turn on the oven or whip out your stand mixer. We intentionally designed this recipe for maximum convenience.
- Let Them Set: For best results, allow the cookies to sit for at least 15-30 minutes after assembly, giving the icing time to firm up. This helps the Kisses adhere securely and prevents any accidental messes when handling. If your kitchen is warm, a brief chill in the refrigerator can speed this up.
- Presentation Matters: Arrange your finished Witch Hat Cookies on a festive platter, perhaps with some artificial cobwebs or plastic spiders, to enhance their spooky appeal.
- Nutrition Information: Please note that the exact nutrition information, including calories, protein, carbohydrates, and other values, will vary depending on the specific brands and types of cookies, Kisses, and icing you choose to use.
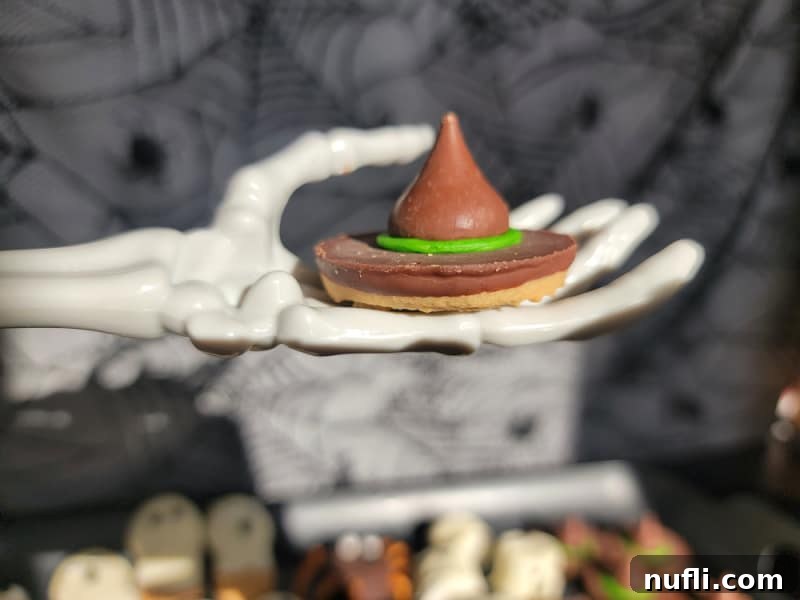
What to Serve with Witch’s Hat Cookies:
These delightful cookies are a fantastic standalone treat, but they also pair wonderfully with other Halloween-themed foods and beverages to create a truly immersive experience:
Festive Drinks:
- Hot Chocolate: A warm, comforting classic that’s perfect for a cool autumn evening.
- Pumpkin Spice Latte: Embrace the fall flavors with a homemade version.
- Kool-Aid Slushie: A vibrant, colorful, and fun option, especially for younger guests.
- Oreo Milkshake: Indulgent and delicious, a perfect sweet companion.
- Freckled Lemonade: A bright, refreshing contrast to the rich chocolate.
- Sonic Ocean Water: A mesmerizing blue drink that fits right into a spooky theme.
Spooky Main Dishes/Entrées:
- Mummy Quesadillas: A savory and fun main course that kids will love.
- Halloween Pasta: A vibrant, themed meal that sets the mood for spooky sweets.
Ghoulish Snacks:
- Monster Munch: A sweet and salty mix perfect for snacking.
- Candy Corn and Peanuts: A simple, classic fall snack mix.
- Kool-Aid Pickles: For those who enjoy a truly unique and surprising treat!
- Salted Caramel Popcorn: A gourmet twist on a movie night staple.
- Plenty of Halloween Candy: You can never have too much candy on Halloween!
When to Serve These Bewitching Bites:
- Halloween Parties: A centerpiece dessert that’s easy to make in bulk.
- School Parties: Perfect for classroom celebrations as a safe and simple treat.
- Sweet Treat for Any Occasion: No need for a special event; enjoy them as an everyday fall delight.
- Trick-or-Treating Fuel: A quick snack before heading out for candy collecting.
- Movie Night: Enhance your Halloween movie marathon with themed snacks.
- Fall Picnics: A delightful addition to any outdoor autumn gathering.
- Office Parties: Bring some festive cheer to your workplace.
More Great Halloween Treat Recipes:
If you’re looking for more easy and fun Halloween dessert inspiration, check out some of our other favorites:
- Reese’s Bats
- Marshmallow Ghosts
- Nutter Butter Ghosts
- Pretzel Bones
- Halloween Bloody Bandages
Explore all of our Halloween Recipes for even more spooky inspiration!
Do you love discovering new recipes? Be sure to explore our copycat recipes, a wide variety of dessert recipes, and our comforting Crock Pot Recipes for every season and occasion.
Stay connected with Tammilee Tips for all our latest recipe posts and culinary adventures! Follow us on Facebook, Instagram, Pinterest, and Twitter.
Witch Hat Cookies Recipe
Easy Witch Hat Cookies are the perfect 3-ingredient Halloween dessert, quick to assemble and delightful to eat!
Prep Time: 5 minutes
Total Time: 5 minutes
Servings: 12 cookies
Calories: 48 kcal per serving
Author: Tammilee Tips

Ingredients
- 12 Chocolate Cookies (e.g., Fudge Strip, chocolate-covered shortbread, or Oreo)
- 12 Hershey Kisses (or other conical chocolate candy)
- Green Icing (store-bought tube or homemade)
- Optional: Halloween sprinkles, other icing colors for buckle details
Instructions
- Assemble all ingredients on a parchment-lined baking sheet for easy cleanup and organization.
- Carefully spread a small amount of icing on the flat bottom of each Hershey’s Kiss. Alternatively, place a dollop of icing in the center of each chocolate cookie.
- Press each iced Hershey’s Kiss firmly into the center of a chocolate cookie. The icing should spread out to create a layered “brim” around the base of the Kiss, forming the witch hat.
- (Optional) Add sprinkles to the wet icing brim immediately, or create a small “buckle” detail with a contrasting icing color.
- Allow the cookies to set for 15-30 minutes, or until the icing is firm, before serving or storing.
Kitchen Tools
- Baking Sheet
- Parchment Paper
- Small Spatula or Butter Knife (for spreading icing, if not using an icing tube)
Nutrition Facts
Nutrition Facts
Witch Hat Cookies
Amount Per Serving
Calories 48 Calories from Fat 18
% Daily Value*
Fat 2g 3%
Saturated Fat 1g 6%
Polyunsaturated Fat 0.2g
Monounsaturated Fat 0.3g
Cholesterol 1mg 0%
Sodium 39mg 2%
Potassium 13mg 0%
Carbohydrates 7g 2%
Fiber 0.3g 1%
Sugar 5g 6%
Protein 1g 2%
Vitamin A 1IU 0%
Calcium 11mg 1%
Iron 0.3mg 2%
Love this recipe? Follow @TammileeTIps on Pinterest!
Tried this recipe? Mention @TammileeTipsLife when you share a photo!
