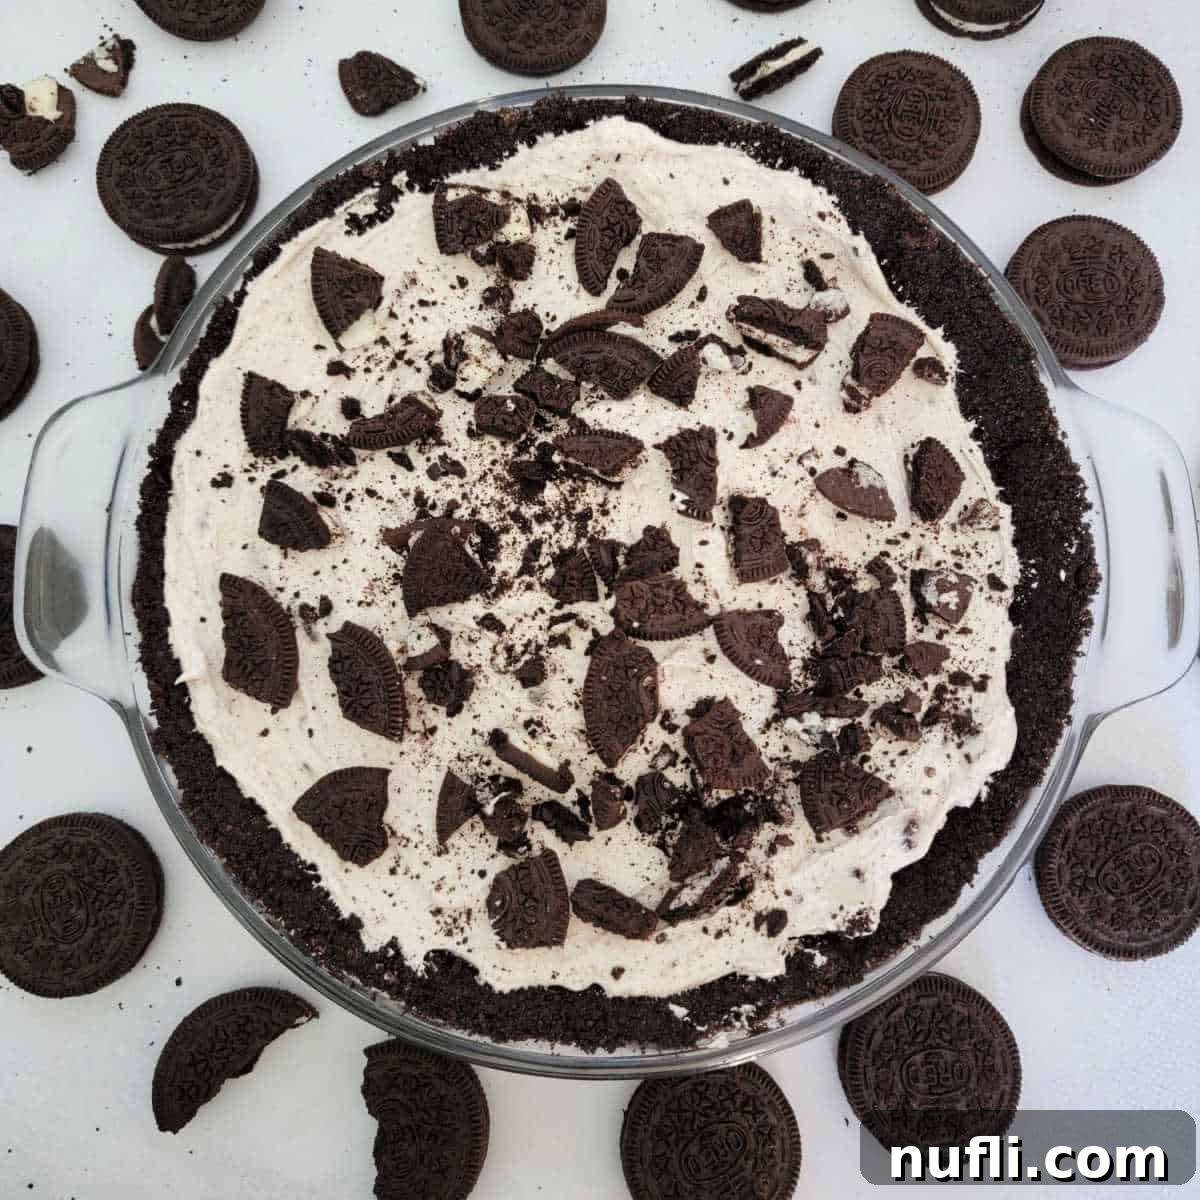
Imagine a dessert so rich, so creamy, and so utterly delicious that it tastes like it took hours to prepare, yet comes together in mere minutes. Welcome to the world of our Easy No-Bake Oreo Cheesecake! This beloved treat features a decadent cream cheese filling, generously studded with chunks of America’s favorite cookie, all nestled within a crunchy Oreo crust. It’s the perfect solution for satisfying your sweet tooth without ever having to turn on the oven, making it an ideal dessert for any season, especially those warm summer days.
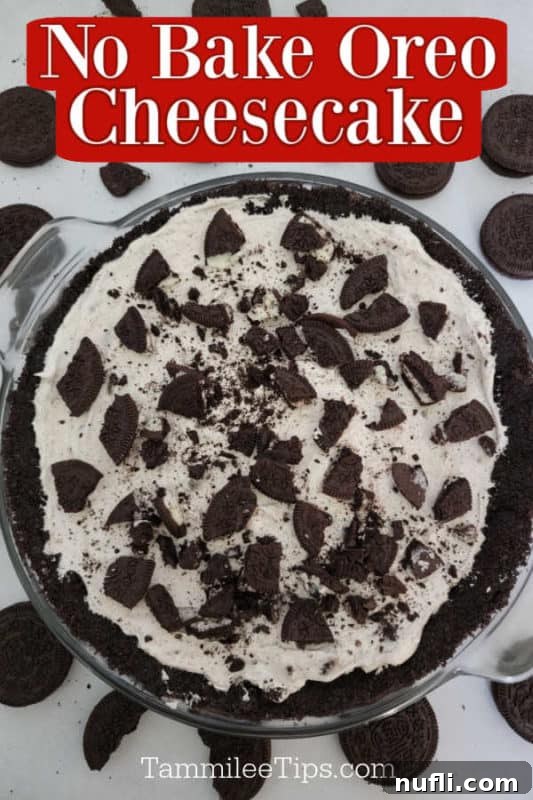
Effortless No-Bake Oreo Cheesecake: Your Go-To Recipe for a Creamy Dream
There’s something truly magical about no-bake desserts. The sheer simplicity, the minimal effort, and the impressive results make them a go-to for busy hosts and dessert lovers alike. Our No-Bake Oreo Cheesecake recipe exemplifies this magic. It’s a foolproof dessert that delivers maximum flavor with minimal fuss, ensuring you get to enjoy a luxurious, chocolatey, and creamy treat without the stress of baking. Whether you’re a novice in the kitchen or a seasoned baker looking for a quick win, this recipe is designed for success and guarantees rave reviews.
Why This No-Bake Oreo Cheesecake Will Become Your Favorite Dessert
The allure of a no-bake cheesecake, particularly one as delightful as our Oreo version, is undeniable. For starters, the name says it all: “no-bake.” This single phrase evokes images of stress-free dessert making, freeing you from the tyranny of preheating ovens and precise baking times. On a sweltering summer day, the last thing anyone wants is to add more heat to their kitchen. This recipe becomes your culinary hero, allowing you to whip up a cooling, refreshing dessert that only asks for a little refrigerator time – a true summer savior!
Beyond the convenience, the texture and flavor profile of this cheesecake are simply irresistible. Imagine a velvety smooth, rich cream cheese filling that melts in your mouth, perfectly complemented by the delightful crunch and iconic chocolatey taste of Oreo cookies. Each spoonful is a harmonious blend of creamy and crunchy, sweet and satisfying, creating a symphony of textures and flavors that will tantalize your taste buds. The ease of preparation means you can spend less time in the kitchen and more time enjoying the company of your loved ones, or simply savoring a quiet moment with a slice of pure bliss.
One of the hardest parts of creating this dreamy dessert? The waiting! Patience is truly a virtue when it comes to chilling a no-bake cheesecake to perfection. We’ve all been there – hovering around the refrigerator, eager for that first taste. Trust us, every minute of chill time is worth it, as it allows the cheesecake to firm up beautifully, ensuring picture-perfect slices and an optimal eating experience. And if you happen to have a curious taste-tester in your household, like a spouse or eager kids, you might find yourself employing stealth tactics to ensure it sets undisturbed!
Essential Ingredients for Your Decadent Oreo Cheesecake
Crafting this incredible no-bake Oreo cheesecake requires a handful of simple, readily available ingredients. The beauty of this recipe lies in its straightforward nature, yet each component plays a vital role in achieving that perfect creamy texture and rich flavor. Here’s a closer look at what you’ll need to create this chocolatey masterpiece that will surely impress.
- Oreos: The undisputed star of the show! We recommend opting for classic Oreos. While double-stuffed are delicious, regular Oreos tend to break down a bit more easily when chopped, contributing to a better texture in the filling. For convenience and ensuring you have enough for both the crust (if homemade) and the filling, a family-size package is usually ideal. There’s absolutely no need to painstakingly remove the cream filling before chopping; it simply adds to the richness and flavor of your cheesecake, making every bite even more satisfying.
- Full-Fat Cream Cheese: This is non-negotiable for that signature cheesecake tang and luxurious creaminess. Always use full-fat cream cheese for the best results, as low-fat varieties can lead to a less stable and less flavorful cheesecake. Ensure your cream cheese is at room temperature before you begin mixing. This step is crucial for achieving a smooth, lump-free batter that incorporates air beautifully, resulting in a light yet rich consistency that sets perfectly.
- Granulated Sugar: We prefer granulated sugar over powdered sugar for this recipe. Granulated sugar provides the perfect level of sweetness and dissolves easily into the softened cream cheese, contributing to a smoother texture without any grittiness that can sometimes occur with powdered sugar if not mixed thoroughly. Its crystalline structure also adds a subtle texture that complements the creamy filling.
- Vanilla Extract: A touch of pure vanilla extract is indispensable as it enhances all the other flavors, adding warmth, depth, and a subtle aromatic sweetness to the creamy filling. Don’t skip this essential ingredient, as it truly rounds out the flavor profile.
- Cool Whip: This light and airy whipped topping is a key component for achieving the perfect fluffy texture in our no-bake cheesecake. It provides volume, stability, and helps the cheesecake set beautifully without the need for gelatin. If you prefer a homemade option, you can substitute an equal amount of freshly whipped heavy cream, gently folded in, for a richer, more dairy-forward taste.
- Oreo Crust: The foundational layer of our cheesecake! You have the option to use a convenient store-bought Oreo crust for ultimate ease and speed, or you can elevate your dessert with a homemade version. A homemade Oreo crust offers a deeper, more intense chocolate flavor and allows you to tailor its thickness and texture to your preferred crunchiness.
Optional Toppings to Elevate Your Cheesecake Experience
While this No-Bake Oreo Cheesecake is absolutely delicious on its own, adding a few simple toppings can transform it from fantastic to absolutely extraordinary, adding visual appeal and an extra layer of flavor. Consider these delightful additions to personalize your masterpiece:
- Freshly whipped heavy cream or extra Cool Whip for a light, airy, and refreshing finish.
- Crushed Oreo crumbles for an irresistible extra layer of chocolatey crunch and a nod to the star ingredient.
- Elegant chocolate shavings or a rich drizzle of chocolate fudge sauce for a touch of sophistication.
- A vibrant medley of fresh berries like sliced strawberries, juicy raspberries, or sweet blueberries for a burst of fresh flavor and eye-catching color that beautifully contrasts the rich chocolate.
- A generous swirl of warm caramel sauce for a sweet and salty indulgence.
Essential Equipment for a Seamless Preparation
One of the joys of a no-bake recipe is that it generally requires less specialized equipment than its baked counterparts. However, having the right tools on hand will make the preparation process even smoother, more efficient, and ultimately more enjoyable. Here’s what you’ll need to assemble your delectable No-Bake Oreo Cheesecake with ease:
- Large Mixing Bowl: A spacious mixing bowl is crucial for comfortably combining all your ingredients without spills or messes. We particularly love glass batter bowls that feature a convenient handle, as they provide excellent stability on the counter and make the entire mixing process much easier and cleaner.
- Hand Mixer or Stand Electric Mixer: While you can technically mix by hand for a good arm workout, an electric mixer (either a versatile hand mixer or a powerful stand mixer) is highly recommended. It ensures your cream cheese mixture becomes perfectly smooth, creamy, and aerated, which is absolutely key for a light and fluffy cheesecake texture that sets beautifully.
- Spatula: A good rubber or silicone spatula is an indispensable tool in this recipe. It’s essential for thoroughly scraping down the sides of the mixing bowl to ensure all ingredients are incorporated, gently folding in the whipped topping to maintain airiness, and expertly spreading the cheesecake filling evenly into the crust for a professional finish.
- Pie Pan or 9-inch Cheesecake Springform Pan: A standard 9-inch pie pan works perfectly for this recipe and is readily available. If you prefer a taller, more dramatic presentation and ease of serving, a 9-inch springform pan is an excellent choice, as its removable sides allow for easy release of the cheesecake without disturbing its beautiful structure.
- Food Processor (Optional): If you plan on embarking on the delightful task of making a homemade Oreo cookie crumb crust from scratch, a food processor will be your absolute best friend. It quickly and efficiently grinds whole Oreos into fine, uniform crumbs, saving you significant time and effort compared to crushing them by hand or in a bag.
Step-by-Step Guide: Crafting Your Perfect No-Bake Oreo Cheesecake
Creating this irresistible No-Bake Oreo Cheesecake is remarkably simple and satisfying. Follow these straightforward steps, paying attention to the small details, and you’ll have a stunning dessert chilling in your refrigerator in no time. Remember, the key to success is using room-temperature cream cheese and gentle folding for that perfect light texture.
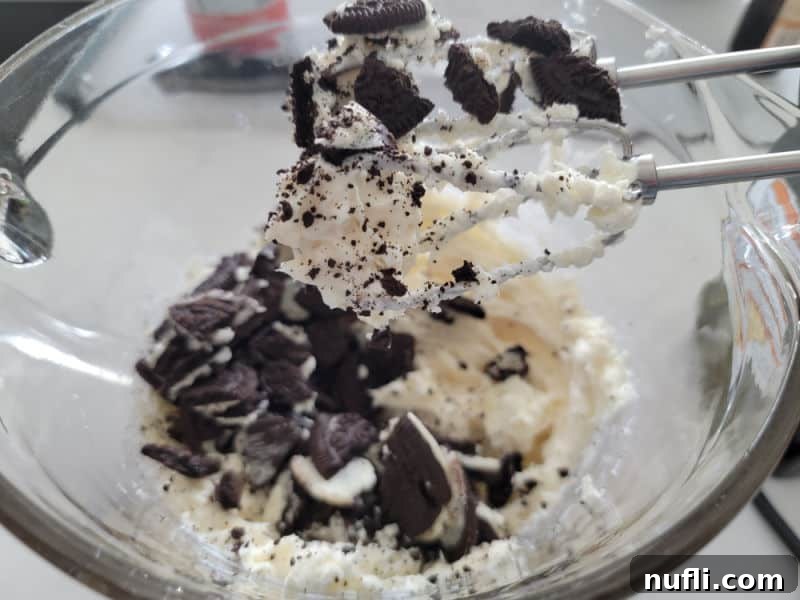
- Prepare the Cream Cheese Base: In your large mixing bowl, combine the softened full-fat cream cheese, granulated sugar, and vanilla extract. Using your hand mixer or stand mixer, beat these ingredients together on medium speed until the mixture is completely smooth, creamy, and visibly free of any lumps. This typically takes 2-3 minutes. Ensuring the cream cheese is truly at room temperature is vital for the best results; cold cream cheese will make for a stubborn, lumpy filling that’s hard to smooth out.
- Fold in Oreos and Cool Whip: Gently fold in the chopped Oreos into the smooth cream cheese mixture until they are evenly distributed throughout. Then, very carefully and with a light hand, fold in the Cool Whip. The goal here is to maintain the light, airy texture of the Cool Whip, so use a spatula and a gentle hand, folding just until combined. Overmixing at this stage will deflate the Cool Whip and result in a denser, less ethereal cheesecake texture.
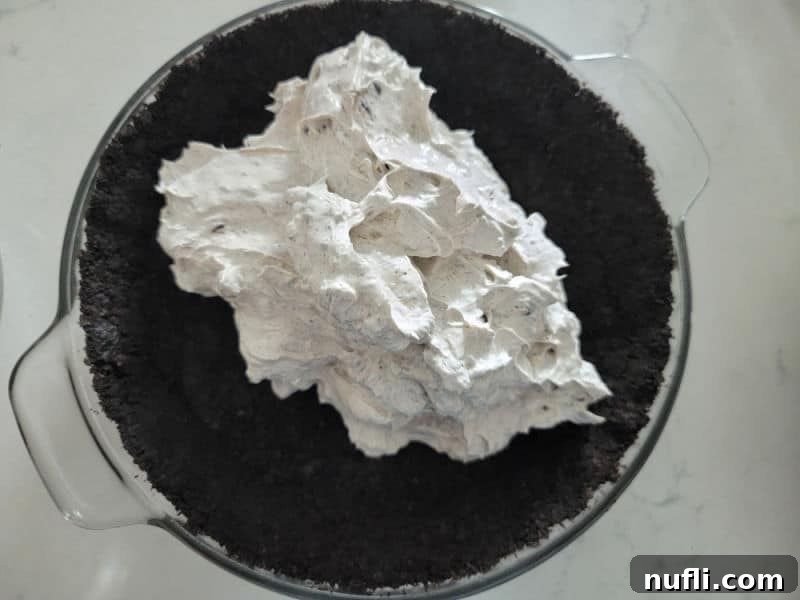
- Assemble the Cheesecake: Carefully spoon the fluffy Oreo cheesecake filling into your prepared Oreo crust (whether you opted for a convenient store-bought crust or crafted a delicious homemade one). Use your spatula or the back of a spoon to gently spread the filling evenly across the crust, ensuring it reaches all edges of the pan. Smooth the top surface as much as possible for a polished and inviting finish.
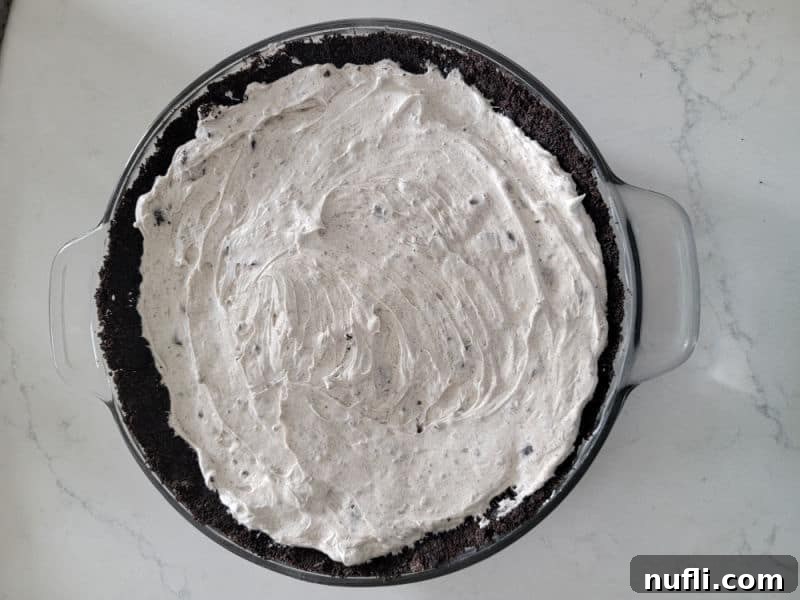
- Chill to Perfection: This is arguably the most crucial step for a perfectly set no-bake cheesecake. Place the assembled cheesecake, uncovered at first or lightly covered, in the refrigerator and chill for a minimum of 2 hours. For the absolute best results and easiest, cleanest slicing, we highly recommend chilling it for at least 4-6 hours, or even better, overnight. The longer it chills, the firmer, more stable, and more flavorful your cheesecake will be.
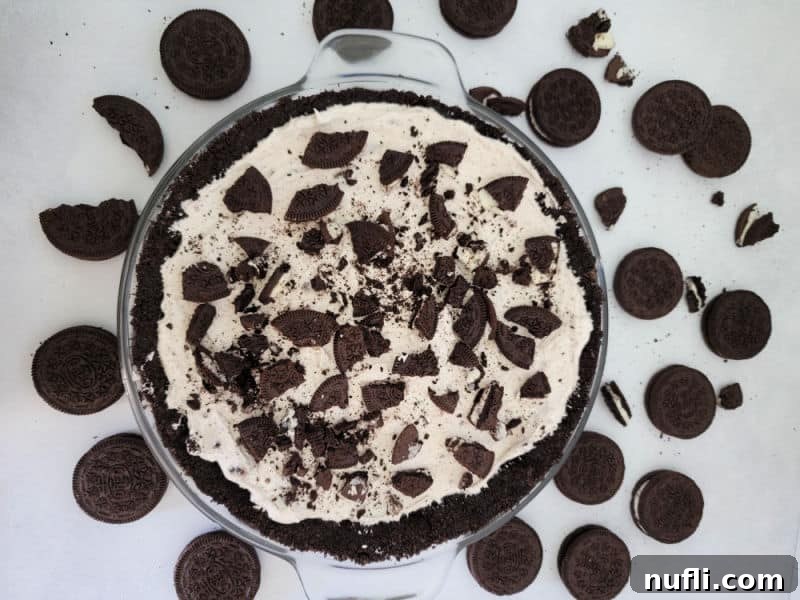
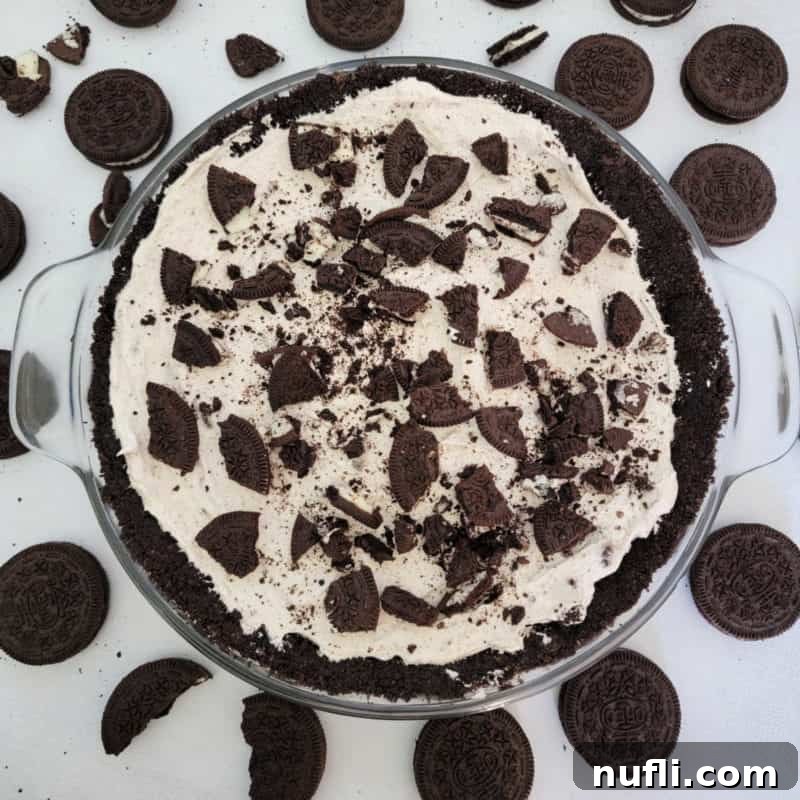
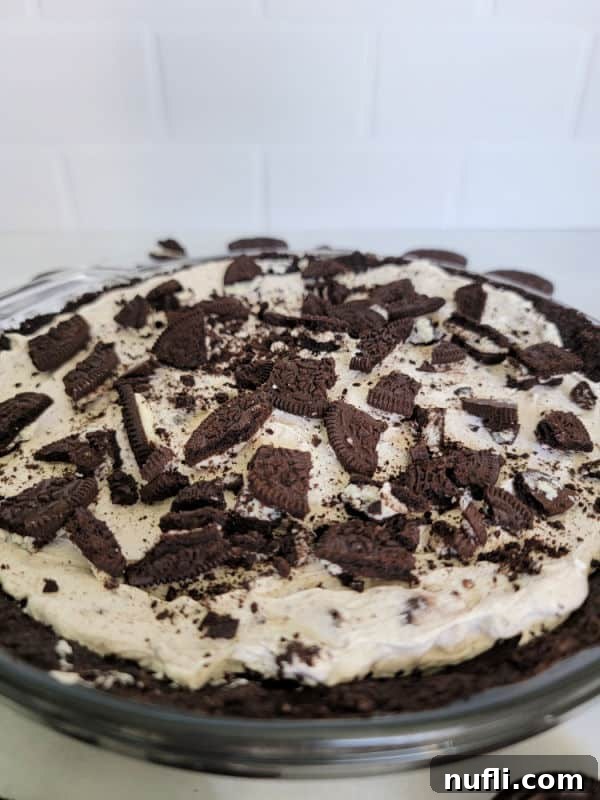
- Garnish and Serve: Once your no-bake Oreo cheesecake is thoroughly chilled and firm, it’s time to add the final touches! Garnish generously with additional crushed Oreos for an extra crunch, a decadent dollop of freshly whipped heavy cream, or extra Cool Whip for an airy finish. Slice, serve, and prepare for an abundance of compliments and delighted smiles!
Preparation, Storage, and Freezing Tips for Longevity
Proper handling and storage are paramount to enjoying your No-Bake Oreo Cheesecake at its best, and even making it ahead of time to ease your entertaining schedule. Here’s everything you need to know to ensure your delicious dessert remains fresh and delightful for as long as possible.
Make Ahead Convenience
This no-bake cheesecake is an excellent candidate for making ahead, which is a fantastic advantage when planning for parties, holidays, or simply wanting a ready-made dessert. You can prepare it fully up to 1-2 days before you plan to serve it. This allows ample time for it to thoroughly chill and set perfectly, enhancing its flavor and firm texture, and freeing up your precious time on the day of your event. Simply cover it tightly with plastic wrap once fully set and store it in the refrigerator.
Optimal Storage Practices
Any leftover No-Bake Oreo Cheesecake should be stored diligently in an airtight container or covered tightly with several layers of plastic wrap in the refrigerator. This protective covering is crucial to prevent the cheesecake from absorbing any undesirable odors from other foods in your fridge and to keep the surface from drying out. When stored correctly, your cheesecake will remain fresh and wonderfully delicious for 3-5 days, making it perfect for enjoying over several days.
Freezing Your Oreo Cheesecake for Future Enjoyment
Yes, you can absolutely freeze this No-Bake Oreo Cheesecake! This is a fantastic option if you want to prepare it well in advance for a future occasion, save individual portions for later cravings, or simply extend its shelf life. To freeze correctly and maintain its quality:
- Ensure it’s Completely Set: Make sure the cheesecake is thoroughly chilled and completely firm before attempting to freeze it.
- For Individual Slices: If you plan to enjoy portions later, cut the cheesecake into desired slices. Wrap each slice tightly in plastic wrap, then add an additional layer of aluminum foil. This double-layer protection is vital to prevent freezer burn and preserve its creamy texture.
- For a Whole Cheesecake: For freezing an entire cheesecake, you can either wrap it directly in its pie pan (if freezer-safe) or carefully transfer it to a freezer-safe plate. Wrap the entire cheesecake tightly with several layers of plastic wrap, followed by a sturdy layer of aluminum foil.
- Extra Protection: For added security against freezer burn, place the wrapped cheesecake (either slices or whole) in an airtight freezer-safe container or a large freezer bag.
- Label and Date: Don’t forget to label your frozen cheesecake with the date of freezing! For optimal taste and texture, frozen cheesecake is best enjoyed within 1-2 months.
Thawing Frozen Cheesecake Gracefully
When you’re ready to enjoy your delicious frozen cheesecake, transfer it from the freezer to the refrigerator and let it thaw slowly overnight. This gradual thawing process is essential as it helps to maintain the creamy texture and prevent the cheesecake from becoming watery or grainy. Once thawed, it will be ready to slice, serve, and savor just like it was freshly made!
Creative Recipe Variations & Dietary Adaptations
While the classic No-Bake Oreo Cheesecake is a timeless favorite, this recipe is incredibly versatile, allowing for fun and delicious variations to suit different tastes and dietary needs. Don’t be afraid to get creative and customize your cheesecake!
Additional Toppings for Extra Indulgence
- Fresh Fruit: A vibrant contrast to the rich chocolate. Blueberries, sliced strawberries, raspberries, or a colorful mix of berries add a touch of freshness, tang, and beautiful visual appeal.
- Gourmet Sauces: Drizzle with warm chocolate fudge sauce, rich caramel sauce, or a tart raspberry coulis for an extra layer of sophisticated flavor.
- Ice Cream Pairing: Serve a slice alongside a scoop of premium vanilla bean ice cream or even cookies and cream ice cream for an ultimate, over-the-top dessert experience.
- Chocolate Shavings or Chips: White chocolate chips, finely shaved milk chocolate, or elegant dark chocolate curls add both visual appeal and an extra dimension of chocolatey goodness.
Flavor Substitutions & Enhancements
- Any Flavor of Oreo Cookies: This is where the fun really begins! Experiment with different Oreo flavors to completely transform your cheesecake’s profile. Imagine a refreshing mint Oreo cheesecake for a cool treat, a nutty peanut butter Oreo version for a rich dimension, or golden Oreos for a lighter, vanilla-forward flavor. Seasonal varieties like Birthday Cake Oreos can also add a festive twist.
- Double Chocolate Decadence: For serious chocolate lovers, whisk in a tablespoon or two of unsweetened cocoa powder (Dutch-processed for a darker color and milder flavor) into the cream cheese mixture. This will deepen the chocolate flavor considerably and make your cheesecake even more rich and truly decadent.
Dietary Considerations
- Vegetarian Option: This recipe is naturally vegetarian as written, containing no meat products.
- Vegan Option: To make this dessert suitable for vegans, simply substitute full-fat vegan cream cheese and a plant-based whipped topping (such as a coconut cream or soy-based cool whip alternative). It’s generally understood that classic Oreos do not contain animal-derived ingredients and are considered vegan-friendly, but always check the label to be absolutely sure, as product formulations can vary by region.
- Gluten-Free Option: Fortunately, finding gluten-free Oreos is now easier than ever! Simply use Gluten-Free Oreos for both the crust (or a pre-made gluten-free crust) and the filling to make this cheesecake safe and enjoyable for those with gluten sensitivities.
- Sugar-Free Option: For a sugar-conscious version, use a keto-friendly or no-sugar-added chocolate sandwich cookie in place of regular Oreos, and substitute granulated sugar with a granular erythritol-based sweetener. Ensure your chosen cream cheese and whipped topping alternatives are also specifically sugar-free to maintain the sugar-free integrity of the dessert.
Adjusting Serving Sizes
- Smaller Serving Size: This recipe is easily adaptable for smaller gatherings or individual treats. You can simply halve the recipe and use a smaller pie dish, or even prepare it in charming individual ramekins or dessert cups for delightful mini cheesecakes, perfect for single servings.
- Larger Group/More Servings: Planning for a crowd or a big celebration? This recipe doubles beautifully! Just ensure you have an adequately sized casserole dish or a larger springform pan to comfortably accommodate the increased volume of the filling. Always ensure enough chilling time for larger portions.
Expert Tips for Your Best No-Bake Oreo Cheesecake
Achieving a picture-perfect and incredibly delicious No-Bake Oreo Cheesecake is simple with a few insider tips. Keep these expert recommendations in mind to ensure your dessert is a resounding success every single time, delighting everyone who tries a slice:
- Room Temperature Cream Cheese is Non-Negotiable: This cannot be stressed enough! Cold cream cheese will result in a lumpy, uncreamy filling, no matter how much you beat it. Take your cream cheese out of the refrigerator at least 30-60 minutes before you plan to start, or until it’s soft enough to yield to gentle pressure with your finger. This ensures a silky-smooth base.
- Don’t Overmix the Cool Whip: Once you’ve gently folded in the Cool Whip, stop mixing as soon as it’s just combined and no streaks remain. Overmixing will deflate the air from the whipped topping, leading to a denser, less fluffy, and less appealing cheesecake texture. Gentle, deliberate folding is the secret to maintaining that light, airy quality.
- Chill Time is Your Best Friend: While 2 hours is the absolute minimum chilling time for this cheesecake, allowing it to chill for at least 4-6 hours, or ideally overnight, yields the best results. This extended chilling time ensures the cheesecake is fully set, wonderfully firm, and incredibly easy to slice cleanly without crumbling, offering the perfect presentation.
- Cover Properly for Storage: Always cover your cheesecake tightly with plastic wrap when refrigerating. This crucial step prevents it from absorbing any unwanted odors from other foods in your fridge and keeps the surface from drying out, ensuring every bite is as fresh as the first.
- Explore Creative Oreo Flavors: Don’t limit yourself to just classic Oreos! This recipe is incredibly adaptable and fantastic with seasonal or specialty Oreo flavors. Imagine a vibrant mint chocolate Oreo cheesecake for St. Patrick’s Day, or a rich peanut butter Oreo version for a decadent, nutty twist. The possibilities are endless!
- For a Super Smooth Top: After spreading the filling evenly into the crust, gently tap the pie pan a few times on the counter. This simple action helps to release any trapped air bubbles within the filling and encourages it to settle into a perfectly smooth, even top surface before chilling, ensuring a professional-looking dessert.
This recipe is a proud and cherished addition to our comprehensive collection of delightful cream cheese recipes, showcasing the versatility of this beloved ingredient.
Perfect Pairings: What to Serve with Your Oreo Cheesecake
This rich and decadent No-Bake Oreo Cheesecake is a showstopper on its own, but pairing it with the right accompaniments can elevate the entire dessert experience. Since it’s quite indulgent, we often recommend pairing it with lighter main courses or refreshing beverages to create a perfectly balanced and satisfying meal.
Refreshing Drinks to Complement Your Cheesecake
- Classic Cold Milk: The quintessential pairing for Oreos! A tall, cold glass of milk is simple, satisfying, and perfectly cuts through the richness of the cheesecake, offering a nostalgic and comforting combination.
- Coffee or Espresso: For an elegant after-dinner treat, a warm cup of freshly brewed coffee or a rich shot of espresso provides a delightful bitterness and warmth that beautifully contrasts with the sweet cheesecake.
- Ultimate Oreo Milkshake: For the ultimate Oreo lover who can’t get enough of this iconic cookie, a creamy Oreo milkshake takes the theme to a whole new level of luxurious indulgence.
- Frosted Coffee: A sweet, blended coffee drink can be a wonderfully refreshing and complementary beverage, offering a unique twist.
- Cool Coke Slushie: For a fun, fizzy, and incredibly cooling option, especially on a hot day, a Coke Slushie offers a playful and refreshing contrast to the creamy dessert.
Lighter Main Courses for a Balanced Meal
Given the delightful richness of the cheesecake, consider serving a lighter, fresh main course beforehand to ensure everyone has ample room to indulge in dessert without feeling overly full. Here are some excellent choices:
- Vibrant Caprese Pasta Salad: A fresh, lively salad bursting with ripe tomatoes, creamy mozzarella, fragrant basil, and pasta is a perfect light and flavorful starter or main.
- Hearty Orzo Pasta Salad: Light and packed with flavor, an orzo salad can be a satisfying yet not-too-heavy entrée, leaving just enough room for something sweet.
- Simple Spinach & Bacon Pasta: A delicious pasta dish featuring fresh greens and savory bacon can be a delightful and relatively light option before a rich dessert.
- Crispy Air Fryer Grilled Cheese: For a comforting, quick, and satisfying meal that isn’t overly heavy, a perfectly crispy grilled cheese makes a great precursor to a sweet treat.
When to Indulge: Perfect Occasions for Your Oreo Cheesecake
The beauty of this No-Bake Oreo Cheesecake lies in its incredible versatility. It’s special enough for grand celebrations, yet remarkably simple enough for a casual weeknight treat. Its universal appeal makes it a guaranteed crowd-pleaser for nearly any gathering or personal craving. Here are some perfect occasions to whip up this irresistible dessert:
- Potlucks: It’s a guaranteed hit and always disappears quickly! Easy to transport and universally loved, it will make you the star of any potluck.
- Summer Barbecues: A refreshing, no-oven-required dessert that’s absolutely perfect for outdoor entertaining and warm weather gatherings.
- Office Parties or Gatherings: Impress your colleagues and friends with minimal effort, providing a delicious treat that everyone will enjoy.
- Holiday Parties: A festive and decadent addition to any holiday spread, offering a delightful alternative to traditional holiday desserts.
- Easy Dessert Night: When you crave something sweet and indulgent but simply don’t want to spend hours in the kitchen, this is your perfect solution.
- Girls’ Night In: The ideal indulgent treat for a cozy evening spent with friends, perfect for sharing and savoring.
- Birthday Celebrations: A fun, unique, and delicious alternative to a traditional birthday cake, especially for Oreo lovers!
- Game Day Gatherings: A sweet treat to keep energy levels up and spirits high during intense game-watching sessions.
- Just Because: Honestly, sometimes you don’t need a grand occasion to enjoy something this incredibly delicious! Treat yourself because you deserve it.
Discover More Irresistible Oreo Dessert Recipes
If you’ve fallen in love with the magic and versatility of Oreos in dessert, you’re in for a treat! The iconic cookies lend themselves beautifully to a wide array of sweet creations, bringing their signature chocolatey crunch to many delightful recipes. Explore more of our fantastic desserts that feature Oreos as their star ingredient:
- Oreo Chocolate Bark: An incredibly easy, two-ingredient treat that’s perfect for quick indulgence, gifting, or satisfying a chocolate craving.
- Oreo Fudge: Rich, creamy, and requiring only three simple ingredients, resulting in decadent squares of pure Oreo goodness.
- Oreo Fluff: A light, airy, and wonderfully fluffy dessert salad that’s surprisingly refreshing and always a hit.
- Oreo Chocolate Poke Cake: A moist and tender cake generously infused with chocolate and irresistible Oreo goodness, drenched in a creamy topping.
- Oreo Rice Krispie Treats: A fun, crunchy, chewy, and utterly delicious twist on a beloved childhood classic, elevated with chunks of Oreo.
This No-Bake Oreo Cheesecake is also proudly one of our absolute favorite desserts made with Cool Whip, perfectly showcasing just how versatile and essential this ingredient can be in creating simple, delicious treats!
Looking for even more culinary inspiration and delightful recipes? Dive into our extensive categories of copycat recipes for your favorite restaurant dishes, explore a wide range of incredible dessert recipes for every sweet craving, and discover our incredibly convenient CrockPot Recipes for effortless meal preparation. There’s something for every taste, skill level, and occasion!
Stay connected and never miss a delicious recipe, helpful tip, or exciting culinary adventure! Follow Tammilee Tips on Facebook, Instagram, Pinterest, and Twitter for all our latest updates, mouth-watering posts, and inspiring content.
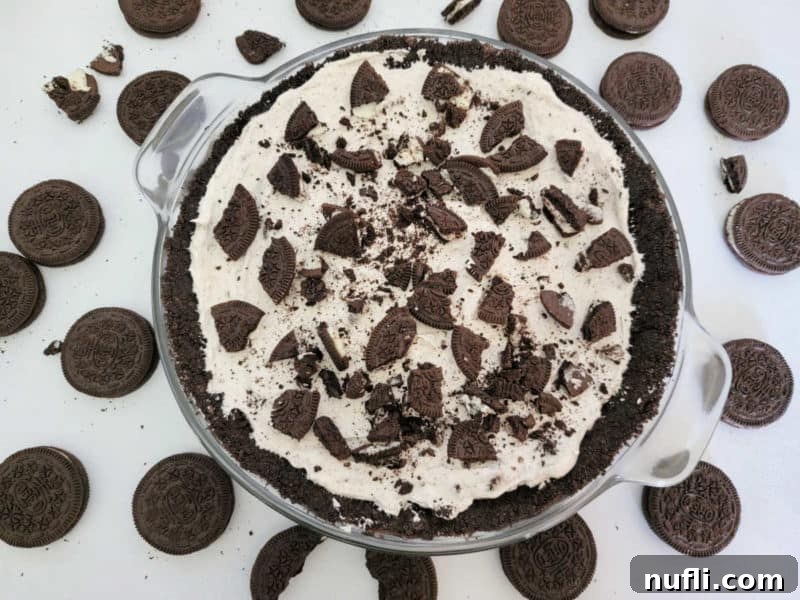
No Bake Oreo Cheesecake Recipe Card
Here’s the printable recipe card for your convenience. This easy No-Bake Oreo Cheesecake takes minutes to prepare and delivers incredible flavor. It’s truly the perfect fuss-free dessert, ideal for any time you need a quick, delicious treat!
No Bake Oreo Cheesecake Recipe
Easy No Bake Oreo Cheesecake takes minutes to prepare and tastes amazing. So easy to make! The perfect no bake cheesecake with Oreos!
Prep Time: 20 minutes
Refrigeration: 2 hours
Total Time: 2 hours 20 minutes
Servings: 8
Calories: 251 kcal
Author: Tammilee Tips
Print Recipe | Rate Recipe
Ingredients
- 1 Oreo Crust (Homemade or store-bought)
- 8 oz Cream Cheese (Softened, full-fat recommended)
- ¼ cup Granulated Sugar
- 1 Teaspoon Vanilla Extract
- 8 oz Cool Whip (or freshly whipped heavy cream)
- 12 Oreo cookies (Chopped into medium-sized pieces)
- Additional Oreos for Garnish (crushed or whole)
- Additional Cool Whip or Fresh Whipped Cream for Garnish
Instructions
- In a large mixing bowl, combine the softened full-fat cream cheese, granulated sugar, and vanilla extract. Beat with an electric hand mixer or stand mixer on medium speed until the mixture is completely smooth, creamy, and free of any lumps (approximately 2-3 minutes).
- Gently add the chopped Oreos to the cream cheese mixture and mix on low speed or fold with a spatula until just combined. Then, very carefully fold in the Cool Whip using a spatula until it is fully incorporated, being careful not to overmix to maintain its light, airy texture.
- Carefully spread the Oreo cheesecake filling evenly into the prepared Oreo crust. Use the back of a spoon or a spatula to smooth the top surface.
- Refrigerate the cheesecake for a minimum of 2 hours, or ideally 4-6 hours, until it is firm and well-set. For the cleanest slices and best texture, chilling overnight is recommended.
- Just before serving, garnish your no-bake Oreo cheesecake with additional crushed Oreos and dollops of Cool Whip or freshly whipped cream. Slice, serve, and enjoy!
Kitchen Tools
- Pie Dish (or 9-inch Springform Pan)
- Pie Server
- Hand Mixer (or Stand Electric Mixer)
- Large Mixing Bowl (Glass Batter Bowl with handle recommended)
- Spatula
- Food Processor (if making homemade crust from whole Oreos)
Nutrition Facts
Amount Per Serving:
- Calories 251 (Calories from Fat 135)
- Fat 15g (23% Daily Value*)
- Saturated Fat 8g (50% Daily Value*)
- Trans Fat 0.02g
- Polyunsaturated Fat 1g
- Monounsaturated Fat 5g
- Cholesterol 33mg (11% Daily Value*)
- Sodium 180mg (8% Daily Value*)
- Potassium 111mg (3% Daily Value*)
- Carbohydrates 28g (9% Daily Value*)
- Fiber 1g (4% Daily Value*)
- Sugar 19g (21% Daily Value*)
- Protein 4g (8% Daily Value*)
- Vitamin A 431IU (9% Daily Value*)
- Calcium 62mg (6% Daily Value*)
- Iron 2mg (11% Daily Value*)
* Percent Daily Values are based on a 2000 calorie diet. Nutritional information is an estimate and can vary based on specific product brands and quantities used.
Love this recipe? Follow @TammileeTIps on Pinterest for more delicious inspiration!
Tried this recipe? We’d love to see your creation! Mention @TammileeTipsLife when you share a photo on Instagram!
