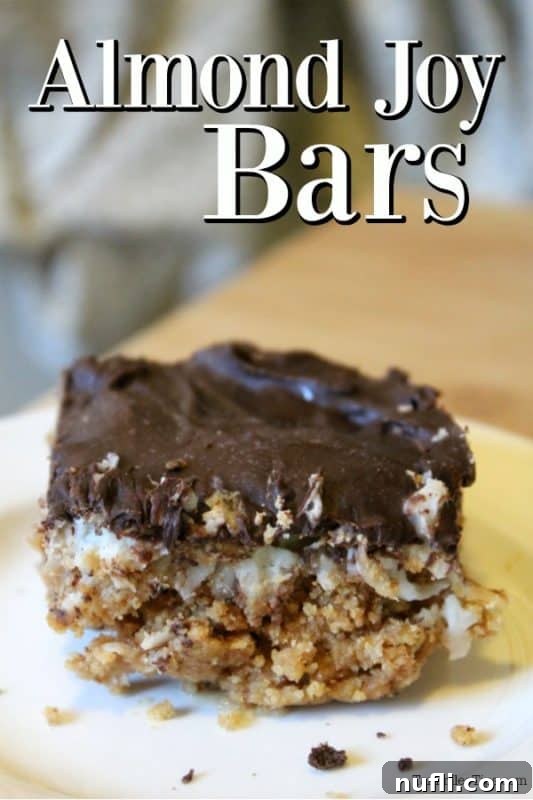
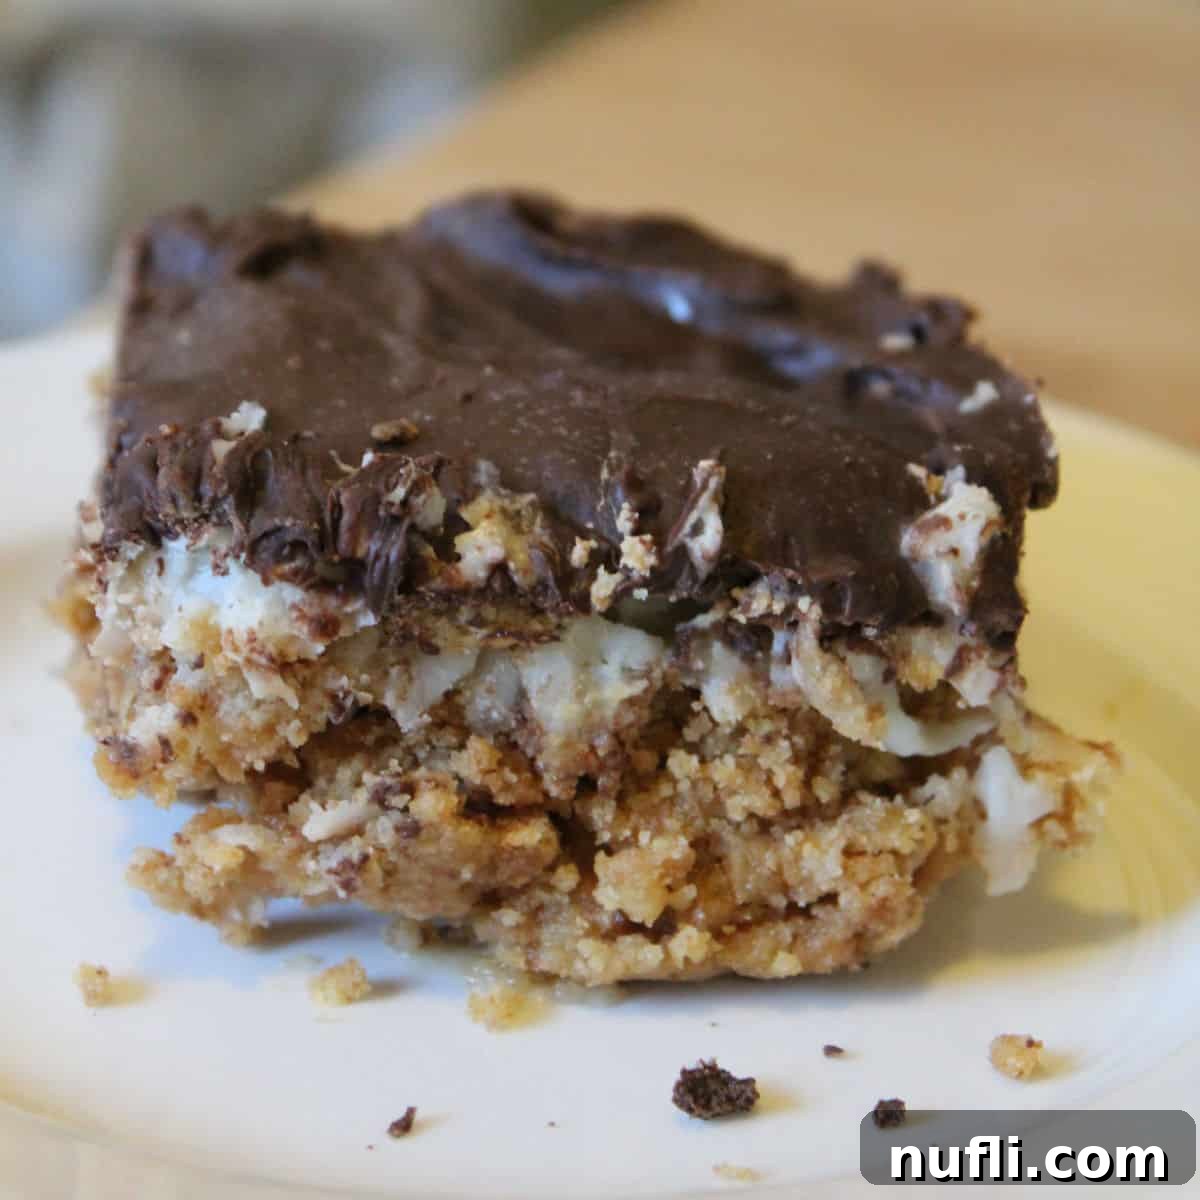
These homemade Almond Joy Bars are more than just a dessert; they are a delightful journey for your taste buds, perfectly blending the irresistible trio of rich coconut, luscious chocolate, and a sturdy graham cracker crust. Forget the small candy bars; this recipe transforms that beloved flavor into a substantial, shareable treat that will become an instant family favorite.

Every bite of these bars promises a perfect harmony of textures and flavors – the satisfying crunch of the crust, the chewy sweetness of the coconut, and the smooth, decadent chocolate topping. This isn’t just a recipe; for us, it’s a sweet piece of family history, lovingly shared from a treasured cookbook that holds decades of culinary memories.
Homemade Almond Joy Bars: A Taste of Nostalgia in Every Bite
The Story Behind the Recipe: Unearthing Family Treasures
This week, amidst the delightful chaos of gutting my office and meticulously reorganizing my collection of cookbooks, I stumbled upon a true gem. It wasn’t just any cookbook; it was a portal to the past, brimming with cherished family memories and the aroma of home-cooked meals from generations ago. This particular cookbook, a humble yet invaluable relic, was compiled around 1967 by the dedicated cookbook committee from the Augustana Lutheran Church in Grand Forks, North Dakota.
What makes this cookbook so profoundly special to me is the deep personal connection it holds. My Dad’s Mom, my dear Grandmother, was an active and passionate member of this committee, and many of her very own recipes are lovingly preserved within its pages. The copy I now hold was originally my Mom’s Mom’s (my other Grandmother’s!) copy. Yes, that’s quite a mouthful to say, but it speaks volumes about the intertwined culinary heritage that flows through our family, making every recipe a story in itself.
As I carefully turned its brittle pages, worn soft with age and use, I discovered more than just recipes. Tucked between the faded instructions were original newspaper clippings from 1967, a forgotten receipt for a tree my Grandfather had purchased in Xenia, Ohio, and, best of all, a collection of my Grandmother’s handwritten notes. These weren’t just idle scribbles; they were her honest critiques – a quick “good” next to a successful dish, or a subtle cross-out for a recipe that didn’t quite meet her discerning standards. Reading through these personal annotations brought back a flood of vivid memories, transporting me straight back to her tiny, yet incredibly efficient, kitchen.
Despite its modest size, my Grandmother’s kitchen was a powerhouse of flavor and warmth. She possessed an incredible knack for transforming simple ingredients into extraordinary meals, always with a touch of love and practicality. I recently inherited one of her well-loved cast iron pans, a true heirloom that I treasure beyond measure. It’s old, beautifully worn, and bears the unmistakable marks of countless family gatherings, holidays, and everyday meals – a silent witness to generations of delicious cooking and shared moments around the table.

A Glimpse into the Past: Christmas 1976
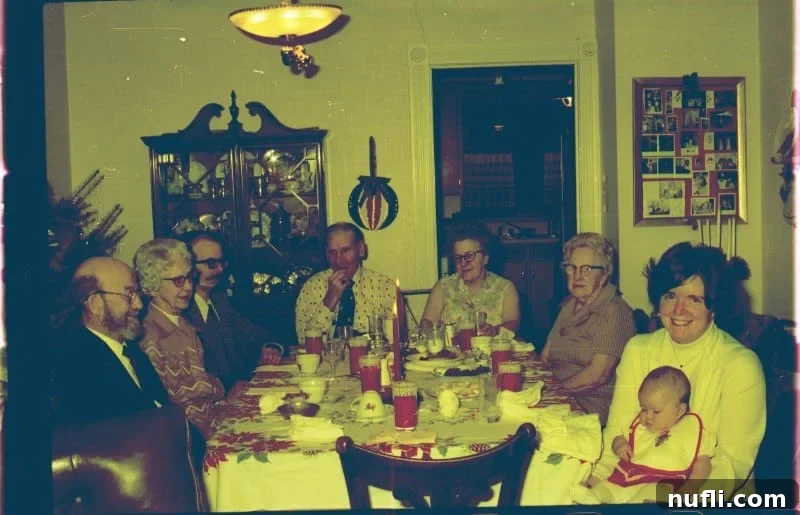
Looking at this precious family photograph, taken during Christmas time in 1976 or 1977, I can’t help but wonder how many of the recipes from that very cookbook graced our festive table. The picture captures a beautiful moment with my Dad’s parents and other assorted relatives, all gathered together, radiating warmth and holiday cheer. In the lower right corner, you can spot my Mom, holding me – yes, that’s me with the delightfully chubby cheeks and an adorable Christmas bib, completely oblivious to the culinary legacy that would one day be passed down to me. It’s a snapshot of a simpler time, filled with laughter, love, and undoubtedly, amazing homemade food.
Today, I am absolutely thrilled to unveil the first of many delectable recipes that I will be sharing from this rediscovered family cookbook! These Almond Joy Bars are not only incredibly delicious but also remarkably easy to prepare, making them a perfect treat for any occasion. They encapsulate the pure joy of homemade goodness that defined my Grandmother’s cooking.
Over the coming weeks and months, I plan to delve deeper into the cookbook’s pages, highlighting more recipes that evoke powerful memories of holidays past and cherished family traditions. My hope is to eventually entice my Mom to visit Spokane, where we can spend a few glorious days baking and cooking together, deciphering some of these vintage instructions, and adding her own invaluable tips and tricks. Until then, I sincerely hope you enjoy these fantastic Almond Joy Bars as much as my family and I do!
Crafting the Perfect Homemade Almond Joy Bars
These Almond Joy Bars are a testament to the fact that sometimes, the simplest recipes yield the most spectacular results. They require minimal effort but deliver maximum flavor, making them an ideal choice for both seasoned bakers and kitchen novices. The combination of a buttery graham cracker crust, a sweet, chewy coconut center, and a rich chocolate topping creates a dessert that’s utterly irresistible and sure to disappear quickly from any platter.
Essential Ingredients for Delightful Bites
Gathering your ingredients is the first step to creating these heavenly bars. Each component plays a vital role in building the layered flavor and texture that makes Almond Joy Bars so iconic and universally loved.
- Crushed Graham Crackers: Forms the delicious, sturdy, and slightly sweet base. For the best texture, crush them finely until they resemble coarse sand.
- Butter: Essential for binding the graham cracker crumbs and adding a rich, buttery flavor to the crust. Use good quality unsalted butter for superior taste.
- Powdered Sugar (Confectioners Sugar): Adds a delicate sweetness to the crust and helps achieve that melt-in-your-mouth texture without grittiness.
- Sweetened Condensed Milk: The magical ingredient that creates the creamy, sweet, and perfectly chewy coconut layer. It acts as both a sweetener and a binder. Do not substitute with evaporated milk, as it will not yield the same consistency.
- Coconut Flakes: The star of the show! Use good quality, unsweetened or sweetened coconut flakes depending on your preference for overall sweetness and chewiness. Shredded coconut also works well.
- Chocolate: For the decadent top layer. Chocolate chips (semi-sweet or milk chocolate work best), or even chopped baking chocolate bars, will provide a smooth and glossy finish.
Simple Steps to Heavenly Bars
Follow these easy, step-by-step instructions to assemble your irresistible Almond Joy Bars. Precision in mixing and patience during chilling are key to achieving perfectly layered and delightful results every time.
- Prepare the Crust: In a large mixing bowl, combine the finely crushed graham crackers, melted butter, and powdered sugar. Mix thoroughly with a fork or your hands until the mixture is uniformly moist and resembles wet sand. Press this mixture firmly and evenly into the bottom of an 8×8 inch baking pan that has been lined with parchment paper, allowing the paper to overhang on the sides for easy removal later.
- Bake the Crust: Place the prepared pan with the crust into a preheated oven at 350°F (175°C) and bake for approximately 10 minutes. This initial bake helps the crust to become slightly crisp and set, providing a stable foundation for the layers to come. Remove from the oven and let it cool slightly on a wire rack.
- Create the Coconut Layer: While the crust cools, in a separate mixing bowl, combine the sweetened condensed milk and coconut flakes. Stir well until all the coconut is thoroughly and evenly coated with the milk, ensuring a cohesive and delicious second layer.
- Add Coconut and Bake Again: Gently and evenly spread the coconut mixture over the warm, baked graham cracker crust. Return the pan to the oven and bake for another 15 minutes at 350°F (175°C), or until the coconut layer is lightly golden brown around the edges and appears set. Remove from the oven and allow the bars to cool completely at room temperature. This step is crucial before adding the chocolate.
- Finish with Chocolate: Once the bars are fully cooled, melt your chosen chocolate. You can do this easily in a microwave in 30-second intervals, stirring vigorously after each interval until smooth, or by using a double boiler over simmering water. Once melted and glossy, spread the chocolate evenly over the cooled coconut layer, ensuring it covers the entire surface for a beautiful finish.
- Chill and Slice: Place the pan in the refrigerator for at least 2-3 hours, or until the chocolate topping is completely firm and set. Once thoroughly chilled, use the parchment paper overhangs to carefully lift the entire block of bars out of the pan. Using a very sharp knife (a dough cutter can also work wonders for creating perfectly straight lines), cut the bars into your desired sizes. For the cleanest cuts, wipe your knife with a warm, damp cloth between each slice. Serve chilled or at room temperature, and enjoy!
Pro Tips for Almond Joy Bar Perfection
While these bars are wonderfully straightforward, a few tips can elevate them from great to absolutely exceptional. Paying attention to these small details will ensure your Homemade Almond Joy Bars are the best they can be, delighting everyone who tries them.
Achieving Crisp, Clean Slices
The coconut layer, while undeniably delicious, can sometimes make these bars a bit soft and prone to “smooshing” or crumbling when cut. Don’t worry, even if they aren’t perfectly uniform, they’ll still taste amazing! However, for beautifully presented bars with clean, defined edges, ensure they are thoroughly chilled for several hours (or even overnight) before attempting to slice them. A dough cutter can indeed help create impressively straight lines, but a very sharp knife warmed under hot water and wiped completely dry between each cut also works wonders. The warmth helps the knife glide smoothly through the chocolate topping and chewy coconut layer without dragging or cracking.
Ingredient Quality Matters
Since this recipe features a relatively small number of key ingredients, the quality of each really shines through in the final product. Opt for good quality chocolate (whether semi-sweet chocolate chips, baking chocolate bars, or even a mix for nuanced flavor), fresh, moist coconut flakes, and a reputable brand of sweetened condensed milk. These small choices will make a significant difference in the overall flavor profile and luxurious texture of your bars.
Storage & Freshness
To maintain their optimal taste and texture, store your Almond Joy Bars in an airtight container at room temperature for up to 3-4 days. If you prefer them firmer or wish to extend their freshness, they can be stored in the refrigerator for up to a week. If refrigerating, allow them to sit at room temperature for about 10-15 minutes before serving for the best, most tender texture. For longer storage, these bars freeze beautifully for up to 2-3 months; simply thaw them in the refrigerator overnight before enjoying.
Creative Variations
Feel free to get creative and customize your Almond Joy Bars! Instead of just a plain chocolate topping, consider adding a sprinkle of toasted sliced almonds over the melted chocolate layer before it sets – this mimics the traditional Almond Joy candy bar perfectly. You could also experiment with different types of chocolate, such as rich dark chocolate for a more intense flavor, or sweet white chocolate for a creamier twist. A tiny pinch of flaky sea salt sprinkled over the melted chocolate can also beautifully enhance all the flavors, offering a wonderful salty-sweet contrast that’s incredibly addictive.
Serving Suggestions
These versatile bars are perfect on their own as an afternoon pick-me-up or alongside a cup of freshly brewed coffee or tea. They make an excellent and much-loved addition to holiday dessert platters, potlucks, bake sales, or any family gathering. For a thoughtful gesture, wrap a few up in a decorative box or bag to create a delicious homemade gift that everyone will appreciate.
Your Kitchen Arsenal
Having the right tools can make the baking process even more enjoyable and efficient, especially when creating layered treats like these Almond Joy Bars. Here are a few items that will come in handy:
- 8×8 Inch Baking Pan: An essential for creating perfectly sized bars with good height. A metal pan generally conducts heat well, ensuring an evenly baked crust.
- Large Mixing Bowl: We are big fans of glass batter bowls that feature a convenient handle. They make mixing ingredients a breeze and stay wonderfully steady on the counter while you work.
- Parchment Paper: Absolutely crucial for easy removal of the bars from the pan after chilling, and it makes cleanup a cinch!
- Rubber Spatula: Ideal for thoroughly mixing ingredients and, crucially, for spreading the coconut and chocolate layers smoothly and evenly.
- Measuring Cups and Spoons: For accurate ingredient proportions, which are always key to successful and consistent baking results.
- Dough Cutter or Sharp Knife: For achieving precise, clean cuts once the bars are perfectly chilled and set.
Nutrition Snapshot
Here’s a brief overview of the estimated nutritional information per serving for these delightful Almond Joy Bars, based on a serving size of 10 bars from an 8×8 inch pan. Please note that these are approximate values and can vary based on specific brands of ingredients used and exact measurement amounts. This information is provided as a general guide.
Nutrition Facts
Almond Joy Bars Recipe
Amount Per Serving (approx. 1/10 of recipe)
Calories: 468 kcal
% Daily Value*
- Fat: 28g (43% DV)
- Saturated Fat: 18g (113% DV)
- Cholesterol: 38mg (13% DV)
- Sodium: 257mg (11% DV)
- Potassium: 302mg (9% DV)
- Carbohydrates: 54g (18% DV)
- Fiber: 3g (13% DV)
- Sugar: 41g (46% DV)
- Protein: 6g (12% DV)
- Vitamin A: 390IU (8% DV)
- Vitamin C: 2mg (2% DV)
- Calcium: 137mg (14% DV)
- Iron: 2mg (11% DV)
* Percent Daily Values are based on a 2000 calorie diet.
More Irresistible Dessert Ideas
If you’re anything like us, a delicious dessert is always a good idea! After you’ve savored these delightful Almond Joy Bars, be sure to explore some of our other fantastic recipes that are perfect for satisfying any sweet craving:
- Chocolate Chip Cheese Ball: A delightful and unexpected sweet dip, perfect for parties and holiday gatherings.
- Ruffles Marshmallow Treats: An irresistible salty-sweet twist on a classic crispy treat – wonderfully addictive!
- Pineapple Angel Food Cake: Light, airy, and bursting with tropical flavor – incredibly easy to make with just two ingredients.
- Apple Pie Dumplings: Bite-sized pockets of warm, comforting apple pie goodness, perfect for individual servings.
- S’mores Brownies: All the joy of a campfire S’more, baked into fudgy, decadent brownies.
- Lemon Cheesecake Bars: Bright, tangy, and creamy – a refreshing dessert perfect for any season.
Are you a passionate recipe enthusiast always on the hunt for new culinary adventures? Don’t miss out on our extensive collections of copycat recipes (to recreate your restaurant favorites at home!), a wide variety of dessert recipes for every sweet tooth, and our incredibly convenient CrockPot Recipes for effortless meal preparation.
Join Our Culinary Community
Stay connected and never miss a delicious update, new recipe, or family story! Follow Tammilee Tips on Facebook, Instagram, and Pinterest for all our latest recipe posts, travel adventures, and inspiring lifestyle tips. We love seeing your creations!
Love this recipe? Show your support and follow @TammileeTIps on Pinterest!
Tried this recipe? We’d love to see your delicious results! Mention @TammileeTipsLife when you share a photo on Instagram!
Recipe originally shared on October 26, 2013. Updated September 2020. This expanded and re-optimized version was published [Current Date, e.g., November 2023] to provide more detailed instructions, tips, and a richer narrative for our readers.
