Prepare to dive headfirst into a world of flavor, because if you’re anything like us, you’re utterly captivated by the enchanting combination of sweet caramel and a hint of savory salt. This beloved pairing has taken the dessert scene by storm, appearing in everything from gourmet cupcakes to decadent ice creams. Today, we’re bringing this irresistible trend to a classic comfort food: the humble, yet ever-so-delicious, Rice Krispie Treat. Get ready for a delightful twist that promises to become your new favorite no-bake indulgence – our ultimate Salted Caramel Rice Krispie Treat recipe!

The Ultimate Salted Caramel Rice Krispie Treats Recipe
Imagine the perfect blend of crunchy, chewy, sweet, and salty, all in one bite. That’s exactly what awaits you with these homemade Salted Caramel Rice Krispie Treats. This isn’t just a dessert; it’s an experience, a moment of pure bliss that transports you back to childhood while introducing a sophisticated flavor profile. And let’s be honest, we won’t judge if you find yourself needing to squirrel away a few pieces for your own secret stash. It happens to the best of us!
Why These Salted Caramel Rice Krispie Treats Will Be Your New Favorite
Rice Krispie Treats are a timeless classic for a reason – they’re incredibly simple to make, require no baking, and appeal to almost everyone. But by adding the magic of salted caramel, we elevate them from a simple snack to a truly show-stopping dessert. Here’s why this recipe deserves a permanent spot in your culinary repertoire:
- Effortlessly Delicious: No oven required! This recipe comes together quickly with minimal fuss, making it perfect for busy days or impromptu cravings.
- Perfect Balance of Flavors: The rich sweetness of caramel and chocolate is perfectly complemented by the crunchy texture of the Rice Krispies and the delightful pop of coarse sea salt. It’s a symphony for your taste buds.
- Crowd-Pleaser Guaranteed: Whether you’re bringing them to a potluck, serving them at a party, or simply enjoying them with family, these treats are universally loved. They disappear fast!
- Versatile for Any Occasion: From a quick after-school snack to a decadent holiday dessert, these treats fit right in. They’re also fantastic for school events, office parties, or a cozy movie night.
- A Fun Twist on a Classic: It takes the nostalgic comfort of original Rice Krispie Treats and adds a modern, gourmet touch that makes them feel extra special.

Gather Your Sweet & Salty Arsenal: Essential Ingredients
The beauty of Rice Krispie Treats lies in their simplicity, and this salted caramel version is no exception. You only need a handful of readily available ingredients to create this masterpiece. Opting for quality ingredients can make a noticeable difference in the final taste and texture of your treats.
Ingredients needed:
- Butter: Essential for melting marshmallows smoothly and adding a rich base flavor. Use unsalted butter to control the saltiness in the recipe.
- Mini Marshmallows: The sticky, sweet binder that holds everything together. Mini marshmallows melt faster and more evenly than large ones.
- Rice Krispies: The star of the show, providing that signature crispy crunch. Fresh cereal is key for maximum crispiness.
- Dark Chocolate Chips: For a delightful layer of rich, slightly bitter chocolate that perfectly balances the sweetness of the caramel. You can also use milk chocolate or semi-sweet depending on your preference.
- Caramel Squares: These melt down into a luscious, gooey caramel drizzle. You can often find these in the baking aisle.
- Coarse Salt: The critical element that transforms caramel into *salted* caramel. We recommend a good quality flaky sea salt or coarse kosher salt for the best flavor and visual appeal.
Mastering the Art of Salted Caramel Rice Krispie Treats: Step-by-Step Guide
Creating these treats is a straightforward process, but following these steps carefully will ensure you achieve that perfect balance of chewy, crispy, and utterly delicious. Let’s get cooking (without an oven, of course)!
Instructions:
- In a large non-stick pot or pan, melt 3 tablespoons of butter over low heat. It’s important to keep the heat low to prevent the butter from browning too quickly.
- Once the butter is fully melted, add the mini marshmallows to the pan. Continue stirring constantly with a spatula until the marshmallows are completely melted and smooth. This requires patience to avoid scorching.
- Immediately remove the pan from the heat. Pour in the Rice Krispies and gently fold them into the melted marshmallow mixture until they are thoroughly coated. Work quickly but gently to avoid crushing the cereal.
- Prepare a 9×13-inch baking pan by lining it with parchment paper. Ensure the paper extends over the sides to create “handles” for easy removal of the treats. Alternatively, spray the pan generously with non-stick cooking spray.
- Transfer the Rice Krispie mixture into the prepared pan. Using a buttered spatula or your buttered hands, gently press the mixture evenly into the pan. Do not press too firmly, as this can result in hard, dense treats. Allow the treats to cool and set completely at room temperature for at least 30 minutes to an hour.
- For the Topping: In a microwave-safe bowl, combine the dark chocolate chips and an additional 1 tablespoon of butter. Microwave in 30-second intervals, stirring after each, until the chocolate is smooth and melted. Be careful not to overheat.
- Once the Rice Krispie base has cooled and set, pour the melted chocolate mixture evenly over the top. Spread it gently with a spatula to create a smooth layer. Immediately sprinkle a generous amount of coarse sea salt over the wet chocolate. This ensures the salt adheres properly.
- Allow the chocolate layer to harden completely. You can speed this up by placing the pan in the refrigerator for about 15-20 minutes, or letting it sit at room temperature for an hour.
- In a separate microwave-safe bowl, melt the caramel squares according to package directions (usually with a small amount of water or milk, microwaved in short intervals and stirred). Stir until completely smooth and drizzly.
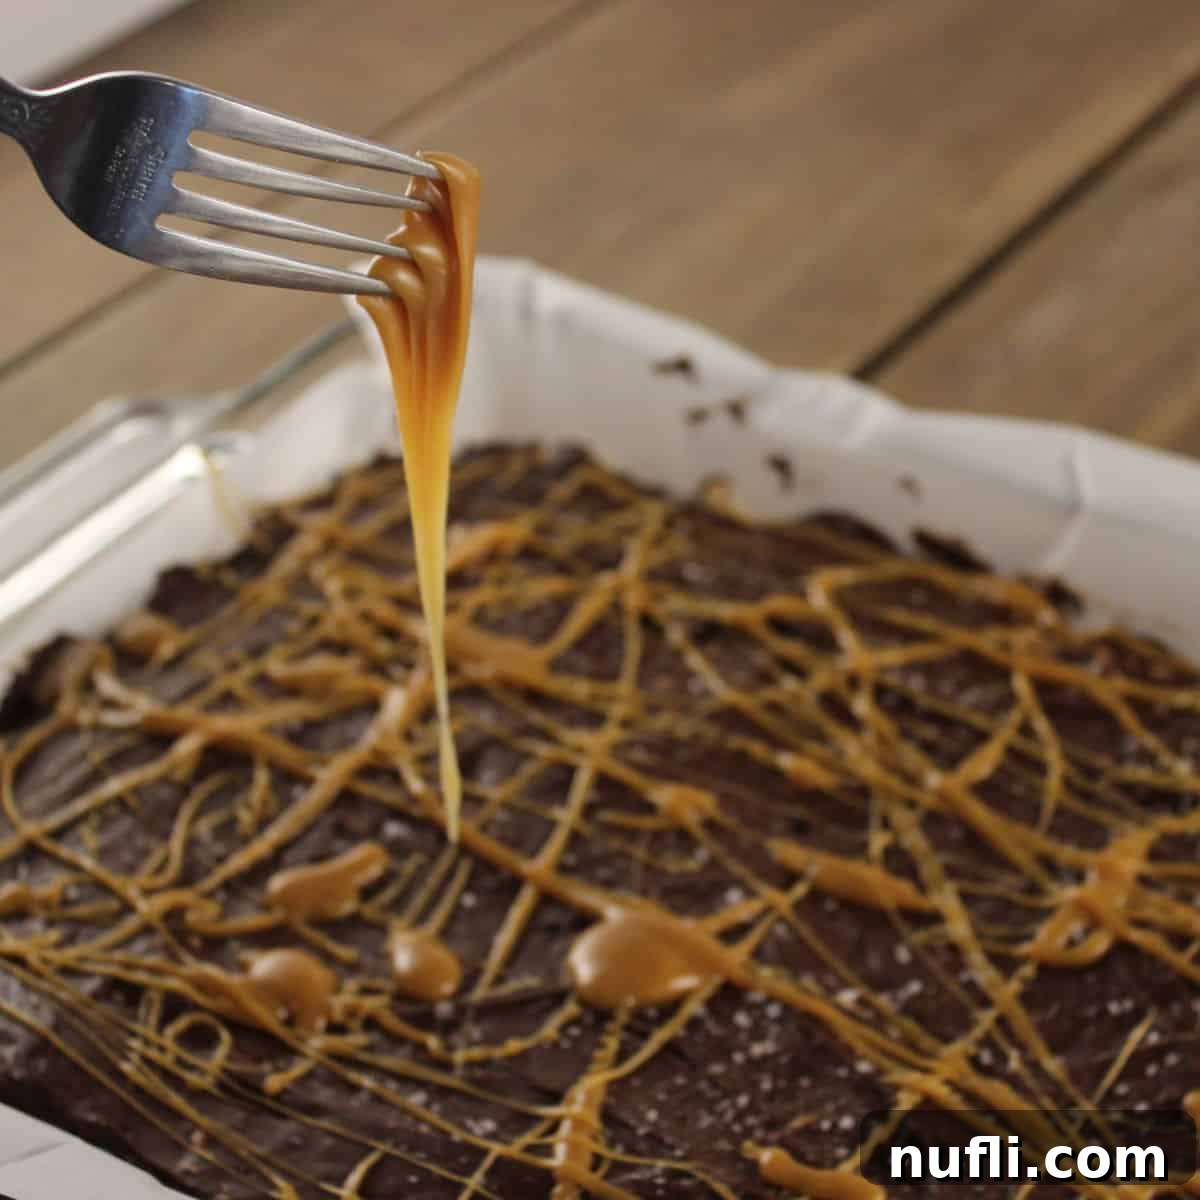
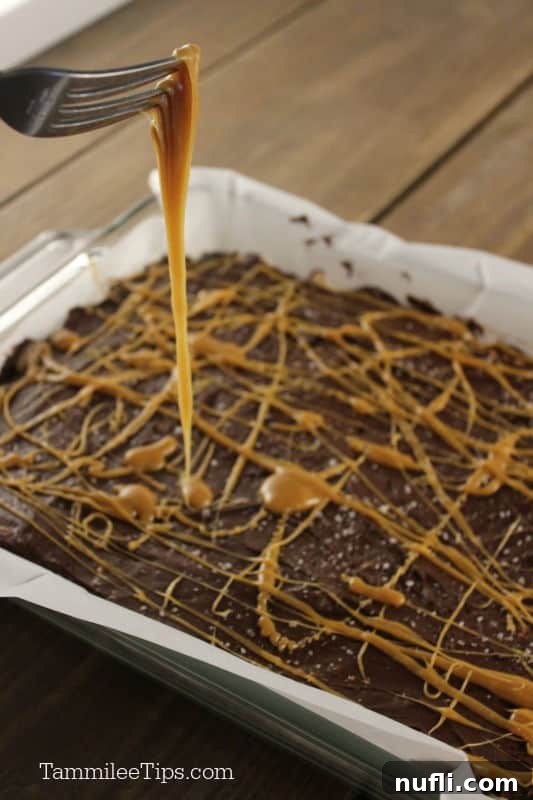
- Once the chocolate layer is firm, drizzle the melted caramel generously over the chocolate. Create an appealing pattern with your spoon.
- Let the caramel layer set and harden before attempting to cut the treats. This might take another 30 minutes at room temperature or 15 minutes in the refrigerator.
- Once all layers are set, use the parchment paper handles to lift the entire block of treats from the pan. Place on a cutting board and cut into approximately 15 equal pieces using a sharp, buttered knife for clean cuts.
Essential Kitchen Tools for a Smooth Process:
- 9×13 Inch Baking Pan
- Parchment Paper
- Large Non-Stick Pot or Saucepan
- Microwave-Safe Bowls (for melting chocolate and caramel)
- Spatula
Pro Tips for Perfectly Popped Treats Every Time
While this recipe is straightforward, a few expert tips can elevate your Salted Caramel Rice Krispie Treats from good to absolutely phenomenal.
- Don’t Overcook the Marshmallows: Once they’re melted and smooth, take them off the heat immediately. Overcooking can make them tough and less chewy.
- Gentle Mixing: When folding in the Rice Krispies, be gentle. You want to coat them evenly without crushing them, preserving their airy crispiness.
- Light Hand for Pressing: Resist the urge to press the mixture down too hard into the pan. A light, even press will keep the treats soft and chewy, not dense and hard. Buttering your hands slightly can help prevent sticking.
- Quality Salt Matters: Use coarse sea salt or flaky salt for the topping. The larger crystals provide a delightful textural contrast and burst of flavor that finely ground salt can’t match. Sprinkle it while the chocolate is still wet!
- Cool Completely: Patience is key for all the layers to set properly. Rushing the cooling process can lead to a messy, sticky situation.
- Buttered Knife for Clean Cuts: To get perfectly neat squares, lightly butter your knife before cutting. Wipe and re-butter as needed.
Unleash Your Creativity: Delicious Variations & Add-ins
This recipe is fantastic as is, but it’s also a wonderful canvas for culinary creativity! Feel free to experiment with these ideas to customize your Salted Caramel Rice Krispie Treats:
- Nutty Crunch: Fold in chopped pecans, walnuts, or almonds with the Rice Krispies for an added layer of texture and flavor.
- Different Chocolates: Instead of dark chocolate, try milk chocolate, white chocolate, or even a mix. You could also use chocolate-caramel swirled chips.
- Pretzel Power: For an extra salty crunch, lightly crush some pretzels and mix them into the Rice Krispie base or sprinkle them over the chocolate layer with the sea salt.
- Spice It Up: A pinch of cinnamon or nutmeg added to the melted marshmallow mixture can add a warm, cozy note.
- Extract Flavor: A teaspoon of vanilla extract or even a hint of rum extract can deepen the flavor profile of the marshmallow base.
- Double Caramel Drizzle: If you’re a true caramel enthusiast, consider adding a thin layer of melted caramel *before* the chocolate layer, and then another drizzle on top.
Storing Your Sweet Creations
Proper storage is essential to keep your Salted Caramel Rice Krispie Treats fresh and delicious. Store them in an airtight container at room temperature for up to 3-4 days. While they can be refrigerated, this can sometimes make them a bit harder, so allow them to come to room temperature before serving for the best texture. If you live in a very warm climate, refrigeration might be necessary to keep the chocolate and caramel from melting.
Frequently Asked Questions (FAQ)
Got questions? We’ve got answers to help you perfect your Salted Caramel Rice Krispie Treats!
Can I use old marshmallows?
While you can, fresher marshmallows will melt more smoothly and result in a chewier, softer treat. Older, drier marshmallows might not melt as evenly.
Do I have to use coarse sea salt?
For the best “salted caramel” experience, yes! The larger crystals of coarse sea salt provide a distinct burst of saltiness and a lovely textural crunch that finely ground salt won’t offer. If you only have fine salt, use it sparingly, as it will dissolve more quickly and can make the treats too salty if overused.
Can I use a different cereal?
Absolutely! While Rice Krispies give the classic texture, you can experiment with other puffed cereals like Chex or even a crispier cornflake for a different bite.
Can I make these ahead of time for a party?
Yes, these treats are perfect for making ahead! They stay fresh for several days when stored in an airtight container at room temperature. This makes them an ideal dessert for parties or potlucks.
My caramel is too thick to drizzle. What can I do?
If your melted caramel squares are too thick, add a very small amount (half a teaspoon) of milk or cream and microwave for another 10-15 seconds, then stir until it reaches a drizzly consistency. Be careful not to add too much liquid.
How can I make sure the chocolate layer doesn’t crack when I cut the treats?
Allow the chocolate layer to harden but not become brittle. If it’s too cold and hard from refrigeration, let it sit at room temperature for 10-15 minutes before cutting. A warm, buttered knife can also help make clean cuts without cracking the chocolate.
Craving More Salted Caramel? Explore These Delights!
If your love for salted caramel runs as deep as ours, you’re in luck! We have more fantastic recipes that celebrate this incredible flavor combination. Be sure to check them out:
- Salted Caramel Football Krispies
- Salted Caramel Popcorn
Beyond Caramel: More Irresistible Desserts to Try
Our recipe collection is bursting with sweet treats for every occasion. If you’re looking to expand your dessert repertoire, here are some other fantastic options:
- Rolo Pretzel Turtles
- Oatmeal Raisin Cookies
- 5 Layer Bars
- Edible Brownie Batter
- Chocolate Caramel Ice Cream Cake
You can find even more delicious ideas in our general recipe categories, including our copycat recipes, dessert recipes, and CrockPot Recipes.
Connect with Tammilee Tips for More Recipes!
Don’t miss out on any of our culinary adventures and amazing recipes! Follow Tammilee Tips on Facebook, Instagram, and Pinterest for daily inspiration and delicious ideas.
Salted Caramel Rice Krispie Treat Recipe
Delicious Salted Caramel Rice Krispie Treats recipe! This dessert is not just for kids! How can you go wrong with salted caramels, marshmallows, and Rice Krispies all combined in a delicious, decadent dessert? The perfect family dessert, potluck party treat, sweet treat, back-to-school snack, and so much more! A fun spin on the original recipe we all know and love.
Prep Time: 15 minutes
Cook Time: 10 minutes
Setting Time: 30 minutes
Total Time: 55 minutes
Servings: 15 pieces
Calories: 208 kcal per serving
Author: Tammilee Tips
Ingredients
- 3 tablespoons Butter
- 4 cups Mini Marshmallows
- 6 cups Rice Krispies
- 10 Ounce Dark Chocolate Chips
- ½ bag Caramel Squares
- Coarse Sea Salt (to taste)
Instructions
- In a large pan, melt 3 tablespoons of butter, then add marshmallows.
- Stir constantly until marshmallows are completely melted and smooth.
- Take off heat and stir in Rice Krispies until well combined.
- Line a 9X13 inch pan with parchment paper or spray well with non-stick spray.
- Press Rice Krispie mix gently into the prepared pan and allow to cool and set (30 minutes to an hour).
- For the Topping:
- Melt chocolate chips and 1 tablespoon of butter in a microwave-safe bowl in the microwave, stirring every 30 seconds until smooth.
- Pour the melted chocolate onto the cooled Rice Krispie mix and immediately sprinkle with coarse salt.
- Let the chocolate layer harden completely.
- Melt caramel squares in the microwave, stirring until smooth and drizzly (add a tiny bit of milk or cream if too thick).
- Drizzle the melted caramel over the hardened chocolate layer.
- Let the caramel layer harden before cutting the treats into pieces.
- YIELDS approximately 15 pieces.
Kitchen Tools
- 9X13 Pan
- Parchment Paper
- Large Pot
- Microwave-Safe Bowls
Nutrition Facts
Calories from Fat 72
This recipe was originally shared on April 1, 2015, and has been updated and expanded in January 2021 to bring you the most comprehensive and delicious version possible.
