Irresistible No-Bake Peanut Butter Balls: An Easy, Kid-Friendly Treat for Any Occasion
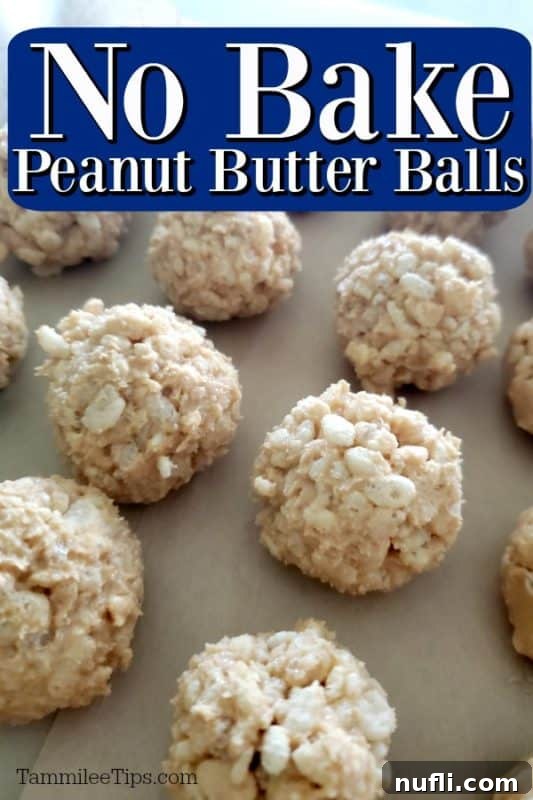
Are you searching for a quick, delicious, and incredibly simple treat that the whole family will adore? Look no further than these amazing No-Bake Peanut Butter Balls! Perfect for an after-school snack, a festive holiday platter, or simply satisfying that sweet craving, these delightful bites come together with minimal effort and without ever needing to turn on your oven. Their rich peanut butter flavor and satisfyingly chewy texture make them an instant favorite, and the best part is, they’re so easy to make that even the youngest chefs can join in the fun!

The Timeless Charm of No-Bake Peanut Butter Balls: A Recipe from Generations Past
This cherished recipe for No-Bake Peanut Butter Treats holds a special place in my heart, passed down through the generations from my grandmother’s treasured church recipe book. Hailing from the charming town of Grand Forks, North Dakota, this cookbook is a true relic, likely over 50 years old, filled with handwritten notes and well-loved pages that whisper stories of countless family gatherings and community potlucks. I often find myself wondering about the exact date it was compiled, a testament to the enduring power of simple, wholesome recipes that stand the test of time.
Over the years, many of our family’s most beloved dishes and desserts have originated from the pages of this very cookbook. It’s a repository of culinary history, a tangible link to my heritage. We’ve adapted numerous gems from it, including our much-loved Almond Joy Bars, each recipe a testament to the joy of homemade goodness. There’s something truly magical about recreating a dish that has brought smiles to faces for decades, connecting with the past through the simple act of cooking. This peanut butter ball recipe is no exception; it’s a sweet echo of simpler times, bringing comfort and nostalgia with every bite.
Why Choose No-Bake? The Ultimate Convenience in Dessert Making
In today’s fast-paced world, convenience is key, and no-bake recipes perfectly embody this philosophy. These peanut butter balls are a stellar example of how you can create an incredibly satisfying dessert without the fuss of baking. The “no-bake” aspect means you save time, energy, and avoid heating up your kitchen, which is particularly delightful during warmer months. It also makes them an ideal project for kids, eliminating the need for hot ovens and sharp tools, allowing them to take a more active role in the kitchen with supervision.
Beyond the sheer simplicity, no-bake treats like these often have a unique texture and richness that baked goods can’t quite replicate. They tend to be denser, chewier, and packed with flavor, making them incredibly satisfying. Whether you’re short on time, don’t have access to an oven, or simply prefer a hands-on, effortless approach to dessert, no-bake recipes offer a fantastic solution. They prove that you don’t need complex techniques or fancy equipment to create something truly delicious.
Explore More Fantastic No-Bake Delights
If you’ve fallen in love with the ease and deliciousness of these No-Bake Peanut Butter Balls, you’ll be thrilled to discover a whole world of other no-bake treats. These recipes are perfect for expanding your repertoire of quick, fuss-free desserts:
- No-Bake Peanut Butter Banana Pie: A creamy, dreamy pie that combines two classic flavors without any baking.
- No-Bake Chocolate Oat Bars: A delightful blend of chocolate and oats for a chewy, rich snack.
- No-Bake Pumpkin Butterscotch Pie: Perfect for fall, this pie offers a comforting blend of pumpkin and butterscotch.
- Raspberry No-Bake Pie: A light and refreshing option bursting with fruity flavor.
- No-Bake Peanut Butter Fudge: For the ultimate peanut butter lover, this fudge is unbelievably smooth and simple.
And if you’re a true fan of all things peanut butter, be sure to check out all of our other incredible recipes with peanut butter for more inspiration!
Mastering Your No-Bake Peanut Butter Balls: Ingredients and Expert Tips
Simple Ingredients, Big Flavor
One of the best aspects of this recipe is its incredibly short ingredient list. You only need four common items, making it easy to whip up a batch whenever a craving strikes. Each ingredient plays a crucial role in achieving the perfect balance of flavor and texture:
- Peanut Butter: The star of the show! You can use either chunky or creamy peanut butter, depending on your preference. Creamy will yield a smoother ball, while chunky will add a delightful crunch. Natural peanut butter (the kind that separates) can be used, but make sure it’s well-stirred and firm for the best consistency.
- Powdered Sugar (Confectioners’ Sugar): This fine sugar is essential for both sweetness and structure. It dissolves easily into the peanut butter mixture, creating a smooth, non-gritty texture that ordinary granulated sugar can’t achieve in a no-bake recipe.
- Butter: Melted butter helps to bind all the ingredients together, adding richness and contributing to the smooth, pliable dough. Unsalted butter is usually preferred, but if you only have salted, you can proceed, just be mindful of the overall saltiness.
- Rice Krispies Cereal: These crispy rice puffs are the secret to the fantastic texture of these balls. They add a light, airy crunch that contrasts beautifully with the dense peanut butter, making each bite incredibly satisfying.
Step-by-Step Directions for Perfect Peanut Butter Balls

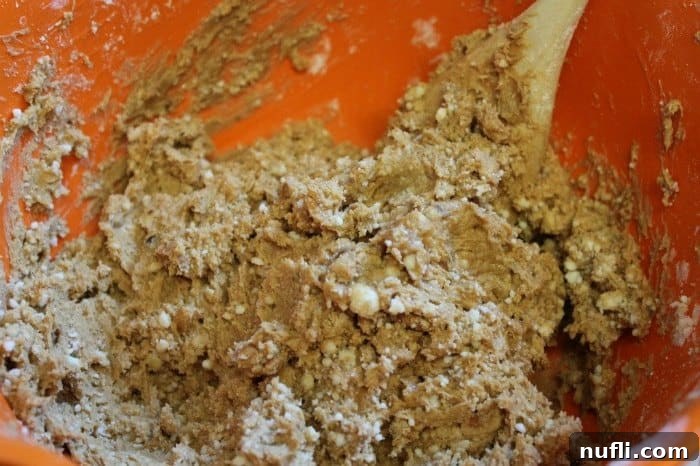
- Combine the Wet and Sweet Ingredients: In a large mixing bowl, start by combining the peanut butter, powdered sugar, and melted butter. Use a sturdy spoon or a rubber spatula to thoroughly mix these ingredients. At first, it might seem a bit dry or crumbly, but keep mixing until it starts to come together into a thick, uniform dough.

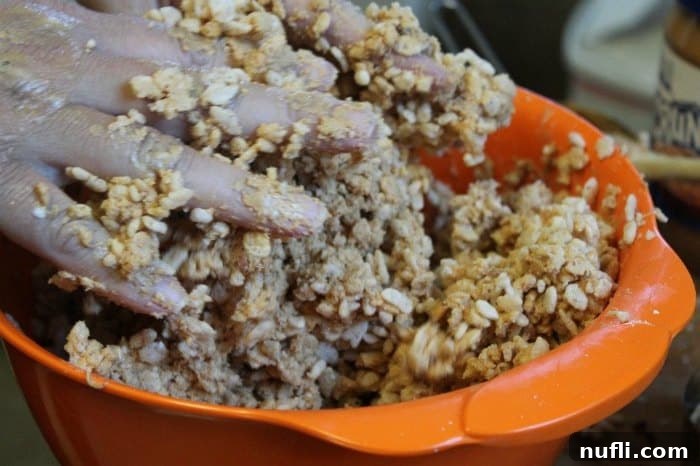
- Incorporate the Rice Krispies: Now, add the Rice Krispies cereal to the peanut butter mixture. This is where things get interesting! Begin mixing with your spoon, trying to coat as much of the cereal as possible. You’ll quickly find that a wooden spoon struggles to adequately combine everything, leading to cereal flying everywhere. For the best results, don’t be afraid to ditch the spoon and get your hands in there! Using your clean hands allows you to effectively knead and press the mixture, ensuring the cereal is evenly distributed and coated without making a huge mess.
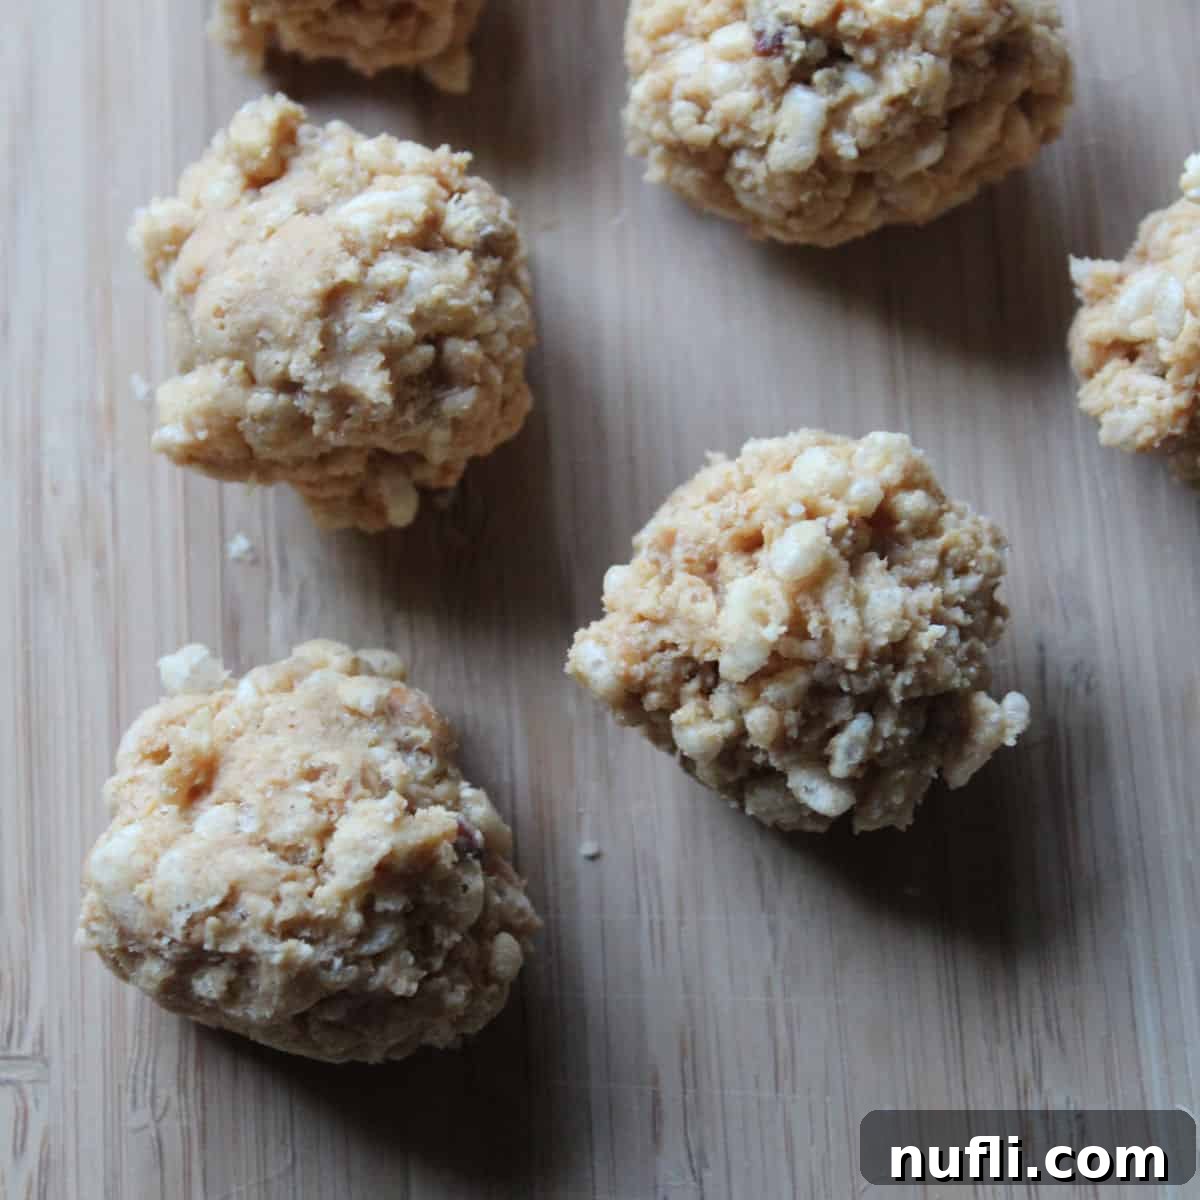
- Shape into Perfect Balls: Once the mixture is well combined, it’s time to form your peanut butter balls. A cookie scoop (medium size works great) is an excellent tool for this step, as it helps create consistent, even-sized balls. Simply scoop a portion of the mixture, then use your hands to roll it into a smooth, round sphere.
Troubleshooting Tips for Sticky Hands and Perfect Shaping
During the shaping process, you might notice the peanut butter mixture becoming increasingly sticky and difficult to work with. This is a common occurrence, especially as the warmth from your hands transfers to the mixture. If the mix starts sticking excessively to your fingers and refuses to form neat balls, here’s a simple trick:
- Wash and Chill: Take a quick break to wash your hands thoroughly with cold water. Dry them completely, and if possible, let them cool down for a minute or two. The cool temperature of your hands will help prevent the mixture from warming up too quickly, reducing stickiness and making it much easier to handle. You can even lightly grease your hands with a tiny bit of butter or non-stick spray if needed, though clean, cool hands are usually sufficient.
- Work in Batches: If you’re making a very large batch, consider dividing the mixture into smaller portions and working with one at a time, keeping the rest in the fridge to stay cool.
Continue rolling until all the mixture is transformed into delightful peanut butter balls. Alternatively, if you prefer, you can press the mixture into a parchment-lined baking dish and cut it into squares or “peanut butter logs” once firm. The choice is yours!
Storing Your No-Bake Peanut Butter Delights
Once your peanut butter balls are shaped, they’re ready to be enjoyed! For optimal freshness and texture, it’s best to store them in an airtight container in the refrigerator. They will firm up slightly when chilled, which enhances their chewiness and prevents them from becoming too soft. Stored this way, they can last for up to two weeks, making them a fantastic make-ahead treat for busy schedules or unexpected guests. You can also freeze them for longer storage; simply place them in a single layer on a parchment-lined tray until firm, then transfer to a freezer-safe bag or container. They’ll keep well in the freezer for up to three months and can be thawed at room temperature or enjoyed slightly frozen.
Personalizing Your Peanut Butter Creations: Variations and Toppings
While these No-Bake Peanut Butter Balls are perfect as they are, don’t hesitate to get creative with variations and toppings! Here are a few ideas to inspire you:
- Chocolate Dip: For the ultimate indulgence, melt some chocolate chips (milk, dark, or semi-sweet) with a teaspoon of coconut oil, then dip half or all of each peanut butter ball into the melted chocolate. Let them set on parchment paper in the refrigerator until firm.
- Sprinkle Fun: Before the chocolate sets (if using), or directly onto the plain balls, roll them in colorful sprinkles for a festive touch.
- Toasted Coconut: Gently toast some shredded coconut in a dry pan until golden, then roll the peanut butter balls in the cooled coconut for added flavor and texture.
- Different Cereals: While Rice Krispies are classic, feel free to experiment with other crunchy cereals like crushed cornflakes or even finely chopped pretzels for a salty-sweet twist.
- Mini Chocolate Chips: Mix a handful of mini chocolate chips directly into the peanut butter mixture for a delightful surprise in every bite.
- Sea Salt Flakes: A light sprinkle of flaky sea salt on top of chocolate-dipped balls can elevate the flavor profile, balancing the sweetness with a savory note.
These simple additions can transform your peanut butter balls into unique treats perfect for any occasion, from casual snacking to elegant dessert platters.
Share Your Sweet Success!
We absolutely love hearing from you! If you decide to whip up a batch of these incredible No-Bake Peanut Butter Balls – or even if you opt for the “Peanut Butter Logs” variation – please let us know how they turned out. Your feedback and photos are always a joy to see. Feel free to leave a comment on this post and share your experience. Did you add any special toppings? Did your family love them? We can’t wait to find out!
This versatile recipe is also a cherished part of our Road Trip Snacks Collection and our compilation of Delicious Cookie Recipes, proving its adaptability and widespread appeal for various occasions.
No-Bake Peanut Butter Balls Recipe
Super easy no-bake Peanut Butter Balls are the perfect after-school snack or treat for any time!
Ingredients
- 2 cups peanut butter (chunky or creamy)
- 2 cups Confectioners Powdered Sugar
- 4 Tablespoons Butter, melted
- 5-6 cups Rice Krispies Cereal
Instructions
- Combine peanut butter, powdered sugar, and melted butter together in a large mixing bowl. Mix until well incorporated.
- Add 5 to 6 cups of Rice Krispies cereal. Mix thoroughly. You may find it easiest to use your hands to ensure all cereal is coated and the mixture comes together properly.
- Shape the mixture into bite-sized balls. Using a medium cookie scoop can help achieve consistent sizes.
- Store in an airtight container in the refrigerator to firm up and keep fresh.
Kitchen Tools You Might Need
- Parchment Paper
- Large Mixing Bowl
- Cookie Scoop – Medium
Nutrition Information (Approximate per serving)
| Nutrition Facts | |
|---|---|
| Amount Per Serving | |
| Calories 98 | Calories from Fat 54 |
| % Daily Value* | |
| Fat 6g | 9% |
| Saturated Fat 2g | 13% |
| Cholesterol 2mg | 1% |
| Sodium 70mg | 3% |
| Potassium 70mg | 2% |
| Carbohydrates 9g | 3% |
| Fiber 1g | 4% |
| Sugar 6g | 7% |
| Protein 3g | 6% |
| Vitamin A 215IU | 4% |
| Vitamin C 2mg | 2% |
| Calcium 5mg | 1% |
| Iron 1mg | 6% |
| * Percent Daily Values are based on a 2000 calorie diet. | |
Recipe originally published on October 3, 2013. Content updated and expanded on September 27, 2020.
Recipe adapted from a beloved family recipe by Mrs. Donald Harmel from North Dakota.
