Spooktacular Crazy Eye Oreo Cookies: The Ultimate Easy Halloween Treat
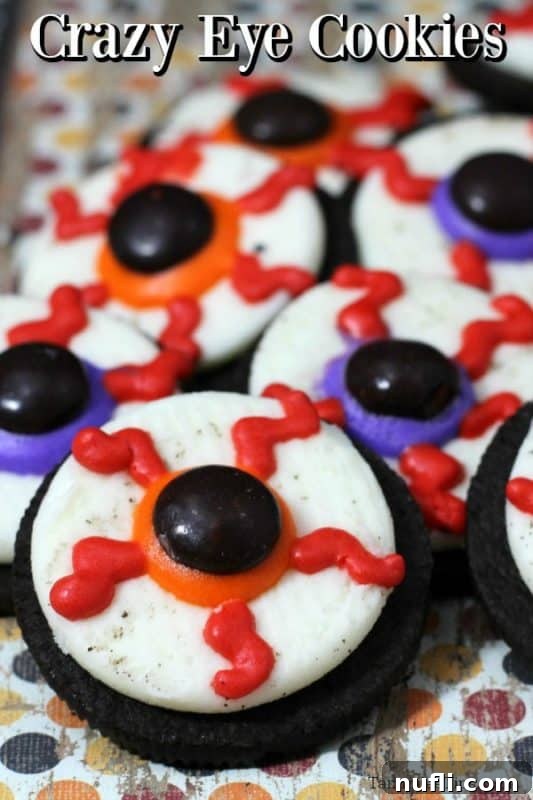
As the leaves begin to turn and a crisp chill fills the air, it can only mean one thing: Halloween is just around the corner! And what better way to celebrate this delightfully spooky season than with a batch of ridiculously fun and incredibly easy Crazy Eye Oreo Cookies? These no-bake Halloween treats are not only a feast for the eyes but also a delicious indulgence that will vanish from your party platters faster than a ghost in the night.
Whether you’re hosting a ghoulish gathering, preparing a special treat for trick-or-treaters, or simply looking for a fun kitchen activity with the kids, these Crazy Eye Cookies are an absolute must-try. They perfectly blend the spirit of Halloween—a little bit creepy, a whole lot of fun—with the irresistible taste of America’s favorite cookie. Say goodbye to complicated baking and hello to a surprisingly simple dessert that delivers maximum impact with minimal effort.

Crafting Your Crazy Eye Oreo Cookies
October officially kicks off our favorite time of year for themed recipes, and we are thrilled to kick things off with these delightful Crazy Eye Oreo Cookies. There’s something truly special about Halloween sweet treats – that magical combination of deliciousness and a hint of creepiness that makes them so uniquely festive. Plus, finding Halloween treats that are both creative and crazy easy to make is always a win in our book!
These spooky sweet treats don’t require hours of intricate work in the kitchen to achieve their impressive look. With just a few simple ingredients and a fun, straightforward process, you’ll have a batch of these eye-popping cookies ready for any Halloween party or simply as a festive snack. Get ready to impress your guests and delight your family with these unforgettable, no-bake Halloween cookies!
What You’ll Need: Simple Ingredients for Spooky Fun
Creating these eye-catching Halloween Oreo cookies is surprisingly simple, requiring only a handful of readily available ingredients. The beauty of this recipe lies in its minimalist approach, allowing the fun decoration to take center stage. Here’s what you’ll need to gather:
Cookie Base & Pupils:
- Oreo Cookies: The star of our show! A standard package of classic Oreos works perfectly. Their iconic white cream filling provides an ideal canvas for our crazy eyes. You can also experiment with different Oreo flavors if you want a unique twist, like chocolate or even seasonal Halloween-themed Oreos for an orange base.
- Chocolate M&M’s (Brown Shell): These small, round candies are perfect for creating the pupils of our crazy eyes. The brown color offers a classic eye look, but don’t hesitate to get creative with other M&M colors for truly wild and imaginative eyes!
For the Royal Icing:
Our vibrant “bloodshot” effect and colorful irises come from homemade royal icing. While it sounds fancy, it’s quite simple to prepare and offers a professional, crisp finish that dries hard. Alternatively, for an even quicker method, you can opt for pre-made icing pens.
- Egg Whites: These form the structural base of royal icing, giving it its crisp texture once dry.
- Powdered Sugar (Confectioners’ Sugar): Provides sweetness and body to the icing, essential for a smooth, pipeable consistency.
- Cream of Tartar: A crucial ingredient that helps stabilize the egg whites, giving your royal icing better volume and consistency.
- Gel Food Coloring (Orange, Purple, Red): Gel food coloring is highly recommended over liquid varieties because it provides vibrant, rich colors without thinning the icing’s consistency. The orange and purple will be for the iris, and the red for the spooky “bloodshot” veins.
Time-Saving Tip: If you’re short on time or prefer a less hands-on approach, store-bought icing pens can be a fantastic alternative to making royal icing from scratch. While the colors might not be as vivid as those achieved with gel food coloring and homemade royal icing, they offer incredible convenience, especially when little helpers are involved in the decorating process!
Essential Equipment for Effortless Decorating
Having the right tools can make all the difference in ensuring your Crazy Eye Oreo Cookies come out perfectly and make the process enjoyable. Here’s a brief list of the equipment you’ll need, along with a few tips:
- Baking Sheet: While these are no-bake cookies, a baking sheet is essential for holding your prepared Oreos while the icing dries. We recommend using baking sheets with raised sides to prevent any accidental slips and spills, keeping your kitchen mess-free.
- Parchment Paper: A true kitchen hero for easy cleanup! Lining your baking sheet with parchment paper ensures the cookies won’t stick and makes transferring them once dry incredibly simple. It also provides a clean surface for any icing drips.
- Large Mixing Bowl: A spacious bowl is crucial for comfortably mixing your royal icing. We’re particularly fond of glass batter bowls with handles, as they offer stability on the counter and make the whisking process much easier.
- Small Bowls: You’ll need several small bowls for dividing and coloring your royal icing into different vibrant shades.
- Piping Bags with Small Round Tips: These are essential for creating the precise circles for the irises and the fine lines for the bloodshot effect. If you don’t have piping tips, a small ziploc bag with a tiny corner snipped off can work in a pinch.

Tips and Tricks for Perfect Crazy Eye Cookies
While this recipe is incredibly straightforward, a few helpful tips can elevate your Crazy Eye Oreo Cookies from fun to fantastically spooky. Don’t be afraid to get creative and make these treats uniquely yours!
- Cookie Canvas Versatility: Don’t limit yourself to Oreos! This decorating technique can be beautifully adapted to other flat desserts. Consider using round sugar cookies, shortbread cookies, or even large chocolate wafers as your base. The key is a flat surface that allows the “eye” to sit prominently.
- Oreo Flavor Explorations: While classic Oreos provide a crisp white background for the eyes, feel free to experiment with different Oreo flavors. Halloween Oreo flavors often feature orange cream, which could give your eyes an even more vibrant, non-traditional base! Mint Oreos could lead to a spooky green eye, or peanut butter for a hazelnut effect.
- Pupil Alternatives: Chocolate M&M’s are excellent for pupils, but candy eyes offer an even simpler and equally effective alternative. These pre-made edible eyes are widely available during Halloween season and simply stick right onto the icing, saving you a step. You could also use small chocolate chips for a different pupil shape.
- Icing Consistency is Key: When making royal icing, pay close attention to its consistency. It should be thick enough to hold its shape when piped but still flow smoothly. If it’s too thin, add a little more powdered sugar; if it’s too thick, add a tiny drop of water at a time until it reaches the desired consistency.
- Drying Time Matters: Allow ample time for your icing to dry completely. This prevents smudging and ensures your cookies are durable for handling and stacking. Depending on humidity, this can take 30 minutes to a few hours. For best results, let them air dry overnight if possible.
- Storage: Once dried, store your Crazy Eye Oreo Cookies in an airtight container at room temperature. They will remain fresh and spooky for several days, making them perfect for preparing ahead of your Halloween festivities.
Recipe: Crazy Eye Cookies for Halloween
These simple instructions will guide you through creating your own batch of creepy-cute Crazy Eye Oreo Cookies. Get ready for some Halloween fun!
Ingredients
Cookie Ingredients:
- 1 package Oreo cookies
- 1 bag M & M’s – brown shell
Royal Icing Recipe:
- 2 Egg Whites
- 1 Cup Confectioners Powdered Sugar
- ½ Teaspoon Cream of Tartar
- Orange, purple, and red gel food coloring
Instructions
Icing Directions:
- Combine egg whites, powdered sugar, and cream of tartar in a mixing bowl. Mix on medium speed for about 4 minutes until the icing forms stiff peaks (it should hold its shape when you lift the beaters).
- If the icing isn’t stiff enough, gradually add an additional ¼ cup of powdered sugar until the desired consistency is achieved.
- Spoon the royal icing into three separate small bowls.
- In the first bowl, add several drops of orange gel food coloring. Stir well until the color is fully mixed and vibrant.
- In the second bowl, add several drops of purple gel food coloring. Stir thoroughly to achieve a consistent color.
- In the third bowl, add several drops of red gel food coloring. Mix well to create a deep red for the “bloodshot” effect.
- Carefully spoon the colored icings into separate frosting bags fitted with small round tips. This will allow for precise decoration.
Cookie Directions:
- Gently remove the top cookie wafer from each Oreo, leaving the cream filling attached to the bottom wafer.
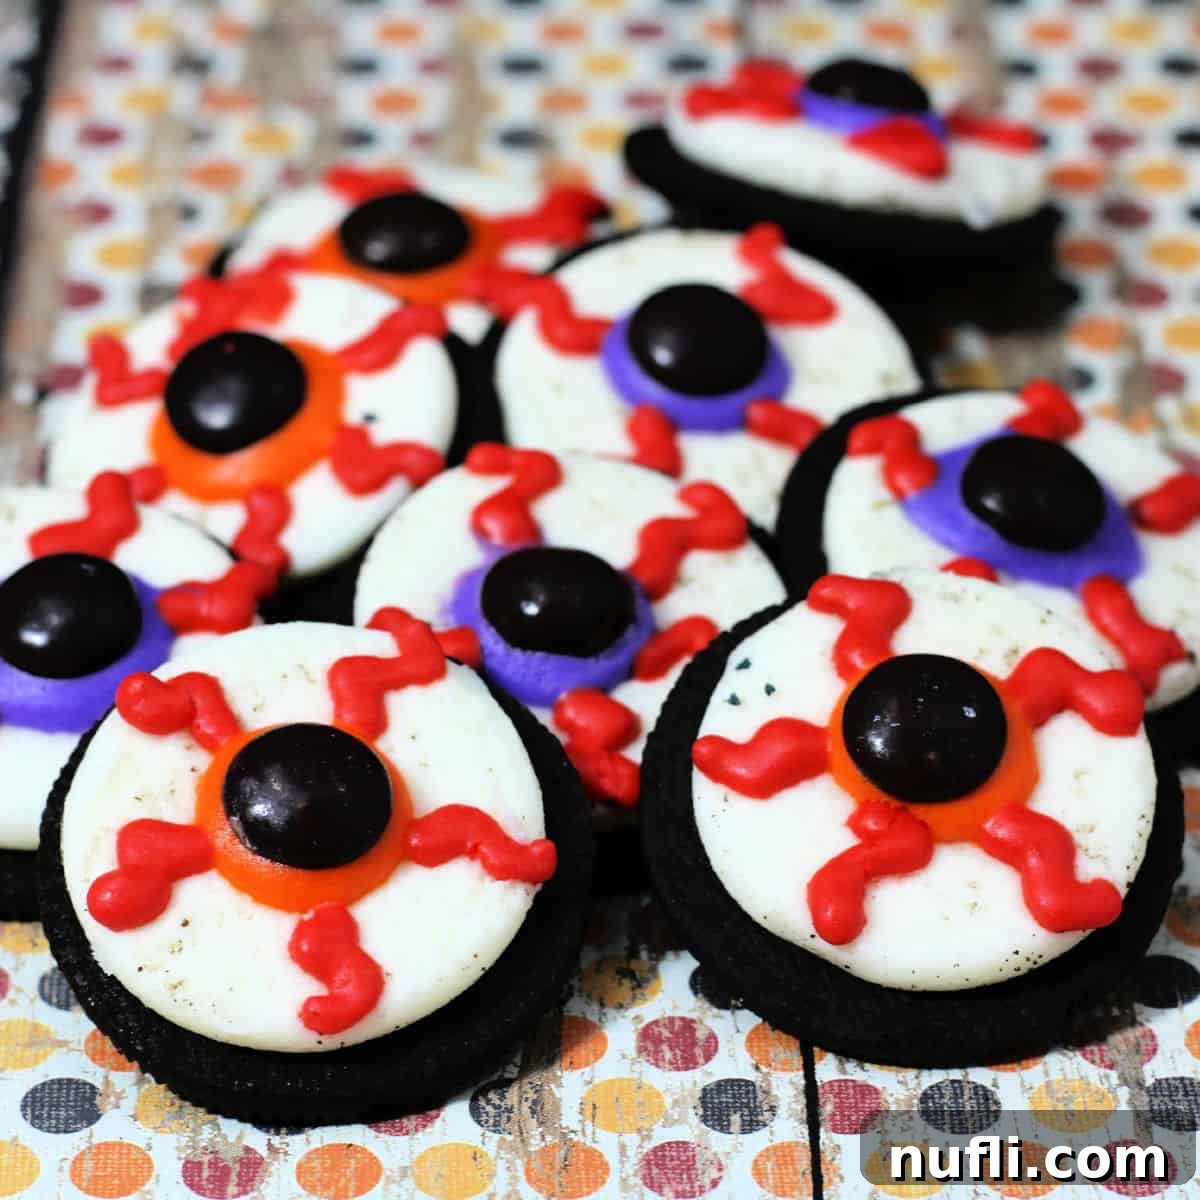
- Using the orange or purple icing bags, pipe a small circle in the center of the white cream filling on the exposed Oreo. This will form the iris of the eye.
- While the iris icing is still wet, carefully place a brown M&M in the very center of the piped circle. This will be the pupil.
- Now for the spooky part! Using the red icing bag, draw four thin, squiggly lines radiating outwards from the center of the eye (the M&M pupil) towards the edge of the cream filling. These lines will create the eerie “bloodshot” effect.
- Allow the decorated cookies to dry completely on a parchment-lined baking sheet for at least 30 minutes, or until the icing is set and hard to the touch. For best results, let them dry longer, especially in humid conditions.

Serving and Storage Suggestions
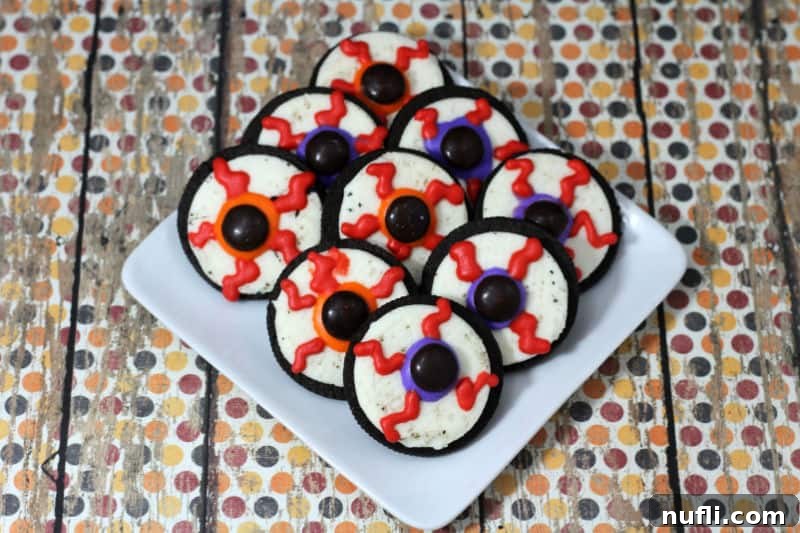
Once your Crazy Eye Oreo Cookies are completely dry, they are ready to be the star of your Halloween spread! Arrange them creatively on a platter, perhaps alongside other spooky snacks, or in a clear glass jar for a truly “eye-catching” display. These cookies are fantastic for school parties, office potlucks, or simply as a fun treat at home. Store any leftovers in an airtight container at room temperature for up to a week, though we doubt they’ll last that long!
More Great Halloween Recipes to Explore
If these Crazy Eye Oreo Cookies have sparked your Halloween culinary creativity, you’ll love exploring some of our other festive and fun recipes perfect for the season:
- Candy Corn Cocktail
- Pumpkin Angel Food Cake
- Kool Aid Pickles
- Pumpkin Rice Krispie Treats
- Frankenstein Rice Krispie Treats
- Witches Broom Pretzel Sticks
- Halloween Owl Pretzels
- Mummy Cake Pops
Don’t forget to check out all of our Halloween Recipes for endless spooky inspiration!
Looking for more culinary adventures? Explore our wide array of copycat recipes, decadent dessert recipes, and convenient CrockPot Recipes. There’s always something new and delicious to discover!
Stay connected with us for all our latest recipe posts and culinary tips. Follow Tammilee Tips on Facebook, Instagram, and Pinterest!
Recipe originally shared on October 4, 2015. Updated October 2020.
