Get ready for some spooktacular fun this Halloween with our incredibly easy-to-make White Chocolate Marshmallow Ghosts! These adorable, bite-sized treats require just three simple ingredients, making them the ultimate last-minute Halloween party favor, trick-or-treat snack, or fun activity for kids. Forget complicated recipes and long hours in the kitchen – these marshmallow ghosts come together in minutes, delivering maximum festive charm with minimal effort.
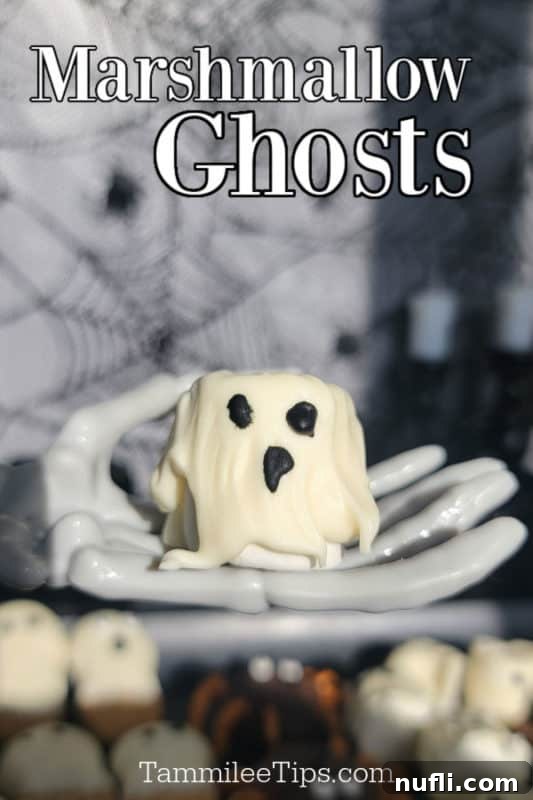
Effortless Marshmallow Ghosts: Your Go-To Halloween Treat
As Halloween draws near, the air fills with excitement for costumes, decorations, and, of course, delicious treats! It feels like just yesterday we were enjoying summer, and now the chill of autumn is setting in, bringing with it the magic of the holiday season. While some might already be counting down to Christmas, our focus right now is entirely on all things ghoulish and delightful for Halloween.
There’s nothing quite like spending a crisp fall day in a warm kitchen, whipping up festive goodies. We’ve been on a roll creating a variety of Halloween recipes, and while mummy and ghost themes are always popular, these marshmallow ghosts offer a sweet simplicity that stands out. This recipe is particularly special because it’s designed for maximum impact with minimal fuss, ensuring you can enjoy the holiday without feeling overwhelmed by elaborate preparations.
Kids absolutely adore these charming little apparitions. Their soft, fluffy texture combined with a sweet chocolate coating makes them irresistible. Plus, the interactive element of decorating the ghost faces adds an extra layer of fun that children (and adults!) will love. It’s the perfect project for a family baking session, yielding delightful results that everyone can enjoy.
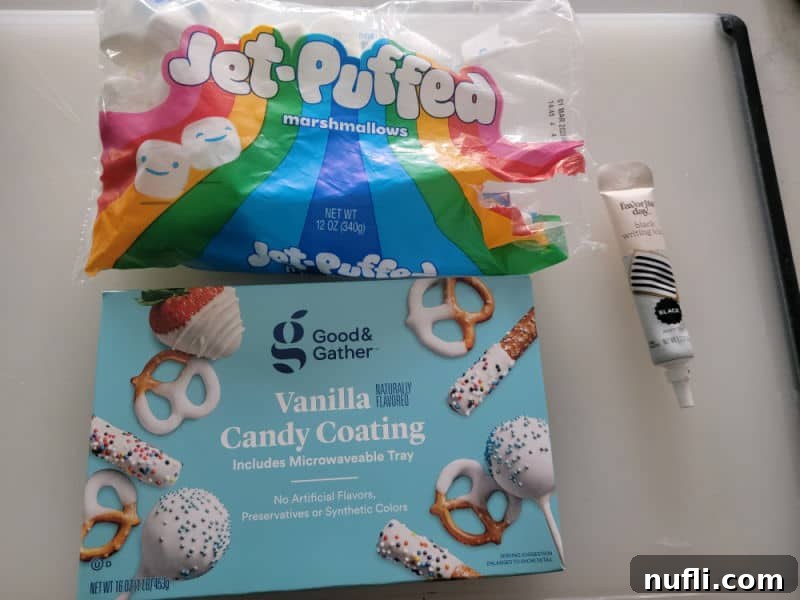
The Three Simple Ingredients You’ll Need
The beauty of these easy Halloween treats lies in their simplicity. You only need a handful of readily available ingredients to bring these friendly spirits to life. Here’s a quick rundown of what you’ll need. Specific quantities and detailed instructions are provided in the recipe card at the end of this article.
- Marshmallows: You can use standard-sized marshmallows or opt for large ones if you prefer bigger ghosts. The key is to have fresh, soft marshmallows that are easy to dip and hold their shape. While store-bought marshmallows are perfectly fine and convenient, feel free to use homemade ones if you’re feeling ambitious and have a favorite recipe!
- White Chocolate or Candy Melts: This forms the ghostly coating. You have several options here: white chocolate chips, vanilla candy melts, almond bark, or even vanilla-flavored melting wafers. Candy melts are often preferred for their smooth consistency and easy melting properties, which result in a beautiful, even coating without the need for tempering. However, good quality white chocolate works just as well.
- Black Icing Pen: This is your secret weapon for giving your ghosts their playful or spooky expressions! A black gel icing pen allows for precise drawing of eyes and mouths. If you don’t have an icing pen, don’t worry! You can use mini chocolate chips for eyes, or even small candy eyeballs for a more cartoonish look. A piping bag with a very small round tip filled with melted dark chocolate or black icing can also achieve the desired effect.
Essential Equipment for Your Marshmallow Ghost Project
Having the right tools can make all the difference, even for a simple recipe like this. While some items are indispensable, others have easy substitutes, ensuring you can still create these delightful treats with what you have on hand.
- Candy Dippers: These specialized tools are incredibly helpful for dipping marshmallows cleanly into melted chocolate and removing them without excess drips. Their design allows for easy handling and ensures a smooth, even coating. If you don’t have candy dippers, a simple fork or a skewer can work as an alternative, though you might need to be a bit more careful to achieve a neat finish.
- Large Mixing Bowl: A microwave-safe bowl is essential for melting your white chocolate or candy melts. We particularly love using a glass batter bowl with a handle, as it makes stirring easy and keeps the bowl stable on the counter while you work. Ensure the bowl is deep enough to fully submerge a marshmallow.
- Baking Sheets: These are crucial for setting your dipped marshmallows. Opt for cookie sheets with raised sides to prevent the ghosts from rolling off. You’ll want enough space to lay out all your marshmallows without them touching.
- Parchment Paper or Wax Paper: Lining your baking sheets with parchment paper or wax paper is key for easy cleanup and preventing the marshmallows from sticking as the chocolate sets. It makes removing the finished ghosts a breeze and keeps your workspace tidy.
If you’re embarking on the ambitious task of making marshmallows from scratch, you’ll also need additional equipment like a candy thermometer, a stand mixer with a whisk attachment, and various bowls for your gelatin mixture. However, for this quick and easy recipe, store-bought marshmallows keep things simple and efficient.
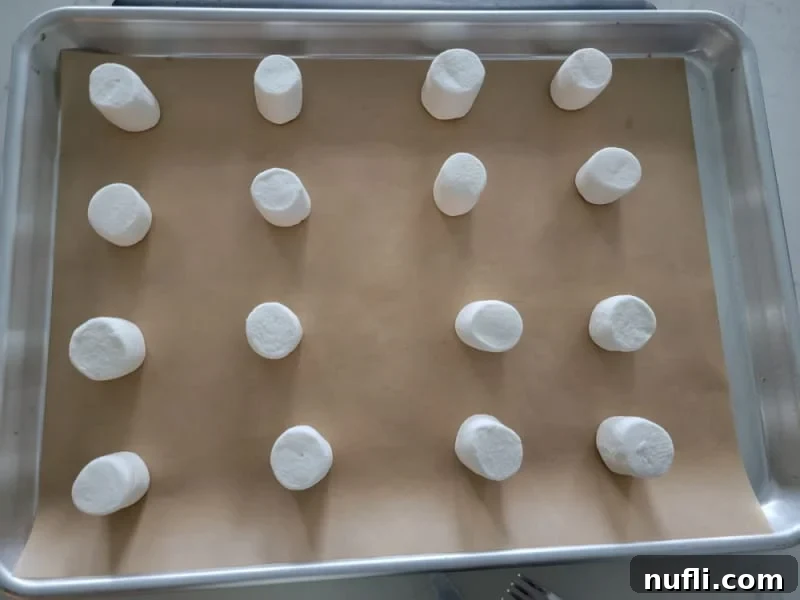
How to Craft Your Spooky Sweet Marshmallow Ghosts
Creating these delightful spooky desserts is incredibly straightforward. Follow these steps for perfect results every time. A complete, printable recipe card with specific measurements is available at the bottom of this post.
Step 1: Prepare Your Workspace
Before you begin melting chocolate, gather all your ingredients and equipment. This makes the process much smoother. Line a baking sheet (or several, depending on how many ghosts you’re making) with parchment paper or wax paper. Arrange your marshmallows on the lined baking sheet, spacing them out so they don’t touch. This helps you visualize how many ghosts you can make and ensures they have enough room to set without sticking together.
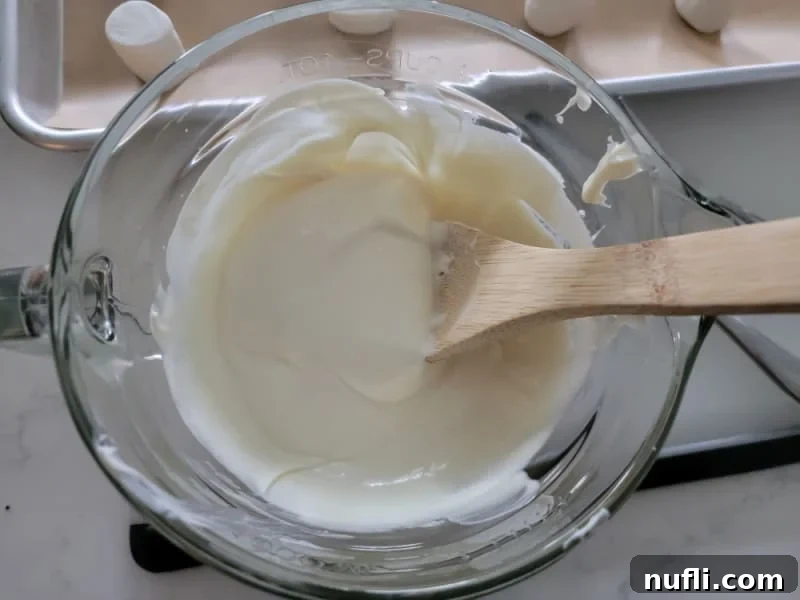
Step 2: Melt the Chocolate Coating
Place your white chocolate, candy melts, or almond bark in a microwave-safe bowl. Heat in the microwave in 30-second intervals, stirring thoroughly after each interval. This gradual melting prevents the chocolate from scorching or seizing. Continue until the chocolate is completely smooth and creamy, with no lumps remaining. Alternatively, you can use a double boiler method for a more controlled melt, gently heating the chocolate over simmering water until fluid.
Step 3: Dip and Shape Your Ghosts
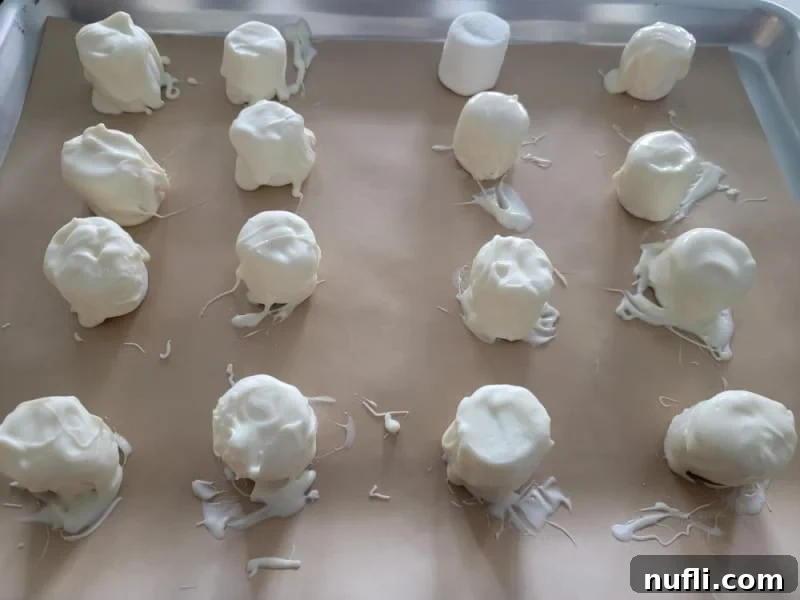
Using a candy dipper, fork, or skewer, carefully dip each marshmallow into the melted white chocolate, ensuring it’s fully coated. Lift the marshmallow out, allowing any excess chocolate to drip back into the bowl. You can gently tap the dipper or fork against the edge of the bowl to remove extra coating. For that classic ghost shape, try to create a slight “drip” at the bottom as you place it onto the parchment paper. If you feel the coating isn’t thick enough, you can spoon a little more melted chocolate over the top and gently maneuver it around the marshmallow to achieve the desired effect. Place the coated marshmallows back on your prepared baking sheet, leaving some space between each.
Step 4: Decorate Your Ghoulish Creations
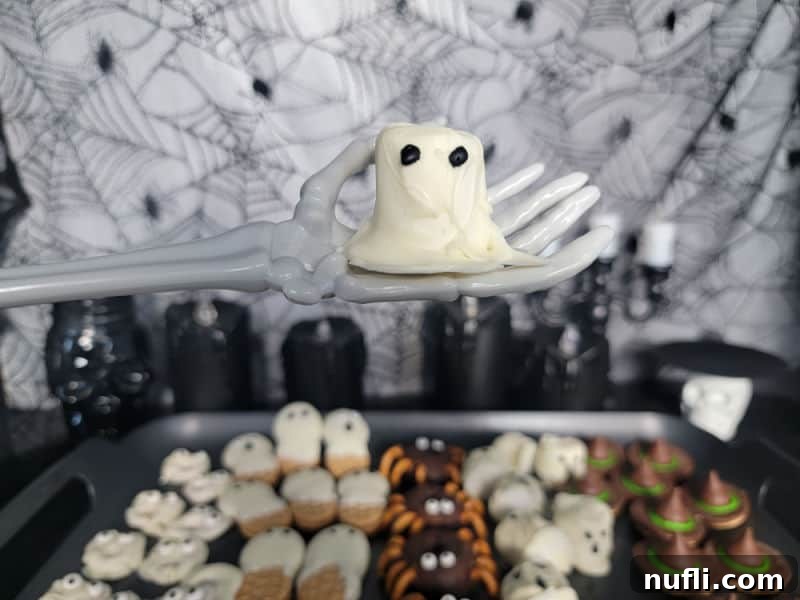
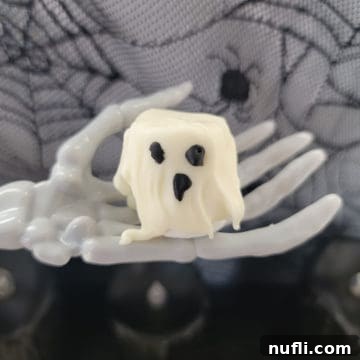
Allow the chocolate coating to set slightly – it doesn’t need to be fully hardened, just firm enough that it won’t smudge. Once set, use your black icing pen (or mini chocolate chips, candy eyeballs, or piping bag) to draw on the ghost faces. You can create various expressions: simple dots for eyes, an oval for a mouth, or more elaborate spooky designs. Let your creativity guide you! Once decorated, allow the marshmallow ghosts to set completely at room temperature or in the refrigerator for a quicker set, especially if your kitchen is warm.
Preparation and Storage Tips for Your Marshmallow Ghosts
One of the best features of these delightful treats is how easy they are to prepare ahead of time and store.
- Make Ahead: Absolutely! These Marshmallow Ghosts can be made a day or two in advance, which is perfect for party planning. Store them in an airtight container in a cool, dry place away from direct sunlight.
- Storage: Any leftover ghosts (if there are any!) should be stored in an airtight container at room temperature. They tend to last well for several days, maintaining their delicious flavor and texture. Avoid refrigerating them for too long, as it can sometimes make the chocolate “sweat” or dull its sheen.
Creative Recipe Variations to Explore
While the classic white chocolate ghost is charming, there are many ways to customize these treats to suit your taste or theme!
- Color Them Up: Don’t limit yourself to white! Use different colored candy melts (orange, green, purple) to create a variety of monster or goblin marshmallows. Think about a Frankenstein’s monster green or a vibrant orange pumpkin face!
- Homemade Goodness: For those who love to bake from scratch, these can certainly be made with homemade marshmallows. The soft, fluffy texture of homemade marshmallows takes these ghosts to an even more gourmet level.
- Dietary Adaptations:
- Vegetarian Option: Simply switch to vegetarian marshmallows, which are typically made without gelatin.
- Vegan Option: Look for vegan marshmallows (brands like Dandies are popular) and ensure your white chocolate or candy melts are also vegan-friendly.
- Gluten-Free: Many commercially available marshmallows are naturally gluten-free. Always double-check ingredient labels to confirm, as formulations can vary.
- Scaling the Recipe:
- Smaller Servings: Easily adapt the recipe to make just a few ghost marshmallows. Simply melt a smaller amount of chocolate coating and dip as many marshmallows as desired.
- Larger Groups: This recipe doubles or triples effortlessly for parties or events. Just ensure you have enough parchment-lined baking sheets to allow all your adorable ghosts to set properly without overcrowding.
Expert Tips for Perfectly Spooky Marshmallow Ghosts
Achieving perfectly coated and adorable marshmallow ghosts is simple with a few insider tricks:
- Smooth Chocolate is Key: Whether you’re using white chocolate melting wafers or candy melts, ensure your chocolate is completely smooth and fluid. If it’s too thick, it will be hard to dip the marshmallows evenly, resulting in a clumpy coating.
- Thinning the Chocolate: If your melted chocolate seems too thick, you can add a tiny amount of coconut oil (about ½ to 1 teaspoon per cup of chocolate) and stir until it reaches a smoother, more dip-friendly consistency. Avoid adding water, as this will cause the chocolate to seize and become unusable.
- Creative Presentation: These DIY Halloween treats aren’t just for eating on their own! They look absolutely fantastic placed on top of chocolate brownies, cupcakes, or even as edible toppers for a Halloween-themed cake. Arrange them on a platter with other colorful candies for a vibrant display.
- Don’t Forget the Paper: Parchment paper or wax paper is truly your best friend for this recipe. It prevents sticking and makes cleanup a breeze. If you find yourself without any, you can place the dipped marshmallows on a cooling rack set over a baking sheet to catch any drips, but be aware they might stick slightly to the rack.
- Time-Saving Treat: The total preparation and setting time for these marshmallow ghosts is impressively quick – often less than 10 minutes active time. This makes them ideal for busy schedules or spontaneous Halloween fun.
- Nutrition Information: Keep in mind that nutritional values, including calories, fat, carbohydrates, and protein, will vary depending on the specific brands and types of marshmallows and chocolate coating you use.
What to Serve with Your Marshmallow Ghosts
These versatile marshmallow ghosts can be enjoyed on their own, but they also pair wonderfully with other Halloween treats and drinks.
Perfect Pairings:
- Drinks: Complement their sweetness with warm beverages like Hot Chocolate or a festive Pumpkin Spice Latte. For something cooler, try a vibrant Kool-Aid Slushie or a creamy Oreo Milkshake.
- Main Dishes/Entrées: Serve them alongside playful Halloween meals like Mummy Quesadillas or spooky Halloween Pasta for a complete themed menu.
- Snacks: Create a full spread of Halloween goodies with Monster Munch, a classic Candy Corn and Peanuts mix, or unique Kool-Aid Pickles and Salted Caramel Popcorn. And, of course, a generous assortment of other Halloween candies!
When to Enjoy These Adorable Ghostly Bites
These white chocolate marshmallow ghosts are perfect for nearly any autumn or Halloween occasion:
- Halloween Parties (for both kids and adults!)
- School parties and classroom treats
- A sweet, unexpected treat after dinner
- Handing out to trick-or-treaters (if individually wrapped)
- Family movie nights with a spooky theme
- Fall picnics or gatherings
- Office potlucks and celebrations
- As decorative and edible toppers for cupcakes or Halloween cakes
Let’s be honest, these charming ghost marshmallows will be a hit with everyone, from the youngest trick-or-treaters to the most seasoned Halloween partygoers!
More Fantastic Halloween Recipes to Try
If you loved making these marshmallow ghosts, be sure to explore some of our other creative and fun Halloween recipes:
- Ghost Pretzels: Another quick and easy 3-ingredient treat featuring a salty-sweet combination.
- Strawberry Ghosts: Healthy and delicious, these fruit-based ghosts are a refreshing alternative.
- Pretzel Skeleton Bones: Salty pretzel sticks dipped in white chocolate, perfect for building edible skeletons.
- Candy Corn Jello Shots: A fun, adult-friendly treat for your Halloween festivities.
Find all these and more Great Halloween Recipes on our site! And if you’re always on the hunt for delicious dishes, explore our copycat recipes, a wide array of dessert recipes, and our convenient Crock Pot Recipes for everyday cooking inspiration.
Stay connected with Tammilee Tips on MSN, Facebook, Instagram, Pinterest, and Twitter for all our latest recipe posts and culinary adventures!
Marshmallow Ghosts
Print
Rate
Ingredients
- 16 Marshmallows regular or large
- White chocolate candy melt, almond bark, or vanilla bark
- 1 Black icing pen
Instructions
- Gather all ingredients and line a baking sheet with parchment paper. Arrange marshmallows on the pan, ensuring they are spread out.
- Melt white chocolate/candy melts in a microwave-safe bowl in 30-second intervals, stirring thoroughly after each, until completely smooth.
- Dip each marshmallow into the melted chocolate, coating it entirely. Allow excess chocolate to drip off, then place on the parchment paper. If needed, spoon extra chocolate over the marshmallow to create a full ghost covering.
- Let the chocolate coating set. Once firm, use the black icing pen to draw eyes and mouths onto your marshmallow ghosts.
Kitchen Tools
- Large Mixing Bowl (microwave-safe)
- Parchment Paper or Wax Paper
- Baking Sheets (with sides)
- Candy Dippers (or fork/skewer)
