Prepare to discover what might just be the world’s most effortlessly delightful fudge recipe! This 2-ingredient cherry fudge is not only incredibly simple to make but also astonishingly quick to come together. For years, making homemade fudge felt like a special occasion endeavor, something reserved for holidays or dedicated baking days. The process, while rewarding, often seemed more involved than my everyday schedule allowed. However, with this revolutionary recipe, that perception has completely transformed. Now, the joy of luscious, homemade fudge is accessible anytime, turning a once-in-a-while treat into a potential spur-of-the-moment indulgence. Get ready to experience the pure magic of minimal effort yielding maximum deliciousness.

Unbelievably Easy 2-Ingredient Cherry Fudge: A Sweet Revelation
The secret to this heavenly treat lies in its astonishing simplicity: just two ingredients are all you need to create a batch of rich, creamy, and wonderfully cherry-flavored fudge. This isn’t just a recipe; it’s a sweet revelation for anyone who loves the idea of homemade treats but is short on time or prefers straightforward methods. The ease of preparation makes it almost “dangerous” – you might find yourself whipping up batches far more often than you ever imagined!
This cherry fudge recipe is a versatile champion, perfect for a multitude of occasions. Craving a quick afternoon snack to satisfy your sweet tooth? This is your go-to. Need an elegant yet simple dessert after dinner? Look no further. Planning for special holidays like Valentine’s Day, Christmas, or even a casual gathering? Its vibrant color and delightful flavor make it an instant hit. It’s truly a sweet treat for any moment you desire a burst of cherry goodness.

The Magical Duo: Just Two Ingredients!
It sounds almost too good to be true, but this delectable cherry fudge genuinely requires only two core ingredients. Their combination, when gently melted and mixed, transforms into a smooth, rich, and perfectly set fudge that will impress everyone who tries it.
Ingredients:
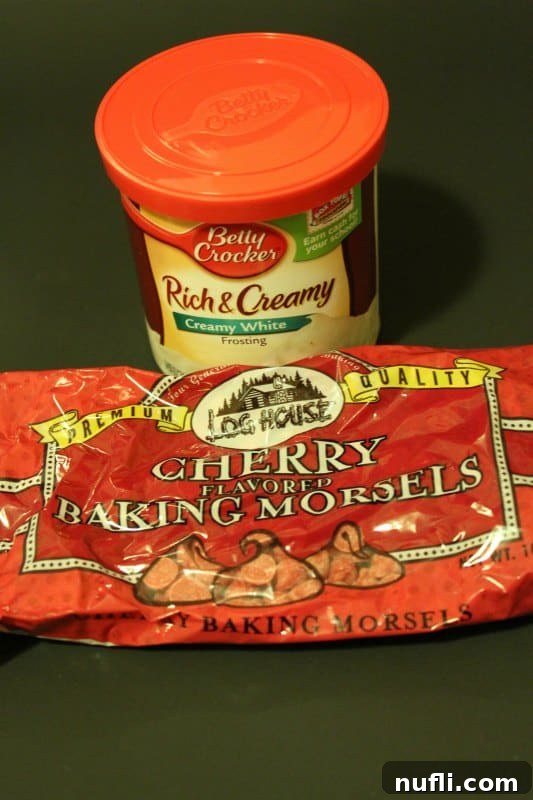
- 1 package Cherry Flavored Chips (typically 10-12 ounces)
- 1 container white icing (vanilla or cream cheese frosting, approximately 12-16 ounces)
Choosing Your Ingredients for Optimal Flavor
The beauty of this recipe lies in its adaptability, especially when it comes to selecting your ingredients. For the cherry flavored chips, various brands offer these delightful baking morsels. Look for them in the baking aisle of your local grocery store, often near chocolate chips or other flavored baking melts. The quality of these chips will directly influence the intensity of your cherry flavor, so don’t hesitate to choose a brand you trust or one that specifies a rich cherry taste. These chips provide both the vibrant flavor and the structure needed for the fudge to set beautifully.
As for the white icing, a standard container of vanilla or cream cheese frosting from the baking aisle works perfectly. The pre-made frosting adds a creamy texture and sweetness, eliminating the need for butter, sugar, or lengthy cooking. Vanilla frosting provides a neutral base that allows the cherry flavor to shine, while a cream cheese frosting can add a subtle tanginess that complements the fruit notes wonderfully. Ensure the icing is at room temperature for easier mixing, though a few seconds in the microwave can also help soften it if needed.
Essential Equipment for Your Fudge Making Adventure
While the ingredients are simple, having the right tools can make the process even smoother and more enjoyable. These aren’t necessarily specialized gadgets, but rather common kitchen items that will ensure your cherry fudge comes out perfectly every time.
- Large Microwave-Safe Mixing Bowl: We are huge proponents of a sturdy glass batter bowl, especially one with a handle. Glass is excellent for microwave use as it heats evenly, and a handle provides a secure grip, preventing slips and spills while you stir the warm, gooey mixture. Its size is crucial for preventing overflow as the chips melt and combine with the frosting.
- Microwave Silicone Cover: This tool is an absolute game-changer. Anyone who has ever melted butter or chocolate in a microwave knows the struggle of unexpected splatters and messy cleanups. A silicone lid cover effectively contains any potential messes, keeping your microwave pristine and saving you valuable cleaning time. It’s an indispensable item for any microwave-assisted baking.
- Parchment Paper: A true friend to any baker, parchment paper is essential for this recipe. Lining your pan with parchment paper ensures that your fudge won’t stick, making removal incredibly easy. Beyond that, it simplifies cleanup to a remarkable degree and allows for neat, effortless cutting and serving of your finished fudge.
- 8×8 Inch Baking Pan: This standard square pan size is ideal for achieving the perfect thickness for your fudge. It provides enough surface area for the mixture to set evenly while keeping the depth suitable for cutting into bite-sized pieces. If you don’t have an 8×8, a similar-sized loaf pan or even a slightly larger pan will work, though your fudge might be a bit thinner.
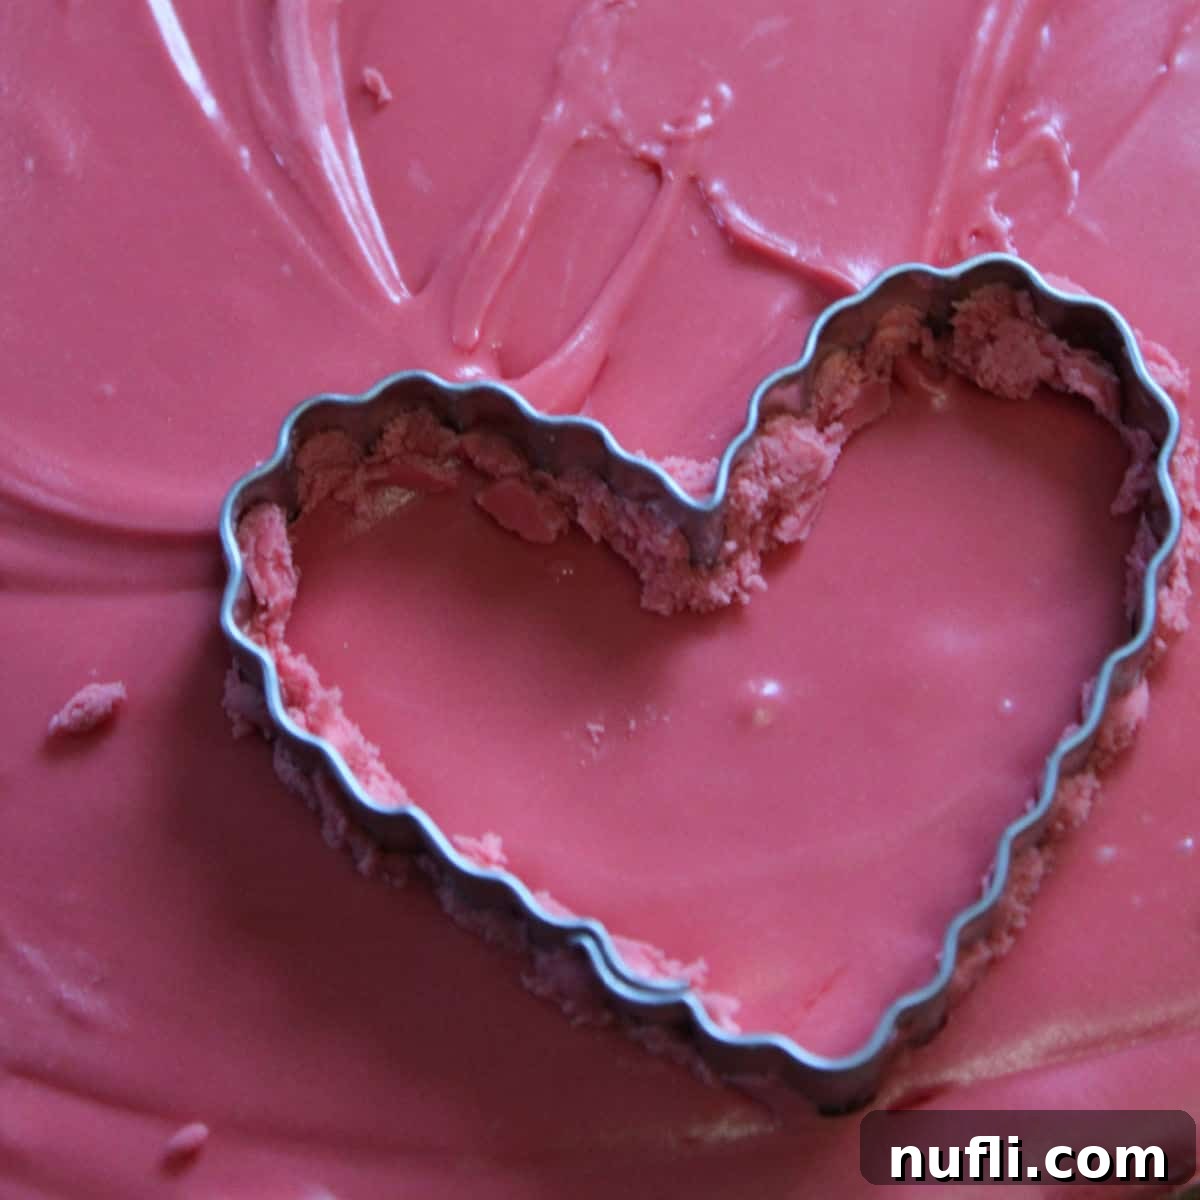
- Cookie Cutters (Optional): While not strictly necessary for making fudge, cookie cutters, like the Wilton From The Heart Nesting Cookie Cutter Set, add a delightful touch, especially for holidays. Cutting the fudge into festive shapes, such as hearts for Valentine’s Day, transforms a simple treat into a charming gift or a decorative dessert centerpiece.
More Easy Dessert Recipes to Explore
If you’re a fan of simple yet incredibly delicious desserts, you’re in for a treat! Our collection features a variety of recipes that require minimal ingredients and effort, delivering maximum flavor. Perfect for those busy days or when you just want a quick sweet fix.
- 3-Ingredient Peanut Butter Cookies: Classic comfort in every bite, unbelievably easy.
- Super Easy Crock-Pot Apple Spice Dump Cake: Warm, spiced, and practically hands-off.
- 3-Ingredient Nutella Cookies: Rich, chocolate-hazelnut goodness in minutes.
- 3-Ingredient Pumpkin Spice Muffins: A seasonal delight that’s perfect for fall.
- 2-Ingredient Nutella Fudge: Another incredible 2-ingredient fudge option for chocolate lovers.
We genuinely hope you enjoy this incredibly easy Cherry Fudge Recipe as much as we do! It’s a testament to how simple ingredients can create something truly special and satisfying.
Do you love discovering new recipes? Be sure to explore our extensive collection, including delightful copycat recipes that bring your restaurant favorites home, a wide array of dessert recipes for every craving, and our incredibly convenient Crock-Pot Recipes for effortless meals.
Stay connected with Tammilee Tips for all our latest recipe posts and culinary adventures! Follow us on Facebook, Instagram, and Pinterest.

Cherry Fudge
5 minutes
1 minute
6 minutes
16
178
kcal
Tammilee Tips
Ingredients
-
10
Ounce
Cherry Flavored Chips
-
12
Ounce
White icing
Instructions
- Combine the Cherry Flavored Chips and White Icing in your microwave-safe bowl. Stir them lightly to begin mixing.
- Microwave the mixture for 30 seconds. Carefully remove the bowl (it may be hot) and stir together thoroughly with a spatula until the chips start to melt and combine with the icing.
- Return the bowl to the microwave for another 30 seconds. After heating, stir vigorously until the mixture is completely smooth and all lumps from the chips have dissolved into the icing, creating a uniform, glossy fudge batter.
- Ensure the cherry chips and icing have fully combined to form a nice, smooth texture with absolutely no lumps remaining. The consistency should be thick but pourable.
- Pour the warm fudge mixture into your parchment-lined 8×8 inch pan. Use your spatula to spread it evenly into the corners. Place the pan in the refrigerator for at least a few hours, or until the fudge is firm enough to cut.
Kitchen Tools
- 8X8 Pan
- Parchment Paper
- Large Microwave-Safe Mixing Bowl
- Microwave Silicone Cover
- Spatula
Nutrition
Calories from Fat 72
Love this recipe?
Follow @TammileeTIps on Pinterest
Tried this recipe?
Mention @TammileeTipsLife when you share a photo!
Tips for Perfect Cherry Fudge Every Time
While this recipe is incredibly straightforward, a few tips can help ensure your fudge turns out perfectly and enhance your overall experience:
- Don’t Overheat: Microwaves vary in power. Start with 30-second intervals and stir well between each. You want the chips to melt into a smooth consistency, not to burn or seize. If the mixture seems too thick, microwave for an additional 10-15 seconds, but avoid prolonged heating.
- Stir Vigorously: Proper stirring is key to achieving that smooth, lump-free texture. Ensure all the melted chips and frosting are thoroughly combined until the mixture looks uniform and glossy.
- Chilling is Crucial: Patience is a virtue here! While it’s tempting to cut into the fudge right away, chilling it for at least 2-3 hours (or overnight for best results) is essential for it to firm up properly and achieve that classic fudge texture. Placing it in the freezer for about 30-60 minutes can speed up the process if you’re in a hurry, but watch it closely.
- Storage: Store your homemade cherry fudge in an airtight container at room temperature for up to a week, or in the refrigerator for up to two weeks. If stored in the fridge, let it sit out for a few minutes before serving to soften slightly.
- Serving Suggestions: This fudge is delicious on its own, but you can also serve it alongside a scoop of vanilla ice cream, as a topping for brownies, or chopped into pieces and folded into a milkshake for an extra special treat.
Flavor Variations to Try
The 2-ingredient fudge method is a fantastic base for countless flavor combinations. Once you’ve mastered the cherry version, consider experimenting with these delightful variations:
- Chocolate Fudge: Use chocolate chips (milk, semi-sweet, or dark) with vanilla or chocolate frosting.
- Peanut Butter Fudge: Combine peanut butter chips with vanilla frosting for a classic combo.
- White Chocolate Raspberry Fudge: Use white chocolate chips with a raspberry-flavored frosting or a swirl of raspberry jam added after melting.
- Mint Chocolate Fudge: Pair chocolate chips with mint-flavored frosting for a refreshing twist.
- Seasonal Swirls: Add a few drops of food coloring to your white frosting before mixing for holiday-themed fudge (e.g., green for mint, red for strawberry).
Frequently Asked Questions About 2-Ingredient Fudge
Here are some common questions you might have about making this super easy cherry fudge:
Q: Can I use different flavored chips?
A: Absolutely! This recipe is incredibly versatile. You can swap cherry chips for chocolate, butterscotch, peanut butter, or white chocolate chips to create different fudge flavors. The principle remains the same.
Q: What kind of white icing works best?
A: A standard canned vanilla or cream cheese frosting works perfectly. Avoid very thin or watery frostings. The thicker, creamier varieties tend to yield the best texture.
Q: My fudge is too soft, what went wrong?
A: If your fudge is too soft, it likely didn’t chill long enough, or perhaps the ratio of chips to frosting was slightly off (too much frosting). Ensure you measure your ingredients accurately and allow ample chilling time. You can try returning it to the fridge or freezer for a longer period.
Q: Can I make this without a microwave?
A: Yes, you can. You can melt the chips and icing together in a double boiler or a heatproof bowl set over a pot of simmering water. Stir constantly until smooth, then proceed with the recipe as directed. This method offers more control over the melting process.
Q: How long does this fudge last?
A: When stored in an airtight container, this fudge can last about a week at room temperature or up to two weeks in the refrigerator. For longer storage, you can freeze it for up to 2-3 months.
Q: Can I add nuts or sprinkles?
A: Definitely! Once your fudge mixture is smooth, feel free to stir in chopped nuts, sprinkles, dried fruit, or mini marshmallows before pouring it into the pan. This adds both texture and extra flavor.
Q: Is this recipe gluten-free?
A: Both cherry-flavored chips and most canned white icings are typically gluten-free, but it’s always best to check the ingredient labels of your specific brands to confirm if you or your guests have gluten sensitivities or allergies.
Enjoy the sweet satisfaction of creating this incredibly simple and delicious cherry fudge. It’s truly a game-changer for homemade treats!
