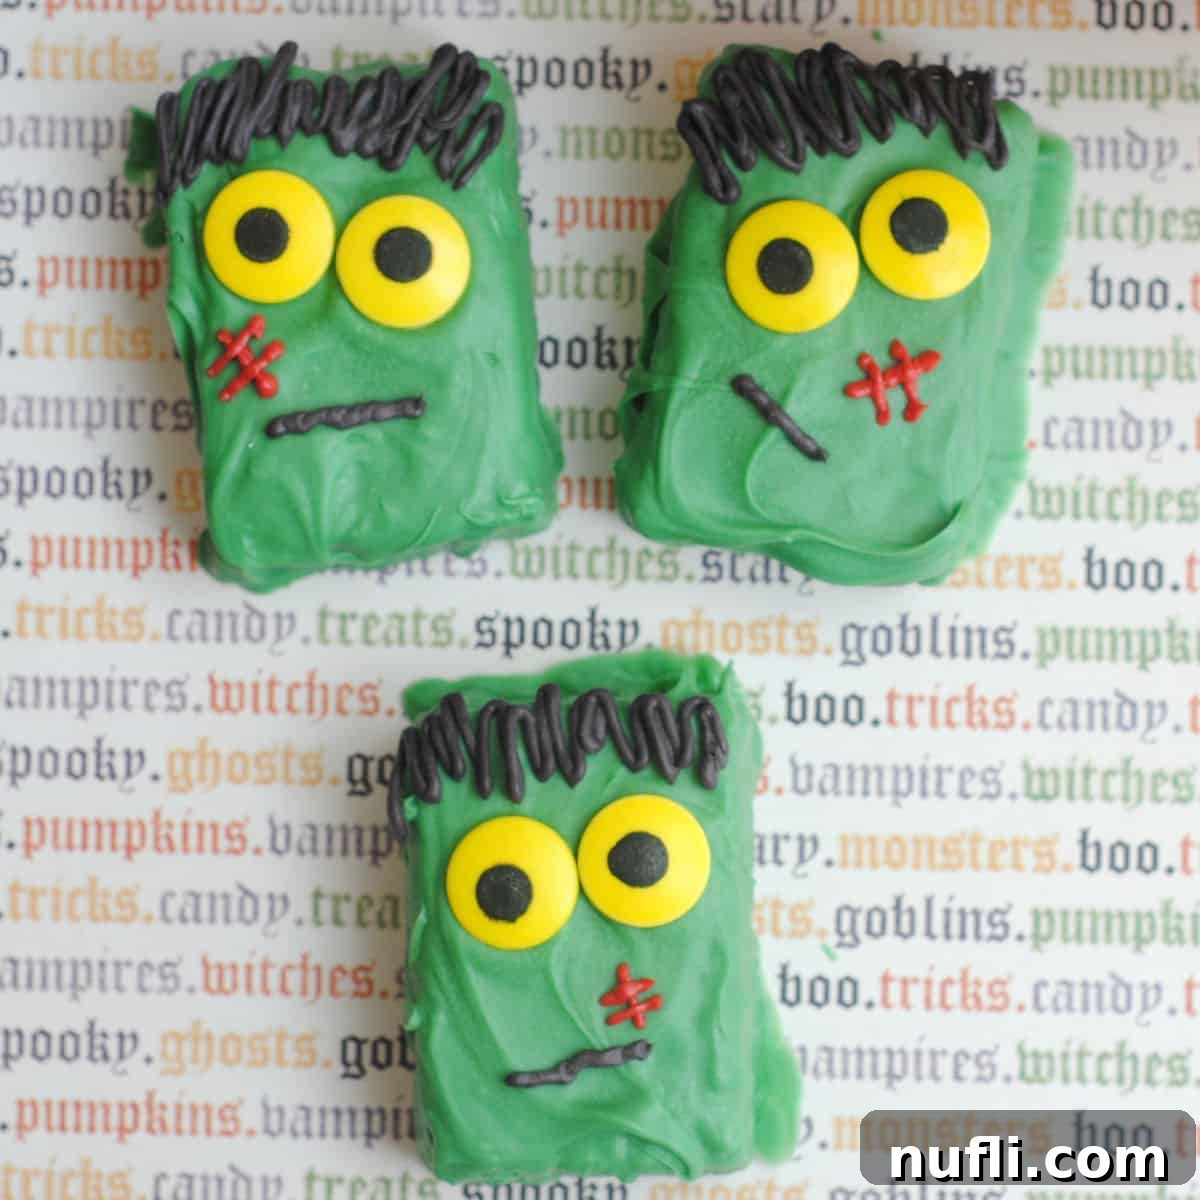
Get ready to unleash your inner mad scientist with these incredibly easy and delightfully spooky Frankenstein Rice Krispie Treats! Perfect for any Halloween gathering, these ghoulish goodies look incredibly impressive without demanding hours of your precious time. Whether you’re whipping up a batch for a school party, a festive family dinner, or a full-blown haunted bash, these treats are guaranteed to be a monstrous hit. Dive into the spirit of the season with a simple recipe that combines classic crispy cereal squares with vibrant candy melts and fun Halloween embellishments, transforming them into adorable, edible monsters that everyone will love.
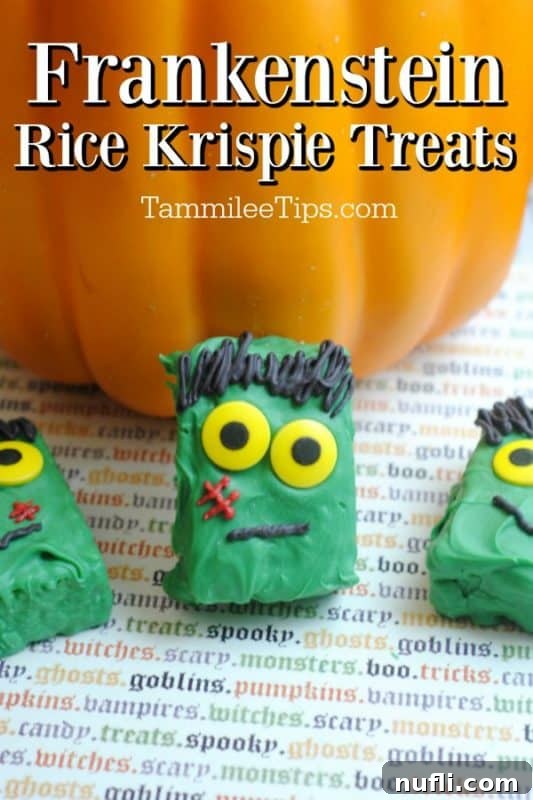
Unleash the Fun: Easy Frankenstein Rice Krispie Treats for Halloween
As the leaves begin to turn and a crisp chill fills the air, it can only mean one thing: Halloween is just around the corner! It often feels like the spooky season sneaks up on us, suddenly appearing on the calendar when we least expect it. If you’re anything like us, you might find yourself scrambling for quick, fun, and easy Halloween treat ideas that don’t require an elaborate baking marathon. Fear not, fellow Halloween enthusiasts, because we have the perfect solution for you: these unbelievably simple and utterly charming Frankenstein Rice Krispie Treats!
There are days when making everything from scratch just isn’t feasible, and that’s perfectly okay! The true magic of the holidays often lies in the joy of sharing and the spirit of the season, not necessarily in culinary perfection. These Frankenstein Krispie treats embody that spirit beautifully. They are incredibly cute, require minimal effort, and come together in a flash, making them a total win-win for busy schedules and eager partygoers alike. After a few years where large gatherings and festive celebrations felt out of reach, we are all about diving headfirst into every holiday this year. We’re thrilled to reconnect with friends, share laughter, and create new memories, especially when it involves delicious, creepy treats, epic drinks, and ghoulish delights!
Why Frankenstein Rice Krispie Treats Are a Must-Make This Halloween
What makes these Frankenstein Rice Krispie Treats so special? It’s their irresistible combination of ease, visual appeal, and nostalgic comfort. Rice Krispie treats are a beloved classic for a reason – their chewy, crispy texture and sweet flavor are universally adored. By adding a simple decorative twist, you can transform these everyday snacks into festive Halloween characters that are sure to draw smiles and compliments. They’re not just treats; they’re conversation starters!
The beauty of this recipe lies in its simplicity. You don’t need to be a master baker or possess intricate decorating skills to bring these little monsters to life. A few basic ingredients, a microwave, and a steady hand are all it takes. This makes them an ideal project for involving kids in the kitchen, offering a fun and safe way to get them excited about Halloween preparations. Imagine their delight as they help dip the treats, place the candy eyes, and draw on funny monster faces! It’s a fantastic way to create lasting holiday memories.
Gathering Your Simple Ingredients for Monsterpiece Treats
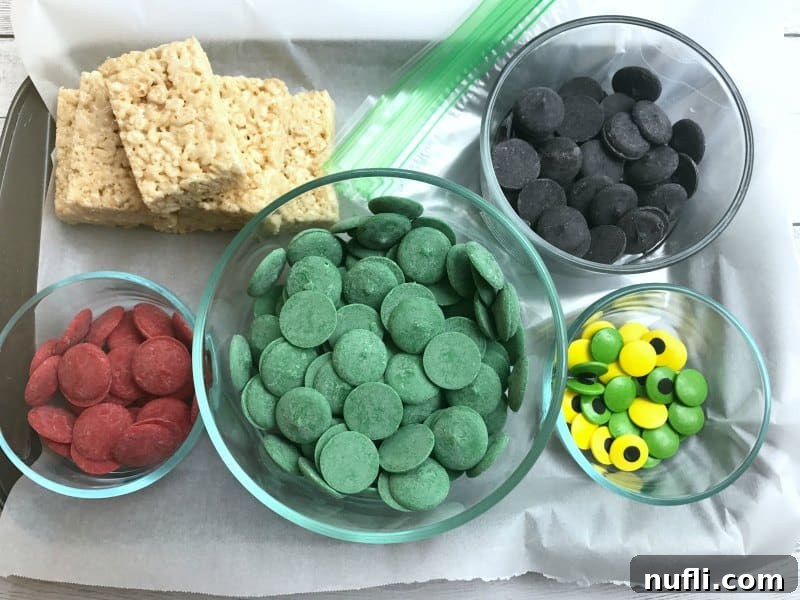
One of the biggest advantages of this recipe is the minimal and easily accessible ingredient list. You won’t need to hunt down obscure items or spend a fortune. Everything you need can be found at your local grocery store or online, making prep a breeze. We’re big fans of using pre-made Rice Krispie Treats for ultimate convenience, but if you prefer to make them from scratch, our best Rice Krispie Treats recipe is always an option!
Ingredients:
- 8 Kellogg’s Rice Krispie Treats (pre-made for ease, or homemade)
- 24 Ounce Wilton green candy melts
- 12 Ounce Wilton black candy melts
- 12 Ounce Wilton red candy melts
- Halloween candy eyes
- 2 small sandwich baggies
- Kitchen scissors
Ingredient Notes and Tips:
- Rice Krispie Treats: Using pre-packaged treats saves a ton of time and ensures consistent size and shape. If you opt for homemade, make sure they are fully cooled and firm before decorating.
- Candy Melts: Wilton candy melts are fantastic for their vibrant colors and smooth melting consistency. Green is crucial for Frankenstein’s signature look! Black is perfect for hair and mouths, while red adds a touch of gruesome detail with a scar. You can find these at craft stores, party supply stores, or easily online.
- Candy Eyes: These are the secret to bringing your Frankenstein treats to life! Look for various sizes to give your monsters different personalities.
- Sandwich Baggies: These act as makeshift piping bags, making it super easy to draw fine details like hair and scars.
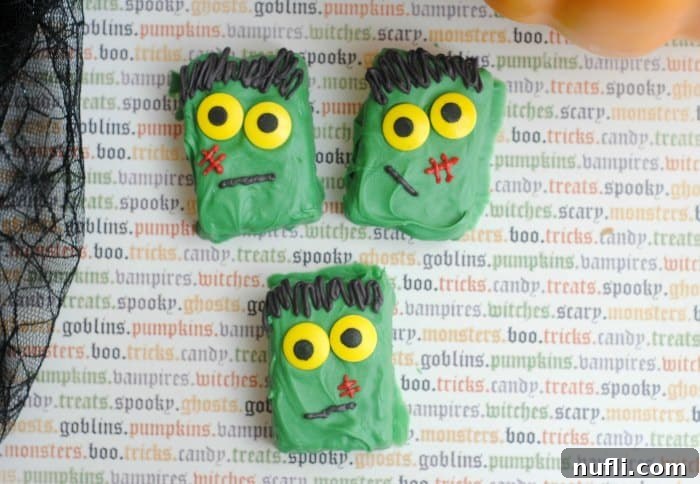
Step-by-Step Guide to Crafting Your Monsterpiece Treats
Creating these delightful Frankenstein Rice Krispie Treats is a fun and straightforward process. Follow these steps, and you’ll have a plate full of adorable monsters in no time!
Instructions:
- Begin by unwrapping each pre-made Rice Krispie Treat and discarding its packaging. If you’re using homemade treats, ensure they are completely cooled and set.
- Line a large baking sheet with parchment paper. This will prevent your treats from sticking and make cleanup a breeze.
- Pour the Wilton green candy melts into a microwave-safe dish. Heat the candy melts in 30-second increments, stirring well after each interval, until they are completely melted and smooth. Be careful not to overheat, as this can cause the chocolate to seize.
- Carefully dip each Rice Krispie Treat into the melted green chocolate, ensuring it’s fully coated. Lift the treat with a fork, allowing any excess chocolate to drip back into the bowl before placing it onto the parchment-lined baking sheet. Immediately, while the chocolate is still wet, press two candy eyes onto each treat to create Frankenstein’s iconic gaze. Repeat this process for all your Rice Krispie Treats.
- Once all treats are dipped and have their eyes, transfer the baking sheet to the refrigerator for about 20-25 minutes. This chilling time allows the green chocolate to set completely, creating a firm base for further decoration.
- While the green chocolate is setting, prepare your black candy melts. Pour them into a clean microwave-safe dish and repeat the melting instructions from step 3 (heating in 30-second increments and stirring until smooth).
- Allow the melted black chocolate to cool for a few minutes until it’s still liquid but slightly thicker. Carefully scoop the melted black chocolate into one of your small sandwich baggies. Snip a tiny corner off the bag with your kitchen scissors – this will act as your piping tip.
- Retrieve the chilled Rice Krispie Treats from the fridge. Gently squeeze the black chocolate out of the sandwich baggie to draw a mouth and hair onto each Frankenstein monster. Get creative with different hairstyles and expressions!
- Let the black chocolate set on its own at room temperature for a few minutes, or briefly place them back in the fridge to speed up the process.
- Finally, prepare your red candy melts. Pour them into a separate clean microwave-safe dish and repeat the melting instructions (30-second increments, stirring until smooth).
- Scoop the melted red chocolate into the second small sandwich baggie and snip a tiny corner.
- With a gentle squeeze, pipe a zig-zag or straight line of red chocolate across Frankenstein’s face to create a scar. This adds that perfect gruesome, yet still cute, touch!
- Repeat the scar detail for all your Rice Krispie Treats. Once all the decorations are complete, allow them to fully set before serving.
Pro Tips for Perfect Frankenstein Treats
Making these Frankenstein Rice Krispie Treats is already straightforward, but a few extra tips can ensure your monsters turn out perfectly every time:
- Melting Chocolate: When melting candy melts, always use low heat and stir frequently. Overheating can cause the chocolate to become clumpy or seize. If it’s too thick, you can add a tiny bit of coconut oil or shortening to thin it out, but do so sparingly.
- Dipping Technique: Use a fork to dip the treats. This allows excess chocolate to drip off easily, preventing a thick, uneven coating. Gently tap the fork against the side of the bowl.
- Working with Kids: This is a fantastic kid-friendly activity! Let them help with dipping (with supervision), placing eyes, and drawing the facial features. Embrace imperfections – every unique monster is charming!
- Storage: Store your finished Frankenstein treats in an airtight container at room temperature for up to 3-5 days. If stacking, place parchment paper between layers to prevent sticking.
- Creative Variations: Don’t limit yourself to Frankenstein! You could use white candy melts for ghosts, orange for pumpkins, or purple for witches. The possibilities are endless for monster-themed treats.
- Homemade vs. Store-Bought: While pre-made treats are a huge time-saver, using a fresh batch of homemade Rice Krispie Treats can offer a softer, chewier texture. Just ensure they are fully cooled and firm before you start dipping and decorating.
Hosting a Spooktacular Halloween Bash?
These Frankenstein Rice Krispie Treats are not just a snack; they’re a centerpiece! They are ideal for school lunches, a special after-school treat, Halloween parties, or simply as a fun dessert for family dinner. Imagine a platter of these adorable monsters greeting your guests – they’re sure to be a conversation starter and a photo opportunity!
When planning your Halloween party, think about how these treats fit into a broader theme. You could host a “Mad Scientist Lab” party, where these Frankensteins are the star experiment. Or a “Monster Mash” where various creatures, including your Krispie monsters, gather for fun. Pair them with other themed snacks and drinks to create a truly immersive experience. Their vibrant green color makes them stand out on any Halloween-themed dessert table, alongside spooky cupcakes, eerie cookies, and bubbling punch.
More Fang-tastic Halloween Inspiration
Looking for more ways to celebrate the spooky season? We’ve got plenty of other easy and fun Halloween recipes and ideas to make your holiday extra special. Check out some of our favorites:
- Pumpkin Rice Krispie Treats: Another adorable Rice Krispie treat variation!
- Candy Corn Bark: A colorful and sweet treat that’s effortlessly festive.
- Halloween Jokes For Kids: Keep the little ones entertained with these silly jokes.
- Halloween Family Games: Fun activities for all ages to enjoy.
- Pumpkin Spice Pretzels: A sweet and salty snack with a seasonal twist.
- Nutter Butter Bats: Simple and cute chocolate-covered cookie bats.
For even more ideas, explore all of our Halloween Party Ideas and recipes. And if you love discovering new recipes, be sure to check out our copycat recipes, dessert recipes, and our CrockPot Recipes for year-round culinary inspiration.
Connect with Us!
Don’t miss out on any of our delicious recipes and helpful tips! Follow Tammilee Tips on Facebook, Instagram, Pinterest, and Twitter for all our latest updates, recipe posts, and more fun content!
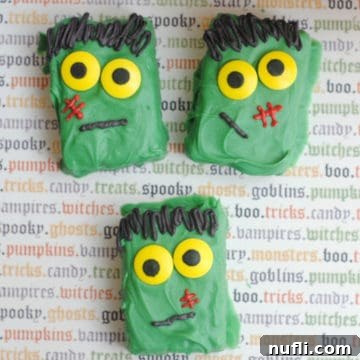
Frankenstein Rice Krispie Treats
Super cute Halloween Frankenstein Rice Krispie Treats perfect for parties and easy to make!
Prep Time: 5 minutes
Cook Time: 30 minutes
Total Time: 35 minutes
Servings: 8
Author: Tammilee Tips
Ingredients
- 8 Kellogg’s Rice Krispie Treats
- 24 Ounce Wilton green candy melts
- 12 Ounce Wilton black candy melts
- 12 Ounce Wilton red candy melts
- Candy Eyes
- 2 small sandwich baggies
- Kitchen scissors
Instructions
- Open each Rice Krispie Treat and discard the packaging.
- Line a large baking sheet with parchment paper.
- Open and pour the Wilton green candy melts into a microwave-safe dish. Heat in the microwave in 30-second increments, stirring until melted.
- Dip each Rice Krispie Treat into the green melted chocolate to coat. Lift the treat using a fork and allow the excess chocolate to drip back into the bowl. Place on the parchment lined baking sheet and give each treat 2 eyes. Repeat with the other Rice Krispie Treats.
- Place the Rice Krispie Treat in the fridge for 20-25 minutes to set.
- Pour the black candy melts into a microwave-safe dish and repeat melting instructions.
- Allow the melted black chocolate to cool a few minutes and scoop into one of the small sandwich baggies. Snip a corner of the bag and give each Rice Krispie Treat a mouth and hair by gently squeezing the chocolate out of the sandwich bag and onto the top of the treats.
- Allow the chocolate to set.
- Pour the red candy melts into a microwave-safe dish and repeat melting instructions.
- Scoop the melted red chocolate into the second sandwich bag and snip the corner.
- Gently squeeze the red melted chocolate out of the bag to make a red scar across Frankenstein’s face.
- Repeat with all the Rice Krispie Treats.
Kitchen Tools
- Cookie Sheets
- Parchment Paper
We hope you thoroughly enjoy making and sharing these fun Frankenstein Rice Krispie Treats! They’re a testament to how simple ingredients and a dash of creativity can transform ordinary snacks into extraordinary holiday delights. Whether you’re a seasoned baker or a complete novice, this recipe offers a stress-free way to add a touch of Halloween magic to your celebrations.
Recipe originally shared on October 27, 2017. Updated and expanded October 2020.
